
Oh, the sheer joy of biting into a sugar cookie that looks like it came straight from a professional bakery case! If you’ve ever stared at those perfectly smooth, colorful cookies and thought, “I could never get my icing to look like that,” I’m here to tell you that you absolutely can. It’s all about the icing, friends! I spent ages testing batches in my own kitchen, trying to find that sweet spot where the mix is smooth, easy to handle, and dries rock-hard without cracking. That’s why I’m sharing my foolproof **royal icing recipe** right here. We’re using meringue powder, which saves you the guesswork of fresh egg whites, making this the most reliable, hard-drying icing you’ll ever make. Trust me; this recipe works every single time!
- Why This Royal Icing Recipe Works for Stunning Cookie Decorations
- Ingredients for Your Foolproof Royal Icing Recipe
- Step-by-Step: How to Make Royal Icing for Beginners
- Tips for Perfect Royal Icing Recipe Results Every Time
- Storage and Refreshing Your Cookie Decorating Icing
- Troubleshooting Common Issues with Your Royal Icing Recipe
- Serving Suggestions for Your Decorated Cookies
- Frequently Asked Questions About Meringue Powder Royal Icing
- What to Bake Next After Mastering This Royal Icing Recipe
Why This Royal Icing Recipe Works for Stunning Cookie Decorations
The biggest headache when decorating cookies is getting that perfect finish. You need an **icing that dries hard**, right? That’s exactly what this method delivers. My goal in developing this batch was to create a **smooth icing technique** that’s stable enough for those tiny piped details but flows beautifully when you need to flood a whole cookie. It’s truly the **best royal icing for cookies** because it just behaves! If you’re looking for inspiration on what to put this amazing icing on, check out my recipe for easy frosted sugar cookie bars—they are the perfect canvas.
I know some recipes call for fresh egg whites, but honestly, working with them can be nerve-wracking. You worry about freshness, and the consistency can vary so much, which leads to cracking later. That’s why I insist on using meringue powder here at Taste This Plate. It’s shelf-stable, incredibly reliable, and gives me the confidence that my **Holiday Cookie Icing** is going to set up flawlessly, whether I’m handing cookies out for gifts or packing them up later. It just adds that extra layer of trust to the whole process.
Achieving a Bakery Style Icing Recipe Consistency
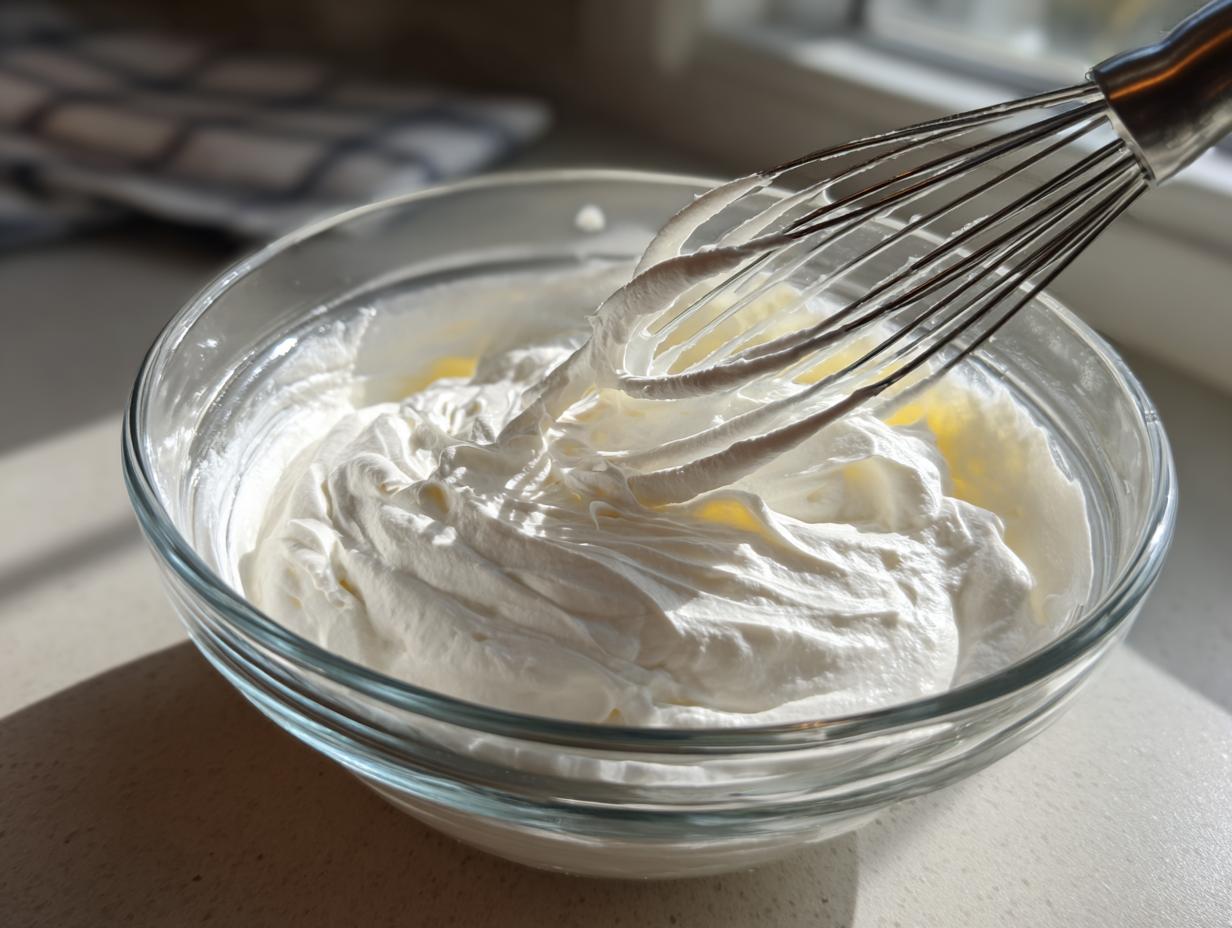
Listen, don’t rush this part! The magic of getting that professional, **Bakery Style Icing Recipe** texture actually happens in the mixer. You absolutely must let the mixer run on medium-high for five to seven minutes. Seriously, set a timer! That whipping time is crucial because it incorporates air without making it too voluminous, which results in that super smooth, glossy finish. It’s the difference between icing that looks homemade and icing that makes people ask where you bought the cookies!
Ingredients for Your Foolproof Royal Icing Recipe
One of the things I love most about this **Easy Royal Icing** is that it uses simple pantry staples. You don’t need any fussy, hard-to-find stuff, which means you can whip up a batch anytime the craving strikes! However, since the final texture relies so much on precision, you have to be very exact here. This is where we build the foundation for icing that hardens perfectly, so please don’t eyeball these measurements!
If you need a recipe for icing that dries rock hard for shipping or stacking your beautiful creations, make sure you have your sugar sifted beforehand. I have a simple guide on how to get your sugar cookie icing to harden perfectly, and it starts right here with the right ingredients.
Here is exactly what you need for about four cups of beautiful, vibrant **Vanilla Royal Icing**:
- 4 cups confectioners’ sugar, sifted (Please, please sift this first! Lumps are the enemy of smooth icing.)
- 2 tablespoons meringue powder (This is our stabilizer and our secret weapon for a hard, glossy finish.)
- 1/2 teaspoon vanilla extract (Just enough for flavor, nothing overpowering.)
- 6 to 8 tablespoons warm water (We start with 6 Tbsp and adjust from there—water is what controls your whole decorating consistency.)
Keep these ingredients ready to go before you turn on that mixer. Getting the ratios right the first time means you skip the frustration later!
Step-by-Step: How to Make Royal Icing for Beginners
This is where we turn simple sugar into magic icing that will give you those stunning, professional results! I’ve laid out the steps simply because I truly believe this should be an **Easy Royal Icing** process—no pulling your hair out allowed. The key, as I mentioned before, is making sure those dry ingredients are happy together before we introduce moisture.
First things first: grab your big bowl, and whisk together that sifted confectioners’ sugar and the meringue powder. You want them totally incorporated before you even think about water. Once they look evenly blended, toss in the vanilla and your starting amount of warm water—go with 6 tablespoons for now. Start your mixer on low just until everything comes together, then scrape down the sides really well. Now it’s time for the heavy lifting!
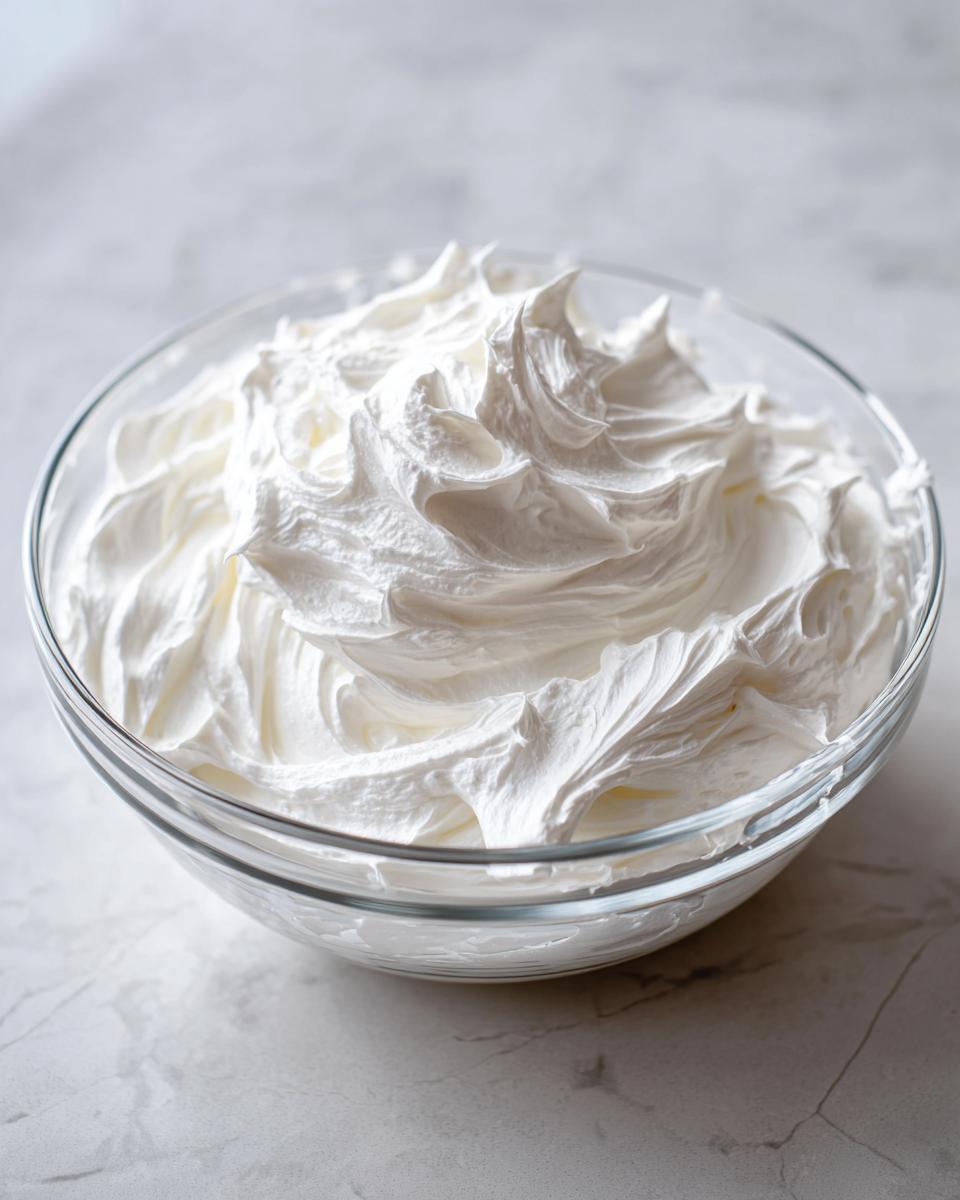
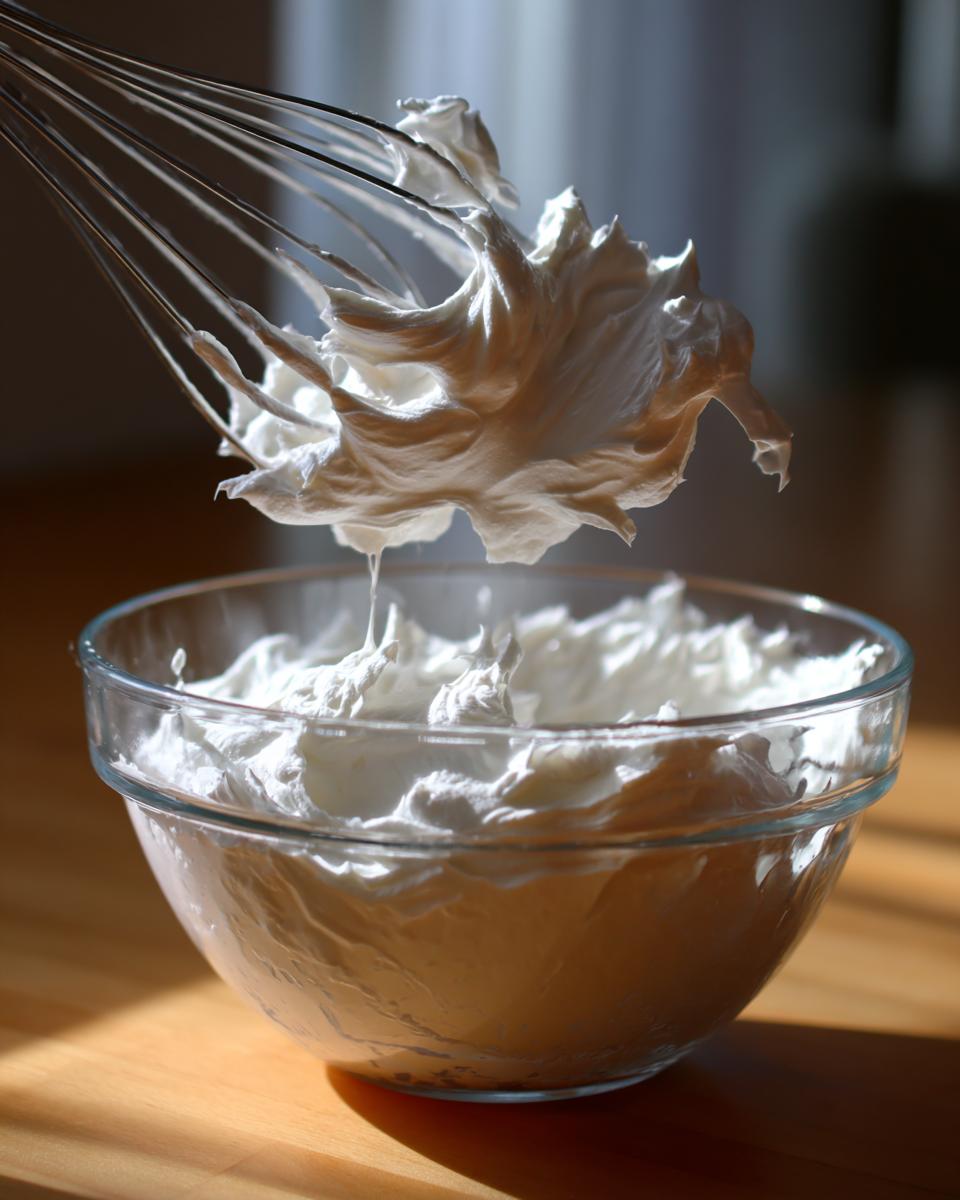
Turn your mixer up to medium-high and let it go for a solid 5 to 7 minutes. This is non-negotiable for getting that **Stable Cookie Icing** texture. You’ll see it get bright white, super smooth, and it should hold stiff peaks when you lift the beater. If you need thinner icing for flooding, now is the time to add the remaining water, just a teaspoon at a time. Remember to check out this guide on cookie icing recipes that dry hard if you’re worried about shipping your decorated cookies later. And if you want to see another great method, this article on famous royal icing recipes is fantastic too!
Mastering Piping Consistency Icing and Flooding
This is the moment of truth—adjusting the consistency for your design. You need two main textures for cookie decorating, and we achieve them with just a little water tweaking. For outlining, you want **Piping Consistency Icing**. When you lift your spoon or mixer beater, the icing should hold its shape right there on top without sinking back down. It needs to be firm enough to keep those beautiful borders.

Now for the fun part: flooding! Flooding takes a thinner mixture. For that **Perfect Flooding Icing**, you’ll keep adding water, maybe up to those full 8 tablespoons. The test here is the famous ‘figure 8.’ Drizzle some icing off your spoon in a figure 8 pattern right back into the bowl. If it takes about 10 to 12 seconds for that figure 8 line to melt back seamlessly into the rest of the icing, you’ve hit the sweet spot. If it disappears instantly? A tad too thin! Add a tablespoon of sifted sugar and remix before checking again.
Tips for Perfect Royal Icing Recipe Results Every Time
Now that you have your **Easy Royal Icing** mixed up, I want to share a few crucial things I learned over years of trial and error to make sure your results are consistently gorgeous. Remember, Kate wants you to have a flawless experience! My biggest piece of advice for achieving that truly **Smooth Icing Technique** is remembering that water is your friend, but only if you add it slowly. If you dump in too much at once, you’ll be back to adding sugar, and we want to avoid that unnecessary mixing cycle.
If you are decorating cookies that you plan to stack up high or ship across the country—maybe for a big holiday order—you might want icing that dries extra tough. Don’t just reduce that water more, though! Try adding just a quarter teaspoon of cream of tartar to your dry mix before you start. It helps stabilize the structure even further, making it rock solid. Also, always trust the process regarding the sugar. You can find more details on getting the right crust in my post about sugar cookie icing that hardens.
If you happen to find your icing seems a bit grainy or you see a tiny lump, don’t panic! Just run it through a fine-mesh sieve or give it a quick blitz with the hand mixer again. Consistency is everything!
Coloring Your Easy Royal Icing
This is my biggest warning when it comes to color: please, please, please use gel food coloring, not the liquid drops you might have for Kool-Aid. Liquid coloring is mostly water, and adding too much will instantly thin out your perfect **Easy Royal Icing** consistency, sending you back to the ‘figure 8’ test. Gel colors are super concentrated, so a tiny toothpick dip gives you vibrant color with zero impact on the texture.
Also, keep in mind that whatever fantastic shade you mix up now will look slightly darker once it dries completely hard. This is normal! If you’re piping details, mix your color a little lighter than you think you need. For deeper, richer tones, check out how other bakers handle vibrant colors; this great article from Recipe Explore gives some fantastic views on color mixing.
Storage and Refreshing Your Cookie Decorating Icing
Okay, you just finished decorating fifty adorable little gingerbread men, and you have a beautiful bowl of leftover icing. What do you do? You don’t want that gorgeous, **Cookie Decorating Icing** to go to waste! The key to keeping it fresh is battling air exposure. Air is the sworn enemy of royal icing; it makes it crusty faster than you can say “piping tip.”
When you’re taking a break, or when you’re all done for the day, you need to seal it up tight. Take a sheet of plastic wrap—the cheap stuff works fine—and press it *directly* onto the surface of the icing in the bowl. I mean, push it right down so no air touches the icing! Then, put a lid on the whole container. This double protection keeps things smooth.
If you mixed this batch right, it should last about a week tucked away in the refrigerator. Now, here’s the essential revival trick: when you pull that **Cookie Decorating Icing** out a few days later, it’s going to look stiff—maybe even a little panicked! Don’t throw it out! Just let it sit on the counter for about 30 minutes to come up to room temperature. Then, grab a spoon and give it a good stir. If it still seems too stiff for your needs, add water one teaspoon at a time until it flows exactly the way you want it to again. See? That’s why we love this reliable recipe—it always comes back to life!
Troubleshooting Common Issues with Your Royal Icing Recipe
Even with the most foolproof **Royal Icing Recipe**, sometimes things don’t go exactly as planned! Don’t you worry about it, because I’ve faced every single one of these little kitchen disasters myself. The beauty of this meringue powder recipe is that it’s usually very forgiving, and the fixes almost always come down to water or sugar ratios. Let’s go through the few things that trip up even seasoned bakers sometimes.
First up: the dreaded lumpy icing. If you skipped sifting the powdered sugar—and I get it, sometimes you’re in a rush!—you might end up with little stubborn clumps. The best fix here is running the icing through a fine-mesh sieve. You might need a spatula to gently push it through, but it works like a charm and saves you from having to start over. If you still have lumps even after sifting, it might mean your meringue powder wasn’t totally dissolved, which is rare but possible.
What if your icing is simply too thin? This happens when you get carried away adding that last bit of water while trying to achieve the perfect flood consistency. If you’ve gone too thin and it’s running right off the spoon without even an ‘8’ showing up, you need more stabilizer and sugar. Slowly mix in 1/4 cup of sifted confectioners’ sugar at a time until the consistency starts improving. Remember, adding sugar is easier than taking water out, so always go slow!
Then there’s the opposite problem: the icing won’t dry hard, even hours later. If your cookies feel tacky or soft to the touch, it almost always means you added too much liquid, or perhaps the humidity in your kitchen is just ridiculously high that day. If this happens, put that batch of icing back in your mixer and add a tablespoon of sifted confectioners’ sugar, or try adding a tiny pinch more of your meringue powder per cup of icing you have. A trick I’ve used is adding a few drops of lemon juice—the acidity can sometimes help things set a bit faster, though you have to be careful not to go too acidic!

Don’t let hiccups discourage you! Every batch you fix makes you a more intuitive baker. You’ll learn exactly how your environment affects the mix, and soon enough, you won’t even need this section!
Serving Suggestions for Your Decorated Cookies
Now that you have this beautiful, rock-solid **Royal Icing Recipe** done, the only question left is: what wonderful things are you going to decorate with it? This icing is truly versatile, but it especially shines when paired with cookies that have a sturdy structure that can handle the intricate work you’re about to do. No one wants beautiful detail work to crack off their cookie!
The absolute classic pairing, of course, is a perfectly baked, crisp sugar cookie. My recipe for those bars is great, but if you want that traditional snap, a simple cut-out sugar cookie works best. The slight vanilla flavor in the icing complements the buttery cookie base perfectly. If you’re making these for a special occasion, remember that this icing classification is perfect for **Holiday Cookie Icing** applications—think crisp gingerbread men or classic Christmas cookies that need that bright white pop.
But don’t feel limited to just cookies! This **Icing That Dries Hard** is fantastic for sealing cookies together if you want to make little cookie sandwiches, or even as the “glue” for constructing small gingerbread houses. If you’re looking for another fun, easy treat idea once you’ve mastered your icing, you’ve got to try my easy pecan pie bark recipe. It requires zero royal icing skills but satisfies that sweet tooth instantly!
Because the icing dries completely hard and glossy, it’s also ideal for any cookie that needs to be stacked in tins or shipped. The durability means your hard work stays pristine! Go ahead and make those beautiful designs; this icing choice ensures they’ll last.
Frequently Asked Questions About Meringue Powder Royal Icing
Even though I tried to cover everything when explaining how to make this **Meringue Powder Royal Icing**, I know you bakers often have those last, specific questions bubbling up. It’s smart to ask! We want to make sure your cookies look stunning and hold up perfectly. Here are a few things I hear all the time when people are trying to nail down their **Royal Icing Recipe**.
Can I use real egg whites instead of meringue powder in this recipe?
You absolutely can, and people did it for years! If you want to swap it out, you’ll replace the 2 tablespoons of meringue powder with 2 fresh, pasteurized egg whites. But here’s the catch, and why I prefer the powder: freshness and safety. Meringue powder is dried and stabilized, so you don’t have to worry about the inconsistency you often get with raw egg whites. If you use fresh whites, you might need slightly less water overall, so you’ll definitely need to watch that ‘figure 8’ test very closely. The powder is just my go-to for a consistent, **No Fuss Royal Icing** batch!
Just how long does royal icing take to dry hard?
This is the million-dollar question for anyone wanting to stack or ship cookies! How long it takes for your **Icing That Dries Hard** depends on a few things—humidity is the biggest factor. On a dry day in my kitchen, flood icing takes about 4 to 6 hours to feel dry to the touch. However, if you want it fully set and stackable (that means you can press on it without leaving a mark), you should let it cure for a full 12 to 24 hours. If you’re in a humid climate, you might need a dehumidifier or a very good fan blowing gently over the cookies to help them set faster.
My icing turned yellowish instead of bright white. What went wrong?
That can be frustrating when you’re aiming for that crisp, clean look! If your **Vanilla Royal Icing** looks a little off-white, it usually comes down to the vanilla extract or the sugar. Vanilla extract is brown, so using too much can definitely cast a tint. I only use a half teaspoon because I want that bright white base before I add color. Also, if you accidentally used a large amount of brown sugar instead of all white confectioners’ sugar, that color will bleed through. Stick strictly to the white powdered sugar for the whitest base possible.
How do I keep my leftover icing from drying out while I work?
I always tell people: air is the enemy! If you stop decorating even for five minutes and your piping bag is just sitting there, the icing inside will start hardening up, which is exactly what ruins that beautiful **Smooth Icing Technique**. The entire time you are working, any bowl of icing you aren’t actively using should have plastic wrap pressed directly against the surface. If you have leftover icing in a piping bag, you can slip the whole bag into a Ziploc bag before setting it aside. And don’t forget, if you need ideas for something truly simple after all that detailed work, check out my recipe for easy no-bake Oreo balls!
If you want to dig deeper into different cookie decorating challenges, I saw a really insightful breakdown of different techniques over at Cake Whiz that might help you master even more styles!
What to Bake Next After Mastering This Royal Icing Recipe
Wow, you did it! You made the absolute best, most reliable **Royal Icing Recipe** for your cookies, and they look stunning. That is seriously something to celebrate. Don’t let that burst of baking confidence fade away now that your cookie decorating is finished. You’ve mastered the technique for smooth, hard-drying icing, and that skill transfers to so many other wonderful treats!
Now that you’ve got your decorating muscle flexed, maybe you need something a little less fussy? If you’re craving more sweets but don’t want to pull out the piping bags again, you should check out my guide on sugar cookie icing that hardens. It’s a slightly different approach that’s great when you need a quick, spreadable glaze instead of a piped design. You’ve got the technical skills down, so take that momentum and make something else amazing for your table. Happy baking, truly!
PrintFoolproof Royal Icing Recipe Using Meringue Powder

Make smooth, stable royal icing that dries hard and glossy, perfect for detailed cookie decorating. This easy recipe is reliable for beginners and yields bakery-style results for sugar cookies.
- Prep Time: 10 min
- Cook Time: 0 min
- Total Time: 10 min
- Yield: About 4 cups 1x
- Category: Dessert
- Method: Mixing
- Cuisine: American
- Diet: Vegetarian
Ingredients
- 4 cups confectioners’ sugar, sifted
- 2 tablespoons meringue powder
- 1/2 teaspoon vanilla extract
- 6 to 8 tablespoons warm water
Instructions
- In a large bowl, combine the sifted confectioners’ sugar and meringue powder. Whisk them together until fully mixed.
- Add the vanilla extract and 6 tablespoons of warm water to the dry ingredients.
- Using an electric mixer on low speed, mix until the ingredients are just combined. Scrape down the sides of the bowl.
- Increase the mixer speed to medium-high and beat for 5 to 7 minutes until the icing is very smooth, bright white, and holds stiff peaks.
- Check the consistency. If the icing is too thick for piping, add the remaining water, one teaspoon at a time, mixing well after each addition.
- To achieve piping consistency (for outlining), the icing should hold its shape when lifted. For flooding consistency, add more water until the icing flows smoothly off the spoon and you can draw a ‘figure 8’ that disappears back into the mixture within 10 to 12 seconds.
- Color the icing using gel food coloring, mixing thoroughly until the color is uniform.
- Use immediately or cover tightly with plastic wrap pressed directly onto the surface to prevent drying.
Notes
- Always sift your confectioners’ sugar to prevent lumps in your smooth icing.
- If you need icing that dries extra hard for stacking or shipping, reduce the water slightly or add 1/4 teaspoon of cream of tartar to the dry ingredients.
- Store unused icing in an airtight container in the refrigerator for up to one week; bring to room temperature and remix before using.
Nutrition
- Serving Size: 1/4 cup
- Calories: 450
- Sugar: 110g
- Sodium: 5mg
- Fat: 0g
- Saturated Fat: 0g
- Unsaturated Fat: 0g
- Trans Fat: 0g
- Carbohydrates: 112g
- Fiber: 0g
- Protein: 1g
- Cholesterol: 0mg