
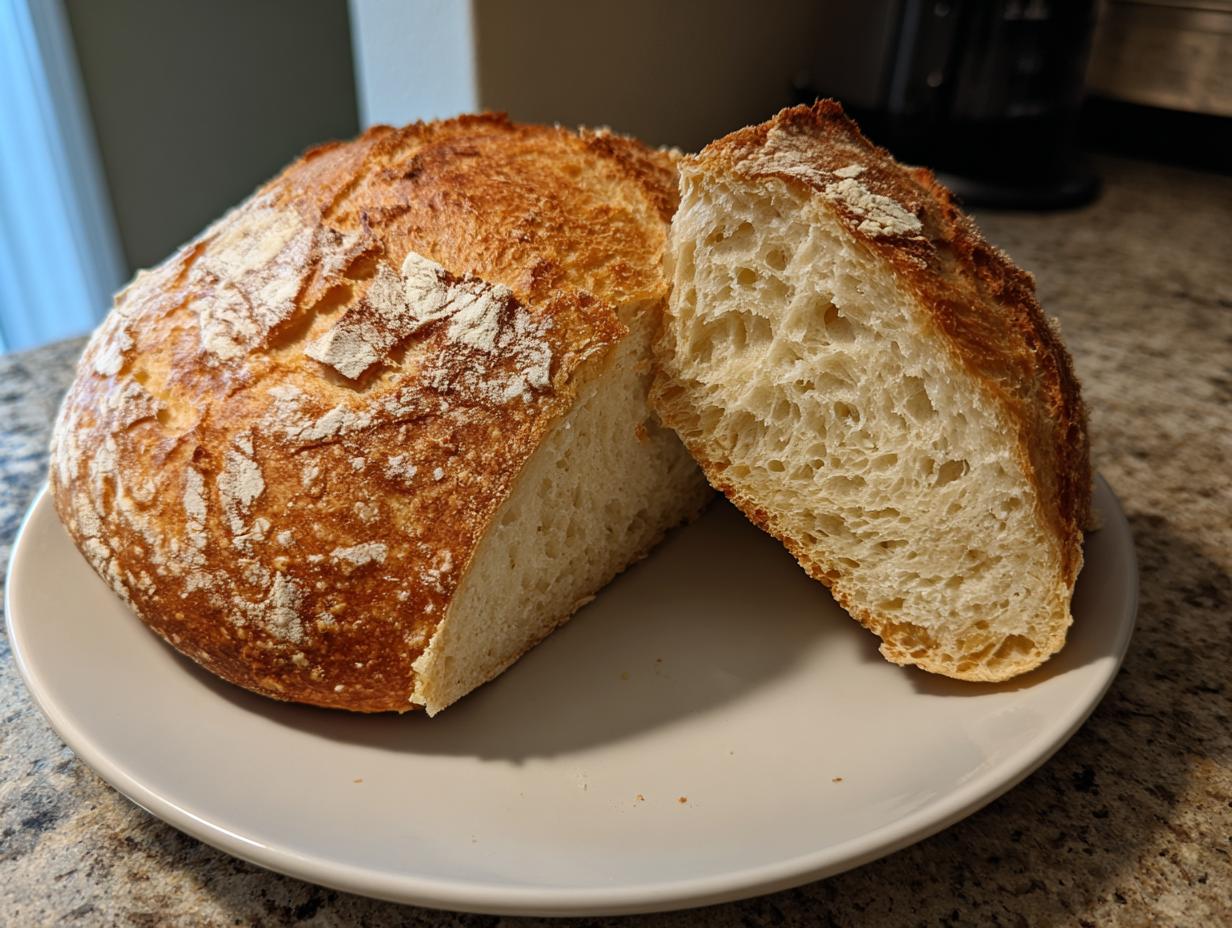
There is genuinely nothing better than the smell of freshly baked bread filling your kitchen, right? It’s pure comfort. When I first started exploring baking beyond cookies, homemade italian bread felt like the ultimate challenge—how could I get that crackly, crackling crust and the soft, airy interior I loved from the bakeries?
Honestly, my early attempts were flat, dense, and a little sad. I quickly realized that baking artisan bread isn’t about complicated steps; it’s about understanding a few core techniques. I want to take all the guesswork out of it for you. This recipe proves you absolutely can create bakery-quality crusty Italian bread right on your standard kitchen counter, even if you’re new to yeast!
- Why This Is the Best Homemade Italian Bread Recipe
- Gathering Your Ingredients for Crusty Italian Bread
- Step-by-Step Instructions: How to Make Italian Bread
- Tips for Success Making Rustic Bread Recipe
- Ingredient Notes and Substitutions for Italian Bread
- Serving Suggestions: Perfect Italian Dipping Bread
- Storage and Reheating Instructions for Your Loaf
- Frequently Asked Questions About Making Italian Bread
- Share Your Homemade Italian Bread Experience
Why This Is the Best Homemade Italian Bread Recipe
I truly believe this recipe takes the stress out of baking. You get all the flavor and texture complexity of a loaf you’d queue up for at an artisan shop, but with simple, reliable steps. Seeing your first italian bread come out golden brown is such a win!
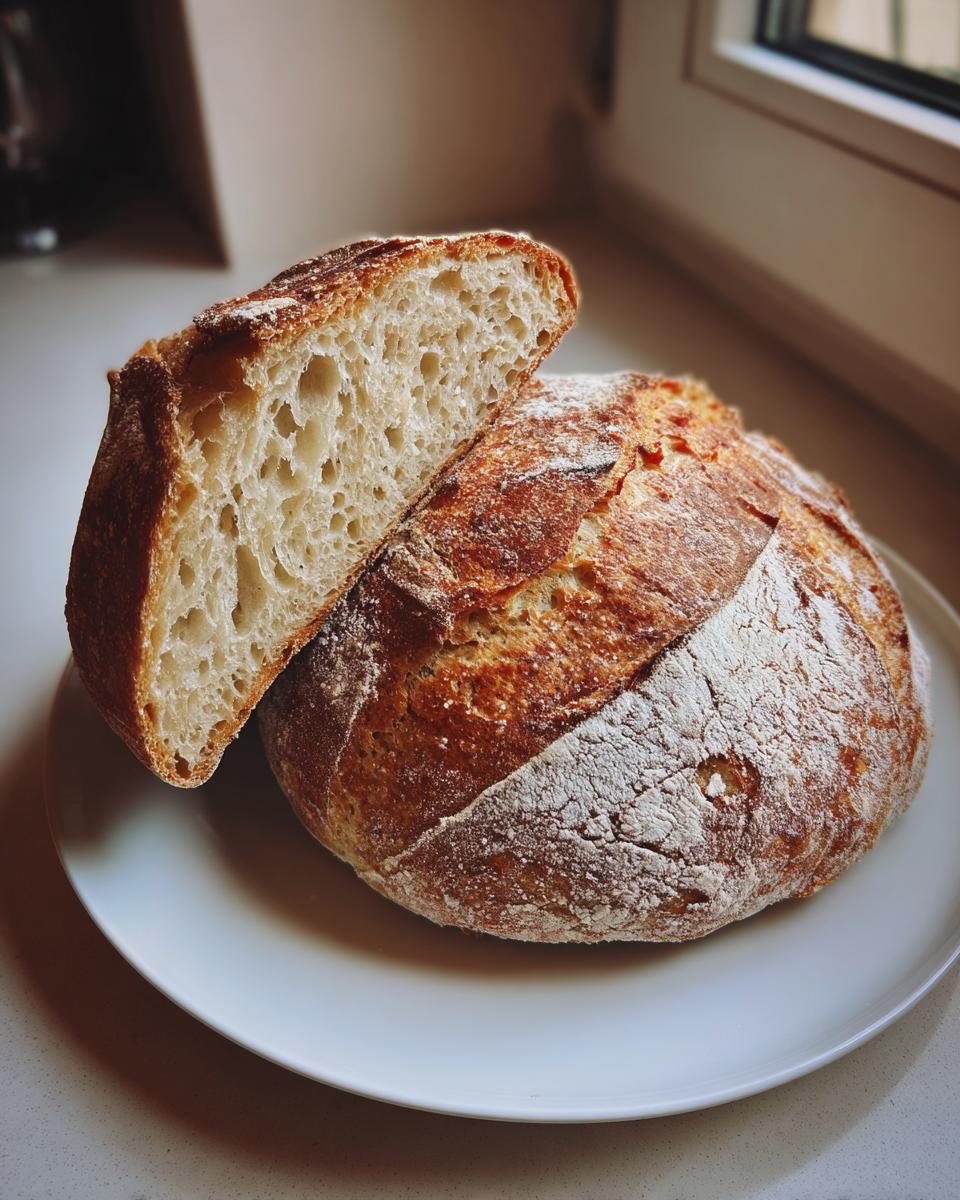
- Crust that crackles the moment you slice it.
- An interior crumb that’s airy, soft, and perfect for soaking up sauce.
- No heavy kneading required—we let time do the hard work!
Achieving the Perfect Crusty Italian Loaf Texture
The secret you’ve been searching for when making a Crusty Italian Loaf isn’t in the kneading; it’s in the oven environment! We use high, high heat combined with steam right at the start. That initial blast of heat and moisture hits the dough, puffing it up instantly and setting that gorgeous, shatteringly crisp exterior. Trust me, the Dutch oven trick is non-negotiable for that perfect crust.
Simple Ingredients for Authentic Italian Loaf
You won’t need any specialized flours or fancy store-bought starters here. This recipe adheres to our core philosophy: simple ingredients, extraordinary meals. We rely on pantry staples to create that deep, Authentic Italian Loaf flavor. Flour, water, yeast—that’s the heart of it! You can really focus on the technique when the ingredients are this accessible.
Gathering Your Ingredients for Crusty Italian Bread
Okay, time to pull out your bowls! Making beautiful italian bread doesn’t require a trip to a specialty shop; we’re keeping this real simple for you. Having everything measured before you start activating the yeast, which I call “mise en place,” saves so much stress later on. I always double-check my water temperature before mixing anything—it makes all the difference for a happy yeast colony!
Here is exactly what you’ll need for one glorious loaf:
- 3 cups All-Purpose Flour (plus more for dusting the counter)
- 1 1/2 cups Warm Water (critical temperature: about 105-115°F)
- 2 1/4 teaspoons Active Dry Yeast (that’s just one standard packet!)
- 1 teaspoon Granulated Sugar
- 2 teaspoons Salt
- 2 tablespoons Olive Oil (plus a little extra to grease the bowl—don’t skip that!)
If you want to see a truly rustic approach to bread making, check out this beautiful Rustic Italian Bread inspiration. It reminds me why getting these starting ingredients just right matters so much!
Step-by-Step Instructions: How to Make Italian Bread
This is where the magic truly happens! Making amazing italian bread sounds hard, but I promise if you respect the temperature and the rising times, you’ll have a beautiful loaf. Remember that time is your secret ingredient here; we are developing flavor slowly, not rushing the process.
Before we start mixing, I highly recommend getting your baking vessel preheated. If you’re using a Dutch oven—which I strongly suggest for that amazing crust—get that thing in the oven now so it’s screaming hot when the dough is ready.
Activating Yeast and Mixing the Dough for Your Italian Bread
The very first step in any great Yeast Bread Recipe is making sure your yeast is alive and kicking! Combine your warm water, sugar, and yeast. If your water is too hot, you’ll kill the yeast—oops! If it’s too cool, it’ll take forever. Aim right around 110°F and wait about 5 to 10 minutes until it looks foamy on top. Once that’s happy, mix your flour and salt, then pour in the bubbly yeast mix and the olive oil. Just stir it with a wooden spoon until it looks like a sticky, messy ball. Don’t even worry about kneading yet!
The Rises: Bulk Fermentation and Proofing
Now, we let time do the heavy lifting for that Fluffy Italian Bread inside. Oil a clean bowl and set your shaggy dough in there, turning it once so it’s coated. Cover it up and let it chill out in a warm spot for about an hour or until it’s doubled. When you turn it out to shape it, be gentle! You want to fold the edges toward the middle just a few times to create tension, but don’t smash out all those lovely gas bubbles we worked so hard to create.
After shaping, put it on parchment paper and cover it loosely again for the final proof, maybe 30 to 45 minutes. It should look puffy, but not puffy like a balloon about to burst.
Baking Techniques for a Bakery Style Bread Finish
This final process brings us that incredible outer layer. If you’re using a Dutch oven, carefully place your shaped dough inside on the parchment paper—don’t forget to score the top quickly with a sharp knife! Cover it and bake at 450°F for 20 minutes. This trapped steam is what guarantees that signature crunch for your Bakery Style Bread.
After 20 minutes, take the lid off. If you used a baking stone, this is when you pull out that pan of hot water for steam. Keep baking for another 15 to 20 minutes until that crust is a deep, gorgeous golden brown. Seriously, the color is everything! Once it’s done, pull it out onto a wire rack. Don’t be tempted to slice it right away; I learned the hard way that slicing too early makes the inside gummy. You have to let this beautiful italian bread cool for at least an hour!
If you want to see a simple recipe for a lovely dipping sauce to go with your fresh bread, check out my guide on classic bread pudding with vanilla sauce—we adapt techniques all the time in the kitchen! And if you want to see how another blogger handles the crust, this tip set from Cook With Yana is also spot on: Crusty Italian Bread Recipe.
Tips for Success Making Rustic Bread Recipe
I’ve learned a few things the hard way when perfecting this Rustic Bread Recipe, so let me save you some trouble! The single most important thing, after getting your dough hot enough in the oven, is patience during the cooling phase. You simply must let your italian bread rest on the rack.
I remember one holiday gathering—I was so excited to show off my first perfect-looking loaf that I cut into it barely 15 minutes out of the oven. The steamy interior immediately collapsed, turning that beautiful, airy crumb into a sticky, gummy mess at the base. It still tasted good dipped in olive oil, but it wasn’t the texture I wanted! So, seriously, wait the full hour.
Also, if you’re nervous about handling hot Dutch ovens, take a look at this fantastic guide on achieving a perfect crust even without one; the tips here are gold: Crusty Italian Bread Recipe. For some fun dessert baking after you master the loaf, you might enjoy my recipe for easy cannoli cookies!
Ingredient Notes and Substitutions for Italian Bread
We stick to the basics because, honestly, that’s all this great italian bread really needs! You’ll notice I specified All-Purpose Flour. While bread flour has more protein and creates a chewier structure—which is lovely—AP flour is what most of us have on hand, and it works beautifully for this recipe’s slightly softer interior.
The olive oil is important; it adds a richness that a standard water-and-flour dough lacks, and it helps keep the dough supple during handling. If you’re out of sugar, just use honey—though you’ll need slightly less liquid in the recipe overall if you substitute honey. And please, if you don’t have instant yeast, use active dry, but make sure you bloom it exactly as we discussed in the activation step!
Serving Suggestions: Perfect Italian Dipping Bread
So, you’ve baked this gorgeous, crusty italian bread—now what’s the best way to enjoy it? Honestly, I think the simplest approach is usually the best one, especially when that crust is fresh out of the oven! It’s fantastic just ripped apart and served warm alongside a big bowl of spaghetti and meatballs.
But for the ultimate experience, you need a good quality, peppery olive oil. If you want to elevate your dipping game even further, check out my recipe for the perfect olive oil bread dip recipe! This loaf truly shines as an Italian Dipping Bread, soaking up all those extra sauce dregs on your plate. Don’t let any piece go to waste!
Storage and Reheating Instructions for Your Loaf
I know you want to eat this italian bread forever, but because of that amazing crust, it does get hard faster than packaged bread. My rule of thumb is to store it cut-side down on the counter for no more than two days. If you have to go longer, wrap it loosely in a paper bag, not plastic! Plastic traps moisture and turns that beautiful crunch into something soft and chewy—and not in a good way.
The reheating trick is magic, though. If it’s lost its crunch, just pop the slices back into a 350°F oven for about 5 minutes. That blast of dry heat will wake up the crust perfectly! Instant gratification without the whole baking process!
Frequently Asked Questions About Making Italian Bread
It’s totally normal to have questions when diving into a new italian bread recipe! Baking yeast breads is more science than art sometimes, but once you nail these fundamentals, you’ll be confident!
I’ve gathered the most common things I hear from folks trying this out for the first time. Don’t worry about making mistakes—that’s how we learn to bake better.
Can I make this an Easy Italian Bread using a No Knead Bread method?
You absolutely can! If you want this to be even more straightforward, treat it slightly like a longer No Knead Bread rise. After mixing (Step 3), just skip the light kneading/shaping step, cover it really well, and let the bulk fermentation go for a solid 2.5 to 3 hours. Then, gently shape it and proceed with the second rise. It makes for really wonderfully textured Easy Italian Bread!
What temperature should the water be for the yeast?
This is key! You want your water to be between 105°F and 115°F. If it’s colder, the yeast just wakes up slowly, resulting in a slow rise. If it’s much hotter than 120°F, you melt the poor little yeast bugs right out of action, and your dough won’t rise at all! That sweet spot lets them get nice and foamy.
If you’re looking for other easy weeknight meals that pair well with fresh bread, you should totally check out my easy burrito bake recipe—it’s a crowd-pleaser!
Share Your Homemade Italian Bread Experience
I truly hope you give this italian bread a try! Baking is all about sharing what we create, so please come back and tell me how it went. Did your crust crackle? Did you dip it into olive oil right away? Don’t be shy—leave a rating below or pop over to the contact page to send me a picture of your beautiful, homemade loaf. Happy baking!
PrintCrusty Rustic Italian Bread: Bakery-Quality Loaf Made Easy
Bake a beautiful, crusty Italian loaf with a soft, airy interior right in your home kitchen. This recipe uses simple ingredients and straightforward techniques so you can achieve bakery-style bread for dipping or serving with dinner.
- Prep Time: 20 min
- Cook Time: 40 min
- Total Time: 2 hr 10 min
- Yield: 1 large loaf 1x
- Category: Baking
- Method: Baking
- Cuisine: Italian
- Diet: Vegetarian
Ingredients
- 3 cups All-Purpose Flour (plus more for dusting)
- 1 1/2 cups Warm Water (about 105-115°F)
- 2 1/4 teaspoons Active Dry Yeast (one standard packet)
- 1 teaspoon Granulated Sugar
- 2 teaspoons Salt
- 2 tablespoons Olive Oil (plus more for bowl)
Instructions
- Activate the Yeast: In a small bowl, combine the warm water, sugar, and yeast. Let this mixture sit for 5 to 10 minutes until it becomes foamy. This shows the yeast is active.
- Mix Dry Ingredients: In a large mixing bowl, whisk together the flour and salt.
- Combine Dough: Pour the yeast mixture and the olive oil into the flour mixture. Use a wooden spoon or spatula to mix until a shaggy, sticky dough forms. Do not overmix at this stage.
- First Rise (Bulk Fermentation): Lightly coat a clean bowl with olive oil. Place the dough in the bowl, turning it once to coat the top. Cover the bowl tightly with plastic wrap or a clean kitchen towel. Let the dough rise in a warm place for 1 to 1.5 hours, or until it has doubled in size.
- Shape the Loaf: Gently turn the risen dough out onto a lightly floured surface. Gently fold the edges of the dough toward the center a few times to form a rough round or oval shape. Avoid punching down the dough aggressively to keep air in the crumb.
- Second Rise (Proofing): Place the shaped dough onto a baking sheet lined with parchment paper, or into a proofing basket dusted heavily with flour or cornmeal. Cover loosely and let it rise again for 30 to 45 minutes. It should look puffy.
- Preheat Oven and Baking Vessel: About 20 minutes before the second rise finishes, place a Dutch oven (with the lid on) or a baking stone into your oven. Preheat the oven to 450°F (232°C). Achieving high heat is key for a crusty exterior.
- Bake the Bread: Carefully remove the hot Dutch oven or baking stone from the oven. Gently transfer the dough onto the hot surface. If using a Dutch oven, score the top of the loaf once or twice with a sharp knife or razor blade. Cover the Dutch oven with the lid, or if using a stone, place a pan of hot water on the bottom rack to create steam.
- Bake Covered: Bake for 20 minutes with the lid on (or with steam).
- Bake Uncovered: Remove the lid (or remove the water pan). Continue baking for another 15 to 20 minutes, or until the crust is deep golden brown and sounds hollow when tapped.
- Cool: Transfer the finished loaf to a wire rack immediately. Let the bread cool completely, at least 1 hour, before slicing. This allows the interior structure to set.
Notes
- To achieve the best crusty exterior, use steam during the first part of baking. A Dutch oven traps the dough’s moisture, creating steam naturally.
- If you want a softer crust, brush the loaf lightly with melted butter immediately after it comes out of the oven.
- For a rustic look, use a mix of bread flour and all-purpose flour.
Nutrition
- Serving Size: 1 slice
- Calories: 180
- Sugar: 1
- Sodium: 250
- Fat: 2
- Saturated Fat: 0.3
- Unsaturated Fat: 1.7
- Trans Fat: 0
- Carbohydrates: 35
- Fiber: 1
- Protein: 6
- Cholesterol: 0