
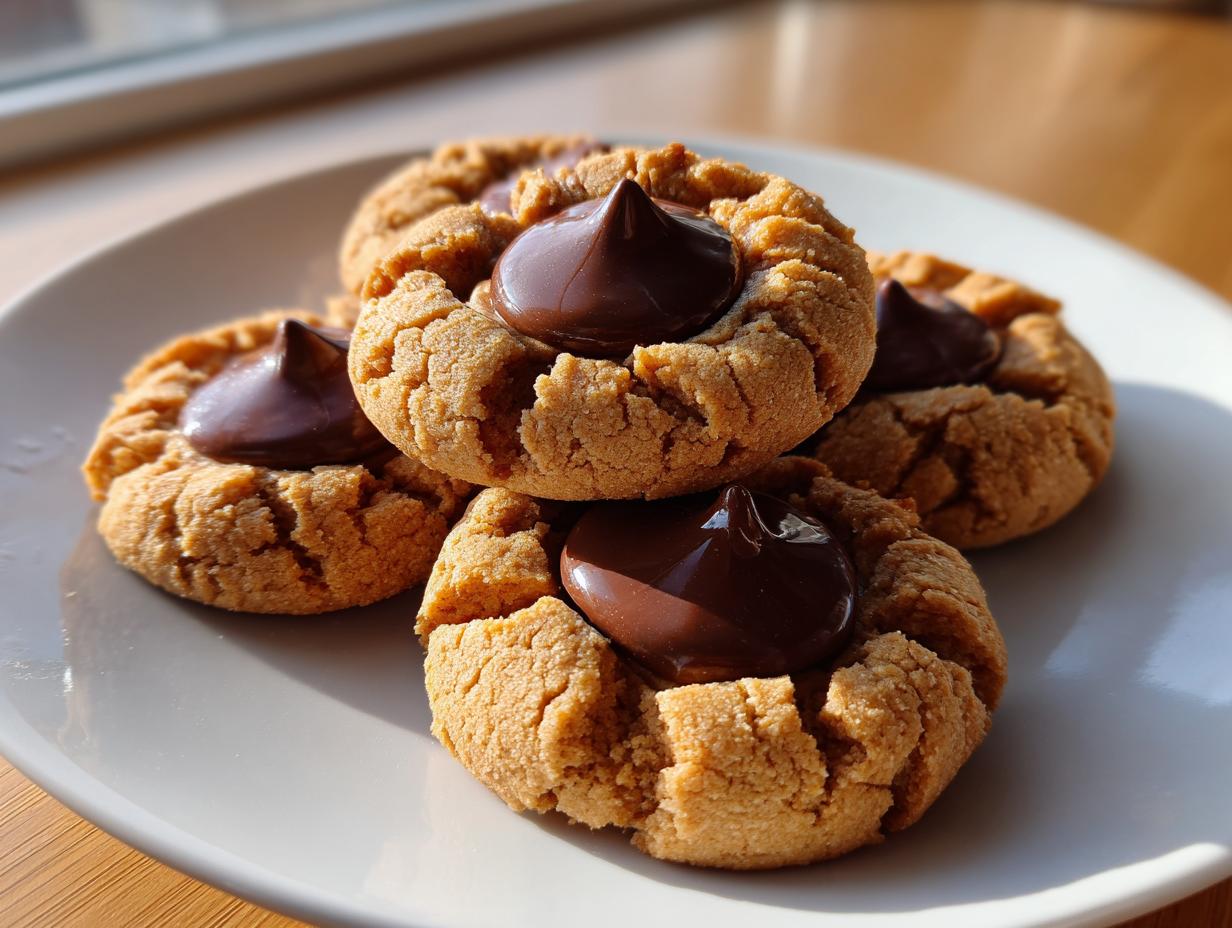
Oh, the holidays! For me, the smell of cinnamon and the sight of a perfectly arranged cookie tray instantly takes me back to my grandmother’s kitchen, measuring out ingredients for what felt like the hundredth batch of peanut butter blossom cookies. That perfect, slightly salty peanut butter cookie, the crackled top, and that beautiful chocolate kiss right in the middle—it’s pure nostalgia in bite form. I spent so much time analyzing classic American desserts, and I realized that many recipes end up too hard or crumbly. Not here! This, my friends, is my ultimate, tried-and-true recipe for Peanut Butter Blossom Cookies that stay unbelievably soft and chewy, even three days later. Forget dry edges; we’re aiming for absolute perfection here.
- Why This is the Best peanut butter blossom Recipe for Soft and Chewy Results
- Gathering Ingredients for Perfect peanut butter blossom Cookies
- Step-by-Step Instructions for Classic peanut butter blossom
- Tips for Success When Making peanut butter blossom Cookies
- Making peanut butter blossom Cookies for Holiday Baking
- Storage and Keeping Your peanut butter blossom Fresh
- Variations on the Classic peanut butter blossom
- Frequently Asked Questions About peanut butter blossom
- Nutritional Estimates for This peanut butter blossom Recipe
Why This is the Best peanut butter blossom Recipe for Soft and Chewy Results
When I was reverse-engineering these iconic treats, the main goal wasn’t just a pretty cookie; it was texture. We want Soft and Chewy Peanut Butter Cookies that actually taste fresh the next day! That’s what makes this my Best Peanut Butter Blossoms Recipe. It avoids the common pitfall of becoming hard by focusing on the creaming process and, critically, how long we bake them. I realized that many recipes bake these jewels until they look done, but that means they’ll be crispy once cool. Trust me when I say, underbaking by just a minute is our secret weapon for that melt-in-your-mouth experience.
We take inspiration from the tried-and-true methods out there, but my testing showed you need the right balance of fat (butter and peanut butter) to flour. Want the rundown on how to make them look exactly like the ones in the photos? I share some great techniques over here for other chewy recipes, like my snickerdoodle blondies, that focus on moisture retention.
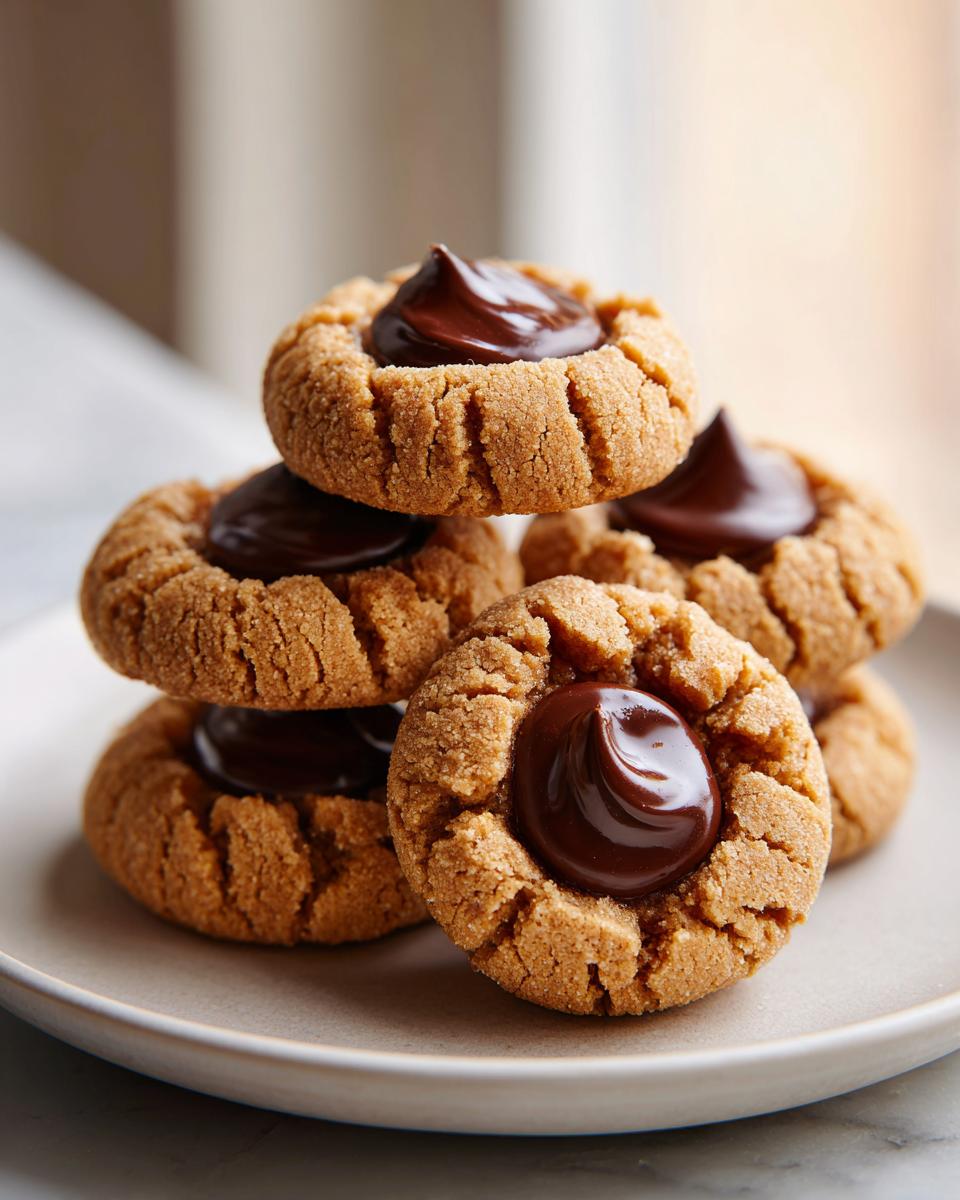
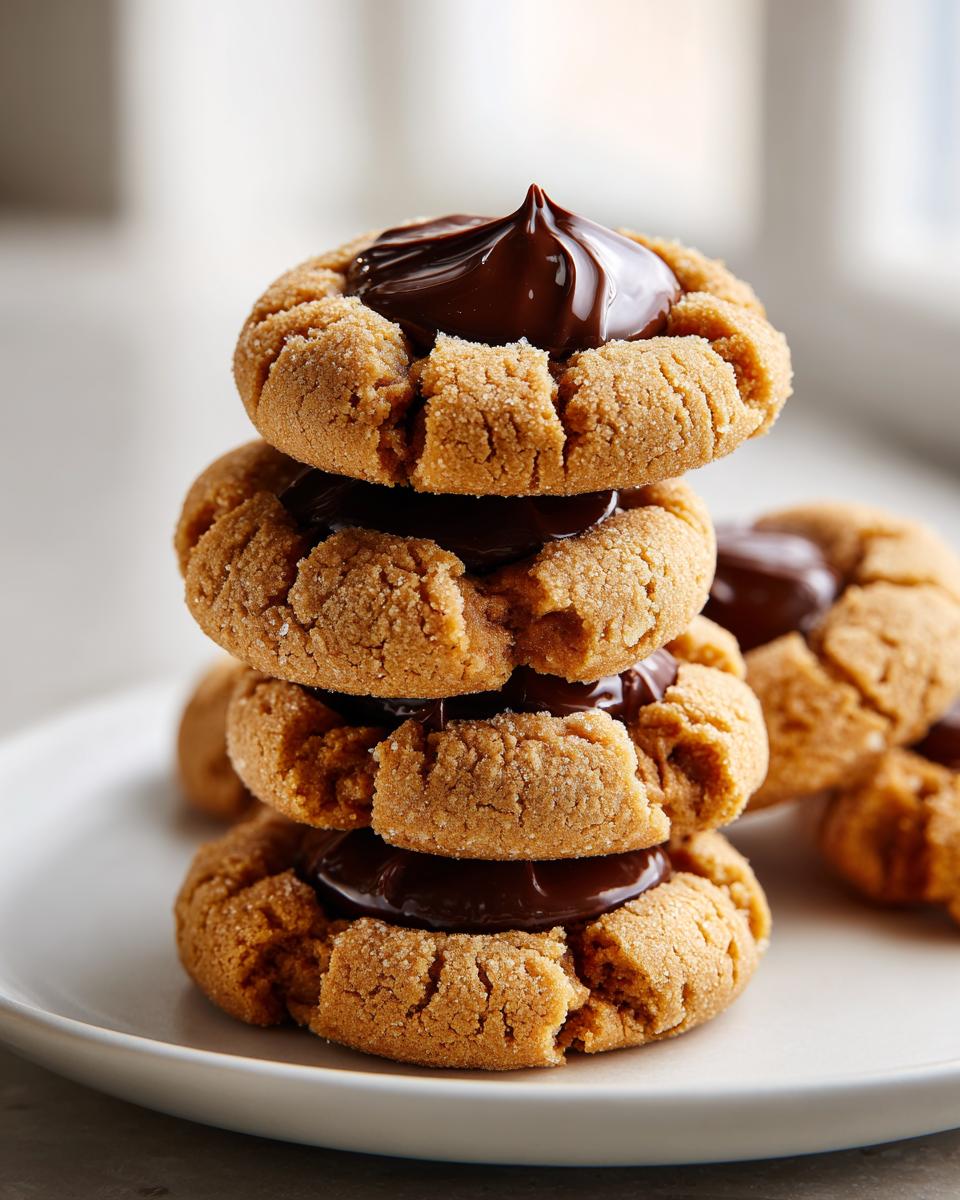
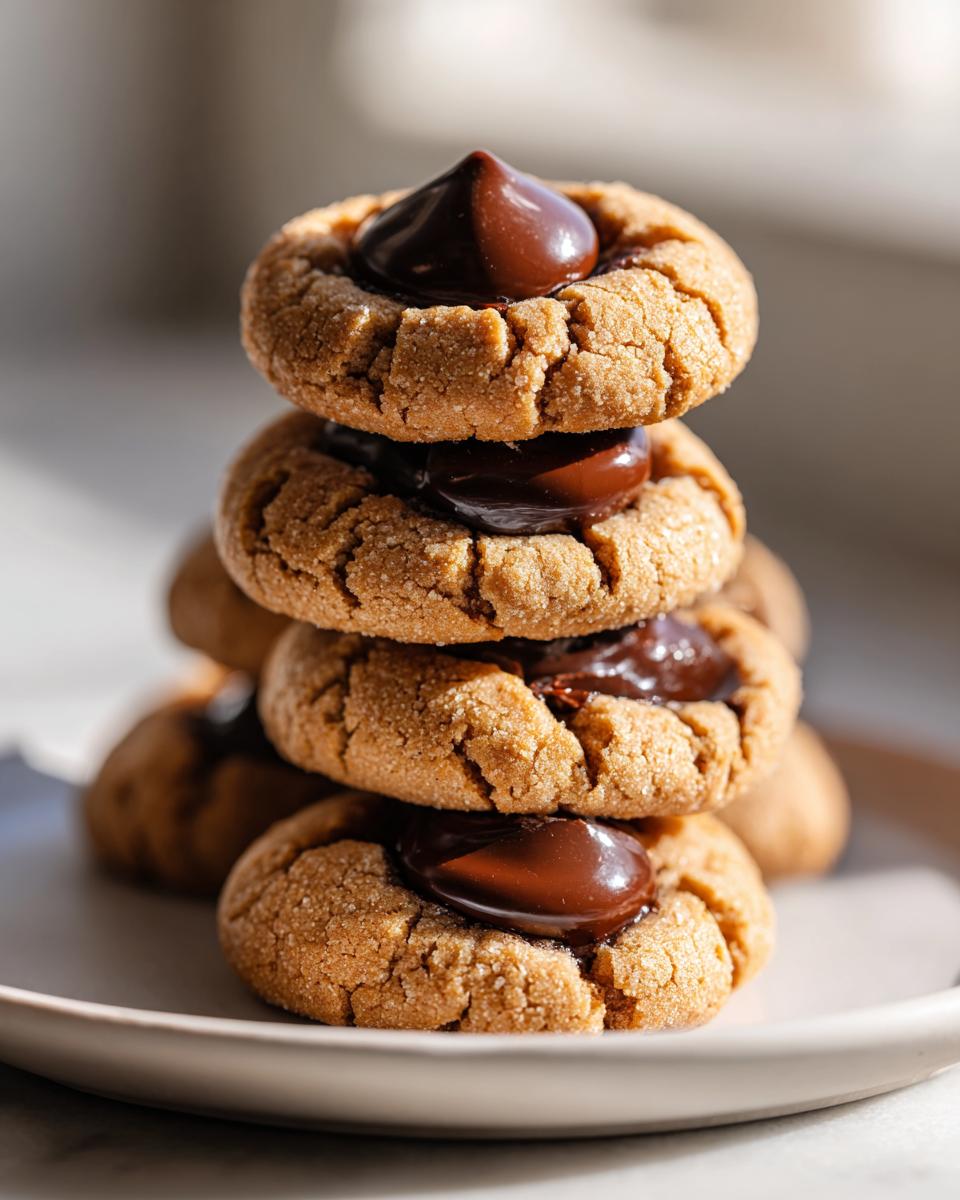
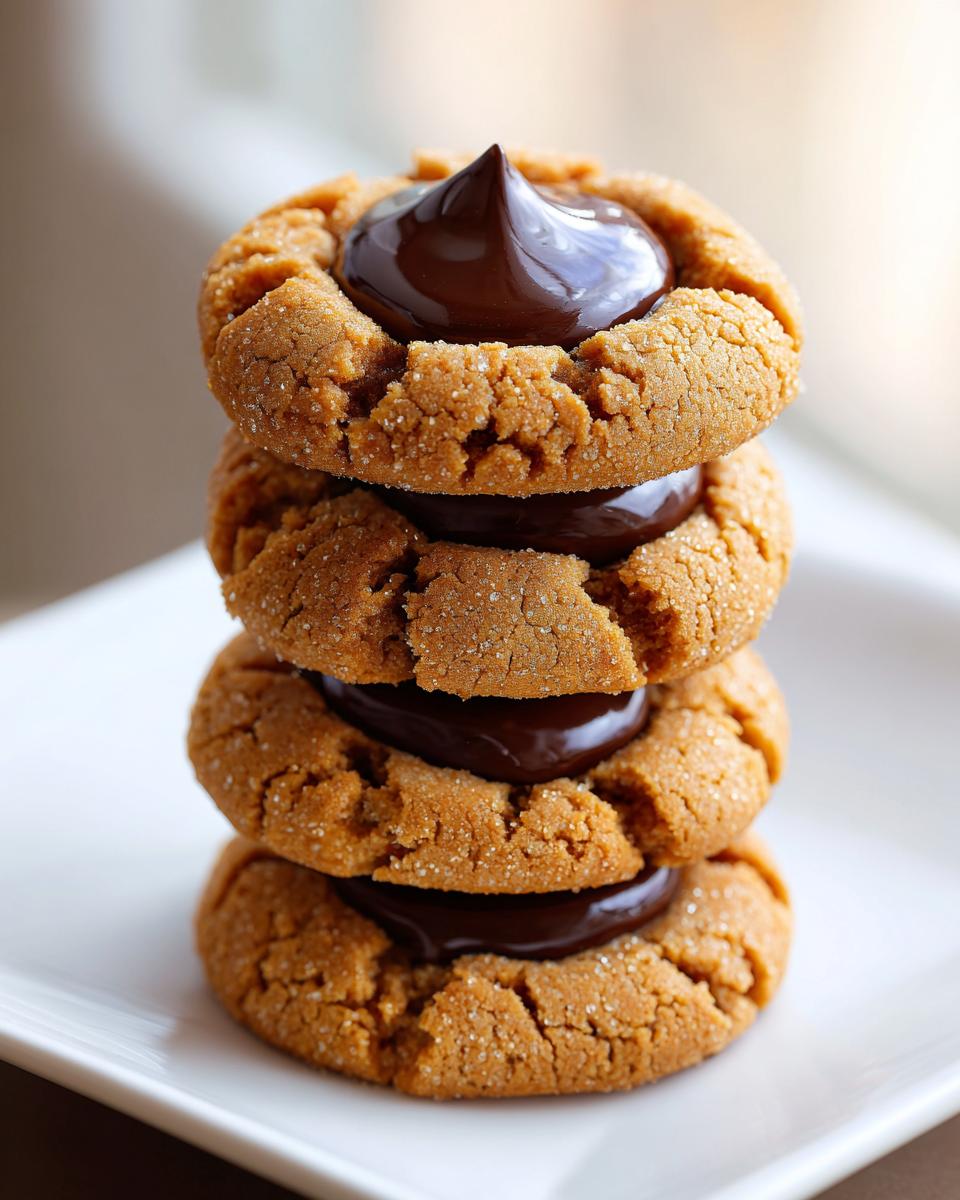
Achieving the Signature Crinkled Top on Your peanut butter blossom
That beautiful, crackled peanut butter top isn’t just happenstance; it’s science! First, you have to roll that dough ball generously in plain granulated sugar just before it hits the tray. As the cookie heats up, the fats start melting, but that sugar coating creates a barrier. This forces the dough underneath to expand and crack outward while the exterior sets quickly.
The temperature is also key here. Baking at 375°F sets the perimeter fast enough to keep the cookie from spreading into a flat disc. Then, pull them out when they look just a tiny bit soft in the center. That slight under-baking is what guarantees you get those lovely, deep fissures in the top when they cool, making them perfect for sharing, even if you’re sending leftovers to friends. For more insight on flawless results, check out the tips shared by the folks over at Flavory Dish.
Gathering Ingredients for Perfect peanut butter blossom Cookies
Okay, let’s talk about what goes into these treats because the ingredients really do make or break the final texture, especially when we’re aiming for that chewy center. This recipe is wonderfully straightforward, which is why it’s one of my go-to Holiday Baking Recipes. You’ll notice a few specific requests on my ingredient list. Follow them closely, and you’ll have a batch of these iconic cookies ready in no time!
Here is what you need for the dough itself:
- 1 cup unsalted butter, softened (and I mean truly softened, not melted!)
- 3/4 cup creamy peanut butter
- 3/4 cup granulated sugar
- 3/4 cup packed light brown sugar
- 2 large eggs
- 1 teaspoon vanilla extract
- 2 1/4 cups all-purpose flour
- 1 teaspoon baking soda
- 1/2 teaspoon baking powder
- 1/2 teaspoon salt
- About 48 Hershey’s Kisses, completely unwrapped
And separately, for the outside coating:
- 1/4 cup granulated sugar, for rolling
Ingredient Notes and Creamy Peanut Butter Choices
Let’s discuss the peanut butter first, because this detail is huge for success. You absolutely must use standard, shelf-stable, creamy peanut butter for this recipe. I’m talking about the kind that doesn’t require stirring, like Jif or Skippy. Why? Because natural peanut butter—the kind that separates and is oily—adds too much liquid and throws off the fat-to-flour ratio. That imbalance leads to spread-out cookies that won’t crinkle right and definitely won’t stay chewy.
Also, remember that butter rule: softened, not melted! If your butter is melted, the dough will absorb it too quickly and the cookies will spread flat before the leavening agents (the soda and powder) even get a chance to do their job. We want the butter pale and fluffy when we beat it with the sugars. That creaming action is what locks in that lovely, soft texture we’re chasing!
Step-by-Step Instructions for Classic peanut butter blossom
Now that you have your ingredients ready—hopefully using that wonderful creamy peanut butter—it’s time to bring it all together. I promise these steps are straightforward and totally manageable, even if this is your first time making Peanut Butter Kiss Cookies. Keep your oven at 375°F and have your baking sheets lined with parchment paper. I always suggest parchment; it saves cleanup and ensures nothing sticks!
First, we cream! In your big bowl, beat the softened butter, that good peanut butter, and both sugars until the mixture is actually light and fluffy. Don’t rush this part; it’s important for that softness. Then, you’ll introduce the eggs one by one, followed by the vanilla. In a separate bowl, whisk your dry stuff—the flour, soda, powder, and salt—so everything is evenly distributed.
Next, add the dry mixture to the wet stuff gradually. Mix it low and slow. I cannot stress this enough: stop mixing the second you don’t see dusty streaks of flour anymore! Overmixing is how you get tough cookies, and we want soft ones. Then, roll those little balls into the sugar for coating, put them on the tray, and bake them for just 8 to 10 minutes. They need to look a little underwhelming when they come out—that’s the magic! If you want some great advice on similar textures, check out how they handle moisture in these cannoli cookies.
The Crucial Moment: Pressing the Chocolate into the peanut butter blossom
This is the moment of truth, and timing is everything when it comes to the Hershey’s Kiss. You need your unwrapped Kiss ready *before* the cookies even come out of the oven. As soon as those trays slide out, you must immediately press one chocolate right into the center of each hot cookie. Don’t wait! If you let the cookies sit even for a minute, they firm up too much, and the chocolate won’t sink in correctly.
The residual heat of that perfectly underbaked cookie is what melts the bottom of the Kiss just enough so it adheres beautifully and creates that iconic look without melting the entire chocolate peak away. If they cool down before you press, you’ll just end up with a broken, crusty cookie on top of a cold base, which is a holiday tragedy! Work fast, then let them sit on the hot pan for five minutes so that chocolate can set up before you move those beautiful Easy Chocolate Drop Cookies to a cooling rack. You can find more great tips for achieving that perfect gooey center at Opera Cook.
Tips for Success When Making peanut butter blossom Cookies
I’ve made probably a thousand batches of these by now—seriously, my kitchen looks like a flour explosion most Decembers—so I’ve learned a few things the hard way. When you’re aiming for that perfect, crinkly, soft cookie that earns the title of a No-Fail Cookie Recipe, these small lessons make a huge difference.
The biggest mistake people make is getting aggressive with the mixer once the flour goes in. Remember how I told you that overmixing develops gluten? Well, tough cookies are the result! Once you add the dry mixture, switch to the lowest speed, or even grab a wooden spoon for the last few turns. You want the dough *just* combined. If you see a little bit of flour clinging to the side of the bowl, that’s actually perfect; it usually gets incorporated when you scoop the dough balls. Don’t try to eliminate every last speck!
Another thing to watch for is your kitchen temperature. If it’s a warm day, or if your creamed butter mixture feels soft or greasy when you go to roll the dough, stop! You need to chill that dough. Pop the whole bowl into the fridge for 30 minutes. This firms up the fat again, which prevents the cookie from spreading too much in the oven, keeping that nice thick center intact. For other recipes where shape retention is key, like my soft sugar cookies, chilling is non-negotiable, and the same thinking applies here.
Finally, I’m circling back because it’s so important: watch the clock, not just the appearance. I always advocate pulling these out when they look 80% done. They should look set around the edges but still puffy and maybe even a little pale in the very center. They firm up significantly on the hot pan post-bake. If they leave the oven looking beautifully golden brown, you’ve already gone too far, and you won’t get that irresistible chewiness. For more great advice on nailing that classic Christmas cookie flavor profile, the folks at Savor Beam have some excellent holiday baking wisdom!
Making peanut butter blossom Cookies for Holiday Baking
As soon as the air gets crisp, I know it’s time to switch gears into full-on Classic Christmas Cookies mode, and the peanut butter blossom is always the first recipe I pull out. These are basically mandatory for any cookie swap or holiday party spread, right? The good news is they are fantastic for making ahead of time, which is a lifesaver when you’re juggling a million things during the holiday rush.
When I’m making a huge batch for gifting or for a big cookie exchange, I always tackle the dough preparation in stages. First, I cream the butter and peanut butter mixture first thing in the morning. I’ll let it sit on the counter for about 15 minutes, then mix in the sugars and eggs. Once the dry ingredients are incorporated, I divide the dough into two or three manageable chunks rather than trying to mix the whole massive batch at once. Trust me, keeping the mixing manageable prevents you from whipping it too hard!
I roll the dough balls and coat them in sugar, then I place them on parchment-lined baking sheets and pop the whole sheet into the freezer for about 30 minutes before baking. This helps them hold that gorgeous, thick shape, which is so important when you’re making Festive Cookie Swap Treats!
If you’re baking them all at once, you can totally keep the chocolate Kisses handy. Just bake the first sheet, press the chocolate, and while that batch is resting on the pan, toss the next pre-rolled sheet into the oven. You can also prep a massive batch of dough and freeze the balls for up to three months. Then, when you need fresh cookies fast, you just unwrap them and roll them in sugar—no need to thaw! It’s an easy trick for keeping homemade cookies on hand throughout the season. If you need some inspiration for wrapping up all those beautiful treats, you might enjoy looking at my thoughts on how to present pumpkin spice everything, like these Pumpkin Snickerdoodle Cookies!
Storage and Keeping Your peanut butter blossom Fresh
The true test of a great cookie recipe is this: How long does it stay soft? We don’t want these beautiful peanut butter blossom cookies turning into little hardened discs by the next afternoon, especially if they are destined for a holiday cookie tin!
Luckily, because we nailed that perfect balance of fat and didn’t overbake them, these hold up beautifully. For immediate enjoyment, let them cool completely on the wire rack until that chocolate Kiss is firm set—maybe about 30 minutes, or longer if your kitchen is warm. Once they are cool, you can store them in a proper airtight container at room temperature. I find that layering them works best if you put a small piece of wax paper between the layers so the chocolate doesn’t stick to the cookie below it. They should stay deliciously soft for a good four or five days this way.
If you’re planning ahead (and honestly, you should be, especially around Christmastime!), you can totally do the make-ahead thing with the dough. Remember how I suggested chilling the dough balls? You can take that one step further and freeze them! Roll the dough balls, coat them in sugar, and then place them spread out on a baking sheet. Freeze them until they are rock hard—this usually takes an hour or so. Then, transfer those frozen balls into a heavy-duty freezer bag. Don’t forget to label the bag with the date!
When you want fresh cookies, you can either bake them straight from frozen (just add 2-3 minutes to the baking time) or let them thaw on the counter slightly before baking. This is such a lifesaver when you need Simple Peanut Butter Desserts fast without starting from scratch. It’s the same concept I use to keep my burrito bakes ready to go for a quick dinner!
Variations on the Classic peanut butter blossom
While I am a huge proponent of sticking to the tried-and-true recipe—especially when it achieves the perfect soft texture—it’s fun to play around once you have that master recipe down pat. Since these peanut butter blossom cookies are built on such a reliable, flavorful base, they handle small tweaks really well. If you’re looking for ways to dress these up for a party or just try something new, I have a few easy ideas that keep the structural integrity intact.
The easiest swap, of course, is the chocolate center. While the classic Hershey’s Kiss is iconic, you can absolutely use a Rolo for a caramel surprise, a Ghirardelli square corner (they melt beautifully!), or even a peanut butter chunk candy if you want to lean into that sweet and salty vibe even more. Just make sure whatever you use is unwrapped before baking!
If you want to enhance the peanut butter flavor itself, you can substitute half of the creamy peanut butter for one of those flavored spreads, like a honey-roasted variety, but be careful; sometimes those have extra oil, so test a small batch first. For a little texture and salt boost when you’re rolling the balls? Try blending a touch of flaky sea salt into the sugar you roll them in. That little pop of salt cutting through the sweetness makes these extra addictive—perfect for quick, Simple Peanut Butter Desserts.
If you are bored with traditional peanut butter, but still want a nutty profile, you could try swapping in almond butter or sunflower seed butter, although I highly recommend checking out my guide on ultra-chewy Almond Joy cookies for a better base for those nut butter swaps since they are built for chewiness! Remember, the key to keeping these specific blossoms from flattening is controlling the fat content, so if you experiment, just stick to swapping the Kiss and adding a pinch of salt. For some fun, chocolate-centric ideas, the folks at Delish Map showcase some neat ways to mix up the topping!
Frequently Asked Questions About peanut butter blossom
It happens! Even with the most tried-and-true recipes, sometimes questions pop up mid-bake. Because I want you to have a flawless batch of these peanut butter blossom cookies, I pulled together the things people always ask me about when they are making these Classic Christmas Cookies for the first time.
Why did my chocolate Kiss sink right into the cookie?
Oh, that’s a common little hiccup! Usually, the chocolate sinks completely or melts away into a puddle because the cookies were baked too long. If the cookie base is baked through and piping hot when you press the chocolate in, all that residual heat just melts the Kiss straight down, and the cookie has nothing left to hold it up in the center. Remember what I said earlier? We need that slight underbake! Pull them when they look slightly soft and puffy. The heat of the cookie should be just enough to start softening the Kiss, not enough to liquidate it entirely.
Can I skip rolling the dough balls in the extra sugar?
Technically, you *can*, but honestly, I wouldn’t recommend it if you are aiming for that perfect visual! Skipping the sugar rolling is one of the fastest ways to end up with a flat cookie that spreads too much. The sugar coating is essential because it encourages the dough to crackle on the surface rather than spreading smoothly outward. It also helps create that textural contrast between the slightly crisp, sugary shell and the chewy interior. If you’re going for those great Chewy Center Cookies, that sugar coating is your friend!
Do I have to use creamy peanut butter, or can I use crunchy?
For this recipe, please stick to creamy! I know crunchy peanut butter is delicious, but it introduces little hard chunks into your dough. When you roll the dough into balls and then press the chocolate on top, those chunks prevent the dough from forming that smooth, uniform surface needed for the classic crinkle, and it can make the final cookie feel a bit gritty. For the softest texture, the creamy stuff blends into the fat base perfectly. If you are planning to sneak these into a lunchbox as Homemade Peanut Butter Treats, the uniform texture of the creamy version is always better received!
Can I use a different chocolate chip instead of a Hershey’s Kiss?
You definitely can experiment with other chocolates, but you must manage your expectations! The beauty of the Kiss is its conical shape and that specific milk chocolate composition, which allows it to hold its shape right on the edge of melting. If you try to use a standard teardrop chocolate chip, it might melt flat too fast. If you want to try something else, look for a similar sized solid chocolate drop. For instance, a triangular piece of a high-quality chocolate bar works better than a standard chip for getting that nice “blossom” presentation. For more on keeping your baking fun and simple, check out my overview of easy spicy tuna kimbap—sometimes a change of pace in the kitchen is just what you need too!
Nutritional Estimates for This peanut butter blossom Recipe
Now, I know some of us are counting macros and others are just trying to fit a little joy into the day, but it’s always good to have a rough idea of what’s in that classic treat! I always run my recipes through a general calculator just so we aren’t completely in the dark about the goodness we’re devouring. Remember, I’m a home cook, not a certified nutritionist, so these numbers are my best guess based on standard, off-the-shelf ingredients.
These estimates are based on making about 4 dozen cookies, so the serving size is just one glorious peanut butter blossom. If you eat three (and I wouldn’t blame you if you did!), just multiply these values!
- Serving Size: 1 cookie
- Calories: 150
- Sugar: 12g
- Sodium: 95mg
- Fat: 8g
- Saturated Fat: 3g
- Carbohydrates: 18g
- Protein: 3g
- Cholesterol: 20mg
Take these figures with a grain of salt, okay? The actual nutritional content can swing depending on the exact brand of peanut butter you use or if you decide to use slightly less sugar when rolling those dough balls. What I can guarantee is that they will be packed with flavor and the satisfaction that comes from making one of the best Simple Peanut Butter Desserts from scratch!
PrintThe Ultimate Soft and Chewy Peanut Butter Blossom Cookies
Create classic Peanut Butter Blossom Cookies that stay soft and chewy long after baking. This recipe uses simple steps to achieve the perfect crackled cookie base topped with a melted Hershey’s Kiss, making it ideal for holiday baking or any day treat.
- Prep Time: 20 min
- Cook Time: 10 min
- Total Time: 30 min
- Yield: About 4 dozen cookies 1x
- Category: Dessert
- Method: Baking
- Cuisine: American
- Diet: Vegetarian
Ingredients
- 1 cup unsalted butter, softened
- 3/4 cup creamy peanut butter
- 3/4 cup granulated sugar
- 3/4 cup packed light brown sugar
- 2 large eggs
- 1 teaspoon vanilla extract
- 2 1/4 cups all-purpose flour
- 1 teaspoon baking soda
- 1/2 teaspoon baking powder
- 1/2 teaspoon salt
- About 48 Hershey’s Kisses, unwrapped
- 1/4 cup granulated sugar, for rolling
Instructions
- Preheat your oven to 375 degrees Fahrenheit. Line baking sheets with parchment paper.
- In a large bowl, cream together the softened butter, peanut butter, granulated sugar, and brown sugar until the mixture is light and fluffy. This step helps create a soft texture.
- Beat in the eggs one at a time, then mix in the vanilla extract.
- In a separate medium bowl, whisk together the flour, baking soda, baking powder, and salt.
- Gradually add the dry ingredients to the wet ingredients, mixing on low speed until just combined. Do not overmix the dough.
- Place the remaining 1/4 cup of granulated sugar in a shallow dish.
- Roll the dough into 1-inch balls. Roll each ball in the sugar to coat lightly.
- Place the sugared dough balls about 2 inches apart on the prepared baking sheets.
- Bake for 8 to 10 minutes, or until the edges are set and the centers look slightly soft. The cookies will look slightly underdone, which helps them stay chewy.
- Remove the baking sheets from the oven. Immediately press one unwrapped Hershey’s Kiss into the center of each warm cookie. The residual heat will melt the chocolate slightly.
- Let the cookies cool on the baking sheets for 5 minutes before transferring them to a wire rack to cool completely. The chocolate will set as they cool.
Notes
- For the best soft and chewy results, do not overbake the cookies. They should look slightly soft when you remove them from the oven.
- If you are baking at high altitude, check your local high-altitude baking charts for minor adjustments to leavening agents.
- To prevent the cookies from spreading too much, chill the dough for 30 minutes before rolling and baking, especially if your kitchen is warm.
- Use creamy peanut butter for the smoothest dough texture.
Nutrition
- Serving Size: 1 cookie
- Calories: 150
- Sugar: 12g
- Sodium: 95mg
- Fat: 8g
- Saturated Fat: 3g
- Unsaturated Fat: 5g
- Trans Fat: 0g
- Carbohydrates: 18g
- Fiber: 1g
- Protein: 3g
- Cholesterol: 20mg