
There is nothing, absolutely nothing, that signals “party time” like a piping hot, cheesy appetizer waiting on the counter. Seriously, watching people gather around a bubbly dish just makes my day! If you’re like me, you want recipes that are reliable, easy to scale up, and guaranteed to disappear fast. That’s where this Creamy Baked Garlic Bread Dip comes in. It’s the ultimate bread dip because it takes everything you love about garlic bread—the butter, the cheese, the intense flavor—and turns it into a delicious spread. Here at Taste This Plate, we believe making food that wows your guests shouldn’t be complicated, and this recipe perfectly proves Kate Reilly’s point: you can create an extraordinary meal from simple, accessible ingredients. If you’re looking for more of these reliable delights, check out all of our favorite easy appetizer dips. This is the comfort food appetizer you’ll turn to again and again, so be sure to bookmark it!
- Why This Baked Garlic Bread Dip is the Best Bread Dip for Parties
- Gathering Ingredients for Your Ultimate Bread Dip
- Step-by-Step Instructions for the Perfect Cheesy Bread Dip
- Tips for Success When Making Any Cheesy Bread Dips
- Serving Suggestions for Your Favorite Bread Dip
- Storage and Reheating Instructions for Leftover Bread Dip
- Frequently Asked Questions About This Bread Dip Recipe
- Nutritional Estimates for This Savory Spread
- Share Your Experience with This Easy Appetizer Dip
Why This Baked Garlic Bread Dip is the Best Bread Dip for Parties
When you throw a party, you need a bread dip that brings the wow factor without demanding you spend three hours chained to the stove. That’s the real secret sauce here! This baked version is pure comfort and guaranteed to be one of the top crowd pleasing snacks on your table. It’s warm, it’s gloriously cheesy, and the roasted garlic flavor is deep, not harsh. Forget those tired cold dips; nothing beats these hot dips for parties.
Simple Ingredients, Extraordinary Bread Dip Results
We focus on accessible things you already have, just like Kate always encourages. We’re talking about cream cheese, mozzarella, and garlic—nothing scary or hard to find! The magic isn’t in fancy sourcing; it’s in the roasting technique. Roasting the garlic transforms it into something sweet and mellow. It’s about maximizing flavor using basic components to create that guaranteed cheesy texture everyone digs. And if you want another guaranteed hit, you absolutely must try our Jalapeño Popper Dip next time!
Gathering Ingredients for Your Ultimate Bread Dip
Okay, let’s talk pantry mission! To make this incredible bread dip, you don’t need a specialty shopping list, which I love because it keeps things simple. You’re going to need one whole head of garlic—yes, a whole head! Don’t skimp here; we’re roasting it, so trust me on this step. Make sure your 8 ounces of cream cheese is actually softened; this is crucial for a smooth mix-in, so take it out early. We also use mozzarella, but remember I say “divided” because half of it goes inside the mix and the other half goes right on top before baking. Grab that Parmesan, the seasonings, and get ready for magic!
Ingredient Notes and Substitutions for This Bread Dip
If you’re out of sour cream, Greek yogurt works in a pinch, though the final texture will be slightly tangier. You want that full, rich flavor, so definitely splurge a little on good Parmesan cheese; the pre-grated stuff just doesn’t melt the same way for this kind of savory spread. And about the mozzarella? If you can grate it yourself, please do! Pre-shredded often has anti-caking agents that stop it from melding perfectly when it gets bubbly. If you enjoy garlic flavor like this, you might also have to try my homemade garlic aioli sometime!
Step-by-Step Instructions for the Perfect Cheesy Bread Dip
Okay bakers, this is where the fun really starts! We’re going to follow Kate Reilly’s advice and focus on the technique here to make sure this bread dip comes out like a dream. It all starts with that gorgeous garlic, which we need to roast until it’s sweet and gooey. Preheat your oven to 375 degrees F and get that small skillet or dish ready for the magic. Remember, we’re aiming for that perfect melt, so pay attention when we get to the baking portion!
Roasting the Garlic: The Secret to Great Bread Dip Flavor
You simply cannot skip roasting the garlic for this recipe. Raw garlic is harsh, but when you roast it, the heat breaks down those sharp compounds and turns the cloves sweet, almost nutty. I’m talking full flavor here—the very essence of a good Garlic Cream Cheese Dip. To do this, slice just a little sliver off the top of your whole garlic head to expose the cloves. Drizzle it with olive oil, wrap it up tight in foil, and pop it in the oven for about 30 to 40 minutes. You’ll smell when it’s done; it should be totally soft when you squeeze it!
Mixing and Baking Your Warm Dips
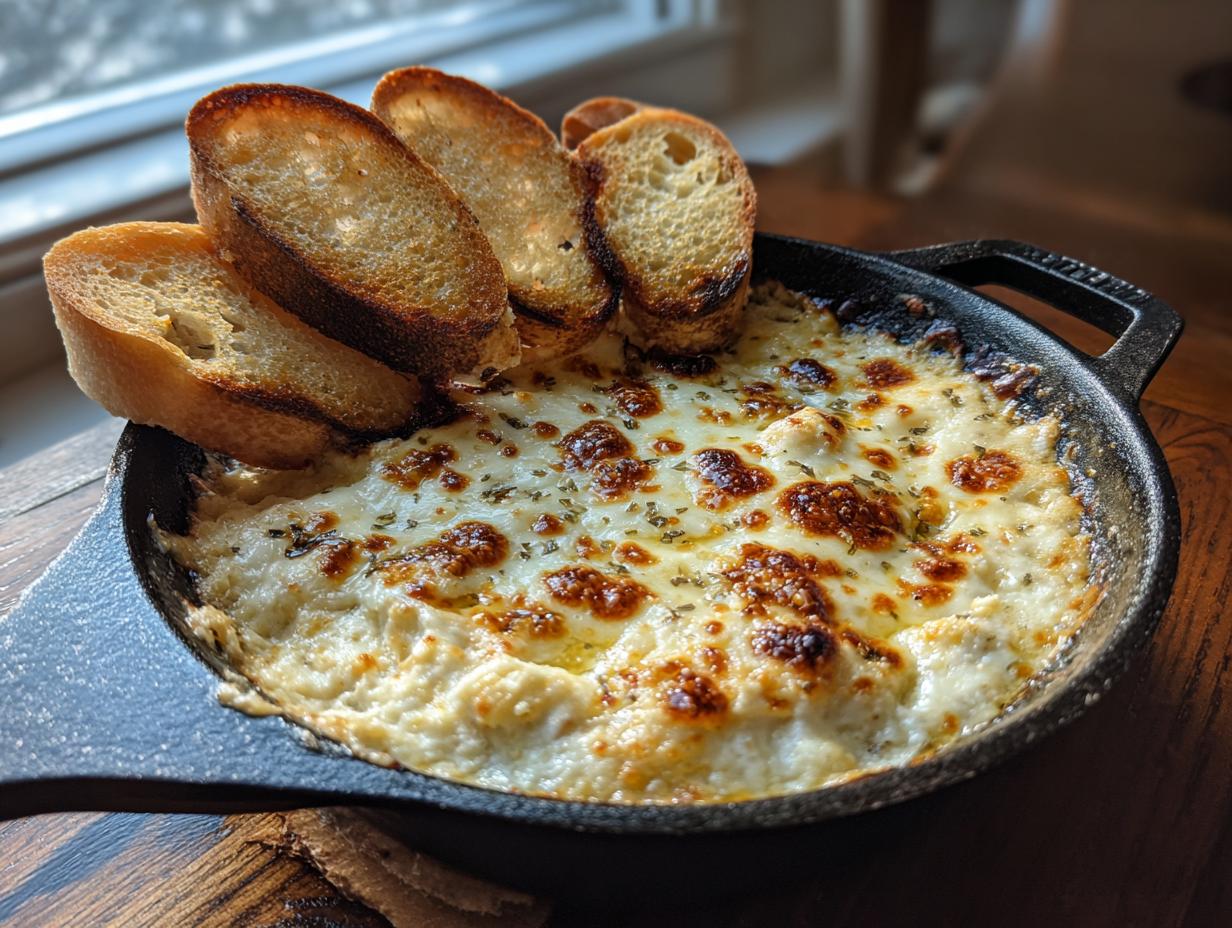
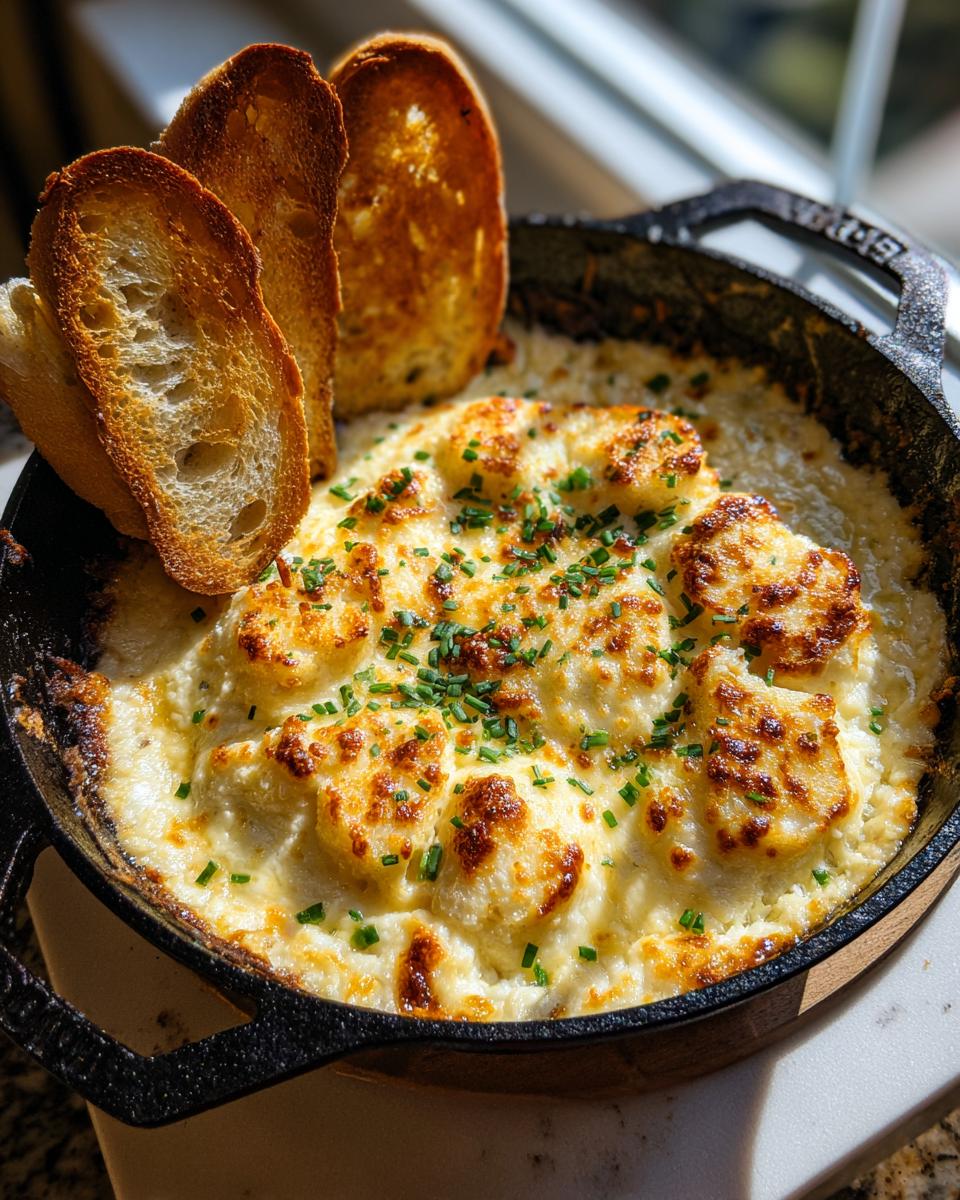
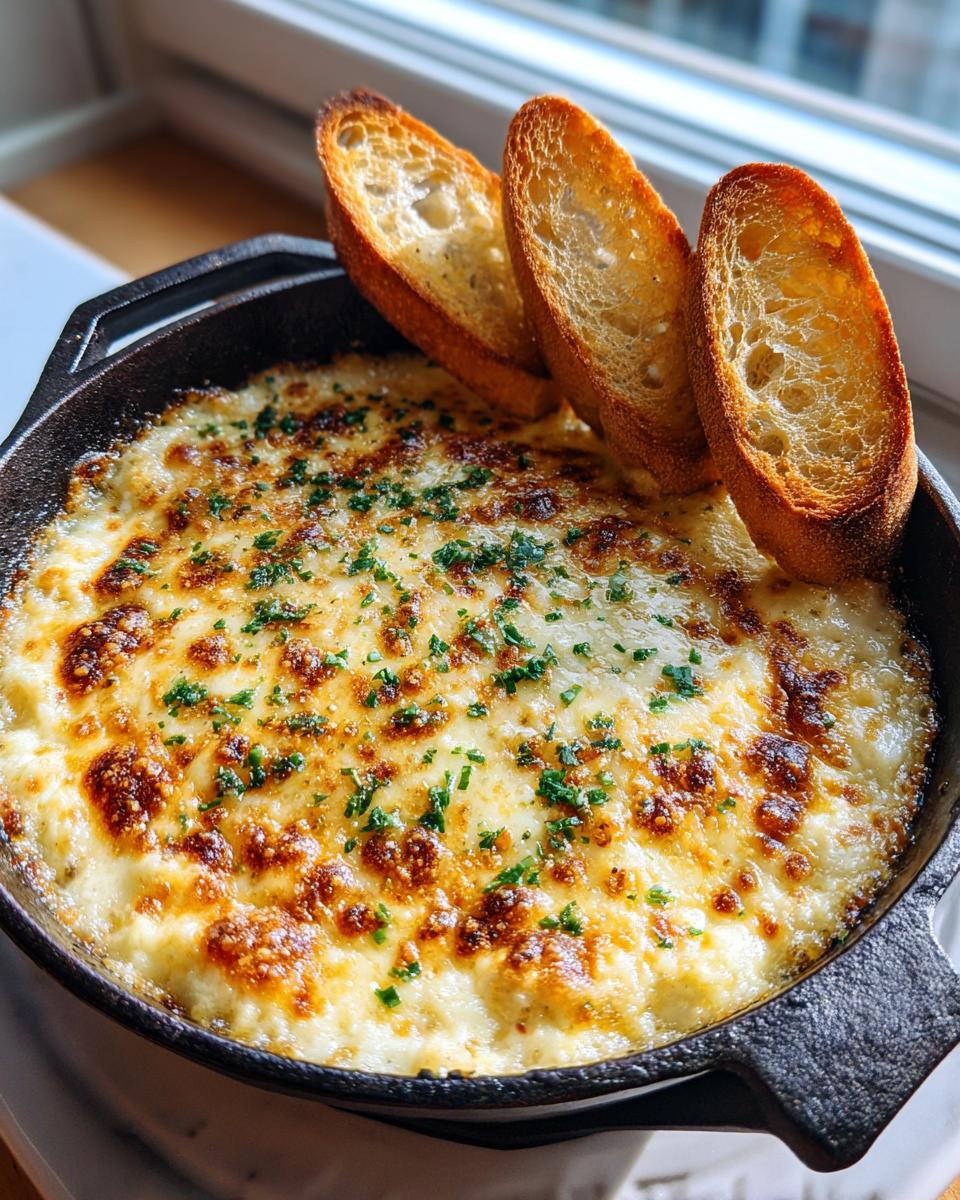
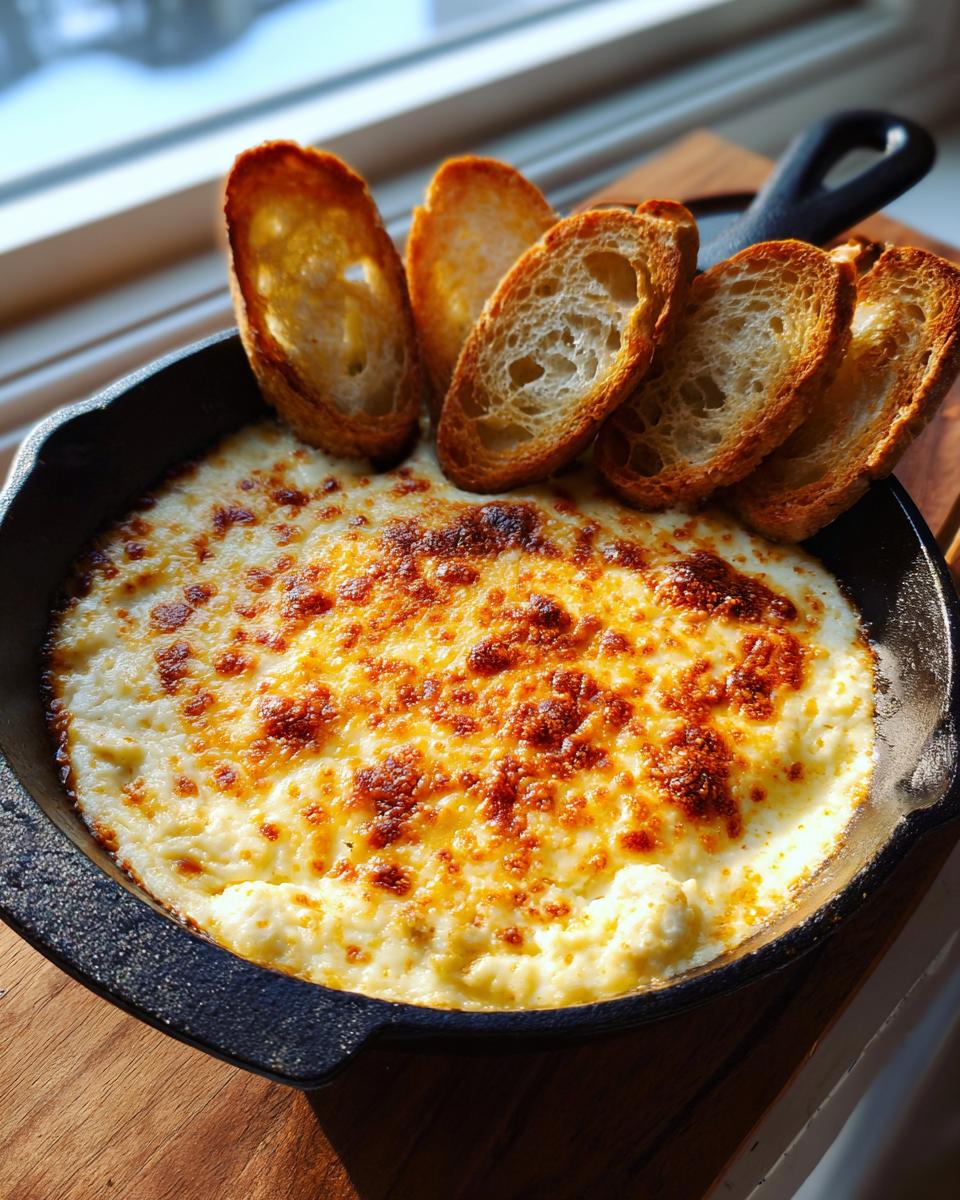
Once that garlic cools just a touch, squeeze the soft pulp right into your mixing bowl. Mash it up until it’s basically paste, and then add the soft cream cheese, sour cream, Parmesan, and all those seasonings. Mix it until it’s smooth as velvet! Now, fold in half that mozzarella. Spread this beautiful base evenly into your prepared dish—we want nice, even coverage for those perfect Baked Cheese Spreads. Top it with the rest of the mozzarella. Bake it for 15 to 20 minutes until it’s bubbly and golden brown on top. This is essential for achieving the best Warm Dips. One last thing: let it rest for five minutes before you dive in. That little bit of cooling time really helps the dip set up!
If you want amazing results for your next gathering, make sure to check out my tips on baking crispy potato wedges soon; they’re great alongside this cheese dip!
Tips for Success When Making Any Cheesy Bread Dips
I’ve definitely had a couple of batches of bread dip that didn’t behave in the oven, so I learned a few tricks the hard way! The biggest thing is temperature control. Make sure your cream cheese is truly softened—if it’s too cold, it will fight with everything else and you’ll get lumps instead of that creamy base we want. Also, don’t burn the topping! If your cheese isn’t browning after the dip is hot, just give it a quick 30 seconds under the broiler, but seriously, watch it like a hawk because it goes from perfect to charcoal fast. Speaking of fast, guess what? You can totally mix up the cheesy base the day before! Just cover the dish tightly and stick it in the fridge. That’s a huge win for parties. When you’re ready, just add the top layer of cheese and bake as directed.
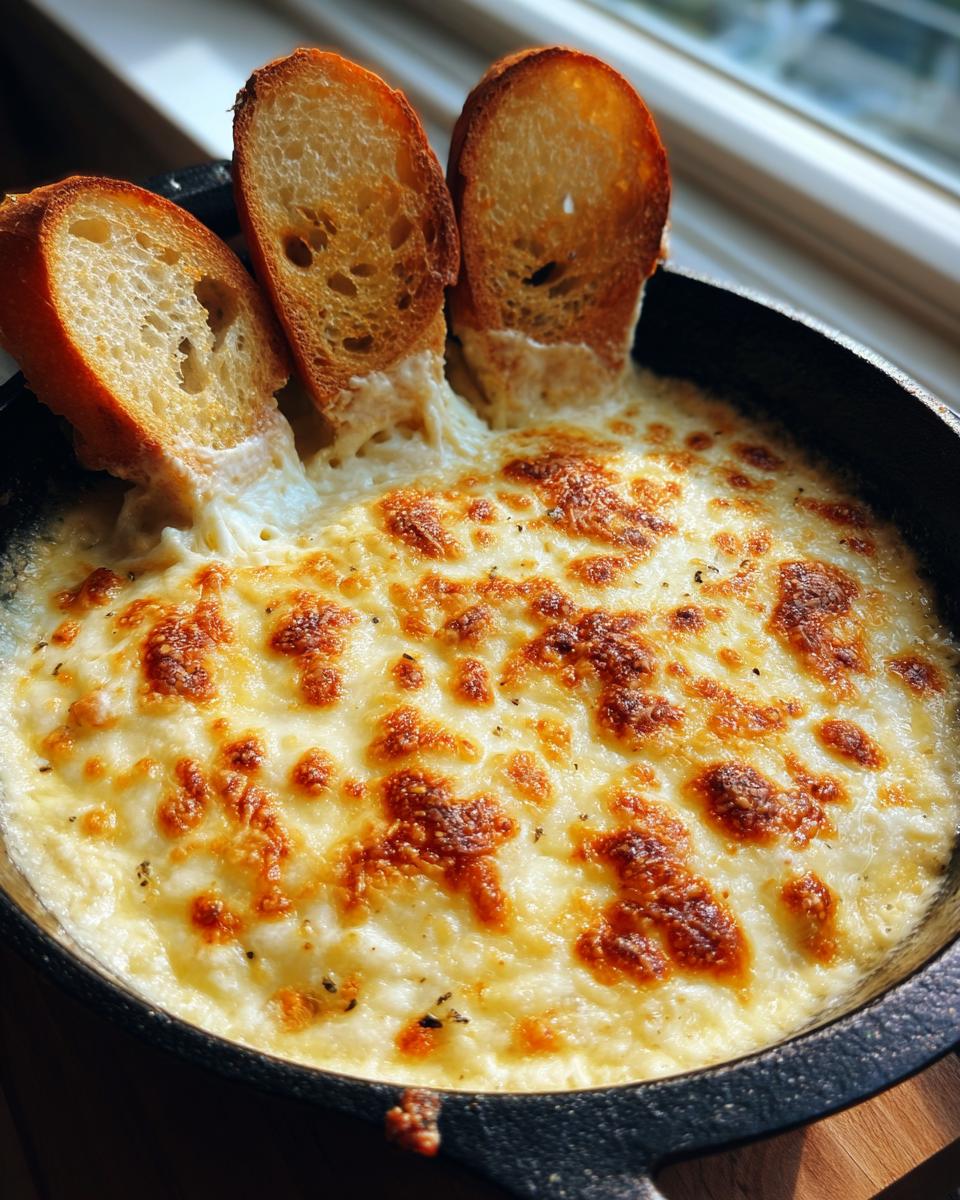
Serving Suggestions for Your Favorite Bread Dip
So, you’ve got this gorgeous, bubbly bread dip waiting right there in the oven! What do you serve it with? Well, the original recipe calls for sliced baguette, and honestly, warm, crusty bread dipping bread is fantastic—nothing beats sinking that toasted slice into the cheesy goodness, right? But let’s talk about variety for your guests. To make sure everyone has something they love, I always put out a few options, making this one of my favorite Simple Party Starters.
For amazing crusty bread pairings, try serving it alongside slices of my rustic garlic naan bread or maybe even some sturdy pita chips. If you have friends who are watching their carb intake, don’t stress! This cheese dip is really delicious with thick carrot sticks, celery, or even some bell pepper strips. If you want to see how they make one of the famous oil dips, check out this recipe for inspiration! Garlic Bread Dip is adaptable for sure!
Storage and Reheating Instructions for Leftover Bread Dip
The biggest flex of making a massive, amazing appetizer is having leftovers the next day, right? Seriously, if you don’t finish this entire batch of dip in one sitting, you’re lucky! Storing leftovers is super easy, but you have to be diligent about keeping it properly covered in the fridge. Just cover the remaining dip tightly—if you still have the skillet, just use foil or plastic wrap tucked right against the surface. It should keep well for three or four days. I usually try to finish it within three days, though, just so the cheese stays happy.
When you’re ready for round two, you have options for reheating. If you want it to taste almost exactly like the first time, grab an oven-safe dish (if you’ve transferred it from the skillet) and bake it at 350 degrees Fahrenheit for about 15 minutes, or until it’s hot and gooey again. If you need it faster—like when you realize you want a cheesy snack five minutes ago—the microwave works too! Put a scoop onto a microwave-safe plate and microwave in 45-second bursts, stirring in between, until it’s adequately warm. Just a heads up: reheating cheese dips like this always changes the texture a tiny bit. It might separate slightly when it cools down, but mixing it vigorously usually brings it right back together!
Frequently Asked Questions About This Bread Dip Recipe
I get so many questions about customizing all our favorite appetizers, and honestly, I love it! It means you guys are actually making these things! Getting this ultimate bread dip just right often comes down to little tweaks here and there. Here are a few things folks ask me all the time before they jump into baking.
Can I make this bread dip without roasting the garlic?
You sure can, but let me warn you—it’s a totally different experience! If you skip roasting the garlic and just mix in minced raw garlic, your cheesy bread dip will have a much sharper, more intense, almost spicy garlic bite. Roasting is what tames that sharpness and makes the garlic sweet and mellow, which really balances the richness of the cheese. If you like things really punchy, go for it raw, but for crowd-pleasing snacks, roasting is my non-negotiable step.
What is the best way to serve this as an Italian Bread Dip Recipe?
This dip definitely leans toward that savory, rich flavor profile, so it qualifies perfectly as an amazing Italian Bread Dip Recipe! The absolute best partner is slices of toasted baguette. Make sure you brush those bread slices with a little olive oil before toasting them lightly, maybe even adding a sprinkle of that Italian seasoning we used in the dip. Honestly, if you’re making this for a big meal, serving it alongside a crisp, simple side salad is a wonderful way to balance out the richness of all that cheese!
If you’re curious about dipping oils versus these baked versions, check out this great Olive Oil and Balsamic Vinegar Bread Dip recipe for inspiration. If you want more amazing recipes like this one, don’t forget to check out all our easy appetizer dips!
Nutritional Estimates for This Savory Spread
Okay, I know some of you are tracking things closely, and others just want to know roughly what you’re getting into with this incredibly rich, cheesy savory spread. Since we are focused on real, home-cooked food here, these numbers are estimates based on the recipe card, so they can definitely change a little based on the exact brand of cheese or sour cream you use. But this gives you a good baseline!
Here is the nutritional breakdown for one serving (which is about 1/6 of the dip, served with bread). Remember, the way you serve it changes things—dipping with huge slabs of sourdough means more calories than dipping with celery!
- Serving Size: 1/6 of dip
- Calories: 240
- Fat: 19g (with 11g saturated fat)
- Protein: 12g
- Carbohydrates: 5g
- Sugar: 2g
- Sodium: 350mg
We use full-fat ingredients because, well, that’s what makes a cheese dip sing! It’s why this is such a satisfying appetizer. Don’t stress too much over the numbers, though. The most important thing is that it tastes amazing and you make wonderful memories around the table eating it. If you’re looking for other comfort food appetizers, maybe bookmark this page right now so you can come back to it!
Share Your Experience with This Easy Appetizer Dip
I really hope this ultimate bread dip makes your next gathering a smashing success! When you take the time to roast that garlic and get those cheeses perfectly melty, I want to hear about it! Please take a moment to leave a rating—five stars if you loved it—and drop a comment below telling me what you served alongside this cheesy wonder. Getting your feedback helps me keep creating reliable, easy recipes for everyone. If you have questions or just want to say hi, you can always reach out to us here!
PrintUltimate Creamy Baked Garlic Bread Dip

Make this crowd-pleasing, cheesy baked garlic bread dip using simple ingredients. It combines roasted garlic flavor with cream cheese and mozzarella for a warm, savory spread perfect for crusty bread.
- Prep Time: 15 min
- Cook Time: 40 min
- Total Time: 55 min
- Yield: 6 servings 1x
- Category: Appetizer
- Method: Baking
- Cuisine: American
- Diet: Vegetarian
Ingredients
- 1 head garlic
- 1 tablespoon olive oil
- 8 ounces cream cheese, softened
- 1/2 cup sour cream
- 1 cup shredded mozzarella cheese, divided
- 1/2 cup grated Parmesan cheese
- 2 tablespoons fresh parsley, chopped
- 1 teaspoon Italian seasoning
- 1/4 teaspoon salt
- 1/4 teaspoon black pepper
- 1 baguette, sliced for serving
Instructions
- Preheat your oven to 375 degrees Fahrenheit. Lightly grease an 8-inch oven-safe skillet or small baking dish.
- Roast the garlic: Slice about 1/4 inch off the top of the garlic head to expose the cloves. Drizzle with 1 tablespoon of olive oil. Wrap the head tightly in aluminum foil. Bake for 30 to 40 minutes until the cloves are soft and golden brown. Let cool slightly.
- Squeeze the roasted garlic pulp out of the skins into a medium bowl. Mash the cloves with a fork until smooth.
- Add the softened cream cheese, sour cream, Parmesan cheese, parsley, Italian seasoning, salt, and pepper to the mashed garlic. Mix well until everything is fully combined and smooth.
- Stir in 1/2 cup of the mozzarella cheese. Spread the mixture evenly into your prepared baking dish.
- Top the dip with the remaining 1/2 cup of mozzarella cheese.
- Bake for 15 to 20 minutes, or until the dip is hot throughout and the cheese on top is melted and lightly browned.
- Let the dip rest for 5 minutes before serving warm with sliced baguette or crackers.
Notes
- For extra flavor, use roasted shallots along with the garlic.
- You can prepare the dip mixture up to one day ahead and store it covered in the refrigerator before baking.
- Serve with sourdough bread, pita chips, or vegetable sticks for dipping.
Nutrition
- Serving Size: 1/6 of dip
- Calories: 240
- Sugar: 2
- Sodium: 350
- Fat: 19
- Saturated Fat: 11
- Unsaturated Fat: 8
- Trans Fat: 0.5
- Carbohydrates: 5
- Fiber: 0.5
- Protein: 12
- Cholesterol: 55