

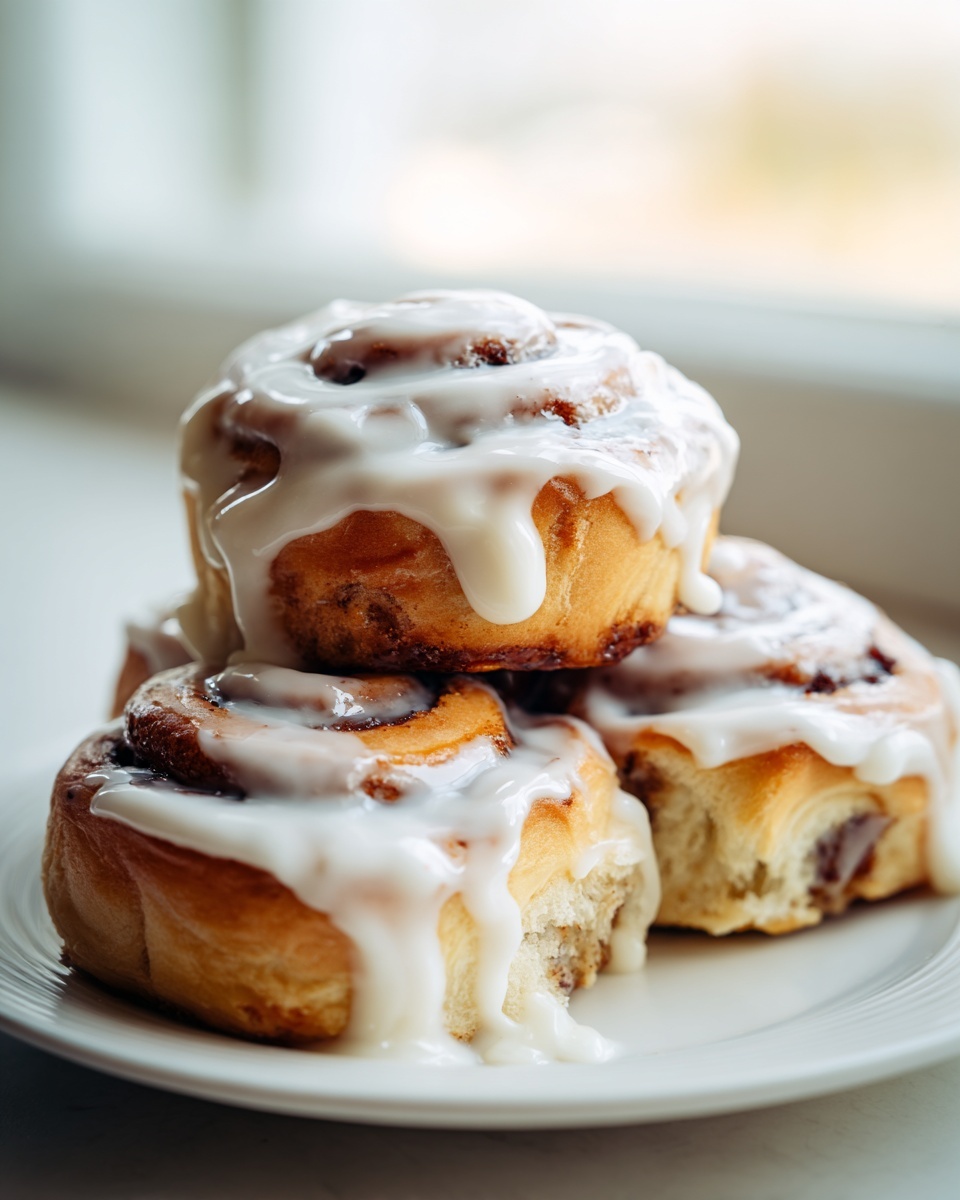
There’s nothing quite like waking up on a Saturday morning and smelling yeast rising gently, followed by the incredible perfume of warm cinnamon sugar filling the whole house. Forget those dry, mediocre treats you grab on the run—I’ve spent far too much time in my kitchen testing and re-testing to bring you the ultimate soft, gooey, bakery-style cinnamon rolls.
Here at Taste This Plate, my mission is making sure you never have a baking fail. After dozens of batches, I truly believe this recipe delivers that decadent, melt-in-your-mouth texture you dream about, complete with rich cream cheese frosting. You deserve this level of deliciousness for your next weekend brunch!
- Why This is the Best Cinnamon Rolls Recipe Ever
- Ingredients for Bakery Style Cinnamon Rolls with Cream Cheese Frosting
- How to Prepare The Ultimate Gooey Cinnamon Rolls
- Tips for Success Making Homemade Cinnamon Rolls
- Serving Suggestions for Weekend Brunch Treats
- Storage and Reheating Your Best Cinnamon Roll Recipe Ever
- Frequently Asked Questions About Making Cinnamon Rolls
- Estimated Nutritional Data for Homemade Cinnamon Rolls
- Share Your Soft and Fluffy Rolls Experience
Why This is the Best Cinnamon Rolls Recipe Ever
I know everyone claims their recipe is the “best,” but these cinnamon rolls are different. I spent so much time tweaking the yeast and the rise so you don’t end up with something dense and sad. My goal, which I talk about all the time here at Taste This Plate, is providing foolproof results, and these are just that. If you want that bakery-quality experience without the bakery price tag, this is the one you need to pin. I promise you won’t go back to the can after trying these!
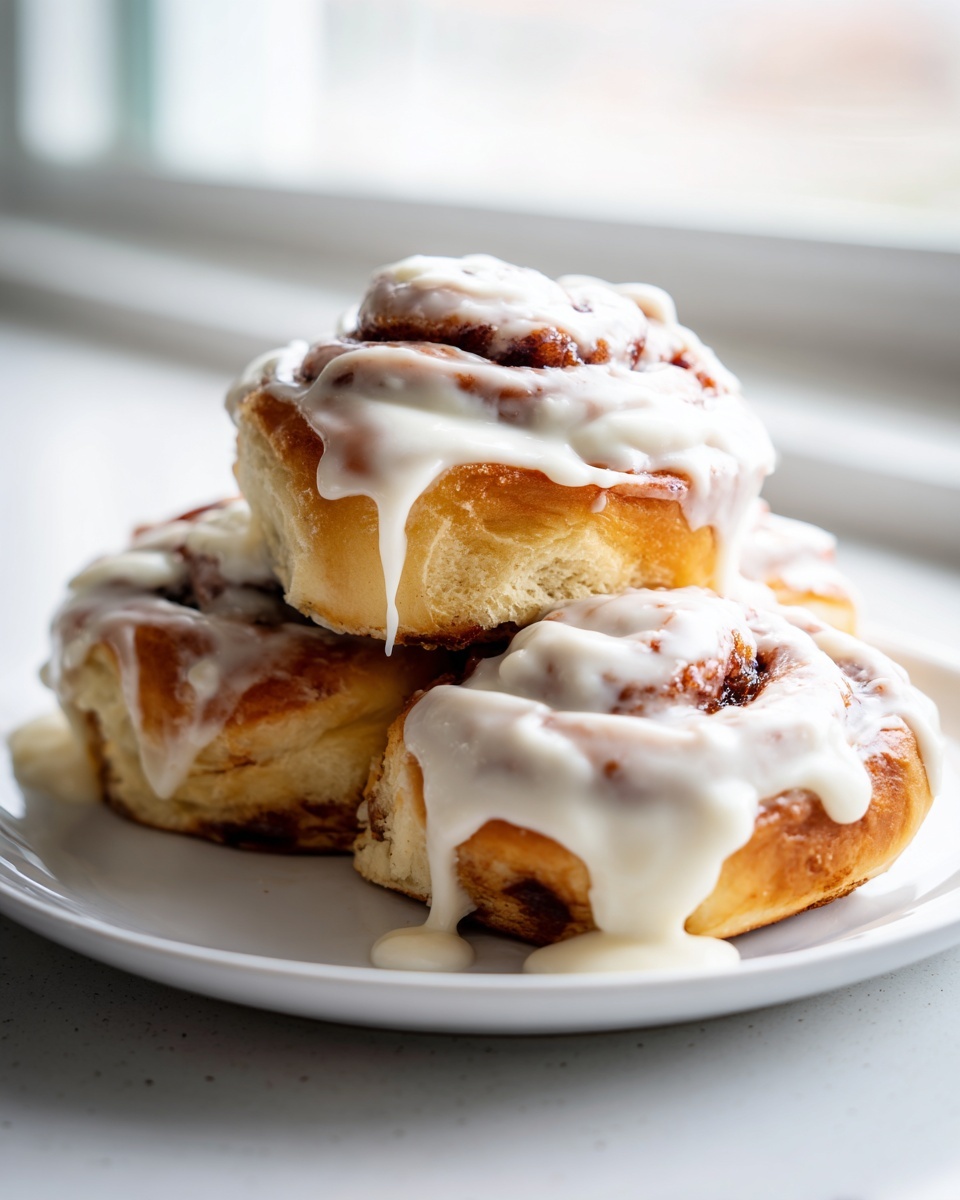
- They are unbelievably soft—seriously, they tear apart like tissue paper.
- That rich, thick layer of cinnamon sugar stays put and melts perfectly.
- The tang from the cream cheese frosting cuts through the sweetness just right.
If you want to learn the secrets to making pastries that genuinely rival what you get from those specialty shops, then keep reading. We’ve got some fantastic techniques coming up that make all the difference. Check out my guide to homemade cinnamon buns if you love testing variations!
Achieving Ultimate Soft and Fluffy Rolls Texture
The foundation of a perfect roll is the dough, no question. We aren’t trying to rush this with a quick-mix style; that’s how you get rolls that dry out almost immediately. By taking the time to properly knead the dough for about seven minutes, we develop the gluten structure just enough. This structure traps all those lovely gases created by the yeast during both rises. That slow, patient process is what creates that airy, fluffy mouthfeel. Trust me when I say waiting for the dough to double in size is non-negotiable if you want the softest yeast rolls breakfast treat possible.
The Secret to Gooey Cinnamon Rolls Recipe Filling
Ah, the gooey factor. This is where many recipes fall flat, either using too little butter or sugar, or worse, using butter that’s too hot. For these incredible gooey cinnamon rolls recipe swirls, we use melted butter—not just softened—and we slather it edge-to-edge across the rolled-out dough. Then we use a generous cup of packed brown sugar mixed with plenty of cinnamon. The combo melts right into the dough while baking, creating that mouthwatering, sticky layer that makes you lick the plate clean. This foolproof method is what gets you that bakery-quality result right in your own kitchen.
Ingredients for Bakery Style Cinnamon Rolls with Cream Cheese Frosting
Okay, now that we’ve hyped up how amazing these cinnamon rolls are going to be, let’s talk about what you need. I always try to keep my ingredients list simple, using things you probably already have. Clarity here is super important so you don’t accidentally grab cold butter when you need melted! Trust me, following these exact measurements ensures that perfect soft and fluffy texture we are aiming for. Here’s the breakdown:
For the Soft and Fluffy Dough
- 1 cup whole milk, warm (about 110°F)
- 2 1/4 teaspoons active dry yeast
- 1/2 cup granulated sugar, divided
- 1/4 cup unsalted butter, softened
- 1 large egg, room temperature
- 1 teaspoon vanilla extract
- 3 1/2 cups all-purpose flour, plus more for dusting
- 1 teaspoon salt
For the Buttery Cinnamon Swirls Filling
- 1/2 cup (1 stick) unsalted butter, melted, for filling
- 1 cup packed light brown sugar, for filling
- 2 tablespoons ground cinnamon, for filling
For the Rich Cream Cheese Frosting
This frosting is key! Make sure your next step is letting the butter and cream cheese sit out. We need them nicely softened so the frosting comes together smoothly, not lumpy.
- 1/2 cup (1 stick) unsalted butter, softened, for frosting
- 4 ounces cream cheese, softened, for frosting
- 2 cups powdered sugar, for frosting
- 1 teaspoon vanilla extract, for frosting
- 1-3 tablespoons milk, for frosting
Once you’ve got all your players gathered, head over to the instructions where we mix up the dough for your fantastic gooey bites!
How to Prepare The Ultimate Gooey Cinnamon Rolls
Okay, we have the ingredients ready, which means it’s time to get our hands dusty! This process is where we transform simple pantry items into those incredible, soft cinnamon rolls. I know yeast can be intimidating for beginners, but trust me, getting that initial foam is your green light to success.
Mixing and Kneading the Yeast Rolls Breakfast Dough
First things first: the yeast needs its wake-up call! Mix your warm milk, yeast, and just a tablespoon of sugar together in a big bowl. Give it 5 to 10 minutes. When it gets foamy on top, that means your yeast is happy and ready to work its magic. To this, you’ll stir in the rest of your sugar, the softened butter, the egg, and vanilla. Once that’s mixed, slowly work in your flour and salt until you get what I call a ‘shaggy’ dough—it looks a little messy.
Now, the kneading! Turn that shaggy mass out onto a lightly floured counter. You need to knead this for about 5 to 7 minutes. You’re looking for a specific feeling here; the texture should become completely smooth and nice and elastic. When you poke it, it should spring back slowly. That’s how you know you’ve built the structure for those fluffy rolls!
The Rise Process for Perfect Cinnamon Rolls
Once kneaded, put your dough in an oiled bowl, cover it up, and tuck it somewhere warm. This first rise is crucial; it needs at least an hour, maybe an hour and a half, to double in size. Patience is a virtue, especially in baking, but if you’re in a whirlwind and need them faster, you can absolutely place the bowl in a *turned off* oven with the light on—that little warmth really coaxes the yeast to hurry up. The second rise, after you’ve cut them, is shorter, maybe 30 to 45 minutes, just until they look nicely puffy in the pan.
If you are determined to make these the fastest batch ever, some people have incredible luck with a pure one hour cinnamon rolls recipe by using different dough hydration techniques, but for this specific recipe, giving it that time ensures the supreme softness.
Assembling and Baking Your Sweet Breakfast Baking
Once risen, punch that dough down gently and roll it out into a big 12×18 inch rectangle. This is the best part: Brush every last corner with that melted butter—don’t be shy! Then, sprinkle the brown sugar and cinnamon mix evenly over the top. This layering creates those gorgeous, buttery cinnamon swirls.
Roll it up tightly from that long edge to make a long log, making sure to pinch that seam closed so the filling doesn’t burst out. Now, for the cleanest slice, forget the knife unless it’s super sharp! I tell everyone to use unflavored dental floss—wrap it underneath, cross your hands on top, and pull. It slices right through without squishing the dough. Cut into 12 pieces and arrange them snugly in your greased pan. Bake at 375°F for about 20 to 25 minutes until they look beautifully golden brown on top.
Whipping Up the Cream Cheese Frosting
We are not letting those hot rolls cool down for long! While they’re baking, get your frosting going. Beat the softened butter and the cream cheese until they are completely smooth—no lumps allowed! Slowly start adding the powdered sugar and vanilla. The trick to making this rich cream cheese frosting the perfect consistency is the milk. Add it just one tablespoon at a time, beating well after each addition, until you have a thick, luscious swirl that’s easily spreadable. Spread it generously over the warm rolls right out of the oven. That contrast between the hot, gooey roll and the melting, cool frosting? Perfection!
This method, including the technique for the dough, is what I rely on for foolproof results every time I make these amazing treats.
Tips for Success Making Homemade Cinnamon Rolls
Baking these amazing cinnamon rolls is all about respecting a few small details, ones that my many test bakes taught me. If you follow the process, you’re going to get restaurant-quality results. Don’t stress about perfection, but do pay attention to the small things that make them so wonderfully soft and gooey. If you want to see what others have achieved with this recipe, some truly incredible results are shared over at Eats Delightful!
Temperature Control for Fluffy Cinnamon Rolls
This is non-negotiable when working with live yeast for your yeast rolls breakfast. Your milk absolutely needs to be warm, around 110°F, but certainly not scalding hot, or you’ll kill the yeast right off the bat! Similarly, look at your butter for the filling. It should be fully melted so it spreads evenly across the dough. If it’s too cool, it’ll drag and create thin spots, meaning no even buttery cinnamon swirls.
How to Guarantee Gooeyness
If you absolutely want that “ooey gooey” reputation, you have to trust me on two things. First, slightly underbake them—I mean just two minutes shy of what looks ‘done.’ The residual heat will finish cooking them while they sit under the frosting. Second, for an extra push toward irresistible decadence, pour just a splash of heavy cream over the tops right after they come out of the oven but before you frost them. That cream gets soaked right up, making the center of your fresh batch of cinnamon rolls unbelievably moist.
For more confidence in your baking, check out my tips on making crusty rustic Italian bread—different techniques, but the same principle of respecting the ingredients!
Serving Suggestions for Weekend Brunch Treats
These gorgeous, sweet rolls are definitely the star of the show, but every star needs a great supporting cast! When I bring these rolls out for a cozy weekend brunch, I like to keep the sides light and fresh so everyone can enjoy more than one roll without feeling totally weighed down. It’s all about balance, right?
For drinks, you can’t go wrong with coffee—a strong French press or a creamy latte balances the richness of the cream cheese frosting beautifully. If you want something a bit more fun for a special occasion, I have a fantastic recipe for a sparkling apple cider mule that feels festive but isn’t too heavy.
If you want a little savory side to make it a meal, go simple. A colorful fruit salad packed with berries, melon, and maybe some segmented oranges works perfectly to cut through all that sweetness. Or, if you really need protein but don’t want to cook complex omelets, having a simple platter of sliced ham or bacon adds that necessary salty contrast. Remember, the goal is to celebrate the everyday, and what’s more celebratory than warm, gooey pastries paired with something crisp and bright?
Storage and Reheating Your Best Cinnamon Roll Recipe Ever
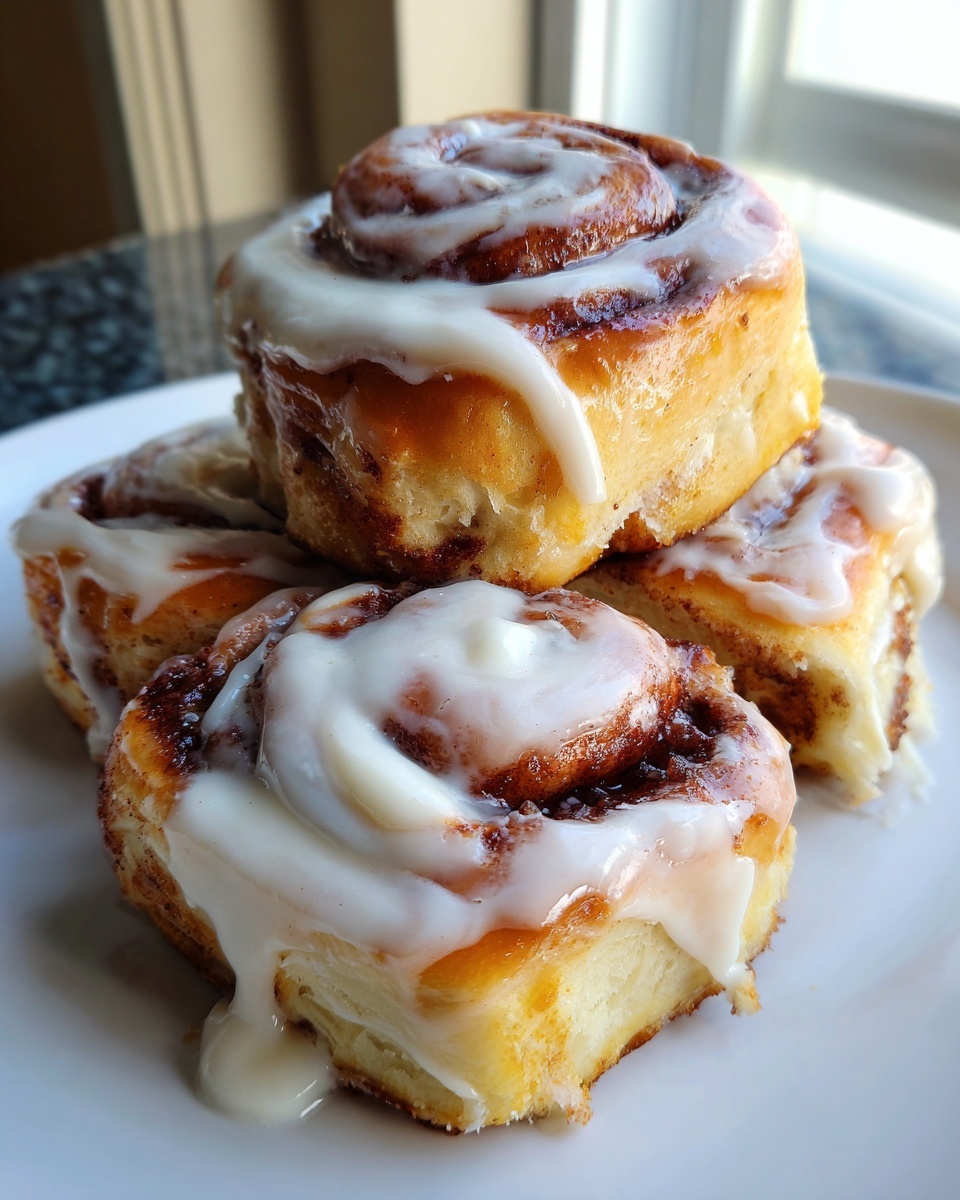
These cinnamon rolls are honestly best eaten the second they come out of the oven when the frosting is still dripping a bit. But let’s be real, you probably won’t finish all 12 (though I try!). Storing leftovers is easy, but how you store them dictates how they reheat later.
If you plan on eating them within a day, leaving the remaining rolls covered tightly with plastic wrap right in the baking dish on the counter is totally fine. My kitchen is always pretty cool, so they stay soft enough. If you need to keep them for longer than 24 hours, that’s when the fridge comes in. Place them in an airtight container—again, cover them well!—and they should be good for about three or four days. They will firm up a bit in the fridge, but don’t worry, we can fix that!
Reheating is crucial to getting back that incredible soft texture we worked so hard for. Skip the microwave if you can, because it often heats them unevenly and can make the dough chewy. The absolute best way to bring your cinnamon rolls back to gooey life is in the oven. Pop one or two rolls on a baking sheet (foil makes cleanup easy!) and warm them at 350°F for about 5 to 8 minutes. They come out warm, gooey, and smelling almost as good as when they were first baked.
If you’re in a rush, the microwave works for a single serving—just 15 to 20 seconds usually does the trick. If you want to make a batch ahead for a future morning, you can even freeze them *after* they have cooled completely. Just wrap the unfrosted rolls tightly in plastic wrap, then foil, and freeze them for up to two months. When you are ready to bake them again, just thaw them overnight on the counter and then use the oven method above for that perfect warming result. Don’t forget, a quick packet of my homemade hot cocoa mix makes the perfect pairing!
Frequently Asked Questions About Making Cinnamon Rolls
I always get so many questions after people try this recipe because they can’t believe how amazing these homemade cinnamon rolls turn out! It’s natural to wonder how to tweak a recipe, especially when you’re aiming for speed or when you notice you’re missing one tiny ingredient. I tried to answer all the common ones I hear from readers right here. If you’re looking for more make-ahead magic, check out my Christmas breakfast casserole!
Can I make these easy cinnamon rolls quick using instant yeast?
Yes, you absolutely can substitute instant yeast for active dry yeast! Instant yeast is great because it lets us skip that whole initial 10-minute proofing step. If you substitute, just skip Step 1 entirely. Mix the instant yeast right in with your flour and salt, and then proceed with adding the wet ingredients. Be mindful, though—since instant yeast is more potent, sometimes it acts faster. So, keep an eye on your rise times; they might take a little less time to double, but for that truly *soft and fluffy rolls* texture, I usually still give them the full rising window.
What is the difference between these rolls and copycat cinnamon rolls?
That’s a great question! Think of the commercial, *copycat cinnamon rolls*—the ones that are super soft but often taste a little too artificial? The huge difference here is the quality of the filling and the dough structure. Our recipe uses real, softened butter and packed brown sugar, which melts into this incredible, buttery cinnamon swirl layer. Commercial ones often rely on chemical flavorings or stabilizers. My method guarantees that deeply satisfying, rich, gooey flavor that you just can’t fake when you’re going for the *best cinnamon roll recipe ever*.
Can I use this recipe as a beginner cinnamon roll recipe?
I truly designed this to be your go-to beginner cinnamon roll recipe! Yes, it has yeast, but that’s the scariest part, and I walked you through it step-by-step, right from activating the yeast to the floss-slicing trick. The kneading might feel therapeutic, and the rising times give you a nice break in between. Because the dough handles so well—it’s not overly sticky unless your kitchen is super hot—you’ll find it very forgiving. Stick to the times I gave you for the rises, and you will definitely achieve soft and fluffy rolls on your very first try!
Estimated Nutritional Data for Homemade Cinnamon Rolls
I always feel a little awkward posting nutrition facts because, let’s be honest, we make these amazing, gooey cinnamon rolls because they taste wonderful, not because they are health food! That rich cream cheese frosting and that buttery filling definitely add up. But I made a commitment here at Taste This Plate to be transparent with every recipe, so here is the breakdown based on the ingredients used.
Please remember, this is just an estimate calculated per serving (which we set at 1 roll). If you sneak a second one (and I won’t blame you!), you’ll need to double these numbers!
- Serving Size: 1 roll
- Calories: 450
- Fat: 22g
- Saturated Fat: 14g (That cream cheese and butter add up!)
- Trans Fat: 0.5g
- Cholesterol: 45mg
- Carbohydrates: 58g
- Fiber: 2g
- Protein: 7g
- Sugar: 45g
- Sodium: 350mg
See? They’re decadent! These are weekend treats, my friends—the perfect centerpiece for a relaxed, memorable breakfast where you don’t worry about the scale, you just worry about wiping the frosting off your fingers. Worth every single calorie, in my book!
Share Your Soft and Fluffy Rolls Experience
Now, here’s the fun part! I poured my heart into making sure this recipe results in the absolute best, soft and fluffy rolls you’ve ever made. But baking is a conversation, right? I truly want to know what happened when these came out of your oven!
Did you nail that perfect amount of gooeyness? Did your family fight over the last one? I absolutely love when you all send me snapshots of your beautiful rolls looking all decadent with that cream cheese frosting dripping down the sides. It honestly makes my day to see my work bringing joy to your kitchen.
Please take a minute to leave a comment below telling me how it went. Rate the recipe—did it live up to the “best ever” hype? If you ran into a snag, tell me that too so I can help you troubleshoot for next time. You can also reach out to me directly through my contact page if you have a longer question!
Thanks for trusting me with your weekend brunch treats. Happy baking, and I can’t wait to see those buttery cinnamon swirls!
PrintThe Ultimate Soft and Gooey Homemade Cinnamon Rolls with Cream Cheese Frosting

Make the best homemade cinnamon rolls that are soft, fluffy, and incredibly gooey, topped with rich cream cheese frosting. This recipe delivers bakery-style quality for your weekend brunch.
- Prep Time: 30 min
- Cook Time: 25 min
- Total Time: 2 hours 25 min
- Yield: 12 servings 1x
- Category: Breakfast
- Method: Baking
- Cuisine: American
- Diet: Vegetarian
Ingredients
- 1 cup whole milk, warm (about 110°F)
- 2 1/4 teaspoons active dry yeast
- 1/2 cup granulated sugar, divided
- 1/4 cup unsalted butter, softened
- 1 large egg, room temperature
- 1 teaspoon vanilla extract
- 3 1/2 cups all-purpose flour, plus more for dusting
- 1 teaspoon salt
- 1/2 cup (1 stick) unsalted butter, melted, for filling
- 1 cup packed light brown sugar, for filling
- 2 tablespoons ground cinnamon, for filling
- 1/2 cup (1 stick) unsalted butter, softened, for frosting
- 4 ounces cream cheese, softened, for frosting
- 2 cups powdered sugar, for frosting
- 1 teaspoon vanilla extract, for frosting
- 1–3 tablespoons milk, for frosting
Instructions
- Activate the yeast: In a large bowl, combine the warm milk, yeast, and 1 tablespoon of the granulated sugar. Let it sit for 5 to 10 minutes until foamy.
- Mix the dough: Add the remaining granulated sugar, softened butter, egg, and vanilla extract to the yeast mixture. Stir to combine.
- Add dry ingredients: Gradually mix in the flour and salt until a shaggy dough forms.
- Knead: Turn the dough out onto a lightly floured surface. Knead for 5 to 7 minutes until the dough is smooth and elastic.
- First Rise: Place the dough in a lightly oiled bowl, turning to coat. Cover the bowl with plastic wrap or a clean towel. Let the dough rise in a warm place for 1 to 1.5 hours, or until doubled in size. (For faster results, place it in a slightly warm oven that is turned off.)
- Prepare the filling: While the dough rises, mix the brown sugar and cinnamon together in a small bowl. Set aside.
- Roll out the dough: Gently punch down the risen dough. On a lightly floured surface, roll the dough into a large rectangle, about 12×18 inches.
- Add butter and filling: Brush the entire surface of the dough evenly with the 1/2 cup of melted butter. Sprinkle the cinnamon-sugar mixture evenly over the buttered surface.
- Shape the rolls: Starting from the long edge, tightly roll the dough into a log. Pinch the seam closed.
- Slice the rolls: Use a sharp knife or unflavored dental floss to cut the log into 12 equal rolls, about 1.5 inches thick each.
- Second Rise: Arrange the rolls cut-side up in a greased 9×13 inch baking dish. Cover the dish loosely and let the rolls rise again for 30 to 45 minutes, or until puffy.
- Bake: Preheat your oven to 375°F (190°C). Bake the rolls for 20 to 25 minutes, or until they are golden brown on top.
- Make the frosting: While the rolls bake, beat the softened butter and cream cheese together until smooth. Gradually beat in the powdered sugar and vanilla extract. Add milk one tablespoon at a time until you reach a thick, spreadable consistency.
- Frost and serve: Remove the rolls from the oven. Immediately spread the cream cheese frosting generously over the warm rolls. Let them cool slightly before serving for the best gooey texture.
Notes
- For extra gooey rolls, slightly underbake them by 2 minutes and pour a small amount of heavy cream over the tops before frosting them while hot.
- If you want to save time, you can use a quick dough method that requires only one rise, cutting the total time down significantly.
- Ensure your butter for the filling is melted but not hot, so it spreads easily without melting the dough.
Nutrition
- Serving Size: 1 roll
- Calories: 450
- Sugar: 45
- Sodium: 350
- Fat: 22
- Saturated Fat: 14
- Unsaturated Fat: 8
- Trans Fat: 0.5
- Carbohydrates: 58
- Fiber: 2
- Protein: 7
- Cholesterol: 45