
You know that feeling, right? When the house fills up with that unbelievably warm, sweet cloud of cinnamon and melted butter? Nothing beats the scent of fresh-baked goods, and honestly, for me, it immediately takes me back to my grandmother’s kitchen. She would always have yeast rolls proofing on the counter!
Lots of people are intimidated by making dough from scratch, but trust me, we are going to tackle this together. Forget the dry, disappointing rolls you’ve had before. I’ve spent years analyzing why some recipes fail and what makes others truly sing. This is it—the definitive guide for making the absolute **best cinnamon rolls homemade** that rival any bakery you’ve ever visited. This recipe is reliable, uses simple techniques, and guarantees you those pillowy-soft, wonderfully gooey swirls every single time. We’re not just making breakfast; we’re making memories!
If you love this style but need something faster for a weeknight treat, you should check out my recipe for quick cinnamon roll bites, but for the full, show-stopping experience, stick with this guide.
- Why You Will Make the Best cinnamon rolls homemade Every Time
- Gathering Ingredients for Incredible cinnamon rolls homemade
- Step-by-Step Instructions for cinnamon rolls homemade Dough
- Baking and Frosting Your cinnamon rolls homemade
- Tips for the Softest Homemade Cinnamon Rolls
- Serving Suggestions for Your cinnamon rolls homemade
- Storage and Reheating cinnamon rolls homemade
- Frequently Asked Questions About Making cinnamon rolls homemade
- Estimated Nutritional Data for Your Homemade Rolls
Why You Will Make the Best cinnamon rolls homemade Every Time
I get it; you want a recipe that actually works, right? My mission here at Taste This Plate is making sure you ditch the stress and get straight to the amazing results. When you follow these steps, you aren’t just making rolls; you are guaranteeing a successful batch of bakery-style comfort food.
- It’s truly a no-fail foundation, which is perfect for beginners needing confidence.
- We emphasize the right rise times, guaranteeing they come out fluffy, not flat.
- The filling ratio is exactly where it needs to be for that legendary gooey layer.
Achieving Softest Homemade Cinnamon Rolls Texture
The secret sauce for the softest homemade cinnamon rolls texture really starts before you even turn on the mixer. We use room-temperature eggs and butter because they emulsify better with the sugar, trapping more air. That trapped air creates tiny pockets in the dough structure. When the dough proofs correctly (we’ll get to that!), those pockets expand just enough to give you that melt-in-your-mouth tenderness.
Gathering Ingredients for Incredible cinnamon rolls homemade
Before we even think about kneading, we need to gather our players! Getting your ingredients ready first—what we call *mise en place*—means the actual baking process is smooth sailing. Nothing interrupts the flow like realizing you’re out of salt. For these **cinnamon rolls homemade**, we need standard pantry staples, but preparation matters!
You’ll need things like warm milk (that’s vital for waking up our yeast!), softened butter, all-purpose flour, granulated sugar, brown sugar for that deep caramel flavor, ground cinnamon, eggs, salt, the yeast itself, cream cheese, powdered sugar, and vanilla for the frosting. Don’t forget we have an option if you aren’t feeling the cream cheese vibe; you can make a simple glaze too!
Ingredient Notes and Substitutions for Your Sweet Roll Recipe
Okay, Kate’s little notes on these ingredients are important. When it comes to the milk for the yeast, it has to be warm—think bathwater temperature, around 110°F. If it’s boiling hot, you’ll kill the yeast, and we absolutely can’t have that! For the dough to come together beautifully and be super soft, your butter and eggs must be at room temperature. If they’re cold, the final mix will be choppy.
If you decide whipping up the full cream cheese frosting feels like a step too far, try this quick mix instead: just combine about a cup of powdered sugar with two tablespoons of milk and a splash of vanilla until it’s pourable. It’s fantastic drizzled over the warm rolls. If you want to check out another great use for softened butter, I have a wonderful whipped honey butter recipe that could change how you look at toast!
Step-by-Step Instructions for cinnamon rolls homemade Dough
Alright, time to get our hands a little messy! This is where the magic really starts. First, we have to wake up our yeast. In a large bowl, combine your warm milk, that single tablespoon of sugar we saved, and the yeast. Give it a gentle stir and just leave it alone for about 5 to 10 minutes. If it gets foamy on top, you’re good to go! If nothing happens, your milk was probably too hot, and we’ll have to start that part over—don’t stress, it happens!
Next up is mixing the dough. Add in the rest of the sugar, the softened butter, those room-temperature eggs, flour, and salt. Mix it on low speed until everything just comes together. Then, crank that mixer up to medium—you need to knead this for a solid 5 to 7 minutes. You’re looking for dough that feels smooth and elastic, not sticky and gross. Seriously, this kneading time is important for those bakery-style results.
For the first rise, put your beautiful dough ball into a lightly oiled bowl and cover it tight. We need warmth for this! This rise takes about an hour to an hour and a half until it has doubled. If your kitchen is cold, put it in the oven with just the light on. That little bit of ambient heat helps it rise beautifully. If you want to understand more about dough development, my guide on making rustic Italian bread goes into great detail on gluten structure!
The Filling: How to Make Gooey Cinnamon Rolls
While the dough is busy doubling, let’s get the filling ready. Mix that ½ cup of softened butter with the packed light brown sugar and the cinnamon until it forms a nice, thick paste. This paste is the key to achieving those unbelievably gooey cinnamon rolls.
Once the dough is risen, gently punch it down—that releases the big air bubbles. Now, roll it super neatly into a 12 by 18-inch rectangle on a lightly floured counter. Grab that delicious filling and spread it everywhere, but leave a little strip bare on one of the long edges. This border is crucial for sealing up the log later! Spreading it evenly ensures every single bite gets that perfect cinnamon hit. These small steps are part of my secret weapon for **pro tips for perfect cinnamon rolls**.
Rolling, Cutting, and Second Proofing for Swirl Buns Recipe
Time to roll! Starting on the long side opposite that bare strip, roll the dough up tightly, like rolling up a yoga mat. You want this log tight! When you get to the end, pinch that bare strip over to seal the seam shut. If the seam pops open while baking, you’ll get flat spots instead of gorgeous spirals.
Now, grab your greased baking dish and cut that log into 12 equal pieces, aiming for about 1.5 inches thick per roll. Lay them cut-side up in the dish. Seriously, stack ’em in there snugly! Cover them loosely and let them sit for 30 to 45 minutes for their second proof. This second rise where they puff up is what guarantees you get those beautiful, light **swirl buns recipe**.
Baking and Frosting Your cinnamon rolls homemade
Okay, the dough is puffy, the house smells amazing already—it’s time for the oven! Preheat your oven to 375°F (190°C). Slide that big dish right onto the center rack. We need to bake these for about 20 to 25 minutes. Keep an eye on them, though, because every oven is a little different! You’re looking for the tops to turn a lovely, inviting golden brown. Trust me, you don’t want to pull them out too early; nobody likes gooey raw dough in the middle!
While those beautiful rolls are getting golden, we hustle on the frosting. This is where we whip up that truly iconic **classic cream cheese frosting recipe**. Now, I have a great recipe for vanilla buttercream too, but for cinnamon rolls, the slight tang of cream cheese is unmatched. In a clean bowl, beat your softened cream cheese and the softened butter for that frosting until it’s completely smooth—no lumps allowed! Then, start adding your sifted powdered sugar bit by bit, along with the vanilla extract. If it looks like it’s fighting you and is way too thick, just add a tiny splash of milk or cream until it loosens up into that perfect, dreamy spreadable consistency. It comes together so fast!
The Final Step: Frosting Warm Rolls for Maximum Flavor
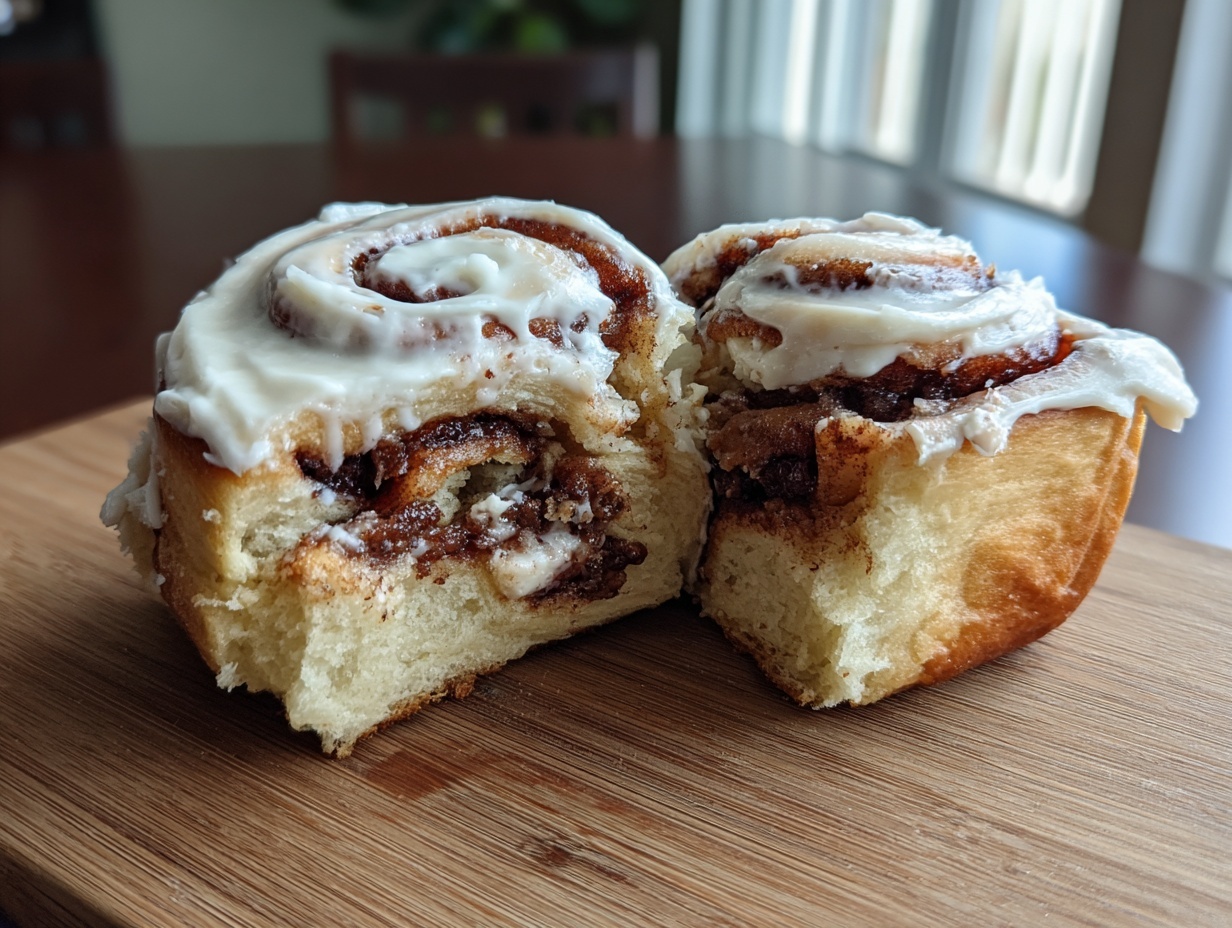
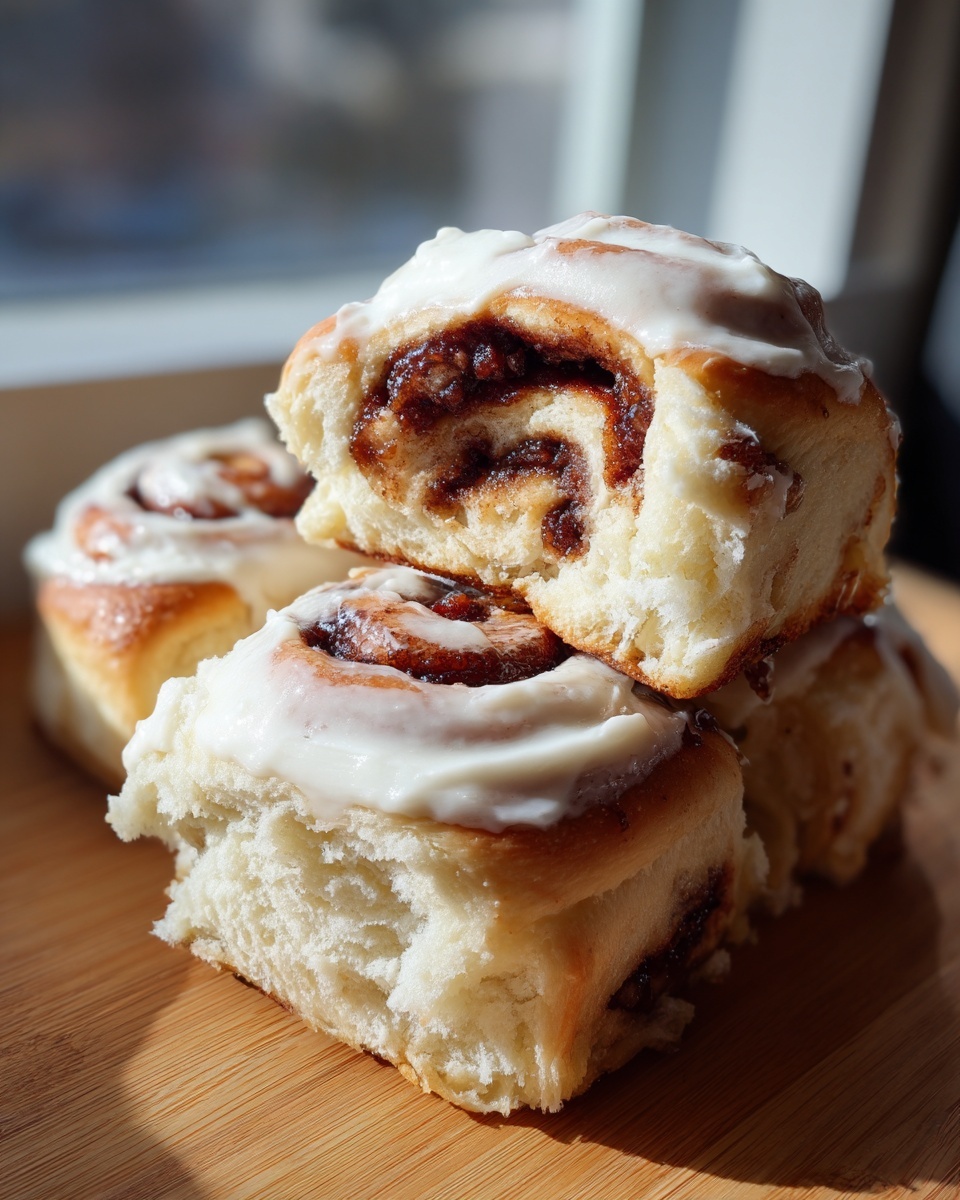
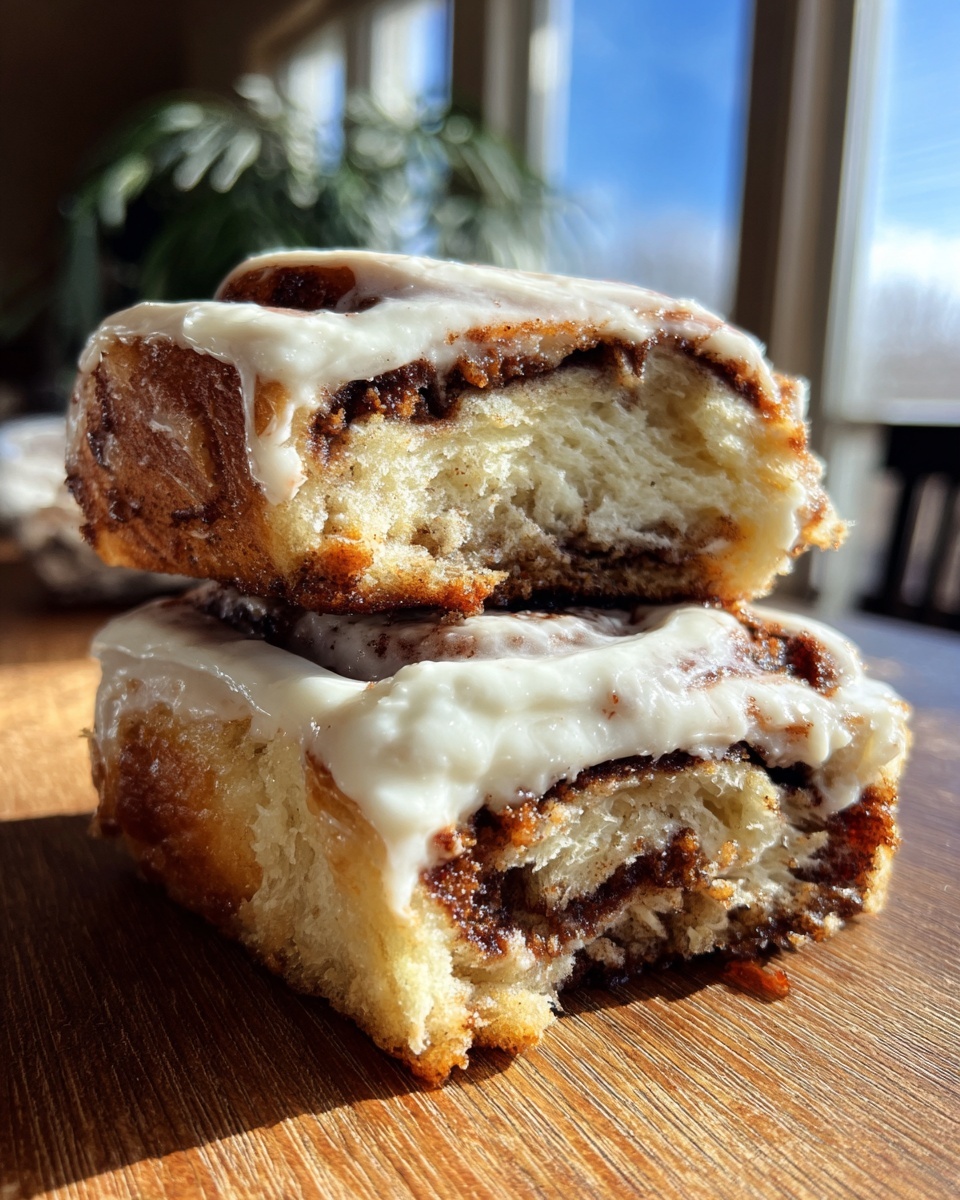
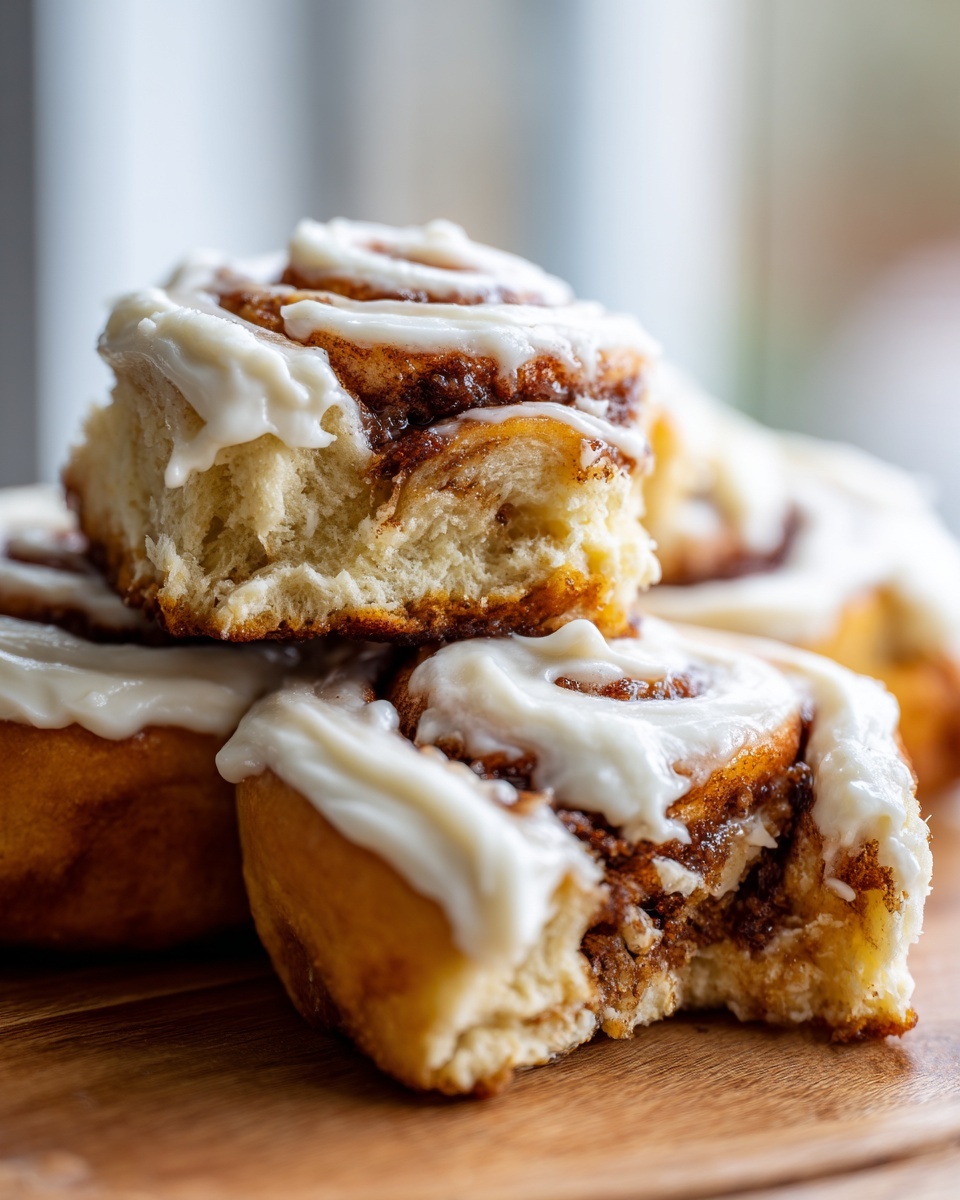
This is the moment we’ve all been waiting for, and timing is everything here. Do NOT let the rolls cool completely. Pull them out of the oven, let them rest for just five minutes—but no more! You want them warm enough that the frosting melts happily into every crevice, but not so hot that the frosting turns into clear sugar water.
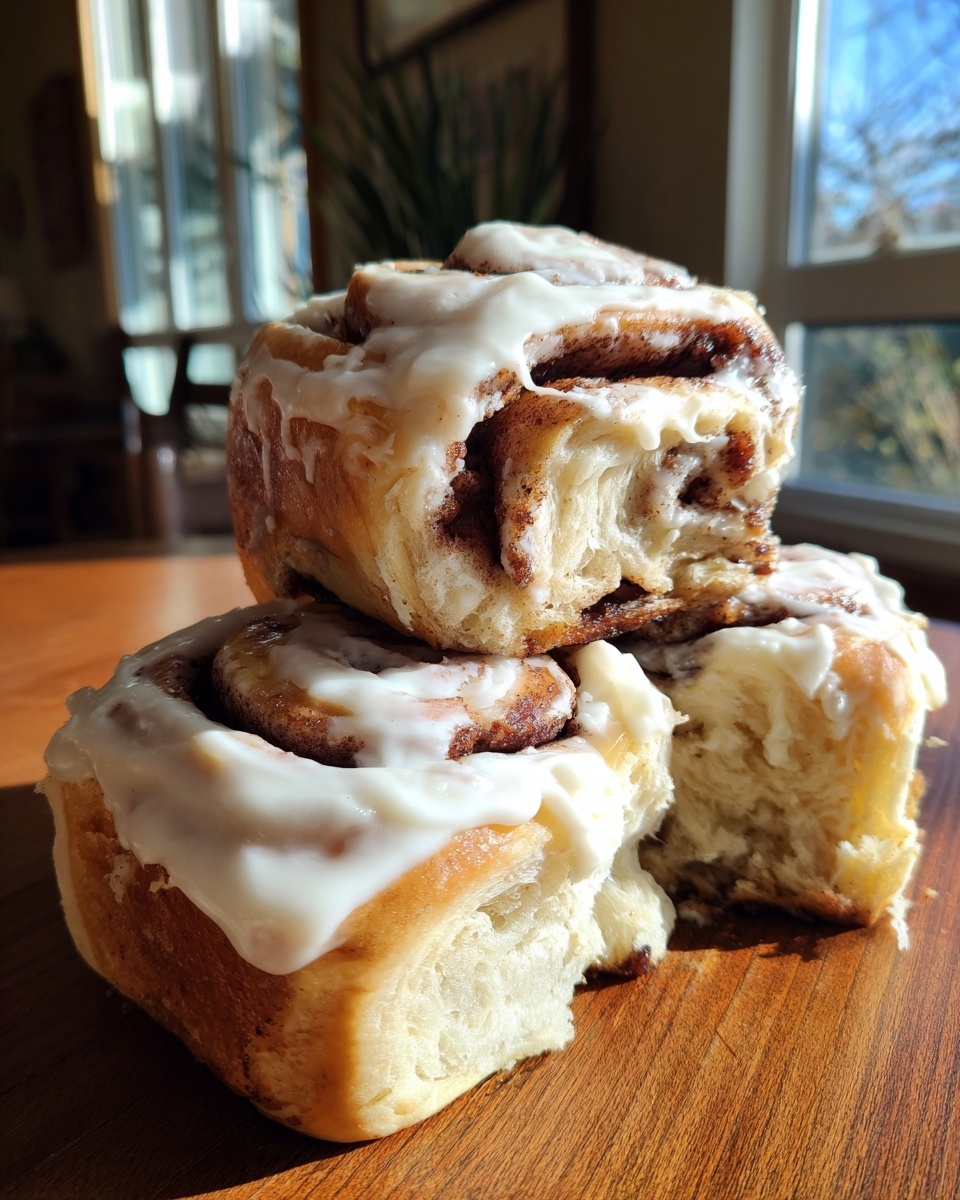
Spread that creamy goodness generously over the entire top of the warm batch. When you do this right, the frosting seeps down between the edges of each roll, melding with the cinnamon brown sugar filling below. That’s the secret to making them taste just like those incredible **bakery style cinnamon rolls at home**, gooey all the way through. Go ahead, grab a fork, because these are ready to eat right now!
Tips for the Softest Homemade Cinnamon Rolls
Even with the best recipe, a couple of little tweaks can take your rolls from good to absolutely unforgettable. Think of these as the extra pointers I picked up babysitting my grandmother’s shoulder in the kitchen—stuff you won’t always find in the main steps!
First, if you want the absolute **softest homemade cinnamon rolls**, please make sure your butter and eggs are room temperature. I know it seems fussy, but cold ingredients throw off the dough balance, and you lose that airy structure we worked so hard to create during kneading. If your kitchen is chilly, this next tip is a lifesaver for your second rise. Don’t just set the bowl on the counter; place it inside your oven, but just turn the oven light on! That tiny bit of heat creates the most perfect, gentle environment for the yeast to thrive. That’s what gets you those flawless, **no fail cinnamon buns instructions** results.
Also, when you slice the rolls, use a piece of unflavored dental floss or a sharp serrated knife instead of a regular knife! Pressing down hard with a regular knife can compact the lovely air you’ve built up. I talk about a few other game-changing techniques in my guide on making creamy mashed potatoes that apply to gentle handling in baking, too.
Serving Suggestions for Your cinnamon rolls homemade
Now that you have these incredible, warm coils of sugary goodness—what do you do? Well, first, stop whatever you are doing and grab a fork immediately. These are best enjoyed fresh, slightly messy, and maybe still glistening from the frosting melt!
These are undoubtedly the ultimate answer to what to make when you need a showstopper **sweet roll recipe for breakfast**. Imagine serving these piping hot on a lazy Sunday morning, pairing perfectly with a deep, strong cup of coffee. They make any holiday brunch instantly better—think Christmas morning or Thanksgiving breakfast. Seriously, they need very little help to shine.
If you’re planning a special brunch spread, I often pair them with something slightly tart to cut through all that sweetness. A big pitcher of water with sliced citrus works, or if you want to get festive, try whipping up a batch of my apple cider Mules. The hint of warm spice in the cider is just heavenly alongside the cinnamon. Honestly, just make sure everyone gets one (or two!) before they cool down too much!
Storage and Reheating cinnamon rolls homemade
Don’t you hate it when you have leftovers because, let’s be honest, sometimes even one batch is too much for one morning? Don’t worry, we have a plan to keep these beauties soft!
If you have any rolls left (good for you for having discipline!), store them covered tightly at room temperature for up to two days. I mean it—cover them tight! If you leave them exposed, they’ll dry out fast, and we worked too hard getting that tender dough for that to happen.
If you need them to last longer than two days, you absolutely can freeze them! You can freeze them frosted or unfrosted, although I usually wait to frost them until they are reheated. Wrap them individually tight in plastic wrap, then tuck them into a freezer-safe bag. They’ll be good for about three months this way.
How to Restore That Fresh-Baked Magic
The goal here is bringing back that just-out-of-the-oven experience—that amazing **warm cinnamon rolls fresh baked** quality. You have two great options for reheating, depending on how many you are saving.
If you’re just warming up one or two, the microwave is your friend. Pop a roll on a plate and heat it for about 15 to 20 seconds. Watch it closely! It gets super soft almost immediately, and the little bit of frosting melts perfectly. Just remember, microwaved rolls are best eaten right away because they tend to get a little tougher once they cool down again.
For the whole batch, or if you want them to taste truly freshly baked, the oven is better. Wrap the rolls tightly in aluminum foil—make sure they are sealed well!—and warm them at 350°F (175°C) for about 10 to 15 minutes. This steams the rolls slightly inside the foil, locking in all the moisture we built into that dough. If they were unfrosted, frost them the second they come out of the foil!
If you happen to have leftovers and want to make a quick breakfast casserole for the next day instead of reheating, I have a super simple prep-and-bake make-ahead brunch casserole idea that might save you time later!
Frequently Asked Questions About Making cinnamon rolls homemade
It’s super common to run into little snags when working with yeast dough for the first time, but honestly, these rolls are pretty forgiving once you know the little tricks! I wanted to pull together the things I hear most often from people trying to nail that perfect texture.
For example, rolling the dough too loosely is a classic mistake if you are new to **easy cinnamon roll recipe from scratch**. If your dough ends up too sticky, it usually means you overworked it or mis-measured your flour slightly. Next time, be gentle and only add flour as a last resort until you punch it down! If you’re looking ahead, thinking about a big family breakfast, maybe check out my guide for a make-ahead casserole to take some pressure off the morning.
If you are worried about timing, remember that you can prep the dough the night before. That helps immensely when you want **warm cinnamon rolls fresh baked** first thing in the morning without starting at 4 AM! We hate dry rolls, so make sure you always use that slightly warm milk to give your yeast the best chance to work its wonders, resulting in those rich **brioche cinnamon rolls** flavor notes we are aiming for.
Can I use instant yeast instead of active dry yeast in this easy cinnamon roll recipe from scratch?
Oh, absolutely, you can! That’s one of the joys of adapting recipes. If you have instant yeast, you can skip that first 5-to-10-minute step where we wait for the foam. Just mix your instant yeast right in with your dry ingredients—the flour, salt, and the remaining sugar—before you add the wet stuff. The yeast will activate later when it hits the warm milk, so you save a little bit of waiting time! It makes the whole process feel even more like a quick, reliable method for your **no fail cinnamon buns instructions**.
Estimated Nutritional Data for Your Homemade Rolls
Now, I know when you’re making something this decadent and delicious, numbers aren’t the first thing on your mind—and they certainly aren’t the first thing on mine when I’m pulling a pan of these beauties out of the oven! However, because we believe in providing you with all the details you might need for your family meals, here is an estimate of the nutrition based on the ingredients listed here.
Please remember that this is just an estimate based on standard measurements for our **cinnamon rolls homemade** recipe, serving 12 people exactly. If you cut them into smaller swirls or load up on extra frosting (which, honestly, I encourage!), your numbers will vary!
- Serving Size: 1 roll
- Calories: 450
- Fat: 25g (with 15g being saturated fat)
- Carbohydrates: 55g
- Sugar: 45g
- Protein: 6g
- Cholesterol: 75mg
Enjoy them without guilt! These rolls are baked with love, and that’s the most important ingredient.
PrintBest Homemade Cinnamon Rolls from Scratch with Cream Cheese Frosting

Make soft, gooey, bakery-style cinnamon rolls at home using this reliable, no-fail recipe. We guide you through the yeast dough and rich filling for truly memorable sweet rolls.
- Prep Time: 45 min
- Cook Time: 25 min
- Total Time: 195 min
- Yield: 12 servings 1x
- Category: Breakfast
- Method: Baking
- Cuisine: American
- Diet: Vegetarian
Ingredients
- 1 cup whole milk, warm (about 110°F)
- 2 1/4 teaspoons active dry yeast (one standard packet)
- 1/2 cup granulated sugar, plus 1 tablespoon for yeast
- 1/2 cup unsalted butter, softened, plus 1/2 cup for filling
- 2 large eggs, room temperature
- 4 cups all-purpose flour, plus more for dusting
- 1 teaspoon salt
- 1 cup packed light brown sugar (for filling)
- 2 tablespoons ground cinnamon (for filling)
- 8 ounces cream cheese, softened (for frosting)
- 1/2 cup unsalted butter, softened (for frosting)
- 2 cups powdered sugar, sifted (for frosting)
- 1 teaspoon vanilla extract (for frosting)
- 1 tablespoon milk or cream (for frosting, if needed)
Instructions
- Activate the yeast: In a large bowl, combine the warm milk, 1 tablespoon of sugar, and the yeast. Let stand for 5 to 10 minutes until foamy. This shows the yeast is active.
- Mix the dough: Add the remaining 1/2 cup sugar, 1/2 cup softened butter, eggs, flour, and salt to the yeast mixture. Mix with a stand mixer on low speed until combined, then increase speed to medium and knead for 5 to 7 minutes until the dough is smooth and elastic.
- First rise: Place the dough in a lightly oiled bowl, turning to coat. Cover the bowl with plastic wrap and let it rise in a warm place for 1 to 1.5 hours, or until doubled in size. This long rise builds flavor and texture.
- Prepare the filling: While the dough rises, mix the 1/2 cup softened butter, brown sugar, and cinnamon together in a small bowl until it forms a spreadable paste.
- Shape the rolls: Gently punch down the risen dough. On a lightly floured surface, roll the dough into a large rectangle, about 12 by 18 inches. Spread the cinnamon-sugar filling evenly over the dough, leaving a small border on one long edge.
- Roll and cut: Starting from the long edge opposite the border, tightly roll the dough into a log. Pinch the seam closed. Cut the log into 12 equal pieces, about 1.5 inches thick.
- Second rise: Arrange the rolls cut-side up in a greased 9×13 inch baking dish. Cover loosely and let them rise again in a warm spot for 30 to 45 minutes, until puffy.
- Bake: Preheat your oven to 375°F (190°C). Bake for 20 to 25 minutes, or until the tops are golden brown.
- Make the frosting: While the rolls cool slightly, beat the softened cream cheese and 1/2 cup butter until smooth. Gradually beat in the powdered sugar and vanilla extract until creamy. Add a splash of milk if the frosting is too thick.
- Frost and serve: Spread the cream cheese frosting generously over the warm rolls immediately after removing them from the oven. Serve warm for the best texture.
Notes
- For the softest homemade cinnamon rolls, make sure your butter and eggs are at room temperature before mixing the dough.
- If your kitchen is cold, place the rising dough in a turned-off oven with the light on to create a warm environment.
- To get those perfect swirls, roll the dough as tightly as you can without tearing it before slicing.
- If you prefer a simple glaze instead of cream cheese frosting, mix 1 cup powdered sugar with 2 tablespoons of milk and 1/2 teaspoon vanilla extract.
Nutrition
- Serving Size: 1 roll
- Calories: 450
- Sugar: 45
- Sodium: 300
- Fat: 25
- Saturated Fat: 15
- Unsaturated Fat: 10
- Trans Fat: 0.5
- Carbohydrates: 55
- Fiber: 2
- Protein: 6
- Cholesterol: 75