

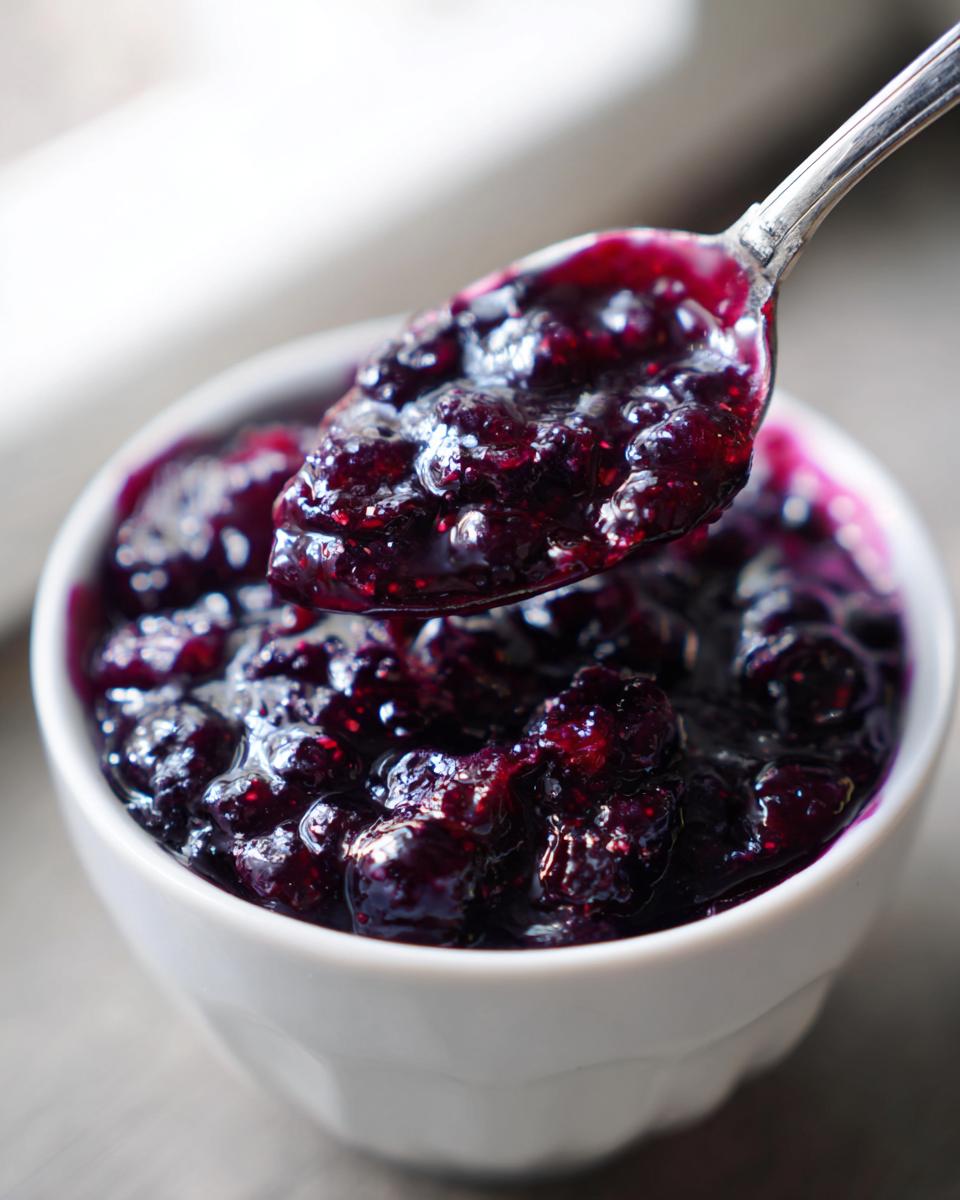
Oh, the smell of homemade jam filling the kitchen! It just takes me right back to my Grandma Kate’s place. She always said there’s nothing quite like a spoonful of sunshine captured in a jar, and I couldn’t agree more. This classic Blueberry jam recipe is actually one of her favorites, and what I love most is how darn simple it is. We’re talking small-batch, a little less sugar than most, and you can totally jazz it up with vanilla or lemon if you’re feeling fancy. It’s perfect for canning, so you can enjoy that delicious blueberry goodness all year round. It’s all about making those amazing home-cooked flavors totally achievable, just like Kate always dreamed!
- Why You'll Love This Blueberry Jam Recipe
- Gather Your Ingredients for Blueberry Jam
- Essential Equipment for Making Blueberry Jam
- Step-by-Step Guide to No Pectin Blueberry Jam
- Tips for Perfect Low Sugar Blueberry Preserves
- Variations for Your Vanilla Blueberry Spread
- Serving and Storing Your Homemade Blueberry Jam
- Nutritional Information for Blueberry Jam
- Frequently Asked Questions About Blueberry Jam
- Share Your Homemade Blueberry Jam Creations!
Why You’ll Love This Blueberry Jam Recipe
This recipe is a total winner for so many reasons!
- It’s super easy to make, even if you’re new to jamming!
- The flavor is pure blueberry heaven, not too sweet.
- Perfect for water bath canning, so you can stock your pantry.
- You can easily make it low-sugar, or add fun extras like vanilla and lemon zest.
- It turns out just right thanks to Kate’s tested tips!
Gather Your Ingredients for Blueberry Jam
Alright, let’s get our goodies together for the best Blueberry jam you’ll ever make! It really doesn’t take much, and that’s part of why I love it so much. You’ll want:
- Plenty of blueberries – I like using about 4 cups. They can be fresh or frozen, whatever you’ve got on hand!
- Sugar, of course! We start with 2 cups of granulated sugar, but remember, you can totally dial this back if you’re going for that low-sugar version we talked about.
- A good splash of 1/4 cup lemon juice. This helps everything thicken up nicely.
- If you’re feeling a little extra, grab some lemon zest – maybe about 1 teaspoon. It’s optional, but oh-so-good!
- And for that hint of warmth, I love adding about 1/2 teaspoon of vanilla extract. Totally optional, but it makes the flavor sing!
- Lastly, a little secret weapon: 1 tablespoon of unsalted butter. It’s optional too, but it really helps cut down on that foamy mess while it’s cooking.
Essential Equipment for Making Blueberry Jam
When you’re making jam, having the right tools makes all the difference, trust me! For our simple Blueberry jam, here’s what you’ll want to have ready:
- A nice, big, heavy-bottomed pot – this is key for even cooking so your jam doesn’t scorch!
- Your blueberry bounty, of course!
- Sterilized jars (you’ll want about 3-4 half-pint ones for this batch). Don’t forget the lids and bands! You can learn how to get them perfectly ready right here.
- A long-handled spoon for stirring – you’ll be doing a bit of it!
- A ladle for getting that hot jam into the jars safely.
- A water bath canner with a rack. This is essential for safely preserving your beautiful jam.
- A funnel that fits your jars makes filling them so much cleaner.
Step-by-Step Guide to No Pectin Blueberry Jam
Alright, let’s get down to making this magical no pectin blueberry jam! Kate always said the process should feel like a gentle dance, not a frantic sprint. Follow these steps, and you’ll have jars of sunshine ready in no time.
Preparing the Blueberries and Jam Base
First things first! If you’re using fresh blueberries, give them a quick rinse. For frozen ones, no need to thaw – just toss ’em right in! Grab your biggest, heaviest-bottomed pot (seriously, this is important for even cooking!) and combine those beautiful blueberries, your sugar, and that zippy lemon juice. Give it all a good stir so everything’s happy together.
Cooking and Thickening Your Blueberry Jam
Now, turn the heat up to medium-high and bring the whole mixture to a good, rolling boil. Keep stirring constantly so nothing sticks! Once it’s boiling away, turn the heat down to medium. This is where the magic really happens – keep stirring often and let it simmer away. You’re looking at about 20 to 40 minutes, depending on how thick you like your delicious Blueberry jam. Just be patient, and the thick, luscious jam will appear before your eyes!
Testing for the Perfect Jam Set
This is the fun part! Before you start cooking, pop a small plate in the freezer. When you think your jam is getting close, take a little spoonful and plop it onto that cold plate. Let it chill for about 30 seconds, then give it a gentle poke with your finger. If the jam wrinkles up a bit, ta-da! It’s ready. If it’s still super runny, let it cook a few more minutes and test again. This little trick is a lifesaver for getting that perfect set in your no pectin blueberry jam, every single time.
Adding Flavor Enhancements and Finishing Touches
If you’re adding that lovely lemon zest or the warm hug of vanilla extract, stir them in during the last five minutes of cooking. It’s just enough time for the flavors to meld beautifully without cooking off. Thinking about that foam? If you’re using the butter (optional, remember!), stir it in now. It works wonders to calm things down. Finally, just skim off any foamy bits that might be hanging out on top. Easy peasy!
Water Bath Canning Your Small Batch Berry Jam
Okay, time to get these beauties into jars! Carefully ladle the hot jam into your sterilized jars, leaving about 1/4 inch of space at the top – that’s your headspace. Wipe those jar rims super clean with a damp cloth; this is crucial for a good seal. Screw on the lids nice and snug, but not super tight. Then, gently place your jars into your water bath canner, making sure they’re covered with water. Let them bubble away in a rolling boil for 10 minutes (if you’re up high, you might need to add a bit more time). Carefully lift the jars out and let them cool completely on a wire rack. You’ll know they’ve sealed perfectly when you hear those little pings, or check them 12-24 hours later. Voila! Your homemade small batch berry jam is ready to enjoy, or to gift!
Tips for Perfect Low Sugar Blueberry Preserves
Making jam without all the sugar is totally achievable, but it does take a little know-how. Over my many kitchen experiments (and a few sticky messes!), I’ve picked up some tricks that’ll help your low sugar blueberry preserves turn out just right!
Ingredient Quality Matters for Blueberry Jam
Seriously, start with the best blues you can find! Whether fresh or frozen, plump, ripe berries really make all the difference in flavor. For sugar, using granulated is standard, but knowing that it helps with the set is key later on. Good ingredients are half the battle won!
Achieving a Soft Set with Less Sugar
When you cut back on sugar, the jam won’t set quite as firm as a traditional recipe. That’s totally okay! Your low sugar blueberry preserves might be a bit softer, almost like a thick syrup, and that’s delicious too. Just know that the shelf life might be a tad shorter if you drastically reduce sugar and don’t process it properly, so always follow those canning steps carefully.
Troubleshooting Common Blueberry Jam Issues
Did your jam not set? Don’t freak out! Sometimes it just needs a little more cooking time. Too much foam? A tiny bit of butter usually does the trick! If it seems gloppy, a quick simmer can often fix it. I’ve learned that patience and a little extra stirring can solve most jam dilemmas.
Variations for Your Vanilla Blueberry Spread
While this classic Blueberry jam is fantastic just as it is, part of the fun of homemade is making it totally your own! We built this recipe with room for creativity, so let’s talk about turning it into your perfect signature vanilla blueberry spread.
Want to add a little warmth? A pinch of cinnamon or a tiny grating of fresh nutmeg during the last few minutes of cooking can be lovely, especially if you love those cozy, spiced flavors. If you think vanilla is good, try almond extract for a different kind of sweetness, or even a hint of orange blossom water for something really elegant. Some folks even love adding a few chopped fresh mint leaves right at the end for a super refreshing twist that’s amazing on toast!
Serving and Storing Your Homemade Blueberry Jam
Okay, you did it! You’ve got jars of gorgeous Blueberry jam. Now what? Well, the sky’s the limit! This jam is just divine spread on warm toast, a flaky scone, or even a buttery biscuit the next morning. Don’t stop there, though! It’s amazing swirled into yogurt, dolloped on top of pancakes or waffles, or even used as a glaze for roasted chicken or pork. And for the cheese lovers, a little dollop with a sharp cheddar or a creamy brie is pure heaven.
Now for storage: those sealed jars you just canned? They’re happy campers in a cool, dark pantry for up to a year, maybe even longer! Once you pop one open, though, pop it in the fridge. It’ll keep beautifully for about 3-4 weeks. If your jam gets a little too thick or stiff after being refrigerated, just give it a gentle stir or a quick warm-up in a saucepan – it’ll be like new again!
Nutritional Information for Blueberry Jam
Just a heads-up, these numbers are estimates for a 1-tablespoon serving of our delicious Blueberry jam. They can change a bit depending on how much sugar you use and the exact size of your berries! You’re looking at roughly:
- Calories: 50
- Sugar: 12g
- Sodium: 0mg
- Fat: 0g
- Carbohydrates: 13g
- Fiber: 1g
- Protein: 0g
- Cholesterol: 0mg
Frequently Asked Questions About Blueberry Jam
Have a question about making this yummy Blueberry jam? We’ve got you covered! Here are some common ones I get asked a lot:
Can I use frozen blueberries for this blueberry jam recipe?
Absolutely! You can totally use frozen blueberries and no need to thaw them first. Just toss them right into the pot. They might release a little more liquid, so keep an eye on that cooking time!
How do I know if my blueberry jam has set properly?
The best trick is the cold plate test! Pop a little plate in the freezer before you start cooking. When you think it’s ready, spoon a bit onto the cold plate. After about 30 seconds, push it with your finger. If it wrinkles up, it’s set perfectly! If not, just cook it a little longer and test again.
What is the shelf life of homemade blueberry jam?
Properly canned and sealed jars of this Blueberry jam can happily hang out in your pantry for up to a year. Once you open a jar, though, make sure to keep it in the fridge, where it’ll stay delicious for about 3 to 4 weeks.
Can I make this blueberry jam recipe without lemon juice?
Lemon juice is super important here! It adds a bright flavor, but more importantly, it helps the natural pectin in the blueberries do its job to thicken the jam, especially in a no pectin blueberry jam. You could try a bit of lime juice, but skipping it altogether might mean your jam doesn’t set as nicely.
Share Your Homemade Blueberry Jam Creations!
Okay, now that you’ve made your amazing batch of Blueberry jam, I’d absolutely LOVE to hear all about it! Did you try the vanilla twist? Was it super low-sugar? Tell me everything in the comments below! And if you snap a pic of your beautiful jars or what you spread them on, tag us on social media – we can’t wait to see your creations!
PrintClassic Blueberry Jam Recipe
A simple, small-batch blueberry jam recipe perfect for canning. This low-sugar version highlights the natural flavor of blueberries, with optional vanilla and lemon twists.
- Prep Time: 15 min
- Cook Time: 30 min
- Total Time: 45 min
- Yield: 3-4 half-pint jars 1x
- Category: Preserves
- Method: Water Bath Canning
- Cuisine: American
- Diet: Vegetarian
Ingredients
- 4 cups fresh or frozen blueberries
- 2 cups granulated sugar (adjust to taste for low-sugar option)
- 1/4 cup lemon juice
- 1 teaspoon lemon zest (optional)
- 1/2 teaspoon vanilla extract (optional)
- 1 tablespoon unsalted butter (optional, to reduce foam)
Instructions
- Wash blueberries if using fresh. If using frozen, do not thaw.
- In a large, heavy-bottomed pot, combine blueberries, sugar, and lemon juice.
- Stir well to combine.
- Place the pot over medium-high heat and bring to a rolling boil, stirring constantly.
- Once boiling, reduce heat to medium and continue to cook, stirring frequently, until the jam thickens. This can take 20-40 minutes, depending on how thick you like your jam.
- Test for set: Place a small plate in the freezer. Spoon a little jam onto the cold plate. Wait 30 seconds, then push the jam with your finger. If it wrinkles, it’s ready.
- If using, stir in lemon zest and vanilla extract during the last 5 minutes of cooking.
- If using, stir in the butter to reduce foam.
- Skim off any foam from the surface.
- Ladle hot jam into sterilized jars, leaving 1/4 inch headspace.
- Wipe jar rims clean and screw on lids.
- Process in a boiling water bath for 10 minutes (adjust for altitude if necessary).
- Remove jars from the canner and let them cool completely on a wire rack.
- Check seals after 12-24 hours.
Notes
- For a no-pectin jam, cook until thickened. The natural pectin in blueberries will help it set.
- For a lower sugar jam, reduce the sugar to 1 cup or to your preference, but be aware it may result in a softer set.
- This recipe makes approximately 3-4 half-pint jars.
- Sterilize your jars and lids before filling.
Nutrition
- Serving Size: 1 tablespoon
- Calories: 50
- Sugar: 12g
- Sodium: 0mg
- Fat: 0g
- Saturated Fat: 0g
- Unsaturated Fat: 0g
- Trans Fat: 0g
- Carbohydrates: 13g
- Fiber: 1g
- Protein: 0g
- Cholesterol: 0mg