
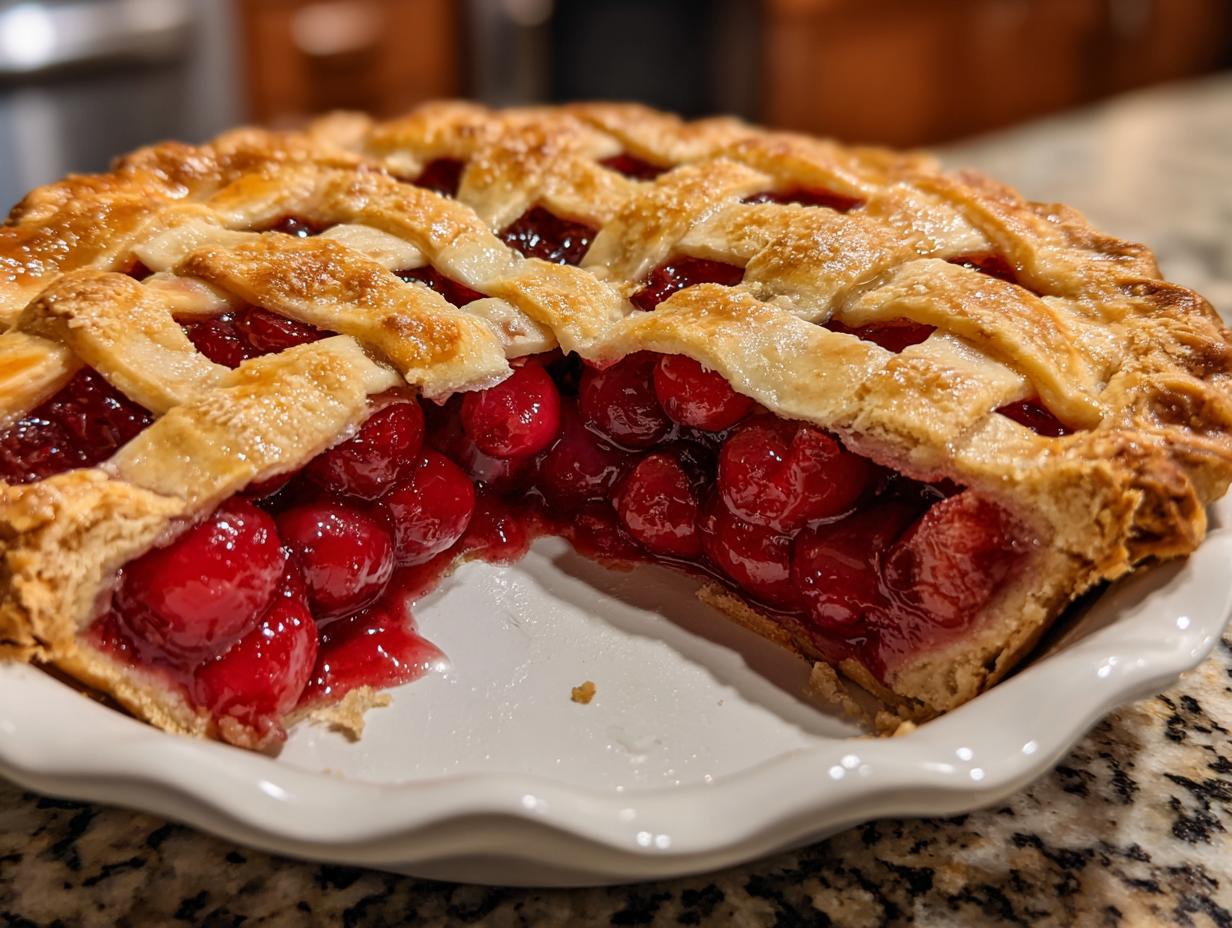
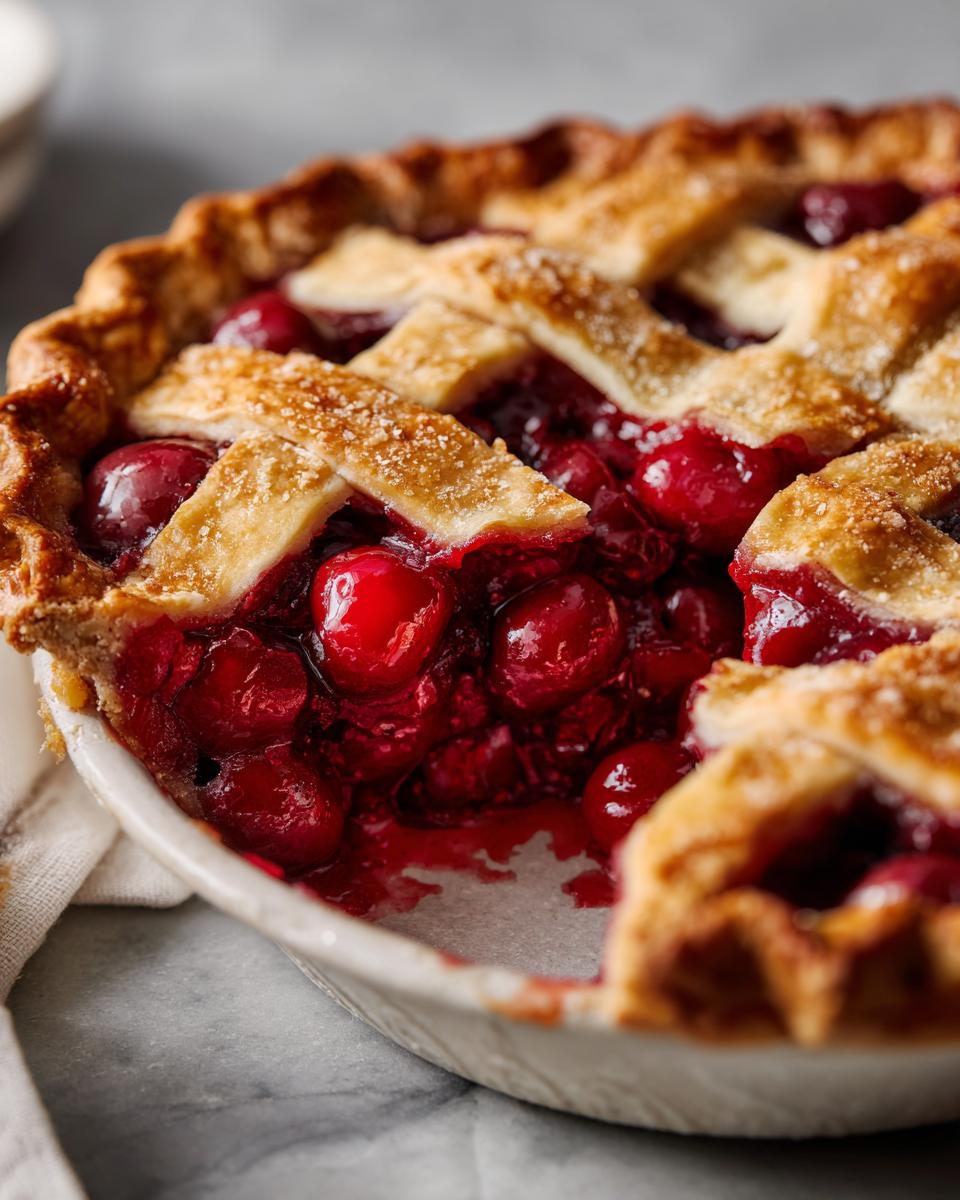
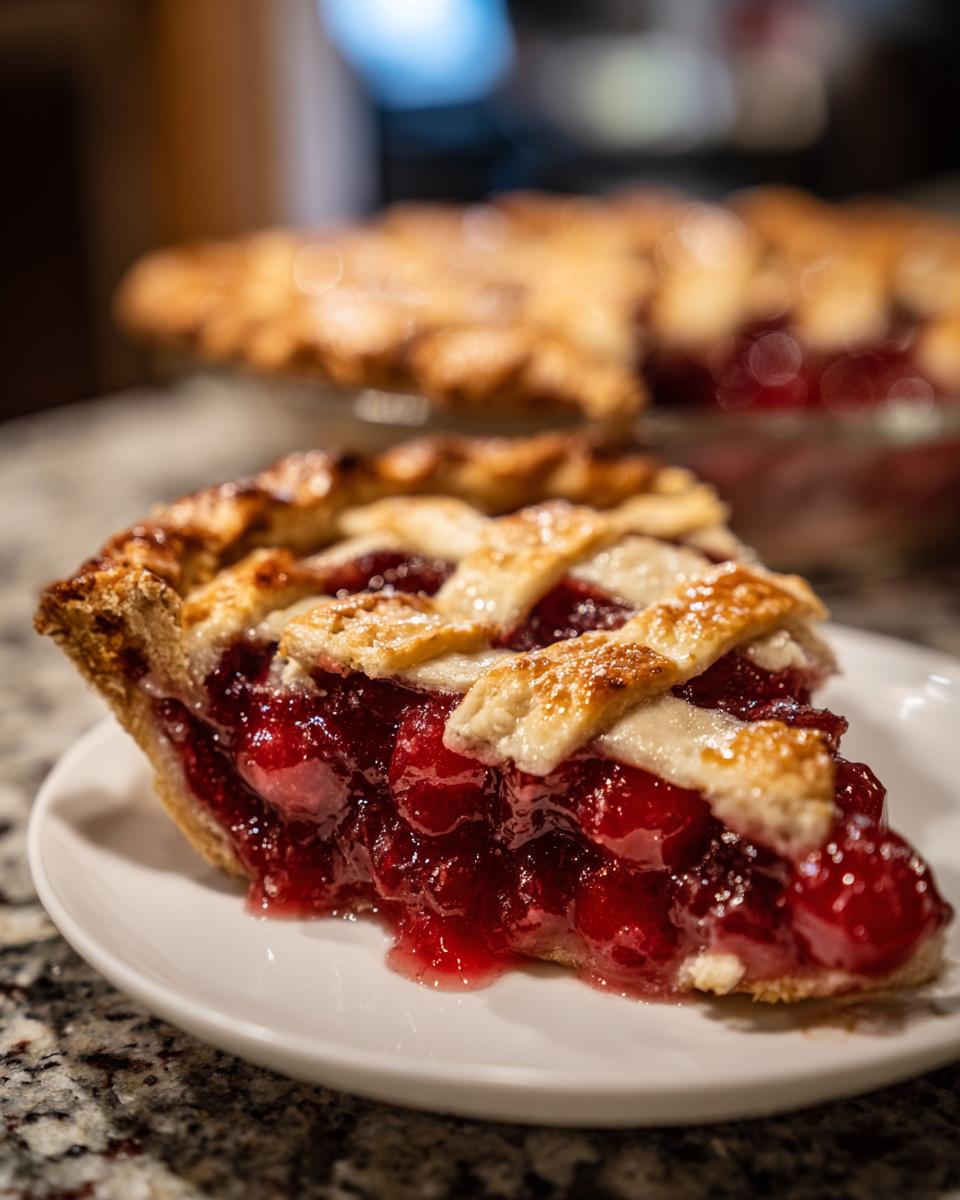
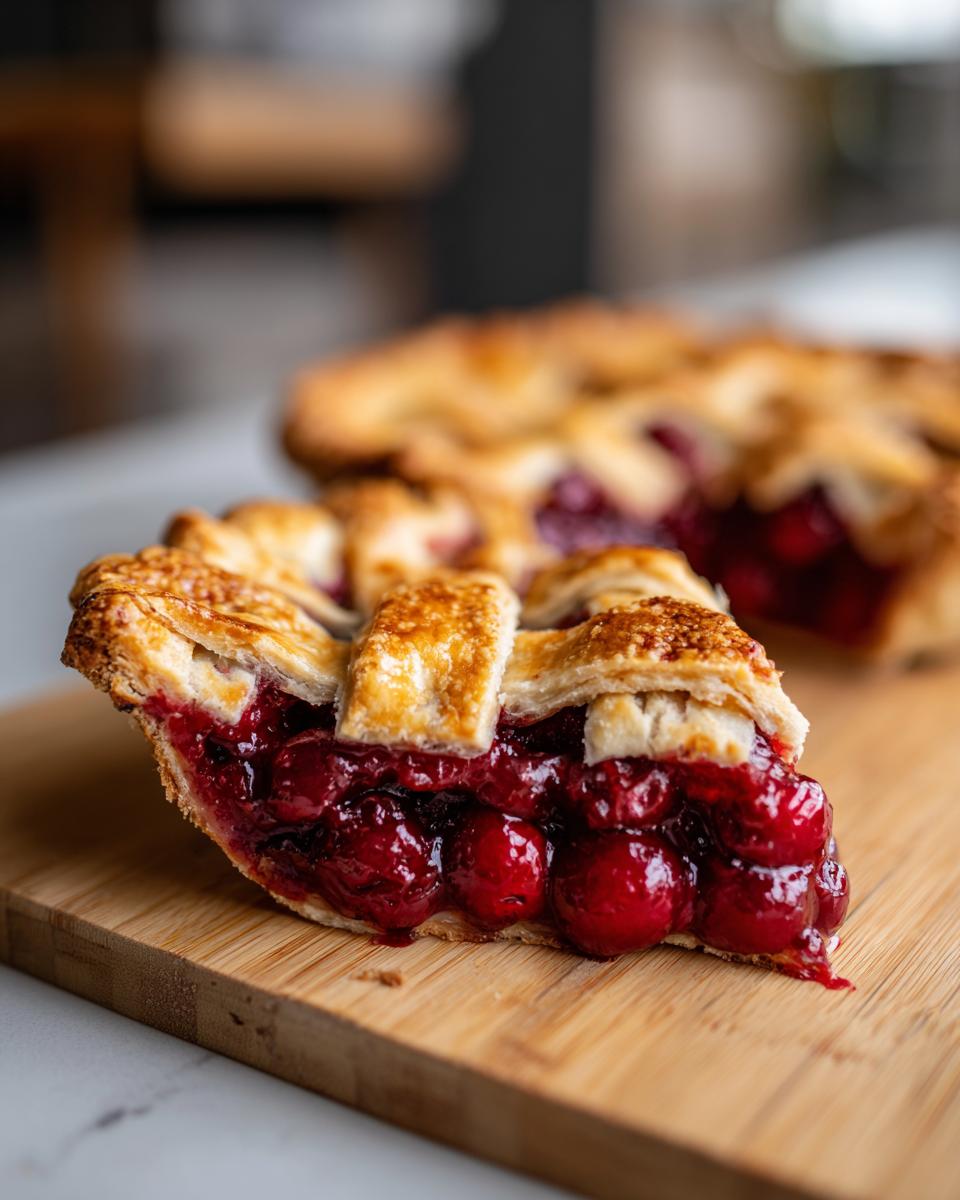
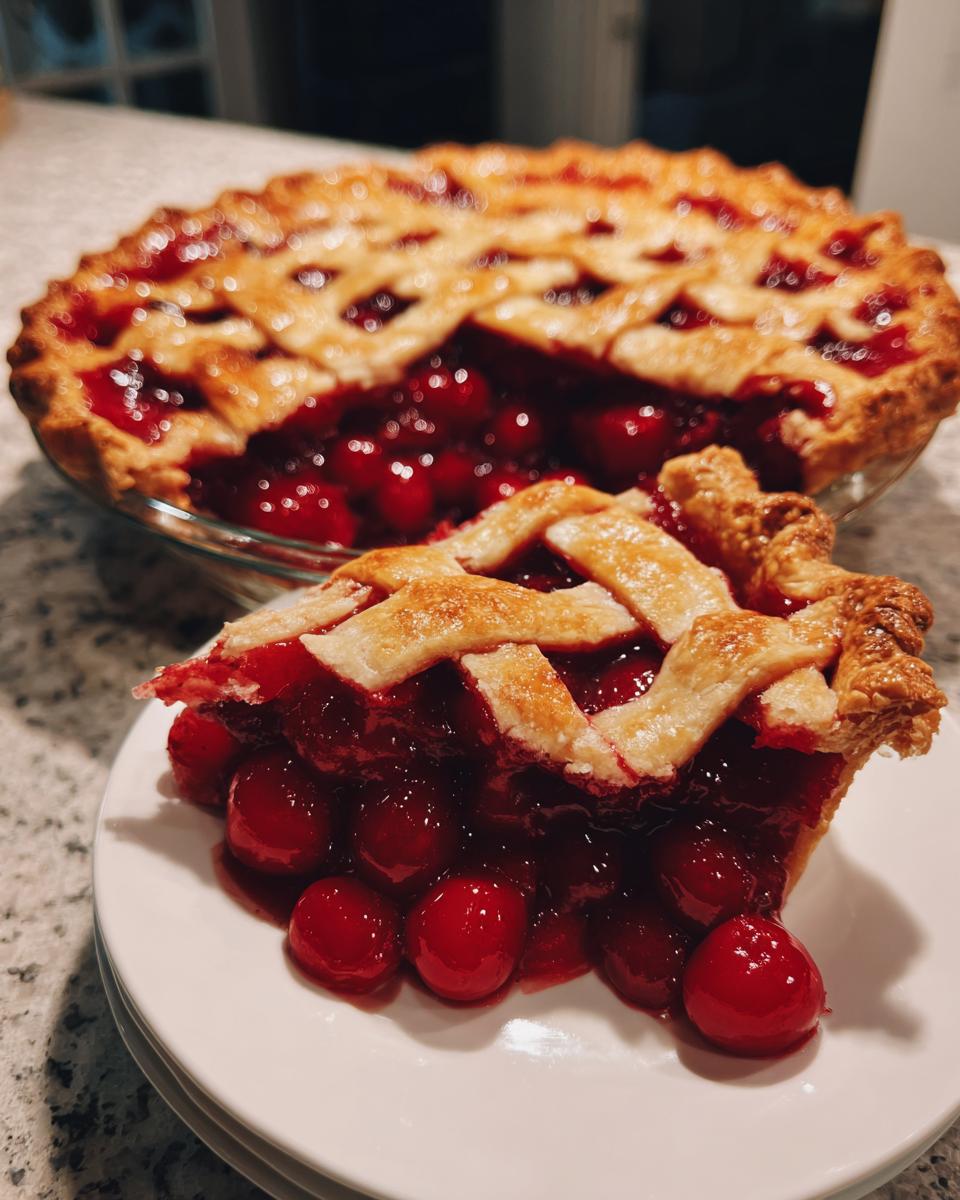
You know, the moment you slice into a perfect homemade cherry pie and see that thick, glossy filling holding its shape? That’s pure baking magic! Forget runny, sad pies that ooze everywhere. We’re talking about that satisfying, café-style slice that just screams “perfection.” This classic cherry pie recipe, with its buttery lattice crust and incredible, never-runny filling, is my absolute go-to, especially when those holidays roll around. It’s built on the same love for simple, delicious food that my grandma poured into her kitchen, just like we aim for here at Taste This Plate. We’ve tested and tweaked this recipe right here in my own kitchen, so you know it’s going to work like a charm for you too!
- Why You'll Love This Classic Cherry Pie Recipe
- Ingredients for Your Perfect Cherry Pie
- Crafting the Thick Cherry Filling
- Assembling Your Lattice Cherry Pie
- Baking Your Homemade Cherry Pie to Perfection
- The Crucial Cooling Step for Your Cherry Pie
- Frequently Asked Questions About Cherry Pie
- Holiday Cherry Pie: Make-Ahead and Storage Tips
- Nutritional Information for Classic Cherry Pie
- Share Your Delicious Cherry Pie Creation!
Why You’ll Love This Classic Cherry Pie Recipe
Seriously, you’re going to adore making and devouring this pie. It’s got all the good stuff! Here’s why it’s my favorite:
- Super Easy to Make: Even if you’re new to pie-making, this recipe is totally doable. We’ve broken it down so you can get that gorgeous homemade cherry pie without the fuss.
- The Most Amazing Thick Cherry Filling: Say goodbye to watery messes! This classic cherry pie recipe gives you that perfect, thick cherry filling every single time. It just holds its shape beautifully.
- Buttery, Flaky Crust: Who doesn’t love a truly buttery crust? This recipe delivers that flaky goodness you dream about, especially with that classic lattice top.
- Perfect for Any Occasion: Whether it’s a cozy Sunday dessert or the star of your holiday table, this pie is always a crowd-pleaser. It’s your go-to for a show-stopping, easy cherry dessert.
- Uses Fresh or Frozen Cherries: Don’t let the season stop you! This recipe works like a charm with either fresh beauties or convenient frozen cherries.
Ingredients for Your Perfect Cherry Pie
Alright, let’s talk about what you’ll need to whip up this gorgeous cherry pie. It’s really all about a few key players that come together beautifully. Don’t worry if you don’t have farm-fresh cherries; this recipe is friendly enough to work wonderfully with frozen ones too!
Here’s your grocery list, so you can imagine all those yummy flavors:
- 3 cups of cherries (fresh or frozen, just make sure they’re pitted!)
- 1 cup of granulated sugar (for that perfect sweetness!)
- 1/4 cup cornstarch (this is our secret weapon for a thick, luscious filling!)
- 1 tablespoon of fresh lemon juice (adds a little zing to brighten everything up)
- 1 teaspoon of almond extract (trust me, this subtle hint is *divine* with cherries)
- 1/2 teaspoon of ground cinnamon (just a whisper of warmth)
- 1/4 teaspoon of salt (enhances all those sweet flavors)
- 2 tablespoons of unsalted butter, cut into small pieces (for richness in the filling)
- Your favorite double pie crust recipe (or a good quality store-bought one if you’re short on time!)
- 1 egg, beaten (this is for our glossy egg wash on top)
- 1 tablespoon of granulated sugar (just for sprinkling on top for that extra sparkle!)
Crafting the Thick Cherry Filling
Okay, so here’s where the real magic happens for that perfect slice of cherry pie: making the filling! This is the step that separates a good pie from an absolutely *spectacular* one. We want that glorious, thick cherry filling that just hugs the bottom crust, not a watery disaster. The secret weapon here is good ol’ cornstarch. It works by absorbing all those lovely cherry juices and thickening them up beautifully as the pie bakes. Seriously, using cornstarch is the best way to get that restaurant-quality, sliceable pie. And don’t skip the little rest! Letting the cherries, sugar, and cornstarch hang out for about 15 minutes lets everything get acquainted and the juices start to flow, which helps the cornstarch start its magic even before it hits the oven. Oh, and if you’re starting with fresh cherries, make sure they’re all pitted! You can usually find a little tool for that, or check out this helpful guide on pitting cherries if you need a hand.
Tips for Achieving a Thick Cherry Filling
Want to guarantee that thick cherry filling? A little extra cornstarch (maybe up to 1/3 cup instead of 1/4 cup) is your friend if you like it super jammy. Also, make sure your oven hits the right temps and that the filling is actually bubbling away during the second baking stage – that’s when the cornstarch really gets activated. And remember, patience with the cooling step is key; it really lets that filling set up perfectly!
Assembling Your Lattice Cherry Pie
Alright, pie assembly time! This is where your beautiful cherry pie really starts to take shape. First thing you want to do is grab your bottom pie crust. Gently pour all that gorgeous, thick cherry filling right into it. Make sure it’s spread out evenly! Then, dot the top of the cherries with those little pieces of butter you’ve got ready. They’ll melt down into the filling as it bakes, adding just a touch of richness. Now comes the fun part – the topping! Lay your top crust over the filling. If you’re going for that classic lattice pie look, cut your dough into strips and weave them over the cherries. It’s easier than it looks, I promise! Once that’s done, just pinch the edges of the top and bottom crust together to seal all that yummy goodness inside. Brush the whole top blanket with your beaten egg wash – this gives it that lovely golden sheen – and then sprinkle it with that extra tablespoon of sugar. That’s what makes it sparkle and get wonderfully crisp!
Creating a Beautiful Lattice Top
Let’s talk lattice! It sounds fancy, but it’s really just weaving. After you’ve poured your filling and dotted it with butter, grab your prepared top crust dough. Roll it out and cut it into strips, maybe about 1/2 inch wide. Just lay about half the strips across the pie, spacing them out. Then, fold back every other strip and lay a new strip across. Unfold the first set of strips. Now, fold back the *other* set of strips and lay another strip across. Keep alternating like this until your whole pie is covered in a beautiful woven pattern. It looks so impressive, and it really lets that gorgeous cherry filling peek through!
Baking Your Homemade Cherry Pie to Perfection
Okay, the moment of truth! We’ve assembled our beautiful pie, and now it’s time to get it into the oven and turn it into that perfect homemade cherry pie we’ve been dreaming of. We’re going to start things off hot to get that crust going and our filling bubbling, then ease up a bit so it cooks through perfectly. So, preheat your oven to a nice, hot 400°F (200°C). Place your pie on a baking sheet – this is super important, trust me! It catches any rogue cherry drips that might bubble over and saves you a ton of cleanup later. Bake it for about 20 minutes. You’ll see it start to puff up and get a little golden. Then, we’re going to dial the heat down to 375°F (190°C) and let it bake for another 30 to 40 minutes. This lower heat ensures that the inside cooks through and the filling thickens up beautifully without the crust burning. Keep an eye on it; if it looks like it’s browning *too* fast, just loosely tent some aluminum foil over the top. Your cherry pie is ready when the crust is a gorgeous deep golden brown and you can see the filling bubbling happily through the lattice!
Baking Tips for a Flawless Cherry Pie
A few little tricks make this whole baking process smoother! For that perfect crust, especially on the bottom, make sure your oven is fully preheated before the pie goes in. Baking on a preheated baking sheet also helps give the bottom crust a good head start, preventing that dreaded soggy bottom. If your oven tends to run hot, don’t be afraid to use that foil trick early on. And remember, every oven is a little different, so use those visual cues – golden crust and bubbly filling within the slits – as your best guide!
The Crucial Cooling Step for Your Cherry Pie
Now that your beautiful cherry pie is out of the oven, smelling like heaven, and looking absolutely gorgeous, there’s one last, super-important step: cooling! I know, I know, the temptation to dig in right away is HUGE, but trust me on this one. Letting your cherry pie cool *completely* is absolutely key. We’re talking at least 3 to 4 hours, maybe even longer. If you slice into it while it’s still warm, that glorious thick cherry filling you worked so hard for will sadly ooze right out. The cooling process is what allows everything to set up perfectly, giving you those clean, beautiful slices. Patience here is truly a virtue, and it makes all the difference for a sliceable, perfect piece of pie!
Frequently Asked Questions About Cherry Pie
Got questions about your classic cherry pie recipe? I’ve got answers! We’ve all been there, wondering about a few key details, so let’s clear them up so you can bake with total confidence.
Can I Use Fresh or Frozen Cherries for My Cherry Pie?
Oh, absolutely! You can use either fresh or frozen cherries for your pie. If you’re using frozen, just toss them right into the filling mixture without thawing them first. They’ll release their juices as they bake, and the cornstarch will work its magic just the same!
How Do I Prevent My Cherry Pie Filling From Being Runny?
The biggest secrets to avoiding a runny pie are using enough cornstarch (don’t skimp!) and, *crucially*, letting the pie cool completely. Seriously, that cooling time is non-negotiable for a firm, sliceable filling. Making sure the filling is actually bubbling during the final baking stage also helps activate that thickener!
How Long Does Homemade Cherry Pie Last?
Once your homemade cherry pie has completely cooled and set, you can store it covered at room temperature for about 1-2 days. If it’s a warm day or you want it to last longer, it’s best to pop it into the refrigerator, where it will keep well for about 3-4 days.
Holiday Cherry Pie: Make-Ahead and Storage Tips
Planning ahead for the holidays often means juggling a million things, right? That’s where this cherry pie recipe really shines as your secret weapon! You can totally get a head start on your holiday cherry pie. Just assemble the whole pie – crust and filling and all – but don’t bake it yet. Tightly wrap it in plastic wrap, and then maybe a layer of foil, and pop it in the fridge for up to 2 days. When you’re ready to bake, just pop that chilled pie straight into your preheated oven – you might need to add about 5-10 extra minutes to the baking time to make sure that filling gets nice and bubbly and the crust turns perfectly golden. And once it’s baked and cooled, this amazing cherry pie will keep covered on the counter for a day or two, or in the fridge for about 3-4 days. So easy!
Nutritional Information for Classic Cherry Pie
Alright, let’s talk about what’s inside each delicious slice of this classic cherry pie! Keep in mind, these numbers are just estimates, and they can change a bit depending on exactly what you use (like your crust ingredients or how sweet your cherries are). But, for a standard slice, you’re looking at roughly:
- Calories: Around 350
- Fat: About 18g (with 10g being saturated fat)
- Carbohydrates: Roughly 45g
- Sugar: Around 30g
- Protein: About 4g
- Sodium: Approximately 200mg
It’s a treat, for sure!
Share Your Delicious Cherry Pie Creation!
Did you whip up this amazing cherry pie? I’d absolutely LOVE to hear all about it! Tell me in the comments below how it turned out, if you made any fun tweaks, or just how much you enjoyed every single bite. And hey, if you snap a picture of your beautiful pie, you’ve got to tag me on social media – I can’t wait to see your masterpiece!
PrintClassic Homemade Cherry Pie with Lattice Crust

A classic homemade cherry pie recipe featuring a thick, non-runny filling and a buttery lattice crust. Perfect for holidays and everyday enjoyment.
- Prep Time: 30 min
- Cook Time: 50 min
- Total Time: 80 min
- Yield: 8 servings 1x
- Category: Dessert
- Method: Baking
- Cuisine: American
- Diet: Vegetarian
Ingredients
- 3 cups fresh or frozen pitted cherries
- 1 cup granulated sugar
- 1/4 cup cornstarch
- 1 tablespoon lemon juice
- 1 teaspoon almond extract
- 1/2 teaspoon ground cinnamon
- 1/4 teaspoon salt
- 2 tablespoons unsalted butter, cut into small pieces
- 1 recipe for double pie crust (store-bought or homemade)
- 1 egg, beaten (for egg wash)
- 1 tablespoon granulated sugar (for sprinkling)
Instructions
- Preheat your oven to 400°F (200°C).
- If using fresh cherries, wash and pit them. If using frozen, do not thaw.
- In a large bowl, combine the cherries, 1 cup sugar, cornstarch, lemon juice, almond extract, cinnamon, and salt. Toss gently to coat the cherries evenly. Let the mixture sit for 15 minutes to allow the juices to release.
- Pour the cherry filling into the bottom pie crust. Dot the top of the filling with the small pieces of butter.
- Place the top crust over the filling. If you are making a lattice crust, cut the dough into strips and weave them over the filling. Crimp the edges of the top and bottom crusts together to seal.
- Brush the top crust with the beaten egg wash and sprinkle with 1 tablespoon of sugar. Cut several slits in the top crust to allow steam to escape.
- Place the pie on a baking sheet (to catch any drips) and bake for 20 minutes at 400°F (200°C).
- Reduce the oven temperature to 375°F (190°C) and continue baking for another 30-40 minutes, or until the crust is golden brown and the filling is bubbly. If the crust starts to brown too quickly, you can loosely tent it with aluminum foil.
- Remove the pie from the oven and let it cool completely on a wire rack for at least 3-4 hours before slicing. This allows the filling to set properly.
Notes
- For a thicker filling, you can increase the cornstarch to 1/3 cup.
- Using almond extract adds a subtle, sophisticated flavor that complements the cherries beautifully.
- To make ahead, prepare the pie up to the point of baking, cover it tightly, and refrigerate for up to 2 days. Bake as directed, adding a few extra minutes to the baking time if necessary.
- Ensure your pie is completely cool before slicing for clean, defined pieces.
Nutrition
- Serving Size: 1 slice
- Calories: 350
- Sugar: 30g
- Sodium: 200mg
- Fat: 18g
- Saturated Fat: 10g
- Unsaturated Fat: 8g
- Trans Fat: 0g
- Carbohydrates: 45g
- Fiber: 3g
- Protein: 4g
- Cholesterol: 40mg