
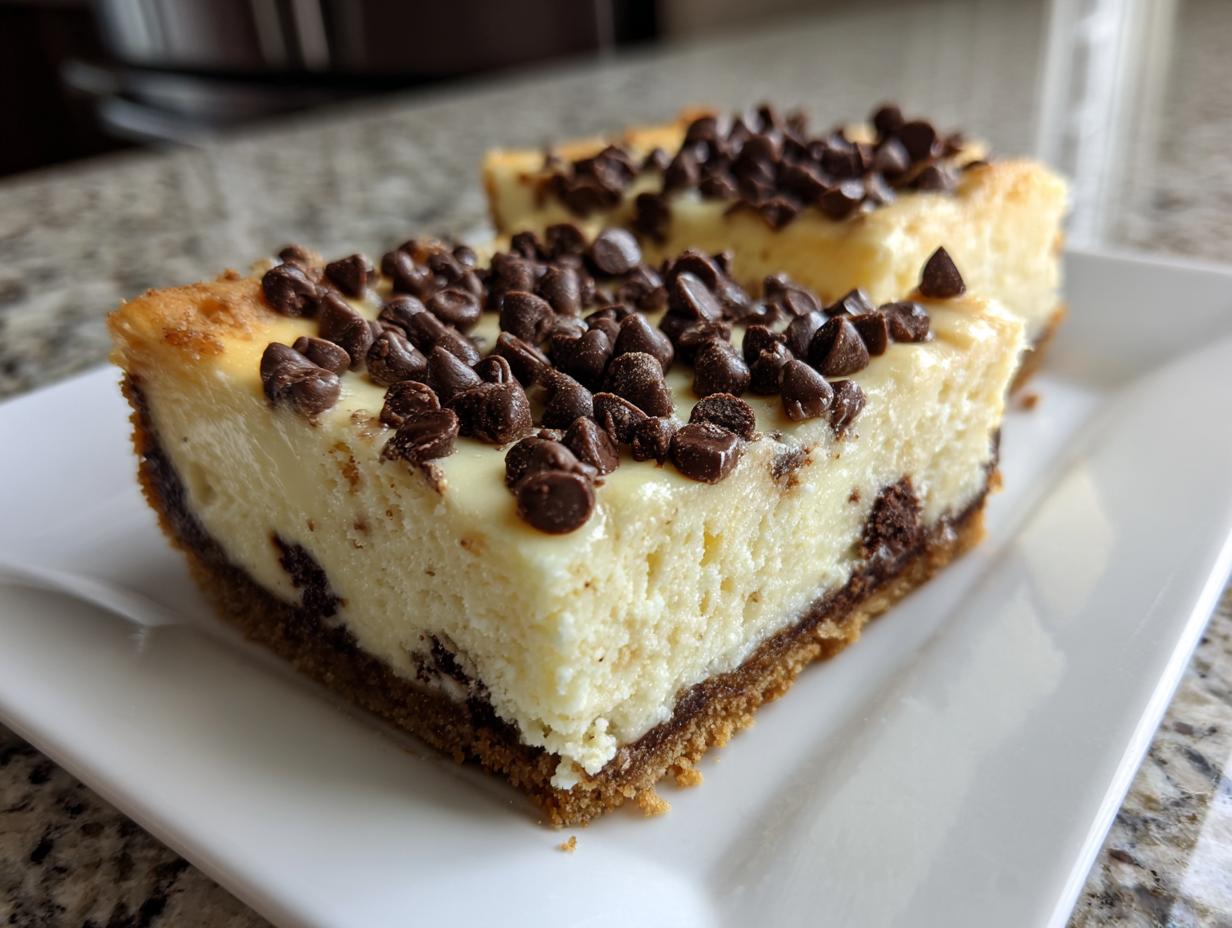
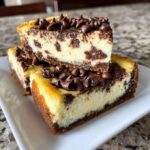
If you’re anything like me, you know that sometimes you need to bring out the big guns for a gathering—something truly decadent that feels like it came straight from a high-end bakery, but without all the fuss. That’s exactly where our chocolate chip cheesecake bars come in! This recipe proves my philosophy: you don’t need complex techniques to make something unforgettable. We’re taking that rich, creamy cheesecake texture we all crave and pairing it with gooey chocolate chips, all in an easy-to-handle bar format. My background, learning the whys behind classic American sweets, made me realize that the best recipes are always built on simple foundations. If you love rich chocolate flavor, you might also want to check out my recipe for the best creamy hot chocolate recipe! Trust me; these bars are simple, rich, and guaranteed to be the star of your next party.
- Why You Will Make This Creamy Chocolate Chip Cheesecake Recipe Again and Again
- Gathering Ingredients for Your Chocolate Chip Cheesecake Bars
- Step-by-Step Instructions for the Easy Cheesecake Recipe
- Tips for the Best Homemade Cheesecake Experience
- Storage and Reheating Instructions for Your Indulgent Cheesecake
- Serving Suggestions for This Chocolate Chip Dessert
- Frequently Asked Questions About Chocolate Chip Cheesecake
- Estimated Nutritional Data for Chocolate Chip Cheesecake Bars
- Share Your Decadent Cheesecake Experience
Why You Will Make This Creamy Chocolate Chip Cheesecake Recipe Again and Again
Okay, I won’t bury the lede. These bars are keepers! When I develop a recipe, I need to know it’s going to be reliable—something I can whip up when guests text that they are ‘on their way.’ This isn’t just another dessert; it’s a guarantee of success.
- These are truly the definition of a creamy chocolate chip cheesecake. We use the slow cooling method, and I promise you, there won’t be any cracks or grainy texture here. That smooth, velvety finish is just unmatched.
- It’s an easy cheesecake recipe that cuts down on fuss. Since we skip the water bath, you skip half the anxiety! Plus, making them as bars, not a full cake, means they come out of the pan cleanly every single time.
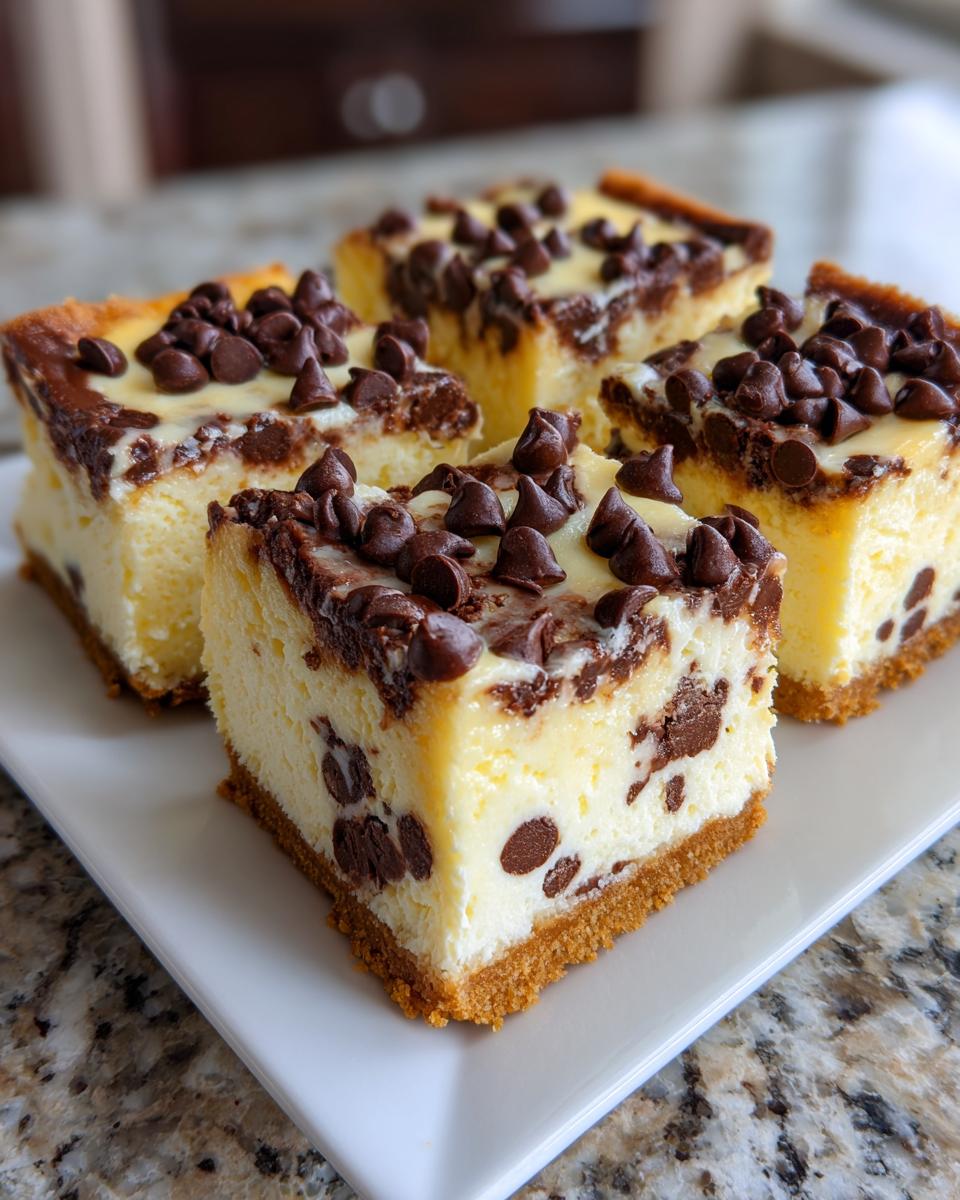
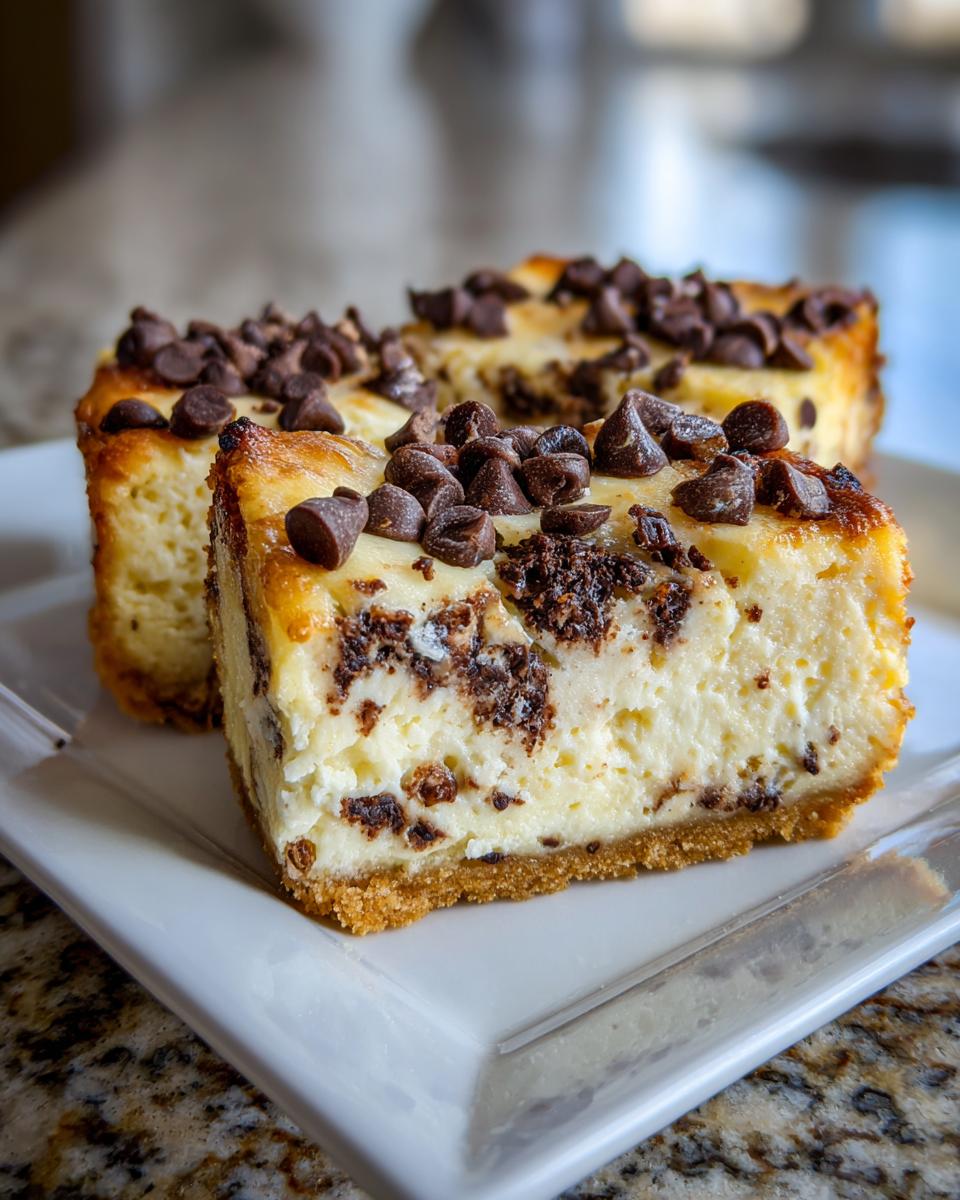
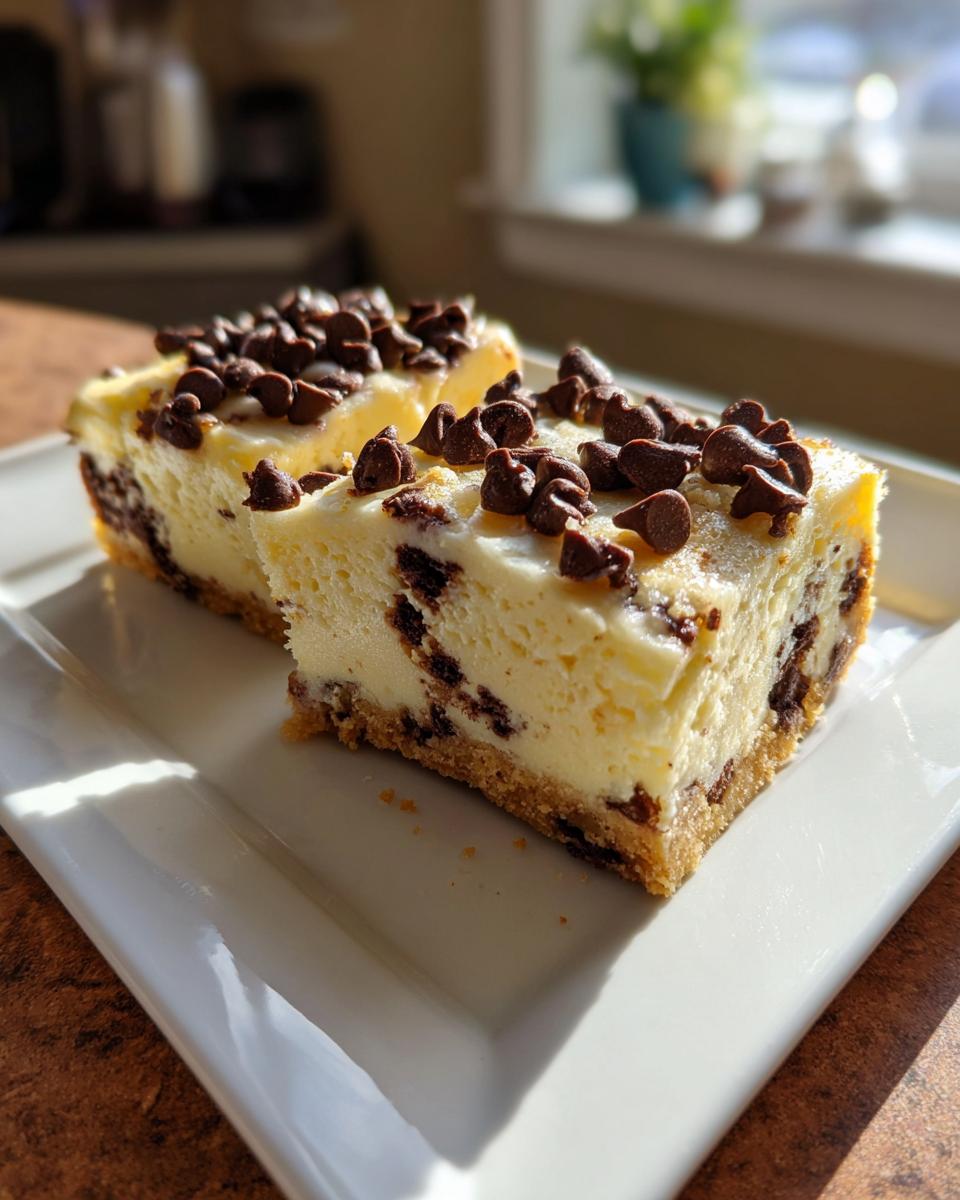
- They are the ultimate crowd-pleaser for dessert recipes for parties. Seriously, a 9×13 pan disappears fast. Everyone loves cheesecake, and the chocolate chips just make them feel extra special and indulgent.
- This recipe is built for convenience. Because they need a good, long chill, you can easily make these bars the day before your event. They taste even better the next day, which is a huge win for weeknight planning!
- We stick to simple ingredients you already have. No specialty vinegars or obscure dairy products—just what you need for an indulgent cheesecake, proving that home baking doesn’t need a specialty grocery run. You can even see my thoughts on pairing them with a simple salad dressing, like my favorite best Caesar salad recipe, to balance things out!
Gathering Ingredients for Your Chocolate Chip Cheesecake Bars
One of the best parts about this recipe—and honestly, a big part of the Taste This Plate philosophy—is that you probably already have most of this stuff sitting in your pantry! We aren’t asking you to hunt down rare saffron or anything wild. We’re sticking to simple, accessible ingredients that come together to make something truly extraordinary. Just make sure your cream cheese is truly soft; that’s my only real non-negotiable here when aiming for that perfect texture!
For the Graham Cracker Crust
The crust is the sturdy foundation that holds up all that amazing cheesecake goodness. You want it firm, so make sure you press it down really well!
- 1 1/2 cups graham cracker crumbs
- 1/4 cup granulated sugar
- 6 tablespoons unsalted butter, melted
For the Rich Cheesecake Filling
This is where the magic happens! Remember, we are going for that utterly smooth and creamy texture, so having room-temperature ingredients here is your best friend. It really helps everything blend without overworking the mixer.
- 2 (8 ounce) packages cream cheese, softened
- 1 cup granulated sugar
- 1 teaspoon vanilla extract
- 1/4 cup all-purpose flour
- 3 large eggs
Chocolate Chips and Final Touches
We use the chocolate chips in two ways: folding some into the top layer of the batter for pockets of gooey goodness, and sprinkling the rest right on top for that beautiful look when they come out of the oven.
- 1 cup semi-sweet chocolate chips (remember to divide these!)
Step-by-Step Instructions for the Easy Cheesecake Recipe
If you want that truly perfect, easy sliceable cheesecake, you have to trust me on the timing here. Cheesecake baking is less about high heat and more about gentle coaxing, especially during the cool-down. We’re keeping things easy, but patience during cooling is non-negotiable for a flawless result that everyone will love!
Preparing the Crust and Oven Setup
First things first, get your oven warmed up to 325 degrees Fahrenheit. Now, grab your 9×13 baking pan. I always line mine with parchment paper, but here’s the trick: leave a little overhang on the sides. That overhang acts like built-in handles, making it super easy to lift the whole thing out later. Press your crumb mixture firmly into the bottom, and pop it into the oven for just 8 minutes. This partial bake sets the crust so it doesn’t get soggy under the creamy filling. Let it cool just a touch while you work on the next part.
Mixing the Decadent Cheesecake Filling
In a big bowl, start by beating your softened cream cheese and the full cup of sugar together until they look totally smooth and creamy—no lumps allowed! This is where you develop that richness. Gently mix in the vanilla and flour until it just disappears. Now, the eggs. Add them in one at a time, mixing on low speed just until they disappear into the batter. I want to stress this from my kitchen to yours: Do not overmix once the eggs are in! Overmixing brings in too much air, and that’s often the culprit behind cracks.
Baking and Achieving the Perfect Chocolate Chip Cheesecake Texture
Take about 3/4 cup of your chocolate chips and gently fold them into the batter—we want pockets of melty goodness, not a solid brick of chocolate! Pour that batter evenly over your pre-baked crust. Now, sprinkle the remaining 1/4 cup of chips right on top so you get that beautiful look when it comes out. Bake it for what feels like a short time, usually 30 to 35 minutes. You’ll know it’s ready when the edges look set, but the very center still has a little wobble, kind of like Jell-O. When I’m making something this rich, sometimes I want a side dish that’s just as satisfying, like my recipe for the best classic creamy deviled eggs recipe!

For tips on why specific recipes turn out so rich, check out this great article on creamy chocolate chip cheesecake bars!
The Crucial Cooling Process for Sliceable Perfection
This step is what separates a good cheesecake from a best homemade cheesecake. When the bake time is up, turn the oven off completely. Prop the door open just a crack—I usually stick a wooden spoon handle in there. Let it sit in that warm, safe environment for a full 30 minutes. This slow descent from the heat prevents the sudden temperature shock that causes cracking. After 30 minutes, take it out and let it cool completely on the counter before you even think about chilling it overnight. That overnight chill is what sets it up for those beautiful, clean slices later.
Tips for the Best Homemade Cheesecake Experience
Listen, making the best homemade cheesecake—even in bar form—is often about what you do *around* the baking time. It’s about those little tweaks that elevate it from ‘pretty good’ to ‘wait, did you buy this from a professional bakery?’ I’ve learned that paying attention to temperature and tiny swaps makes a huge difference in the final texture and flavor profile of this chocolate chip cheesecake.
Crust Variations for Your Chocolate Chip Cheesecake
If you really want to lean into that chocolatey richness, you can absolutely play around with the base. Grandma always said, ‘The foundation must stand proud!’ For these bars, that means making sure the crust complements the filling, not overpowers it.
My favorite flavor boost is swapping out some of the graham cracker crumbs. If you happen to have chocolate wafer cookies around, try substituting half of the graham cracker amount—about 3/4 cup—with crushed wafers! It creates a slightly darker, richer base that pairs beautifully with the semi-sweet chips in the filling. It’s a small change, but it gives you those wonderfully rich dessert bars.
Achieving Creamy Texture: Room Temperature Ingredients
I mentioned this earlier, but honestly, it’s worth repeating because it’s the most common mistake people make with cheesecake. If your cream cheese is cold, you will get lumps, no matter how powerful your mixer is. Period.
You need that cream cheese—and yes, even your eggs—to be fully at room temperature. I usually take them out about an hour before I plan to start mixing. When they are soft, they incorporate air properly when beaten with the sugar, which is the secret to that signature creamy chocolate chip cheesecake. When the ingredients are happy and warm, they blend beautifully, and you prevent that slightly grainy texture that can ruin an otherwise perfect bake. If you’re ever looking for a lighter contrast, I have a fantastic recipe for vanilla buttercream that would go great on a different type of cake!
Storage and Reheating Instructions for Your Indulgent Cheesecake
Now that you’ve made these incredible rich dessert bars, we need to make sure they stay perfect! Since these are so moist and packed with dairy, refrigeration is key. Cover the pan tightly—I usually use aluminum foil placed directly over the top of the bars if they are still in the pan—and they hold up beautifully for about four to five days in the fridge. Honestly, they tend to disappear long before that, but it’s good to know! If you somehow manage to have leftovers, these freeze wonderfully; wrap individual bars tightly in plastic wrap and foil, and they are perfect for a future craving.
Serving Suggestions for This Chocolate Chip Dessert
Once these chocolate chip cheesecake bars are perfectly chilled and sliced, the fun really begins! Because they are already so rich and decadent, you usually don’t need a ton of extra fanfare, but a little something on the side can elevate them, especially when you’re serving them at dessert recipes for parties.
My go-to is keeping things elegant and simple. A light shower of flaky sea salt right before serving really cuts through the sweetness and highlights the chocolate flavor—don’t skip this if you like that salty-sweet balance!
For beverages, these bars pair magically with a strong cup of coffee or an espresso; the bitterness is such a nice counterpoint to the creamy filling. If you are looking for a decadent partner, I know a few people who pair these with a small dish of warm chocolate sauce for dipping. If you want to go full-chocolate mode, try my recipe for easy creamy chocolate fondue!
If you want a little something fruity to cut the richness for those who aren’t huge chocolate fans, just a small drizzle of raspberry sauce or a few fresh raspberries scattered around the plate makes them look absolutely restaurant-worthy!
Frequently Asked Questions About Chocolate Chip Cheesecake
It’s funny how even the easiest recipes bring up the most questions! When I perfected this chocolate chip cheesecake recipe, especially making it into the bar format, I learned a few things that might help you out. Don’t worry if you are aiming for a slightly different outcome; we can usually tweak things easily. If you struggle with cracks often, you might want to check out my guide on the best cheesecake recipe for no crack, creamy results!
Can I make this a full-sized chocolate chip cheesecake instead of bars?
You absolutely can! These bars are based on a standard 9×13 pan, but if you want a beautiful, full-sized round cake, just transfer the batter into a greased and parchment-lined 9-inch springform pan. The real change is in the baking time. Since the batter will be much deeper in a round pan, you’ll need to add about 10 to 15 minutes to the bake time, maybe even a little more. Keep watching that center wobble, though—that’s your real indicator, not the clock!
What if I want a no bake cheesecake variation?
I totally get wanting a no bake cheesecake variation, especially when it’s blazing hot outside! You can certainly skip the oven entirely for this. The work is still in getting that filling super smooth, but instead of baking, you just pour the batter over your pre-made crust and then move straight into the chilling phase. Remember what I mentioned in the notes? You’ll need to chill it for at least 6 hours, but honestly? Overnight is always better for that firm, yet creamy texture. For more inspiration on this style, check out the great tips over at Dishes by Daisy!
How do I get perfectly clean slices for my cheesecake bars recipe?
This is the secret to making them look fancy enough for any event! Two things are non-negotiable here for the perfect cheesecake bars recipe presentation. First, they must be completely cold—I mean, overnight chill is best. Second, before every single cut, you need to dip a very sharp knife into a glass of hot water, wipe it completely dry, and then make your cut. Wiping the knife clean removes the sugar and melted chocolate residue so your next slice is as clean as the first one. That hot, clean knife melts through the chilled cheesecake beautifully.
Estimated Nutritional Data for Chocolate Chip Cheesecake Bars
Okay, so while I believe the joy of eating these bars far outweighs any need to count calories—because honestly, they are worth every single delicious bite—I always like to give you all the information you need. Since we’re sticking to simple ingredients, we can generate a good ballpark estimate here. Remember, this is just a guide! Your serving size might be bigger or smaller than what I used for these calculations.
The following nutritional breakdown is based on dividing the entire batch into 24 bars, which gives you a nice, generous portion that feels just right for a rich dessert bar. This is based strictly on the ingredients listed in the recipe above, so if you add extra mix-ins or use a different crust, you’ll see those numbers shift!
- Serving Size: 1 bar
- Calories: 280
- Sugar: 22g
- Fat: 17g
- Saturated Fat: 10g
- Carbohydrates: 27g
- Protein: 5g
- Cholesterol: 55mg
- Sodium: 180mg
As you can see, these homemade bars deliver a serious treat! They have a good amount of sugar, which is expected from cheesecake, but they also offer a decent hit of protein to keep you satisfied momentarily. They are perfect for those special occasions when you want something truly indulgent!
Share Your Decadent Cheesecake Experience
Well, friend, that’s it! You’ve navigated the crust, tamed the creamy filling, and successfully executed the slow cool-down. Now you are officially in possession of what I consider the best chocolate chip cheesecake bars you’ll ever make at home.
But gathering around the table isn’t just about me telling you how great this recipe is; it’s about all of us sharing our kitchen adventures! Once you’ve had a chance to chill these until they are firm enough to handle, I desperately want to hear what you think. Did you try the chocolate wafer crust swap? Did your family devour them instantly? Don’t keep those happy kitchen moments to yourself!
Please take a moment to leave a star rating right below this post and drop a comment telling me how it went. Your feedback helps future bakers feel confident trying this decadent cheesecake recipe. If you snap a photo of those clean slices, please tag me on social media—seeing your beautiful creations is truly the best part of my day! For more inspiration, you can always pop over and see what the folks at Cravy Bites are making. And if you have any lingering questions about technique or variations, you can always reach out directly through my contact page here: Contact Page Link.
Happy baking, and thank you for being part of the Taste This Plate family!
PrintCreamy Chocolate Chip Cheesecake Bars: Easy Recipe for Parties
Create decadent chocolate chip cheesecake bars that are thick, creamy, and simple to make. This easy cheesecake recipe uses accessible ingredients and results in a rich dessert perfect for slicing and sharing at any gathering.
- Prep Time: 20 min
- Cook Time: 35 min
- Total Time: 4 hours 55 min
- Yield: 24 bars 1x
- Category: Dessert
- Method: Baking
- Cuisine: American
- Diet: Vegetarian
Ingredients
- 1 1/2 cups graham cracker crumbs
- 1/4 cup granulated sugar
- 6 tablespoons unsalted butter, melted
- 2 (8 ounce) packages cream cheese, softened
- 1 cup granulated sugar
- 1 teaspoon vanilla extract
- 1/4 cup all-purpose flour
- 3 large eggs
- 1 cup semi-sweet chocolate chips
Instructions
- Preheat your oven to 325 degrees Fahrenheit. Line a 9×13 inch baking pan with parchment paper, leaving an overhang on the sides for easy removal.
- Prepare the crust: In a medium bowl, combine the graham cracker crumbs, 1/4 cup sugar, and melted butter. Press the mixture firmly and evenly into the bottom of the prepared pan. Bake the crust for 8 minutes. Remove from the oven and set aside.
- Prepare the cheesecake filling: In a large bowl, use an electric mixer to beat the softened cream cheese and 1 cup of sugar until the mixture is smooth and creamy. Beat in the vanilla extract and flour until just combined.
- Add the eggs one at a time, mixing on low speed after each addition until the egg is incorporated. Do not overmix the batter.
- Gently fold in 3/4 cup of the chocolate chips into the cheesecake batter.
- Pour the cheesecake batter evenly over the pre-baked crust. Sprinkle the remaining 1/4 cup of chocolate chips over the top.
- Bake for 30 to 35 minutes, or until the edges are set but the center still has a slight jiggle.
- Turn off the oven, prop the oven door open slightly, and let the cheesecake cool inside the oven for 30 minutes. This slow cooling prevents cracking.
- Remove the cheesecake from the oven and let it cool completely on a wire rack. Once cool, cover the pan and chill in the refrigerator for at least 4 hours, or preferably overnight, for the best sliceable texture.
- Lift the cheesecake out of the pan using the parchment paper overhang. Cut into bars before serving.
Notes
- For an even richer crust, substitute 1/2 cup of the graham cracker crumbs with crushed chocolate wafer cookies.
- If you prefer a no bake cheesecake variation, chill for 6 hours instead of baking, ensuring the cream cheese is very soft before mixing.
- This recipe makes an easy sliceable cheesecake, perfect for large gatherings.
Nutrition
- Serving Size: 1 bar
- Calories: 280
- Sugar: 22g
- Sodium: 180mg
- Fat: 17g
- Saturated Fat: 10g
- Unsaturated Fat: 7g
- Trans Fat: 0.2g
- Carbohydrates: 27g
- Fiber: 1g
- Protein: 5g
- Cholesterol: 55mg