
Oh, the smell of true summer baking! When those blackberries come into season, pulling out the rolling pin just feels right. I grew up watching my grandmother celebrate every season with a perfect, homemade dessert, and nothing was more anticipated than her blackberry pie. I know many of you worry about getting that elusive flaky crust, or worse, cutting into a delicious-looking pie only to find a puddle where the filling should be. Well, friend, consider those worries officially over! I tested and re-tested this recipe until I nailed the all-butter crust and the secret to a filling that sets up beautifully—flawless results, every single time, guaranteed.
- Why This Classic Blackberry Pie Recipe Works Every Time
- Gathering Ingredients for Your Homemade Blackberry Pie
- Step-by-Step Instructions for the Old Fashioned Blackberry Pie
- Baking Secrets for Your Blackberry Pie
- Crucial Cooling Time for the Blackberry Pie
- Serving Suggestions for this Sweet Summer Dessert
- Storage and Reheating Instructions for Blackberry Pie
- Common Questions About Making Blackberry Pie
- Baking with Fresh Berries: Tips for Seasonal Fruit Baking
Why This Classic Blackberry Pie Recipe Works Every Time
There are so many recipes out there, right? But this isn’t just another fruit pie; this is the one that stops people in their tracks. I’ve taken all the things I learned studying why things go wrong in the oven and built them into this structure. It’s an Old Fashioned Blackberry Pie that works because we respect the science just a little bit!
- We use a precise amount of cornstarch in the filling. That’s your insurance policy against turning a beautiful pie into soup.
- The crust demands ice-cold components. This separation of fats and liquids creates those signature flaky layers. It’s the reason you get that perfect, golden shield for your fruit.
If you’re looking for a truly reliable Classic Berry Pie, this is the blueprint. You can even check out my tips for a triple berry version if you want to mix it up next time!
The Secret to a Buttery Pie Crust That Stays Flaky
Look, the key to avoiding that dreaded soggy bottom isn’t just about the filling; it starts with the dough. I always tell people: cold, cold, cold! When you work the butter into the flour, you need those butter chunks—think small peas—to stay solid. Why? Because when the pie hits the hot oven, that cold butter melts fast and releases steam, creating those beautiful air pockets that make the crust light and flaky.
If you handle the dough too much, your warm hands melt the butter instantly, and you end up with a tough, dense crust instead of a tender, buttery pie crust built for holding gallons of juicy fruit. Chill it, handle it gently while rolling, and watch the magic happen. It’s simple science, trust me!
Gathering Ingredients for Your Homemade Blackberry Pie
Alright, let’s get shopping! Building an amazing homemade blackberry pie starts with prepping your team of ingredients. Seriously, don’t skip checking the temperature of your butter and water before you start mixing—it makes all the difference in the world if you want that crust to sing. We’ve broken everything down so you know exactly what needs to stay crisp and cold, and what needs to be tossed together gently for that perfect sweet-tart payoff.
Ingredients for the Flaky Double Crust
Remember, the colder these feel in your hands, the flakier the result! We need enough for the bottom crust and the top lattice, so this is enough for a real showstopper.
- 2 1/2 cups all-purpose flour
- 1 teaspoon salt
- 1 cup (2 sticks) cold unsalted butter, cut into small cubes
- 1/2 cup ice water, plus 1-2 tablespoons more if needed
Ingredients for the Best Blackberry Filling
The star of the show! See that cornstarch? That little bit of magic is how we get that thick, gorgeous, non-runny texture—the secret to the best blackberry filling.
- 6 cups fresh or frozen blackberries (don’t thaw the frozen ones!)
- 1 1/2 cups granulated sugar
- 1/4 cup cornstarch
- 1 tablespoon lemon juice
- 1 teaspoon vanilla extract
And don’t forget the egg wash ingredients (1 large egg beaten with 1 teaspoon water) and some coarse sugar for sprinkling over the top for that lovely sparkle!
Step-by-Step Instructions for the Old Fashioned Blackberry Pie
Okay, now for the fun part—putting it all together! While this is an Old Fashioned Blackberry Pie, our methods make it feel super modern in terms of foolproof results. We’re going to build that crust first, let it rest, then toss the filling, and finally, weave that beautiful top. Take your time here; rushing the dough is the number one mistake people make!
Making and Chilling the Flaky Pie Crust Tutorial
I want you to channel your inner mixer here! Whisk your flour and salt, then work in those cold butter cubes. Use your fingertips or a pastry blender until you see crumbs, some the size of sunflower seeds, some the size of peas. Remember, those butter chunks are the key to your flaky pie crust tutorial success! Once the ice water is mixed in—just barely until it comes together—divide the dough, wrap, and chill for at least 60 minutes. Don’t cheat the chill time!
Mixing the Perfectly Set Blackberry Filling
This is straightforward but important. In a clean bowl, gently toss the berries with your sugar, cornstarch, lemon juice, and vanilla. You just want everything lightly coated—stop stirring before the berries break down. That cornstarch is your magic shield against pie secrets no soggy bottom issues later on, so make sure it’s evenly distributed.
Assembling and Weaving the Lattice Top Pie
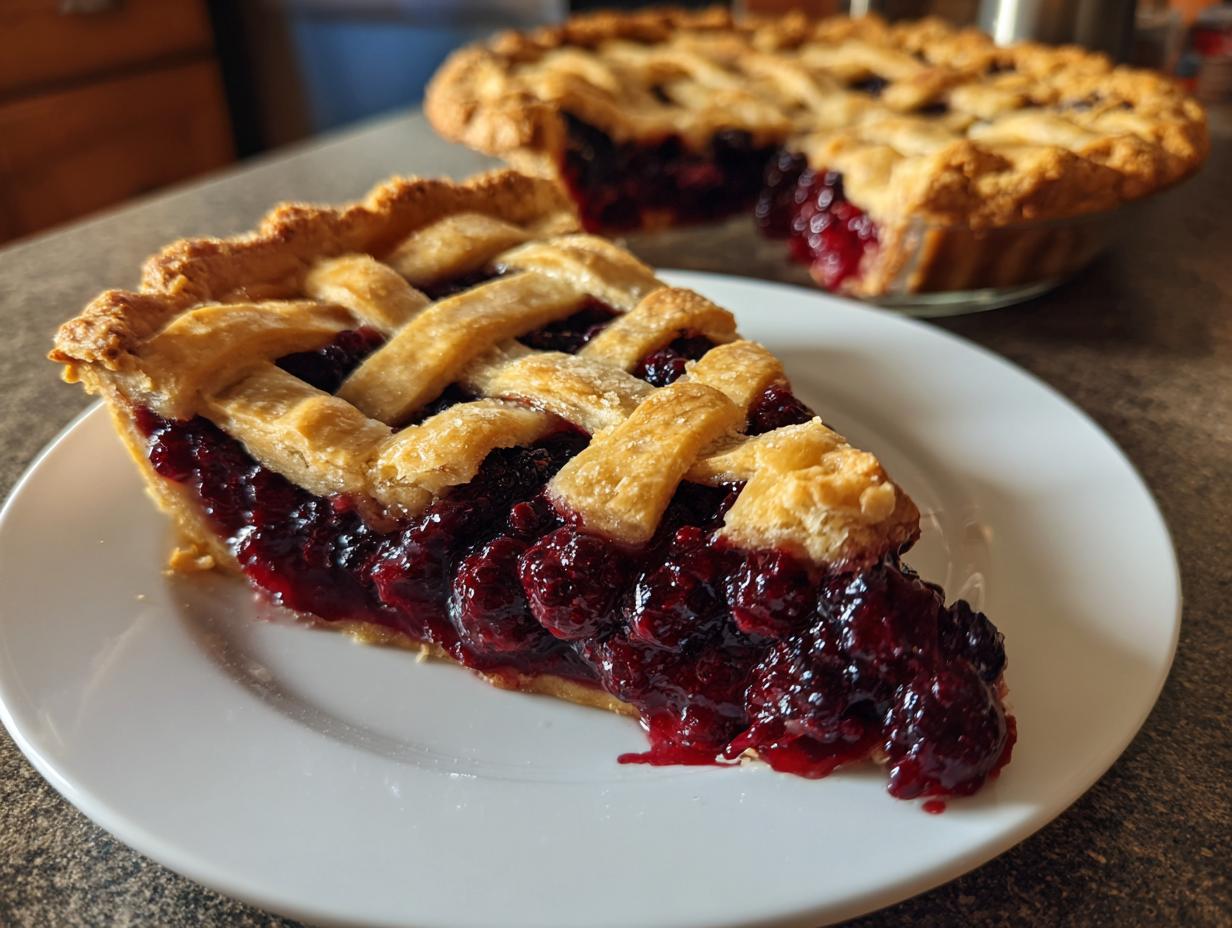
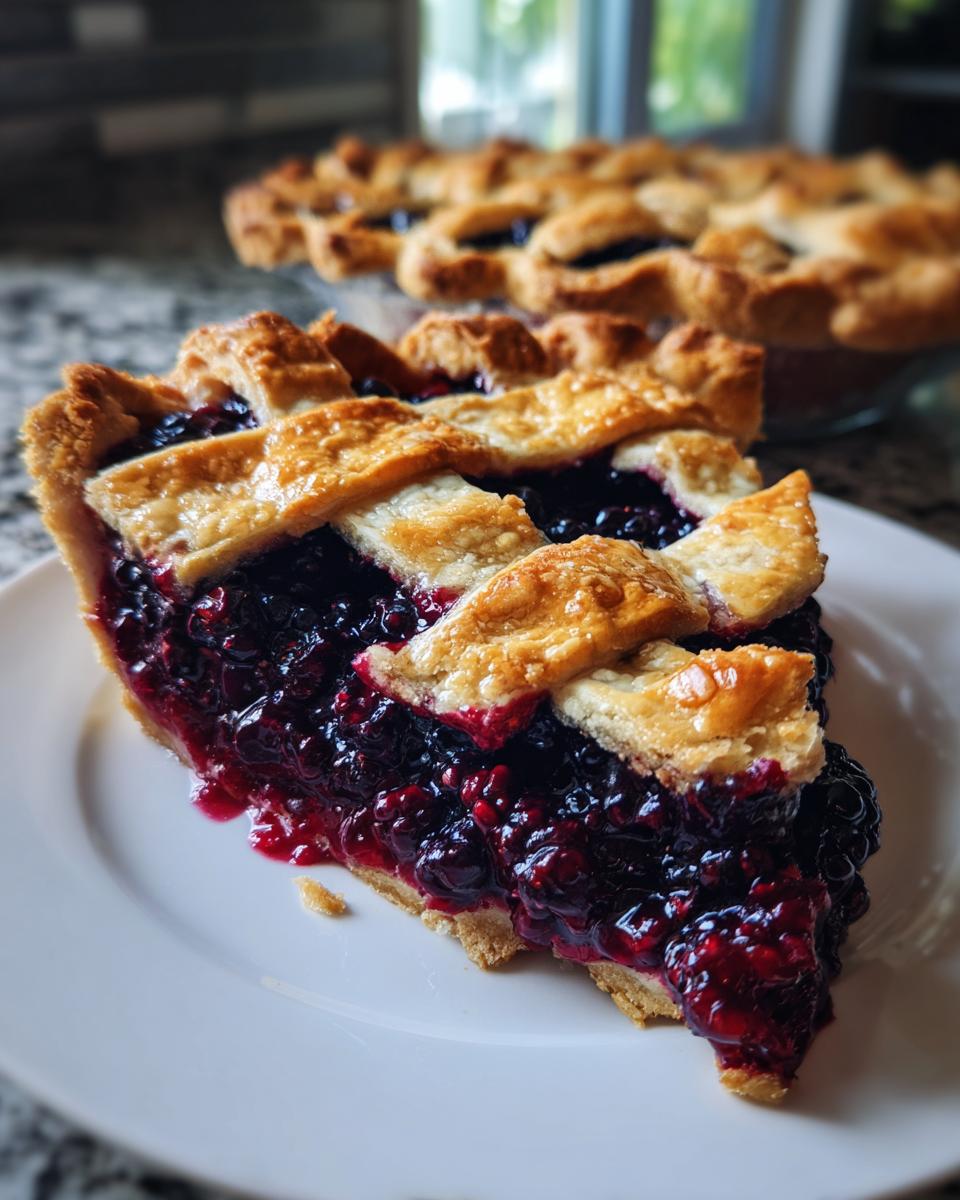
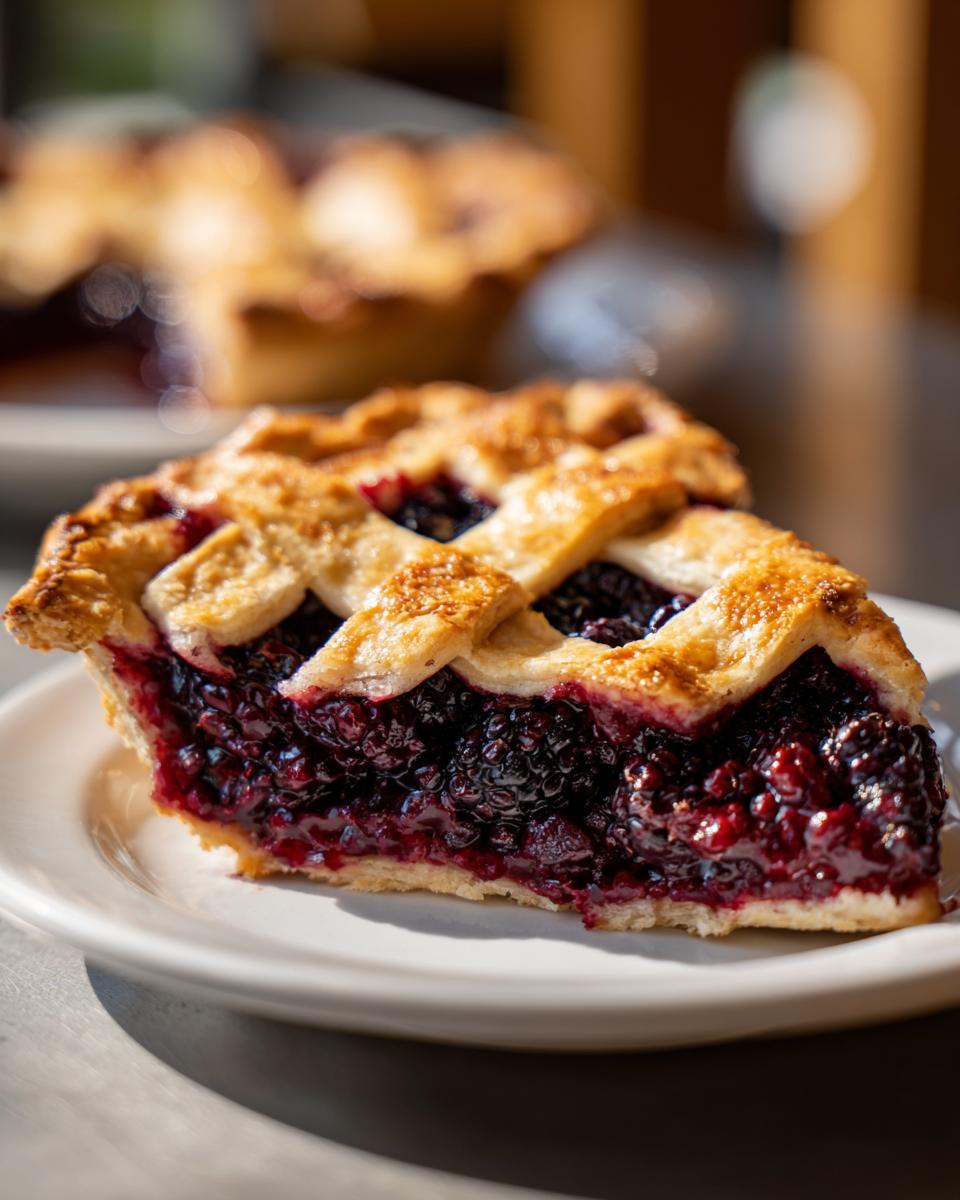
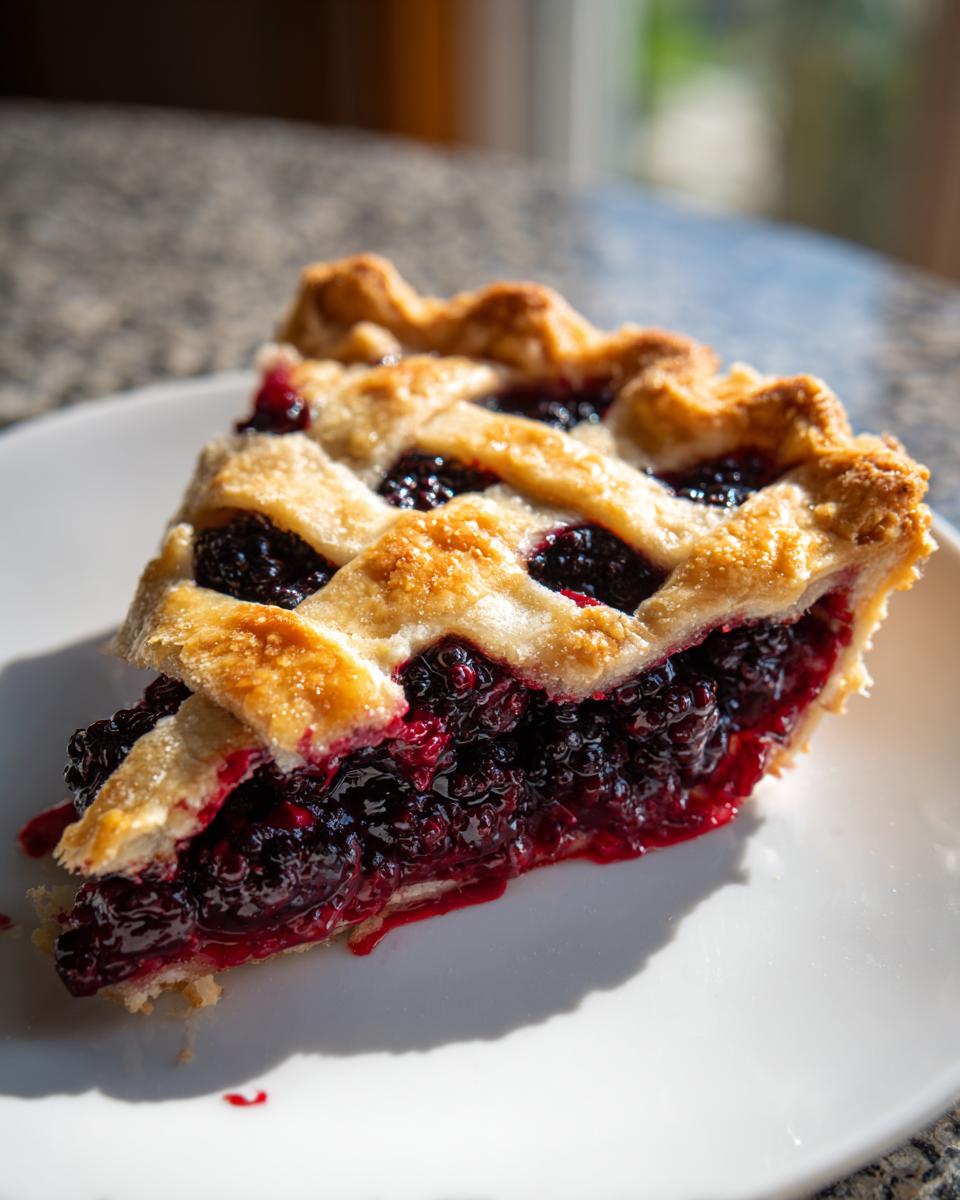
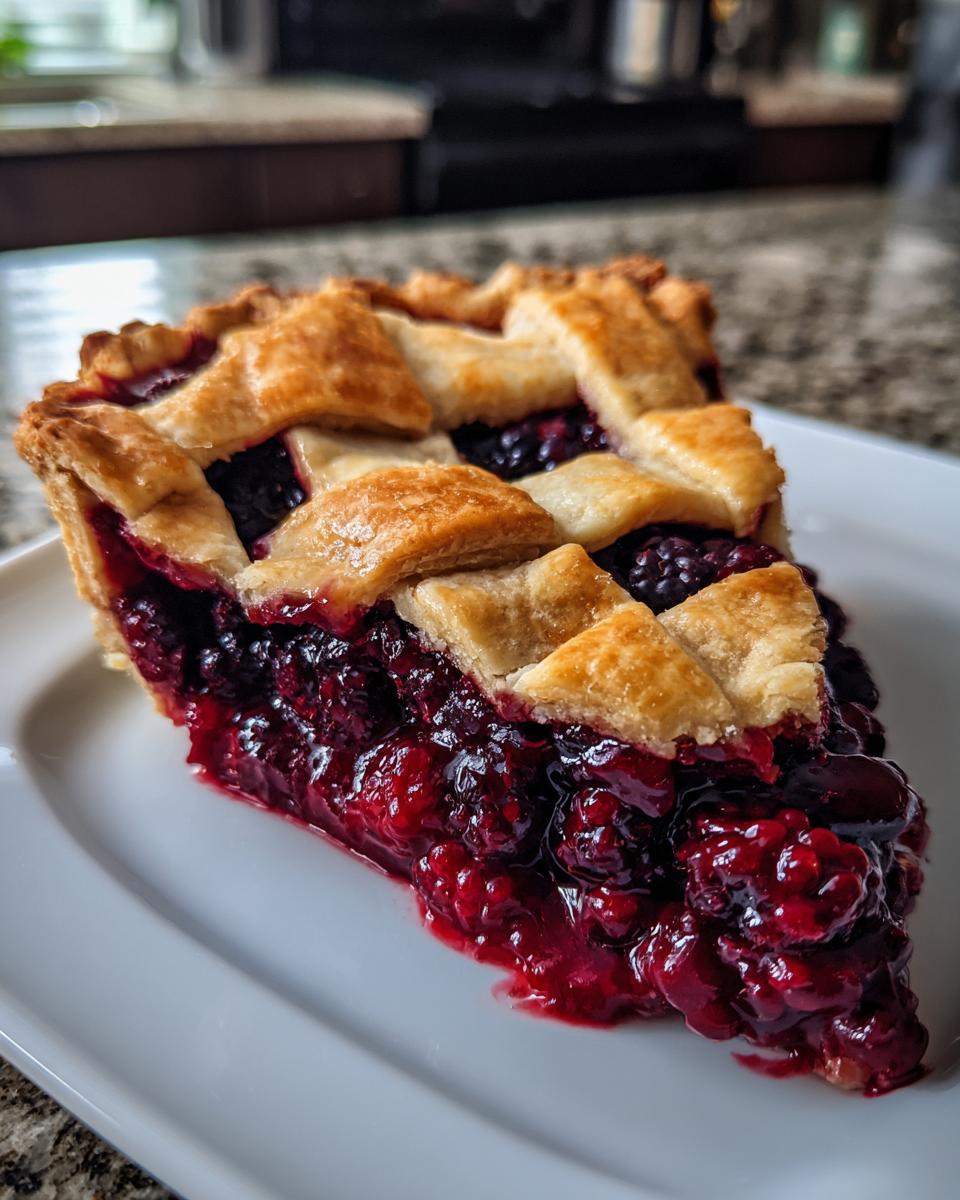
Lightly flour your counter and roll out one disk to about a 12-inch circle. Ease that dough into your pie plate. Now for the showstopper! Roll out the second disk and cut even strips—I aim for 3/4-inch wide. Start weaving them over the berry mound. It’s like braiding hair, honestly! Weave over, under, over, under. Once you’ve sealed and crimped those edges, you’ve got yourself a stunning lattice top pie structure!
If you want to see my fancy apple bread pudding recipe sometime for a different kind of dessert fix, just let me know! That one is amazing too.
Baking Secrets for Your Blackberry Pie
Baking day is my favorite day, and when it comes to the oven part for this blackberry pie, we need a little patience. You’re going to start it hot—preheat that oven to 400°F (200°C)! That initial blast of heat is crucial because it sets the butter in the crust right away, helping it achieve that flaky texture instantly. Bake it there for about 20 minutes.
Then, don’t stop! Reduce the temperature down to 375°F (190°C) and let it finish cooking for another 35 to 45 minutes. Also, please put that pie on a baking sheet! It catches those gorgeous berry juices that will inevitably bubble up, saving you a scrubbing nightmare later. If you notice the edges of your beautiful lattice getting a little too brown before the filling looks set, just drape a little foil loosely over the edge. That protects the crust while the middle finishes cooking.
If you’ve been looking for an easy recipe that tastes like it took all day, you might also want to check out my cannoli cookies—they are surprisingly simple!
Crucial Cooling Time for the Blackberry Pie
Listen to me carefully on this point: you must let this pie cool. I know, I know! The smell coming from the cooling rack is pure torture, and you just want that first slice, especially when it’s looking all warm and homey. But if you slice this beauty before it’s had its proper rest, you will absolutely get that runny mess we worked so hard to avoid.
That 4-hour cooling period isn’t flexible; it lets the cornstarch work its magic and fully set the juices, locking everything in place. I learned this the hard way—I once cut one open after only 90 minutes, and the filling just oozed out. That pie looked gorgeous on top, but it was a disaster underneath! Let it set, and you get that perfect slice every time, just like you would with my snickerdoodle blondies.
Serving Suggestions for this Sweet Summer Dessert
Once cooled (and only once cooled, remember!), this pie is ready for its grand unveiling! Presenting this sweet summer dessert is honestly half the fun. The deep, dark purple filling contrasted against that golden lattice? Gorgeous. It looks like something pulled straight off a postcard from a country fair.
This pie is truly wonderful all on its own, but why stop there when we know how good it can be?
Pairing Your Blackberry Pie with Desserts with Ice Cream
You absolutely have to serve this with vanilla ice cream. It’s the rule! The contrast between the warm, spiced berries and the cold, creamy ice cream is just divine. You can also use some fresh whipped cream, maybe sweetened just a touch. If you love rich sauces, you might want to check out my bread pudding with vanilla sauce recipe—that sauce works wonders drizzled over a slice of pie too!
Storage and Reheating Instructions for Blackberry Pie
So, if you manage to have any glorious blackberry pie leftover (which is a minor miracle in my house!), you need to know how to treat it right. Since this pie is so moist, I generally prefer to keep leftovers covered on the counter for the first day. After that, if you won’t finish it quickly, tuck it into the fridge; it keeps really well for about three days that way.
If you’re reheating a slice—and you absolutely should—don’t just microwave it! That’s instant sogginess, and we worked too hard for that flaky crust. Pop a slice on a baking sheet set to 350°F (175°C) for about 10 minutes. This warms the filling just enough while crisping that bottom crust right back up. Honestly, reheating works beautifully, almost as good as fresh! For more practical kitchen tips, you can check out how I handle my honey mustard chicken salad leftovers.
Common Questions About Making Blackberry Pie
I always get emails asking about little changes or worries when people tackle this recipe for the first time, especially when it comes to fruit pies. Making a perfect blackberry pie is really about managing moisture, so most questions circle back to that! Don’t fret if you’re unsure about your berries or if you’re nervous about that lattice work; we’ve got you covered.
Can I use frozen blackberries in this blackberry pie recipe?
Absolutely, yes! That’s one of the best things about this recipe—it works wonderfully with whatever you have on hand. The most important thing is this: do not thaw them first! If you thaw them, you just end up with berry juice already sitting in the bottom of your bowl, and we certainly don’t want that. Toss the frozen berries with the sugar and cornstarch straight from the freezer. Just know that since the berries are colder going in, you might need to add 5 to 10 extra minutes to your total bake time just to ensure that filling is bubbling thick in the middle.
How do I prevent the bottom crust from getting soggy?
This is the question I get asked the most! Remember how we talked about the cornstarch being your secret weapon? That’s number one. Make sure you toss the berries really well with that mixture! But the cooling time is every bit as essential. You absolutely must let this pie cool for a full four hours before slicing. This isn’t optional; it’s one of the biggest of the pie secrets no soggy bottom techniques we discussed. If you need other great Southern Dessert Recipes ideas, you might enjoy my thoughts on classic banana pudding.
If you’re looking for other takes on this classic, check out Paula Deen’s version over at nomlee.com, but stick to our cooling instructions; that’s where the real magic happens!
Baking with Fresh Berries: Tips for Seasonal Fruit Baking
There’s just nothing that beats the flavor of a berry picked fresh, is there? When you are able to get your hands on beautiful local fruit, you want to treat it right! If you’re using fresh berries straight from the patch instead of frozen, give them a very gentle rinse and make sure they are completely dry before tossing them with the sugar mixture. Moisture is our enemy in the crust but necessary in the fruit!
Trust me, using beautiful, in-season fruit makes this blackberry pie taste like pure summer sunshine. If you need another fun way to use up your summer haul, you absolutely must try my zucchini banana bread recipe—it’s unbelievably moist!
If you want some more inspiration for showcasing the very best of summer’s produce, check out this beautiful rustic recipe too!
PrintClassic Homemade Blackberry Pie with Foolproof Flaky Lattice Crust

Create a showstopper dessert with this old fashioned blackberry pie recipe. You will master the all-butter, flaky double crust and achieve a perfectly set, juicy sweet-tart filling every time. This recipe guarantees no soggy bottom.
- Prep Time: 45 min
- Cook Time: 65 min
- Total Time: 110 min
- Yield: 8 servings 1x
- Category: Dessert
- Method: Baking
- Cuisine: American
- Diet: Vegetarian
Ingredients
- 2 1/2 cups all-purpose flour
- 1 teaspoon salt
- 1 cup (2 sticks) cold unsalted butter, cut into small cubes
- 1/2 cup ice water, plus 1-2 tablespoons more if needed
- 6 cups fresh or frozen blackberries (do not thaw if frozen)
- 1 1/2 cups granulated sugar
- 1/4 cup cornstarch
- 1 tablespoon lemon juice
- 1 teaspoon vanilla extract
- 1 large egg, beaten with 1 teaspoon water (for egg wash)
- 1 tablespoon coarse sugar for sprinkling
Instructions
- Prepare the Flaky Pie Crust: In a large bowl, whisk together the flour and salt. Cut in the cold butter using a pastry blender or your fingers until the mixture resembles coarse crumbs with some pea-sized pieces of butter remaining.
- Gradually add the ice water, one tablespoon at a time, mixing lightly with a fork until the dough just comes together. Do not overmix. Divide the dough in half, form each half into a disk, wrap in plastic, and chill for at least 1 hour.
- Prepare the Blackberry Filling: In a separate bowl, gently combine the blackberries, granulated sugar, cornstarch, lemon juice, and vanilla extract. Toss carefully to coat the berries. The cornstarch is the secret to avoiding a runny filling.
- Assemble the Pie: Preheat your oven to 400°F (200°C). On a lightly floured surface, roll out one disk of dough into a 12-inch circle. Carefully transfer it to a 9-inch pie plate. Trim the edges, leaving a 1-inch overhang.
- Pour the blackberry filling into the bottom crust.
- Create the Lattice Top: Roll out the second disk of dough. Cut the dough into even strips, about 3/4-inch wide. Weave the strips over the filling to create a lattice pattern. Trim the strips and crimp the top and bottom crust edges together to seal.
- Brush the entire top crust and lattice with the egg wash and sprinkle evenly with coarse sugar.
- Bake the Pie: Place the pie on a baking sheet to catch any drips. Bake at 400°F (200°C) for 20 minutes. Then, reduce the oven temperature to 375°F (190°C) and continue baking for another 35 to 45 minutes, or until the crust is golden brown and the filling is bubbling thickly. If the edges brown too quickly, cover them loosely with foil.
- Cool Completely: Let the pie cool on a wire rack for at least 4 hours before slicing. This cooling time allows the filling to set fully, which prevents a soggy bottom.
Notes
- If you use frozen blackberries, do not thaw them first. Add them directly to the sugar mixture. You may need to add 5-10 minutes to the total bake time.
- For the flakiest crust, keep your butter and water as cold as possible throughout the mixing process.
- Serve this classic berry pie warm with a scoop of vanilla ice cream for the ultimate comfort food experience.
Nutrition
- Serving Size: 1 slice
- Calories: 420
- Sugar: 35g
- Sodium: 250mg
- Fat: 24g
- Saturated Fat: 15g
- Unsaturated Fat: 9g
- Trans Fat: 0.5g
- Carbohydrates: 52g
- Fiber: 4g
- Protein: 5g
- Cholesterol: 60mg