
Isn’t it the best feeling when you pull something truly bakery-style out of your own oven? I know for me, my happiest moments happen when things aren’t complicated, just delicious. When I first started developing recipes for this site, my goal was always to give you something reliable—a recipe for scones that doesn’t end in a frustrating, dry hockey puck!
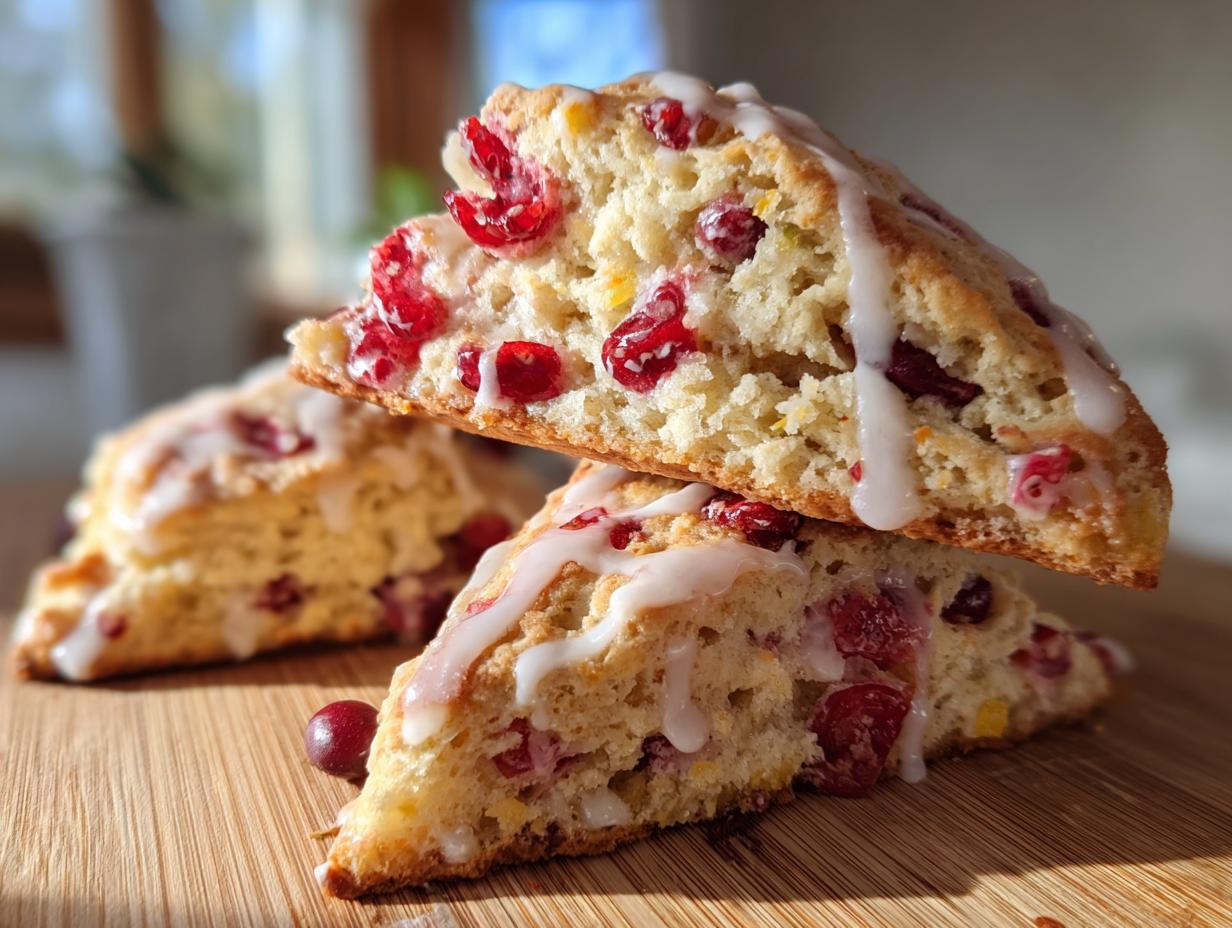
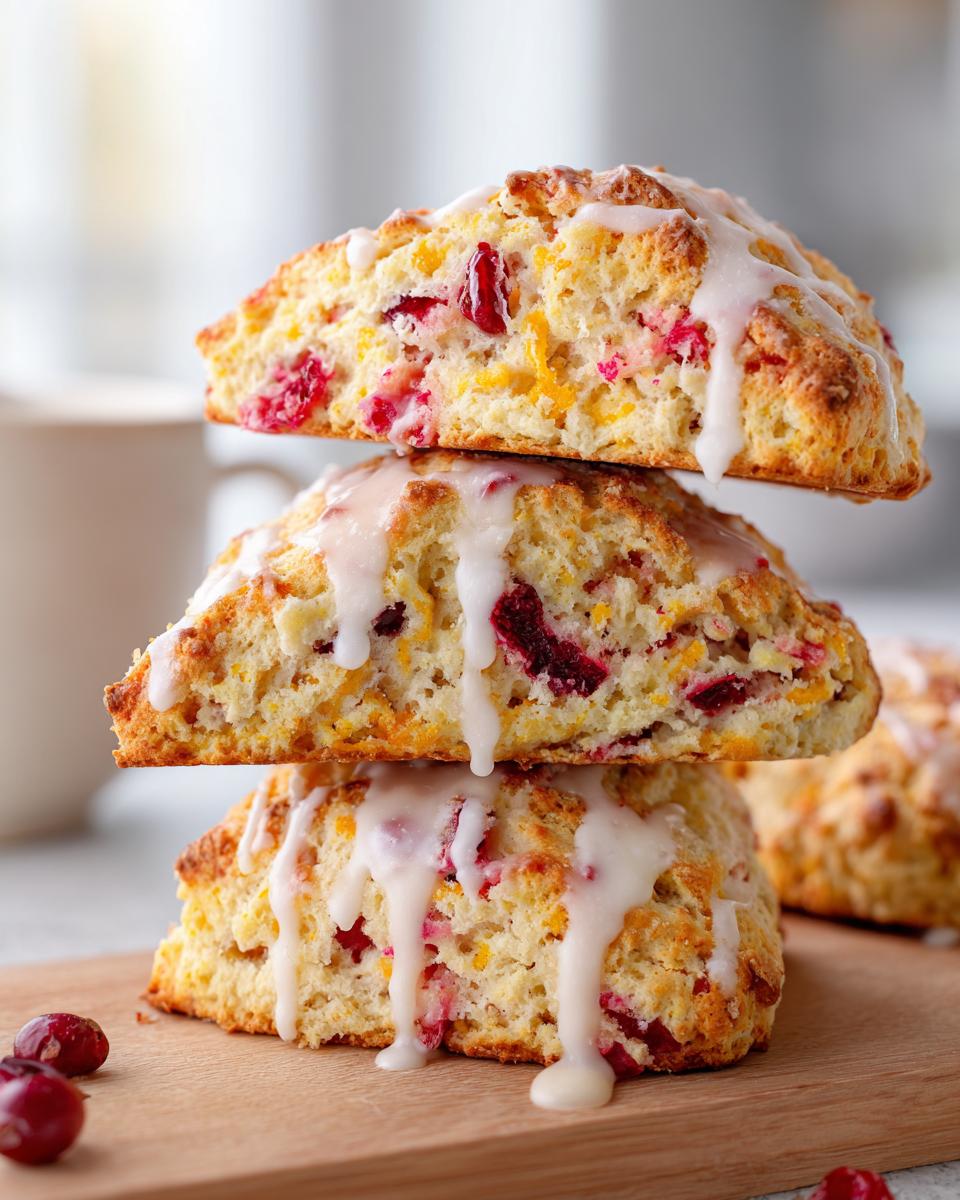
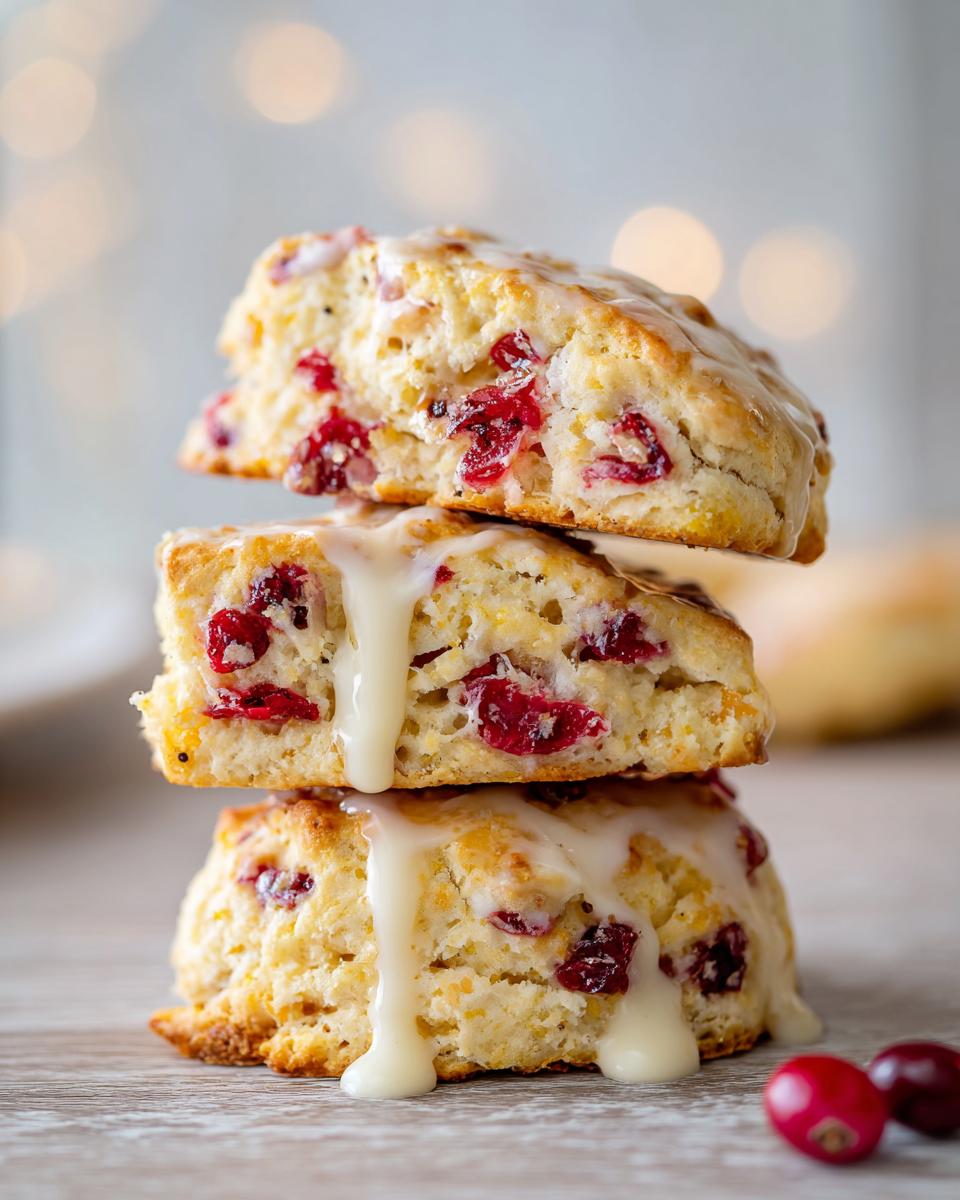
These Cranberry Orange Scones are exactly that: unbelievably tender, perfectly flaky, and bright with fresh winter flavor. They are honestly easy enough for a Tuesday morning, but special enough for your next big brunch. We’re skipping the fancy techniques and focusing on a few key basics to make them absolutely perfect every single time. If you’re looking for incredible breakfast baking ideas, bookmark this recipe right now!
- Why You Will Love These Cranberry Orange Scones
- Ingredients for Perfect Cranberry Orange Scones
- The Technique: How to Make Bakery Style Scones from Scratch
- Creating the Sweet Orange Glaze for These Scones
- Tips for Achieving Perfect Homemade Scones from Scratch
- Serving Suggestions for Your Fresh Scones
- Storage and Reheating Instructions for Scones
- Frequently Asked Questions About Making Scones
- Estimated Nutritional Data for These Scones
- Share Your Baking Success
Why You Will Love These Cranberry Orange Scones
Honestly, there are so many reasons to choose this specific recipe over others when you’re craving a great batch of homemade scones. I tested so many versions before settling on this one, and I just knew it was a winner. Here’s what makes them truly special:
- They are undeniably flaky! We focus hard on keeping the butter cold so you get those beautiful layers instead of a dense brick.
- The texture remains moist for days. That’s thanks to the buttermilk in the base recipe—it’s a true game-changer for homemade scones from scratch.
- Maximum flavor payoff for minimal effort. We use fresh orange zest and tart cranberries, which makes them feel rich even though this is an easy scone recipe.
- They bake up beautifully tall! I love seeing them rise on the sheet pan; it’s proof that the technique works.
- The sweet orange glaze is optional, but trust me—it elevates them right into bakery style scones territory. It’s just a simple coating, but wow, what a difference!
- These are perfect for any occasion, fitting right in whether you need a special tea time recipes treat or just something better than a standard biscuit.

Ingredients for Perfect Cranberry Orange Scones
Okay, let’s talk supplies! For these scones to turn out that perfect combination of tender and tall—what everyone wants when they look up a good how to bake scones guide—temperature control is everything. I can’t stress this enough: your butter and your buttermilk absolutely need to be cold. Chilly ingredients are the secret weapon for flaky pastries!
We use simple things here, nothing you can’t grab at any standard grocery store. Everything works together, but the texture relies on having that butter cubed and icy cold.
Here is what you’ll need for 8 incredible servings:
- 2 1/2 cups all-purpose flour
- 1/3 cup granulated sugar
- 1 tablespoon baking powder
- 1/2 teaspoon salt
- 1/2 cup (1 stick) cold unsalted butter, cut into small cubes
- 1 cup fresh or frozen cranberries
- Zest of 1 large orange
- 1 cup cold buttermilk
- 1 large egg, beaten (for egg wash)
- 1/4 cup powdered sugar (for glaze)
- 1 tablespoon fresh orange juice (for glaze)
Ingredient Notes and Substitutions for Your Scones
Most of these ingredients are straightforward, but I like to give you options just in case your pantry is missing something specific. This makes it a truly easy scone recipe for any day!
First, the buttermilk. If you don’t have any buttermilk on hand—and don’t worry, I often forget to buy it too—you can make a quick substitute! Just take 1 cup of regular milk and mix in 1 tablespoon of white vinegar or fresh lemon juice. Let that sit on the counter for about five minutes until it looks slightly curdled. That’s your homemade buttermilk, ready to go!
For the cranberries: Fresh or frozen are great. If you only have dried cranberries, that works fine too, but since dried fruit is a little less hydrated, you might consider soaking your dried cranberries in a tablespoon of warm water or a tiny splash of orange juice for about 10 minutes before stirring them into the dough. Just make sure you pat them slightly dry before adding them so they don’t introduce unwanted extra liquid to the mixture.
The Technique: How to Make Bakery Style Scones from Scratch
This is where we get serious about achieving those gorgeous, high-rising scones that look too good to be homemade—but they totally are! Remember how I talked about cold ingredients? That really pays off here. When those little pockets of chilled butter hit that hot oven, they create steam, and that steam is what lifts your dough up and creates that beautiful, flaky texture we talked about. This step-by-step process is what turns a basic recipe into a success for your next baking project.
Mixing the Dough for Fluffy Scones Tutorial
First up, we need to incorporate that cold butter into our dry mix. You want to use either a pastry blender or just your fingertips. You’re looking for a mixture that resembles coarse sand, but with some visible, pea-sized chunks of butter still floating around in there. Don’t try to mix it until it looks uniform!
Once the butter is worked in, pour in all your cold buttermilk at once. Now, use a fork—not a mixer, unless you want tough scones—and work it gently until everything is *just* combined. Seriously, stop mixing as soon as you can’t see much loose flour anymore. The dough should look shaggy, almost like it doesn’t quite want to come together. That’s a sign you haven’t overmixed, and that is crucial for a fluffy scones tutorial success!
Shaping and Baking Your Scones for Maximum Rise
Turn that shaggy dough out onto a lightly floured surface. Give it a gentle pat down until it’s about 3/4 of an inch thick. Don’t roll it or press it thin; we want height! Slice it into 8 wedges, or push a biscuit cutter straight down if you prefer rounds. A little tip I learned from my baking mentor is that if you place your cut scones close together on the baking sheet, they support each other as they rise, forcing them to go *up* instead of spreading *out*.
Make sure your oven is fully preheated to 400°F (200°C). Before they go in, give the tops a quick, delicate brush with a beaten egg wash. This is what gives you that gorgeous, golden-brown shine. Bake these beauties for about 15 to 18 minutes. You’ll know they’re done when they are golden brown and sound hollow when tapped.
Creating the Sweet Orange Glaze for These Scones
Now that you have these perfectly risen, tender classic scones cooling just slightly, it’s time for the finishing touch! While these cranberry orange scones are honestly wonderful plain—maybe just with a smear of good butter—that thin, sweet orange glaze really does push them over the top into that irresistible bakery style territory.
This glaze recipe is wildly simple, which is perfect because we don’t want to spend ages on something that’s just meant to drizzle nicely. All you’re doing is taking 1/4 cup of powdered sugar and whisking it with about 1 tablespoon of fresh orange juice. You want to whisk until it’s smooth, but still thin enough to run easily off a spoon.
If it looks too thick, just add a teeny drop more juice. If it looks too runny, add a small pinch more powdered sugar. It’s very forgiving! The key time to apply this is when the scones are still warm, but not piping hot. If they are scorching hot, the glaze will melt right off and disappear into them. We want it to set on top, right?
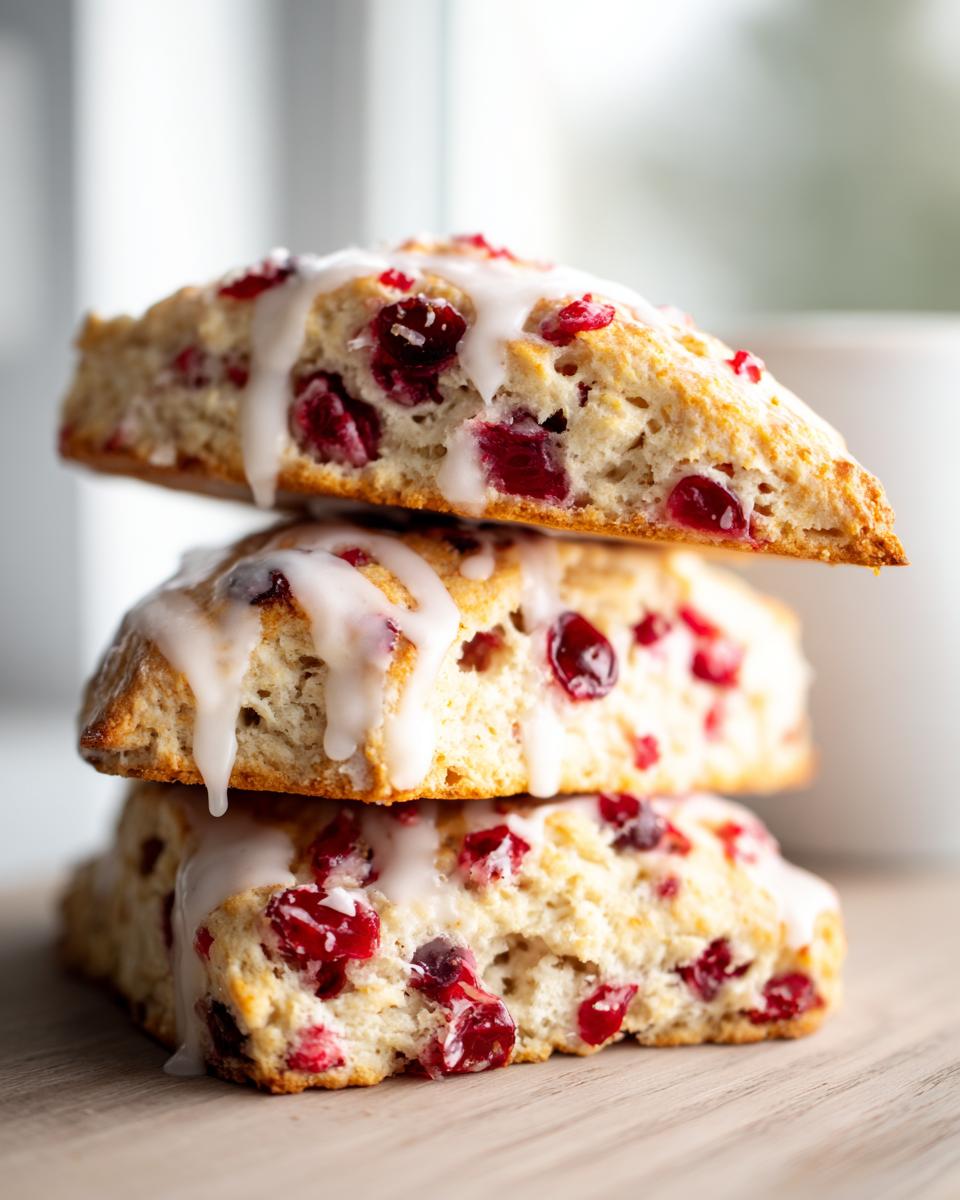
Just take a spoon and drizzle that beautiful glaze back and forth over the tops of the scones. It will set up beautifully as they cool down just a bit more. Seriously, the smell of that sweet citrus hitting the warm cranberry is heavenly. This simple orange glaze is what seals the deal for this fantastic sweet treat!
Tips for Achieving Perfect Homemade Scones from Scratch
There are a few ground rules in my kitchen when it comes to making incredible scones that aren’t dry, and they really boil down to two things: keeping things cold and touching the dough only as much as absolutely necessary. If you nail these two points, you have unlocked the secret to a truly moist scone recipe—far better than anything store-bought!
Remember that buttermilk hack we talked about? It’s worth mentioning again because it helps create a slightly more tender dough that cooks beautifully. Even if you’re using regular milk with vinegar, ensuring that liquid hits the dry ingredients when it is completely chilled keeps that structure sound. I always keep my measuring cup of buttermilk waiting in the fridge right up until the second I need it!
The absolute biggest sin in scone baking is overworking the dough. When you mix too much, you develop gluten, and guess what that creates? Toughness. We want fluffy, tender layers—that texture comes from handling the dough so minimally that it still looks a little ragged when you cut it. The less time you spend kneading or fussing over the dough, the better your final product will be! Trust me on this one; this approach is what guarantees those tall, bakery-style results we’re aiming for when we attempt homemade scones from scratch.
Also, think about your butter again. You see those large pea-sized bits? Don’t panic if they look huge compared to what you might see in a cake recipe. Those pieces are what create the steam pockets that push the dough upwards, giving you lift and flakiness. It’s science, folks! If you are mastering these techniques here, you will certainly be ready to tackle other delicate breakfast items like my carrot banana muffins next time.
Serving Suggestions for Your Fresh Scones
Now that your gorgeous Cranberry Orange Scones are cooled and glistening under that sweet glaze, the real fun begins: eating them! While honestly, these are perfect straight out of the oven with nothing else, serving them up the right way can turn a simple breakfast pastry into a real event. These are your perfect homemade scones from scratch, so treat them nicely!
When I make a batch, I usually plan for brunch, but they are truly versatile. They make fantastic brunch baking ideas because the citrus keeps them feeling light and refreshing, not heavy like a cinnamon roll.
For the traditionalists among us, these fit right into the category of classic afternoon tea scones. If you want to go fully authentic, slice them in half horizontally and serve them warm with a side of clotted cream and a sharp, high-quality raspberry jam. The tartness of the cranberry in the scone is just magnificent with rich cream.
But let’s be real, sometimes you just need a good scone with your coffee on a quiet morning. For that quick fix, I just slice mine open, maybe add a thin smear of salted butter—the saltiness plays so nicely against the sweetness of the glaze—and enjoy!
You could also serve these alongside something savory if you’re building a full spread, like my avocado toast with feta. The mix of sweet pastry and savory toast keeps everyone happy at the table. Either way you serve these scones, they disappear fast, so make extra!
Storage and Reheating Instructions for Scones
Truthfully, these Cranberry Orange Scones are at their absolute peak texture-wise—that flaky, tender crumb—on the day you pull them out of the oven. They are truly a breakfast pastry that beckons you to eat them immediately! But if you are lucky enough to have leftovers (or if you are smart enough to bake a double batch like I often do!), knowing how to store them properly is key to keeping that homemade freshness.
For the short term, meaning if you plan on enjoying the rest tomorrow morning, keep them sitting out at room temperature. Just make sure they are in a truly airtight container. Don’t just toss them under a dome lid; trap the air! This prevents them from going stale too quickly. The glaze will likely soften a bit, but the interior crumb should hold up well.
If you need to store them longer, say for up to three days, you can refrigerate them in that same airtight container. They might firm up a bit in the cold, but don’t worry, we have a fix for that!
The best way to bring these scones back to life is definitely not the microwave—that just makes them rubbery, and nobody wants that. Reheating should always be done in a low oven. I set mine to about 325°F (160°C). Place your leftover scone—maybe even slice it in half first—directly on the oven rack or a small baking sheet. Warm it for a quick five to seven minutes. This gently warms the butter pockets back up, which re-releases steam and refreshes that beautiful, flaky texture. It tastes almost exactly like they just came out of the oven! They are honestly one of those easy scone recipes that warm up better than almost any other pastry around.
Frequently Asked Questions About Making Scones
I know when I finally commit to baking a batch of scones, I always end up with a million little questions buzzing in my head right before I start. Did I chill my butter long enough? Will they taste okay tomorrow? Those little uncertainties can stop you before you even start, and we don’t want that here! Here are some common questions I always get asked about making these beauties.
Can I turn these Cranberry Orange Scones into a savory version?
That’s such a smart question! The structure of this dough is incredible—it’s what makes it so versatile. To go savory, you just need to pull back on the sweet elements. First, skip the granulated sugar completely, and of course, nix the orange zest and the glaze. Instead, you can fold in things like sharp cheddar cheese (about 3/4 cup works nicely!), some fresh chives, or even some crumbled bacon. If you add cheese, you might want to cut the salt down a touch. You still use the cold buttermilk, and the technique stays exactly the same! It’s amazing how easily this base recipe adapts for a savory snack or side dish.
What is the secret to tall scones?
If I had to bottle up one single tip that makes the difference between a squat, dense scone and a beautiful, tall one destined for a tea party, it would be the temperature of your ingredients. Keep that butter frozen or just barely cut, and make sure your buttermilk is straight from the coldest part of the fridge. Cold fat melts slower in the oven, and that slow melt creates the steam pockets needed for height. The second secret, which we talked about—never overwork the dough! Don’t knead it, don’t fuss with it. Pat it gently, cut it, and get it into the oven fast. Minimal handling means maximum lift!
If you are looking for more ideas on boosting breakfast flavor, I have a fun recipe for blueberry breakfast quesadillas that’s surprisingly good!
Estimated Nutritional Data for These Scones
I always try to keep things simple here at the blog, which means I try to keep the nutritional deep dive simple too! I want you to focus on the joy of baking these Cranberry Orange Scones, not on counting every single gram. However, I know many of you are curious about what goes into these delicious treats, especially when planning a big brunch spread.
The numbers below are based on dividing the entire recipe batch into 8 equal servings. Please remember, these are just estimates. The brand of butter you use, how much glaze soaks in, or if you use sour cream instead of buttermilk for a batch can tweak these figures slightly. We focus on accessibility in our recipes, but that means results can vary slightly depending on what you pull out of your pantry!
Here is the snapshot for one glorious serving of our scones:
- Calories: 320
- Fat: 16g
- Total Carbohydrates: 40g
- Sugar: 18g
- Protein: 6g
Don’t stress too much over these numbers, friends! These are a wonderful treat, perfect over a quiet breakfast or served alongside something heartier. When you bake delicious things from scratch using real ingredients, that’s always a win in my book.
Share Your Baking Success
You did it! You made gorgeous, flaky, perfectly balanced Cranberry Orange Scones, and you proved that absolutely anyone can bake something this beautiful right in their own kitchen. I’m so proud of you for trying this recipe, and now I really want to hear all about it!
When you’ve taken the time to bake something special, seeing how it turns out for you is honestly the best part of running this site. Did your glaze set perfectly? Did they rise nice and tall? Did your family gobble them up so fast there weren’t any left for the next morning? Tell me everything!
Please take a moment after you’ve enjoyed your morning coffee and let me know how the recipe worked for you. Leave a star rating right below—it helps so many other home bakers feel confident trying these scones out for themselves. And if you have any tweaks or additions you tried (maybe adding a drop of almond extract next time?), drop that in the comments too. I read every single one, I truly do!
If you took a beautiful photo of your finished batch, I’d be thrilled if you shared it on social media and tagged me—or you can always reach out directly through my contact page. I’d love to cheer you on! Happy baking, friends, and thank you again for trusting my recipe for your next batch of scones!
PrintThe Best Cranberry Orange Scones with Sweet Glaze

Make tender, flaky scones bursting with fresh citrus and tart cranberries. This easy scone recipe includes a simple orange glaze for a bakery-style treat perfect for breakfast or afternoon tea.
- Prep Time: 15 min
- Cook Time: 18 min
- Total Time: 33 min
- Yield: 8 servings 1x
- Category: Breakfast Pastries
- Method: Baking
- Cuisine: American
- Diet: Vegetarian
Ingredients
- 2 1/2 cups all-purpose flour
- 1/3 cup granulated sugar
- 1 tablespoon baking powder
- 1/2 teaspoon salt
- 1/2 cup (1 stick) cold unsalted butter, cut into small cubes
- 1 cup fresh or frozen cranberries
- Zest of 1 large orange
- 1 cup cold buttermilk
- 1 large egg, beaten (for egg wash)
- 1/4 cup powdered sugar (for glaze)
- 1 tablespoon fresh orange juice (for glaze)
Instructions
- Preheat your oven to 400°F (200°C). Line a baking sheet with parchment paper.
- In a large bowl, whisk together the flour, granulated sugar, baking powder, and salt.
- Cut the cold butter into the dry ingredients using a pastry blender or your fingertips until the mixture resembles coarse crumbs with some pea-sized pieces of butter remaining. This keeps the scones flaky.
- Gently stir in the cranberries and orange zest until they are evenly distributed.
- Pour in the cold buttermilk all at once. Use a fork to mix until just combined. Do not overmix; the dough will look shaggy.
- Turn the dough out onto a lightly floured surface. Gently pat the dough into a 3/4-inch thick circle or rectangle.
- Cut the dough into 8 wedges or use a round biscuit cutter to cut out the scones. Place them on the prepared baking sheet, ensuring they are close together for taller sides.
- Brush the tops lightly with the beaten egg wash.
- Bake for 15 to 18 minutes, or until the tops are golden brown and the scones are risen.
- While the scones cool slightly, whisk together the powdered sugar and orange juice to create a thin glaze.
- Drizzle the glaze over the warm scones before serving. These are best enjoyed the same day.
Notes
- Keep all wet and dry ingredients cold. Cold butter creates steam pockets, which results in tall, fluffy scones.
- For the tallest rise, gently fold the dough a few times instead of kneading it.
- If you do not have buttermilk, mix 1 cup of regular milk with 1 tablespoon of white vinegar or lemon juice and let it sit for 5 minutes before using.
Nutrition
- Serving Size: 1 scone
- Calories: 320
- Sugar: 18
- Sodium: 250
- Fat: 16
- Saturated Fat: 10
- Unsaturated Fat: 6
- Trans Fat: 0
- Carbohydrates: 40
- Fiber: 1
- Protein: 6
- Cholesterol: 65