
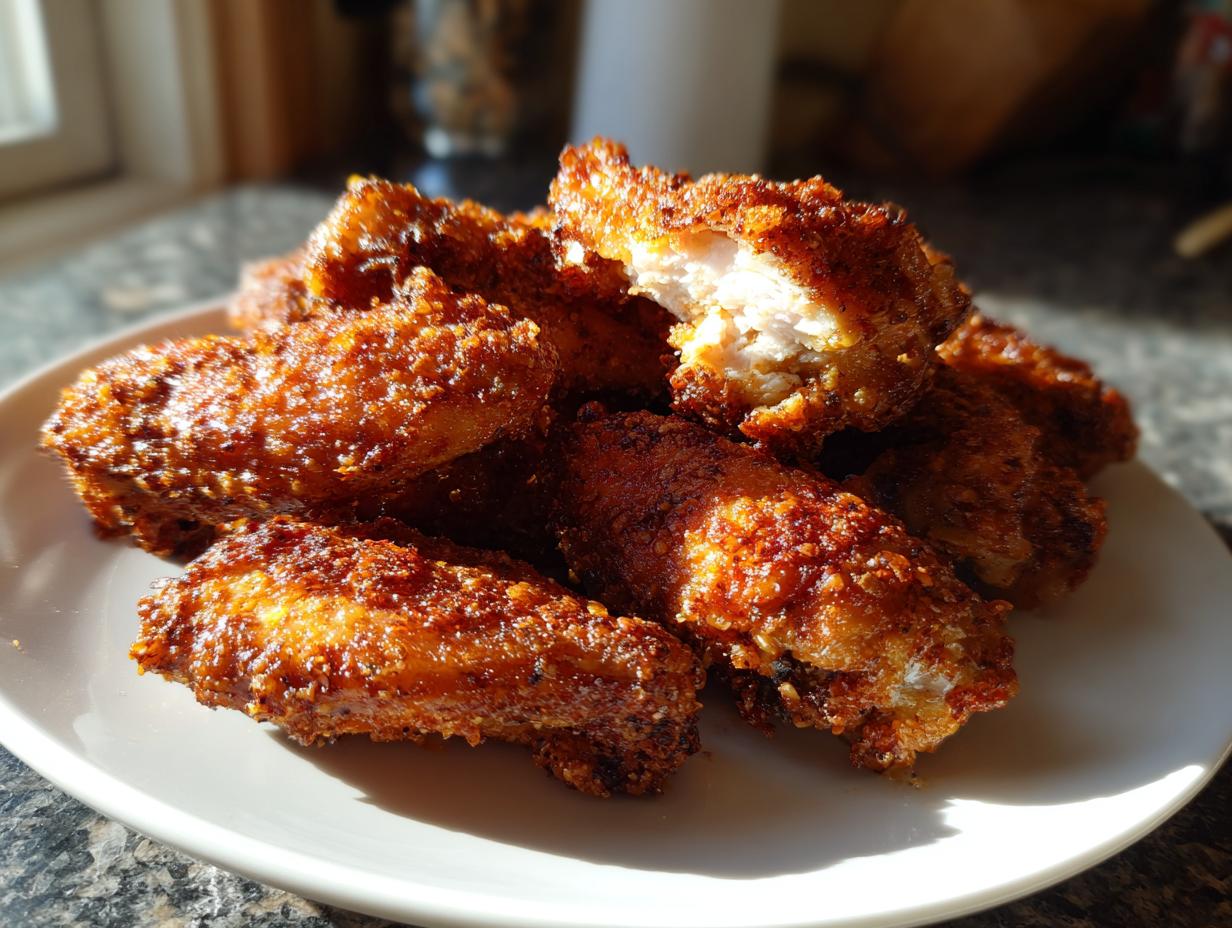
Oh, the sheer disappointment of soggy, flabby chicken wings! We’ve all been there. You try to keep it healthier, you skip the deep fryer, and what do you end up with? Something that tastes like it was steamed instead of roasted. It drives me crazy, and honestly, it’s why so many people swear off making wings at home.
Back in my early kitchen experiments—when I was trying to crack the code on why baked food often disappoints—I spent countless hours analyzing ratios and heat science. I refused to believe that you couldn’t get that incredible crackle you crave without dunking them in oil. So, I cracked the code. I’m thrilled to share my answer with you: The Ultimate Crispy Baked Chicken Wings (No Fry Required). This recipe uses a simple, almost magical dry rub that changes the game entirely. Trust me, once you see how this technique works on your batch of homemade chicken wings, you’ll never look back. We are going for maximum crunch using just the heat of your standard oven!
- Why You Will Love These Crispy Baked Chicken Wings
- The Secret to Perfect Oven Baked Chicken Wings: Ingredients
- The Best Baked Wings Technique: Step-by-Step Instructions
- Tips for Success with Crispy Chicken Wings
- Ingredient Notes and Substitutions for Your Chicken Wings
- Making Game Day Chicken Wings: Variations and Flavors
- Storage and Reheating Instructions for Leftover Chicken Wings
- Serving Suggestions for These Easy Chicken Wings
- Frequently Asked Questions About Crispy Baked Chicken Wings
Why You Will Love These Crispy Baked Chicken Wings
I know you’re scrolling Pinterest looking for that one recipe that actually works. You want wings that taste like they came from a great sports bar, but you don’t want the mess or the guilt of frying. Well, stick around, because these baked chicken wings check every single box. They truly are my go-to party food staple.
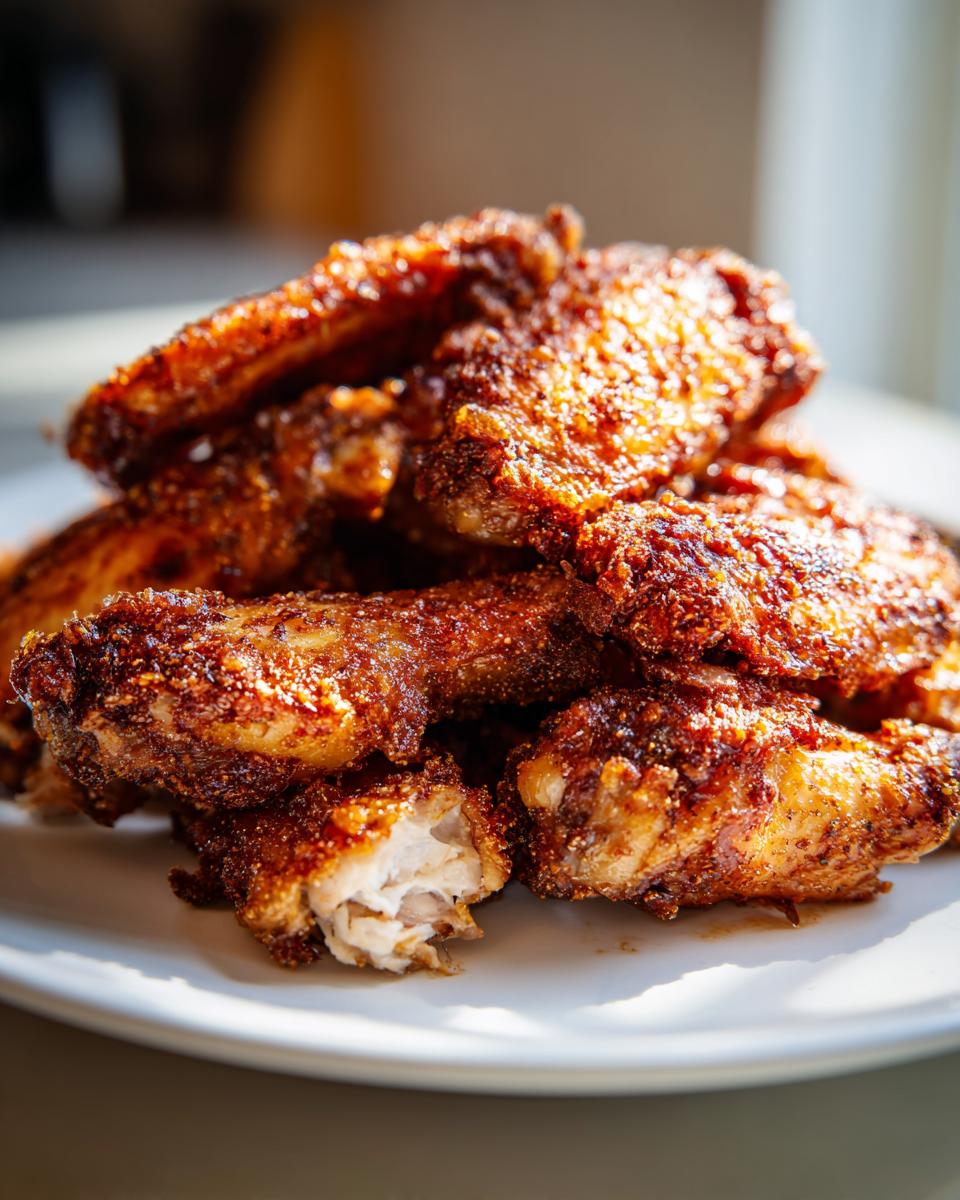
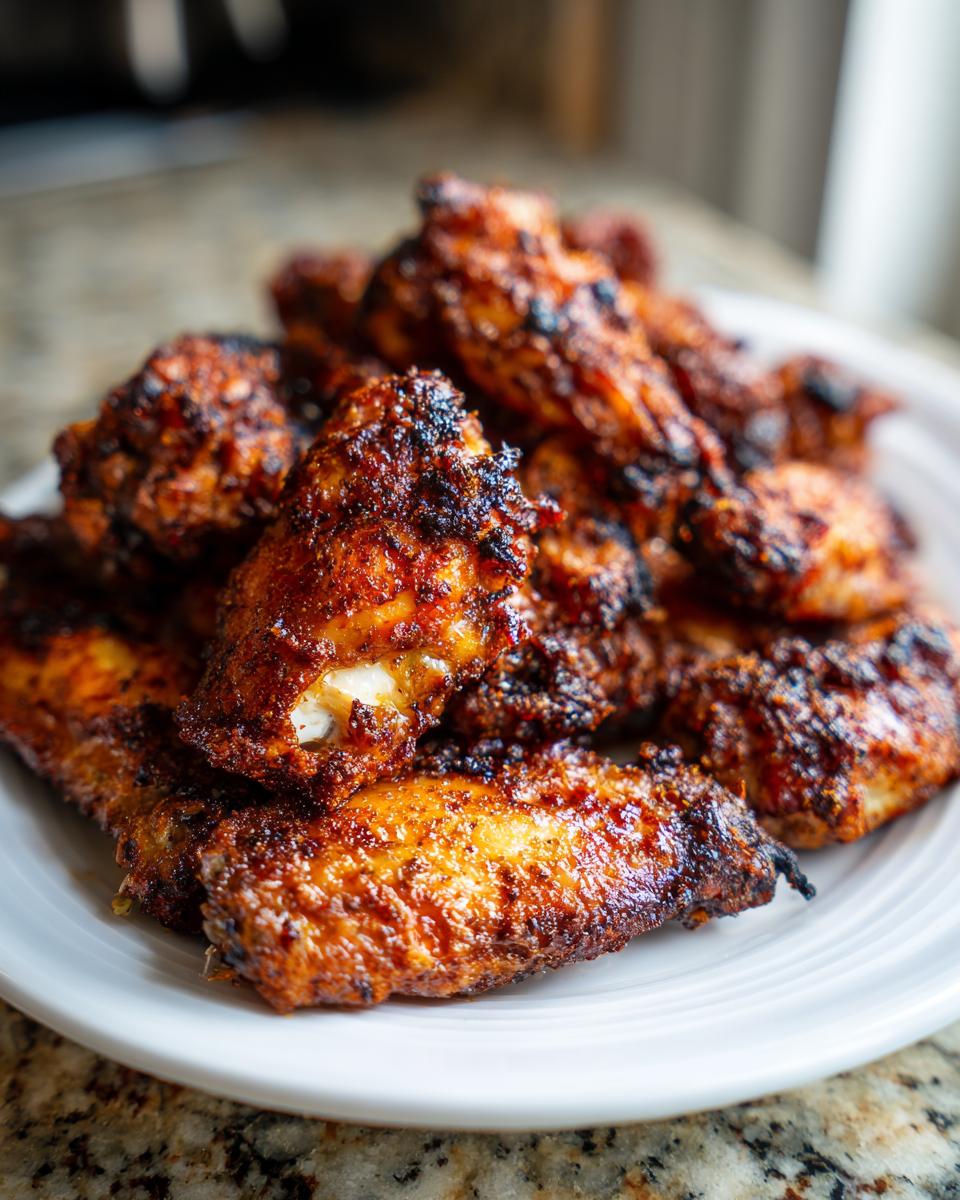
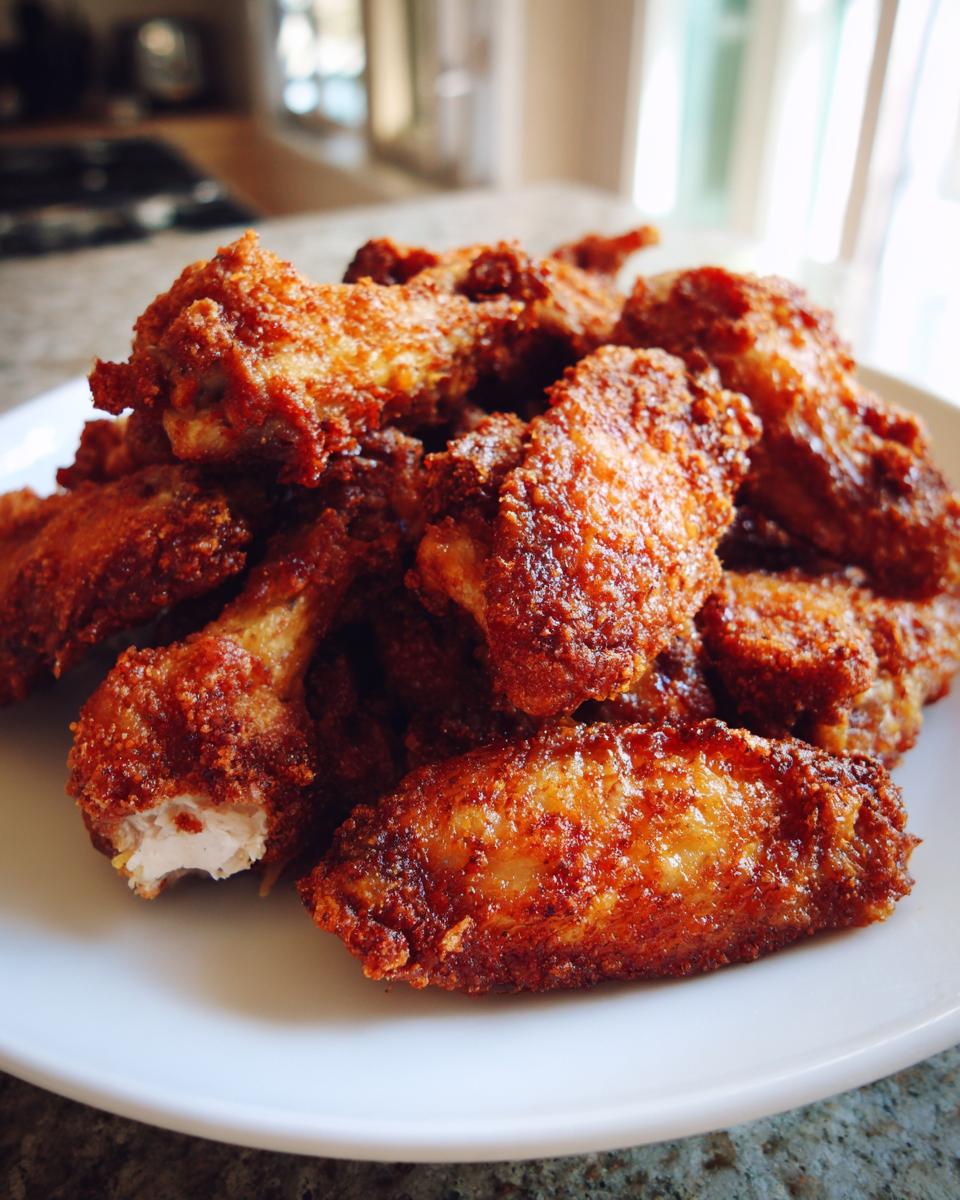
- Shockingly Crispy Skin: We are talking crunchy edges and golden-brown skin that snaps when you bite into it. This is thanks to a little bit of simple science in our dry rub—no deep fryer necessary!
- Minimal Cleanup: Because we bake these on a foil-lined sheet pan with a rack, cleanup is a breeze. You just toss the foil! It makes them perfectly suited for a last-minute quick dinner or feeding a crowd.
- Perfect for Game Day: These are sturdy, easy to toss in sauce, and they hold their heat well on a platter. They’re truly the best game day chicken wings because they deliver big flavor without complicated steps.
- Incredible Flavor Base: Even before you add sauce, the seasoning pack in these wings gives you incredible flavor payoff. They are seasoned perfectly right out of the oven, which means even if you prefer a dry rub wing, you’re set! You can find more of my favorite dips and sides over here at simple appetizers and snacks.
The Secret to Perfect Oven Baked Chicken Wings: Ingredients
Okay, listen up. When I developed this technique, I wasn’t trying to track down fancy specialty items. That defeats the purpose of an easy, reliable recipe, right? My whole philosophy here at the site is about getting extraordinary flavor from ingredients you can grab at any grocery store without breaking the bank. That’s how we build trust in the kitchen—by proving that simple steps lead to amazing results.
For these chicken wings to turn perfectly golden and crunchy, you don’t need a huge spice rack. You just need the right combination, used in the right way. Pay close attention to how I describe the measurements here; millimeters matter when we’re talking about getting that perfect coating!
Essential Ingredients for Crispy Chicken Wings
Here’s what you’ll need to gather before we even think about turning the oven on:
- 3 lbs chicken wings (Make sure you separate those flats and drumettes! They cook more evenly that way.)
- 1 tablespoon baking powder (Seriously, if you can find aluminum-free, grab it. It really makes a difference in the final look and taste, but regular will work in a pinch.)
- 1 teaspoon salt
- 1 teaspoon black pepper
- 1 teaspoon garlic powder
- 1 teaspoon onion powder
- 1/2 teaspoon paprika
- 1/4 teaspoon cayenne pepper (Only if you want that little kick. Feel free to leave it out if you’re making these for sensitive palates!)
- 2 tablespoons melted butter (This is for the post-bake toss—it helps the sauce grab on better!)
- Your favorite wing sauce (Buffalo, Honey BBQ, whatever makes your heart sing!)
That baking powder is the magic dust here. It dries out the skin during the cooking process just enough to mimic that deep-fry crackle. It gives you truly crispy chicken wings whenever you need them.
The Best Baked Wings Technique: Step-by-Step Instructions
This is where the magic happens, folks. If you follow this technique exactly, you will have the crispiest, juiciest chicken wings you’ve ever made in your home oven. We aren’t just throwing them on a sheet pan and hoping for the best; we are building texture layer by layer. It might seem like a few extra steps, but trust me, this is how you get those fantastic no fry chicken wings! If you want to see my written guide on a very similar method, check out my full recipe for crispy baked chicken wings.
Preparation: Drying and Seasoning Your Chicken Wings
First things first: moisture is the enemy of crispiness. Grab your paper towels and pat every single wing dry, top to bottom. Seriously, keep dabbing until they feel as dry as you can possibly get them. Now, dump those dry wings into a large bowl with our incredible dry rub mixture—the one featuring that essential baking powder. Toss them really well! You want every surface coated evenly. That baking powder is our secret weapon to getting that beautiful crackly texture without ever dipping them in hot oil. It sounds simple, but this seasoning step locks in moisture inside while preparing the outside for battle against the heat. This same seasoning base works wonderfully if you are looking for easy chicken wings recipes too!

Baking for Maximum Crispiness: Oven Settings and Timing
We need heat to make these oven baked chicken wings sing! Preheat your oven way up high to 425°F (220°C). Set up your baking sheet: line it with foil (for easy cleanup, thank goodness!) and place a wire rack on top. This rack setup is non-negotiable because air needs to circulate underneath! Arrange your seasoned chicken wings on the rack in a single layer. Do not let them pile up; they need space to breathe and crisp up! We bake them for 25 minutes. Then, carefully flip every single wing over and slide them back in for another 20 to 25 minutes. That full 45 to 50 minutes ensures they are cooked through and super crunchy.
Finishing Your Flavorful Chicken Wings
Once they come out looking deeply golden and satisfyingly crispy, pull them out. Toss them quickly in a bowl with two tablespoons of butter—it adds a little richness and helps sauces grab on better! Now, if you are saucing them, toss them gently with your favorite glaze. If you prefer a dry rub wing, you can skip the sauce and serve them right away! The most important thing here is speed. Serve these healthy chicken wings immediately while they are piping hot and at their crunchiest peak. You won’t believe they weren’t deep-fried!
Tips for Success with Crispy Chicken Wings
I’ve made batches of these chicken wings so many times, I could probably do it in my sleep! But because I want you to have the same flawless experience I do every time you try this recipe, let me share what I learned the hard way. Getting that satisfying crunch for your oven baked chicken wings comes down to paying attention to detail in these final steps. You can read my deep dive on all the technical details over at how to make crispy wings, but here are the quick wins.
First, let’s revisit the pan situation. You absolutely cannot overcrowd these things. When I say arrange them on the rack in a single layer, I mean it! If those chicken wings are touching even a little bit, they steam each other instead of crisping up. If you have too many wings for one rack, get a second rack and a second baking sheet. It’s worth the extra time cleaning two pans versus eating sad, soggy wings.
Now for the little trick I sometimes use when I have guests coming over and an extra five minutes: the broiler finish. If your wings are cooked through (that 45-minute mark hits) but they aren’t *quite* as golden brown or shatteringly crisp as you want, you can move them under the broiler. Slide the rack onto the highest possible shelf in your oven. Turn on the broiler and watch them like a hawk! We are talking one to two minutes, tops. They go from perfect to burnt charcoal terrifyingly fast, so stand right there and don’t walk away!
Also, remember the notes about sticking? If you’re nervous about any residue sticking to your rack, you can always use parchment paper under the rack this time. Parchment helps with cleanup, but remember—it blocks a little bit of that intense bottom-up heat, so you might need one or two extra minutes in the oven compared to when the wing sits directly on the metal.
Ingredient Notes and Substitutions for Your Chicken Wings
I always get questions about substitutions whenever a recipe calls for something specific, especially when people are trying to make my crispy chicken wings work with what they already have in the pantry. Baking, especially when you are trying to manipulate texture, can sometimes feel like chemistry class, but I promise, we can keep this flexible without ruining the final result!
Let’s talk about that critical baking powder. In the recipe, I strongly suggest using aluminum-free baking powder. Why? Well, the aluminum-free version tends to give you a cleaner overall flavor profile. Regular baking powder sometimes leaves a very subtle metallic aftertaste, especially when it’s concentrated as it is in our dry rub. However, if you look in your cabinet right now and only see regular baking powder? Don’t panic! Use it. It will still raise the pH level of the skin beautifully and promote that glorious browning and crisping we are after. The texture will be almost identical, and you might not even notice the flavor difference.
What about the spices in the dry rub? They form the backbone of our flavor before the sauce goes on. If you’re out of garlic powder or onion powder, you can lean on the others, but don’t skip them entirely if you can help it; they add depth! If you’re making these for someone sensitive to spice, the cayenne pepper is the first thing to go. You can substitute it 1:1 with smoked paprika to keep that rich coloring without the heat.
And for my friends who aren’t big fans of traditional sticky glazes, this recipe is truly adaptable. Remember, the crispiness comes from the dry rub and the high heat. If you skip step 8 (tossing in the butter) and skip adding bottled sauce in step 9, you are left with incredible, flavorful, dry rub chicken wings! They are naturally leaner and still intensely satisfying. You can even mix up a second dry rub entirely—maybe something with smoked paprika and cumin—and toss half the batch in that for variety at your next potluck.
Making Game Day Chicken Wings: Variations and Flavors
Now that you have mastered getting the ultimate crispiness—which is half the battle in making amazing chicken wings—we get to the fun part: the flavors! Since the base you’ve created using the baking powder rub is so phenomenal and neutral, it acts like the perfect canvas for almost anything. This means you can switch up the final sauce or dry rub on every batch you make for your next game day marathon!
Think of the base recipe as your MVP: the crispy skin and juicy meat are locked in. Everything after the wings come out of the oven at the 50-minute mark is just dressing them up! You can make a batch of classic Buffalo, toss some in a sticky glaze, or go full-on savory. It’s all about playing around with that tasty foundation. I have tons of ideas for pairings, but my absolute favorite thing to serve besides celery is a simple, chewy flatbread—you can check out my easy homemade garlic naan bread recipe if you need an awesome addition to soak up any extra sauce!
Here are a couple of my favorite ways to twist this basic method into show-stopping party food chicken wings:
For Incredible Honey BBQ Wings:
This is super straightforward! After you pull the wings out of the oven (Step 6), skip the plain melted butter toss. Instead, toss them immediately with your favorite bottle of Honey BBQ sauce while they are scorching hot. The residual heat helps that sauce thicken slightly and cling beautifully to the crisp skin. If you want them extra sticky, put them back on the rack for just 3 minutes under the broiler after saucing, watching carefully so the sugars don’t burn!
For Savory Garlic Parmesan Wings:
This one is amazing because it relies less on a wet sauce and more on coating. Once the wings are perfectly baked and hot from the oven (Step 6), skip the butter and sauce toss entirely. Instead, put the wings back into the large bowl. Sprinkle generously with a mixture of finely grated Parmesan cheese, garlic powder, some dried parsley, and maybe an extra dash of black pepper. Toss them quickly and pile them high on a serving platter. The residual heat melts the cheese just enough to adhere, giving you that famous savory coating. These never last long at any gathering!
For Extra Spicy Chicken Wings:
If your crew likes heat, you can amp up the spice factor right in the initial dry rub, or you can add it at the end. If you added the initial cayenne in the rub, you’re already ahead of the game. If you want serious heat, try tossing the wings (after the initial bake) in a mix of melted butter and a high-quality hot sauce right before serving. Just be sure to warn your guests about the heat level!
See? This one recipe truly gives you a blank slate for an entire afternoon of delicious, crispy, homemade chicken wings!
Storage and Reheating Instructions for Leftover Chicken Wings
If you happen to have any of these unbelievably crispy chicken wings left over—which I admire your restraint if you do!—the way you store and reheat them is critical. We worked so hard to banish sogginess, so we definitely don’t want to bring it back via refrigerator storage, right? The goal here is to keep that snap alive for game day tomorrow!
The single most important rule for leftovers is this: If you sauced them, separate the components before storing. Wet sauce degrades that beautiful crisp texture almost immediately. If you have leftover sauce in a bottle, store it in the fridge. If you have leftover sauced wings, store them, and then—this is key—store the celery and blue cheese dressing separately too. We want everything dry when it goes into the fridge.
Never, ever store your leftover oven baked chicken wings in an airtight plastic container if they were sauced. Condensation will sneak in and ruin everything. Use a wide, shallow container and line it with paper towels before stacking the wings loosely inside, or even better, place them on a plate covered loosely with plastic wrap. Get them into the cold as fast as possible!
Now, for reheating, we are banning the microwave entirely. The microwave turns crispy food into rubbery disappointment, and we just won’t stand for that here at Taste This Plate.
If you have an air fryer, that is my preferred method for leftovers. Preheat your machine to about 375°F (190°C) and toss the wings in for about 4 to 6 minutes. Give them a little shake halfway through. They shock back to life beautifully!
If you are using a standard oven, preheat it to 375°F (190°C) as well. Place the wings (sauced or dry rub) single-layer on a wire rack set over a baking sheet (just like we did the first time!). Pop them in for about 8 to 10 minutes, just until they are heated through and you feel that skin firming back up. If they were dry rub wings, they’ll likely be perfectly crisp again. If they were sauced, they should be hot and sticky without being mushy. These methods ensure your easy chicken wings taste almost as good as the first batch!
Serving Suggestions for These Easy Chicken Wings
We’ve done the hard work—we’ve engineered the perfect crispy exterior and filled our chicken wings with juicy flavor. But what do you put around them? A great appetizer or quick dinner needs friends on the plate, right? Luckily, since these are so versatile, they pair well with everything from cooling dips to hearty sides.
For any true game day spread, you absolutely must have your cooling components nearby. I’m talking about the classics: big, crisp celery sticks and creamy blue cheese dressing. These aren’t just suggestions; they are mandatory! That sharp, cool bite of cucumber or celery cuts through the richness of the wing—whether it’s spicy Buffalo or sweet Honey BBQ—and it’s just perfect for resetting your palate between crunchy bites. Keep the dressing thick!
But these aren’t just for snacking! If I’m making a bigger batch of these easy chicken wings for a family dinner, I like to bulk up the plate a bit. They are fantastic served right over a bed of fluffy white rice. The rice soaks up any leftover sauce, making sure none of that delicious flavor goes to waste. It instantly turns a snack into a full, satisfying meal.
If you need something green to balance out all that savory goodness, a simple side salad is perfect. Don’t overthink it; you don’t want anything too complicated competing with your amazing wings. I often toss together some mixed greens, maybe a few cherry tomatoes, and keep the dressing light and bright. You can find some of my favorite simple dressing recipes for that perfect light side over here at my salad section. It greens up the table beautifully!
Ultimately, because these are such solid finger food ideas, they work well alongside almost any other party food you might be serving—think veggie platters, chips and dip, or even some mini sliders. But trust me, the crispy wings will always disappear first!
Frequently Asked Questions About Crispy Baked Chicken Wings
Since I’ve shown you the exact technique for making the best crispy chicken wings in your oven, I know you might still have questions cropping up as you plan your next menu. That’s totally normal! Getting the science right takes a little convincing, especially when you’re used to deep frying. I’ve gathered the most common things people ask me when they are trying to master these homemade chicken wings for the first time.
Can I use aluminum-free baking powder for the best crispy chicken wings?
Yes, absolutely! In the recipe, I mention that if you can grab the aluminum-free kind, you should. It helps ensure you get that ultra-clean flavor. But here’s the deal: if you’ve already got regular baking powder in the cabinet, don’t run out to buy a new container! Regular baking powder does the exact same job of reacting with the moisture on the skin to help them brown beautifully and crisp up. You’ll still end up with amazing oven baked chicken wings!
How do I make these healthy chicken wings without butter?
That’s a great question, especially if you’re counting calories or trying to keep things lighter for a weeknight meal instead of a big party! The crispiness for these healthy chicken wings is almost entirely established in the baking powder dry rub and the high-heat baking process. The melted butter in Step 8 is mostly there to help any sauce adhere better, and it adds a nice richness.
If you are serving your wings dry (just the seasoning rub) or you plan on saucing them heavily, you can skip that butter toss entirely. Just take them out of the oven, toss them in your sauce, and serve! You won’t sacrifice much crispiness at all, and you shave off a little extra fat. Easy peasy!
Can I use this technique for Air Fryer Wings?
Oh, yes, you totally can! This dry rub mix is honestly fantastic across the board, and for air fryer wings, it works brilliantly. The air fryer is actually amazing at mimicking the environment of a convection oven, so that baking powder magic really shines.
The main difference is temperature and time. Air fryers cook much faster and more intensely. If you were going to use this recipe in an air fryer, I would suggest setting your machine to about 380°F and cooking them for 18 to 20 minutes total, flipping halfway through. They might even get crisper than the oven batch, which is fun! Just watch them closely because air fryers can go from perfect to overcooked in seconds. You can learn more about my general kitchen approach over at my About Page if you’re curious!
PrintThe Ultimate Crispy Baked Chicken Wings (No Fry Required)

You can achieve restaurant-quality crispy baked chicken wings right in your oven. This simple technique uses a dry rub and high heat to give you golden, crunchy skin and juicy meat without any deep frying. These are perfect for game day or your next party.
- Prep Time: 15 min
- Cook Time: 50 min
- Total Time: 65 min
- Yield: 4 servings 1x
- Category: Appetizer
- Method: Baking
- Cuisine: American
- Diet: Gluten Free
Ingredients
- 3 lbs chicken wings (flats and drumettes separated)
- 1 tablespoon baking powder (aluminum-free for best results)
- 1 teaspoon salt
- 1 teaspoon black pepper
- 1 teaspoon garlic powder
- 1 teaspoon onion powder
- 1/2 teaspoon paprika
- 1/4 teaspoon cayenne pepper (optional, for heat)
- 2 tablespoons melted butter (for tossing after baking)
- Your favorite wing sauce (e.g., Buffalo, Honey BBQ)
Instructions
- Preheat your oven to 425°F (220°C). Line a large baking sheet with aluminum foil for easy cleanup, then place a wire cooling rack on top of the foil. This setup allows air to circulate around the wings, which is key for crispiness.
- Pat the chicken wings completely dry using paper towels. Removing surface moisture is the most important step for crispy skin.
- In a large bowl, combine the baking powder, salt, pepper, garlic powder, onion powder, paprika, and cayenne pepper. This is your dry rub.
- Add the dried chicken wings to the bowl. Toss them thoroughly until every piece is evenly coated with the dry rub mixture. The baking powder helps raise the pH level of the skin, promoting browning and crisping.
- Arrange the coated wings in a single layer on the wire rack. Do not let the wings touch each other; give them space for air flow.
- Bake for 25 minutes.
- Flip each wing over carefully. Return the pan to the oven and bake for another 20 to 25 minutes, or until the skin is deeply golden brown and very crispy.
- Remove the wings from the oven. Place them in a clean, large bowl. Drizzle with the melted butter and toss gently to coat.
- If you are using a sauce, add your desired amount of sauce (like Buffalo or Honey BBQ) to the bowl and toss until the wings are fully coated.
- Serve immediately with celery sticks and blue cheese dressing for the best experience.
Notes
- The secret to truly crispy baked chicken wings is using baking powder in the dry rub. Do not skip this ingredient if you want that ‘fried’ texture.
- For extra crispiness, you can briefly place the wings under the broiler for 1 to 2 minutes at the very end, watching them closely to prevent burning.
- If you prefer a dry rub wing, skip step 6 and 7, and simply serve the wings immediately after they come out of the oven.
Nutrition
- Serving Size: 4 wings
- Calories: 320
- Sugar: 1
- Sodium: 450
- Fat: 22
- Saturated Fat: 7
- Unsaturated Fat: 15
- Trans Fat: 0
- Carbohydrates: 2
- Fiber: 0
- Protein: 28
- Cholesterol: 95