

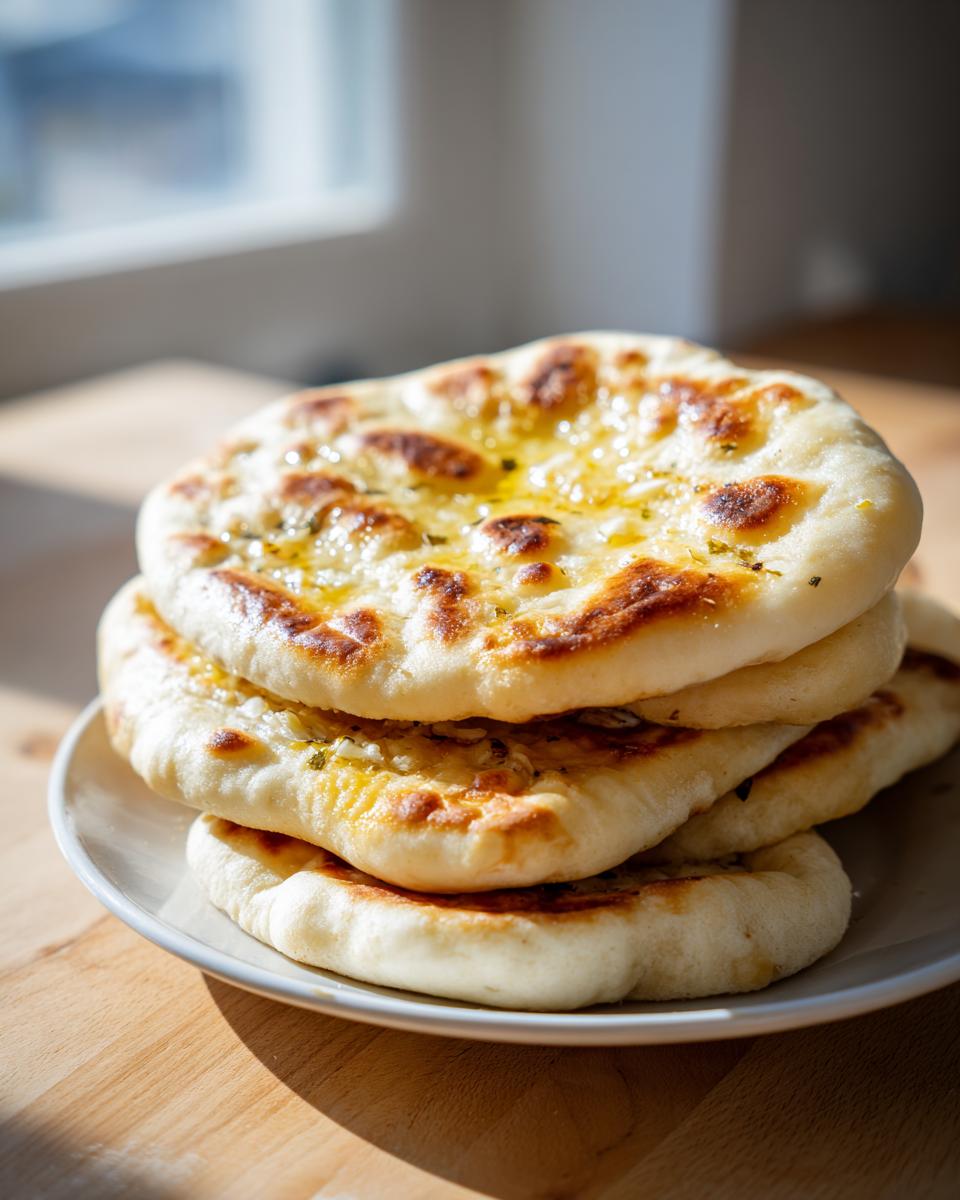
There’s just something deeply comforting about pulling fresh bread out of your own oven—or in this case, right off the stovetop! For years, I thought truly soft, fluffy, restaurant-quality naan bread was locked behind the secret walls of Indian restaurants that owned a blazing hot tandoor. But after analyzing why some flatbreads work and others fall flat, I cracked the code right here in my own kitchen. Trust me, you absolutely do not need that giant clay oven! We’re achieving that perfect pillowy texture and incredible chewiness using just a regular skillet. Plus, we’re loading this batch up with garlic and butter, because why wouldn’t we? If you love this kind of flavor boost, you have to check out my recipe for garlic parmesan herb bread, too!
- Why This Homemade Naan Recipe Delivers Soft and Fluffy Naan Bread
- Gathering Your Ingredients for Buttery Naan Bread
- How to Make Naan at Home: Step-by-Step Instructions
- Transforming Your Naan Bread into Garlic Naan Recipe
- Tips for Success Making Your Best Indian Flatbread
- Serving Suggestions for Your Naan Bread
- Storage and Reheating Instructions for Naan Bread
- Frequently Asked Questions About Homemade Naan Recipe
- Estimated Nutritional Data for Naan Bread
Why This Homemade Naan Recipe Delivers Soft and Fluffy Naan Bread
When I started testing this **homemade naan recipe**, my goal wasn’t just to make any flatbread; I wanted that incredible spongy softness you get at your favorite restaurant. That’s when I realized it’s all about technique, not fancy equipment. We achieve the **Soft and Fluffy Naan** because we’re using yeast correctly and giving it ample time to do its job. Forget the tandoor; the secret weapon here is bringing your cast-iron skillet up to screaming hot temperatures before we cook. That high, direct heat is what makes those beautiful bubbles form almost instantly, giving you an **Authentic Naan Texture** without setting foot outside your kitchen.
The Secret to Chewy Flatbread Recipe Texture
If you want that lovely pull when you tear off a piece, we need gluten, and gluten needs time and agitation! That’s where the yogurt and the kneading come into play for our **Chewy Flatbread Recipe Texture**. The yogurt isn’t just for flavor; its acidity tenderizes the flour slightly. Then, when you knead for a solid seven minutes, you’re building up strong gluten strands in that dough. When that elastic dough hits the scorching hot skillet, those strands stretch, puff up perfectly, and create the signature pockets we all love. It’s the dough stretching under the intense heat that mimics what the clay walls of a tandoor oven do!
I’ve tried rushing this, believe me, and you end up with tough crackers. Don’t stress about perfection in the kneading; just make sure you trust the process and save your best tips in my cinnamon buns recipe notes, because that teaches you dough patience, too!
Gathering Your Ingredients for Buttery Naan Bread
Okay, let’s talk about what you need! Making restaurant-style **Buttery Naan Bread** starts with simple pantry staples, but getting the details right makes all the difference between good bread and amazing bread. We aren’t messing around with shortcuts here, especially when it comes to that golden, delicious topping.
For the dough itself, you’ll need:
- 1 ½ cups warm water – this needs to be nice and toasty, around 105°F to 115°F. Too hot and you kill the yeast, too cold and they won’t wake up!
- 1 tablespoon granulated sugar (this is the yeast’s breakfast!)
- 2 ¼ teaspoons active dry yeast
- 3 cups all-purpose flour, plus extra for dusting
- 1 teaspoon salt
- 2 tablespoons plain yogurt – full fat is what I always recommend here; it adds richness.
- 2 tablespoons olive oil, plus maybe a touch more for greasing the bowl.
And then for that perfect finish that makes this Garlic Naan Recipe sing, we prepare our topping separately:
- 4 tablespoons unsalted butter, melted until smooth.
- 2 cloves garlic, minced really finely. I mean, really minced!
Don’t skip the kneading and rising; that’s where the magic happens!
Ingredient Notes and Substitutions
I get questions all the time about tweaking these staples, so let me give you my honest take. First, that yogurt—please try to use **full-fat plain yogurt**. It really helps tenderize the dough in a way that low-fat just can’t match, guaranteeing that soft texture we are chasing.
If you’re looking at your pantry and realize you only have instant yeast instead of active dry yeast? No problem! Just skip Step 1 where we proof the yeast separately. Go ahead and mix the instant yeast directly in with your flour, salt, and sugar. It will still work like a charm for your **Quick Naan Recipe**.
Also, if you have a dairy issue or just want something slightly different, technically you can use sour cream, but honestly, the tang and richness of true **Yogurt Flatbread** made with yogurt is superior. I haven’t tested it with milk, so I stick to the yogurt—I want predictable, flawless results, and you should too!
How to Make Naan at Home: Step-by-Step Instructions
Alright, deep breath! This is the main event. I know rolling out dough can feel intimidating, especially when you’re aiming for that light, airy texture, but this is where my years of testing come in handy. We follow these steps precisely, and I guarantee you’ll feel like you mastered ancient bread-making secrets. Remember, making **naan bread** from scratch is rewarding, and this process is designed to be straightforward!
Activating Yeast and Mixing the Naan Bread Dough
First things first: we gotta wake up those yeast buddies! Take your large bowl, pour in that warm water, sugar, and yeast. Now, this is important: you can’t use this mixture right away. You have to wait about 5 to 10 minutes. If everything is happy, the top will look foamy, almost bubbly, like the head on a beer. If it’s not foamy, that means your water was too hot or your yeast is old—we have to start over if that happens! Once you see that foam, dump in your flour, salt, the yogurt, and that initial bit of olive oil. Mix it all up with a sturdy spoon until you just can’t stir it anymore and you have a shaggy, messy ball of dough.
Kneading and the Essential Rise Time for Soft Naan
Time to get your hands dirty! Turn that shaggy mess out onto a lightly floured surface. We need to knead this dough for a solid 5 to 7 minutes. Don’t worry about adding too much flour; this **Soft and Fluffy Naan** dough should feel a little tacky but it shouldn’t stick horribly to your hands when you pat it. Once it’s smooth and elastic, put it into a clean bowl you’ve lightly oiled. Cover it up and let it rest in a warm, draft-free spot for about 1 to 1.5 hours. You’re looking for it to visibly nearly double in size. That rise is what develops the structure for that perfect chew.
Skillet Naan Bread Cooking Technique (No Tandoor Needed)
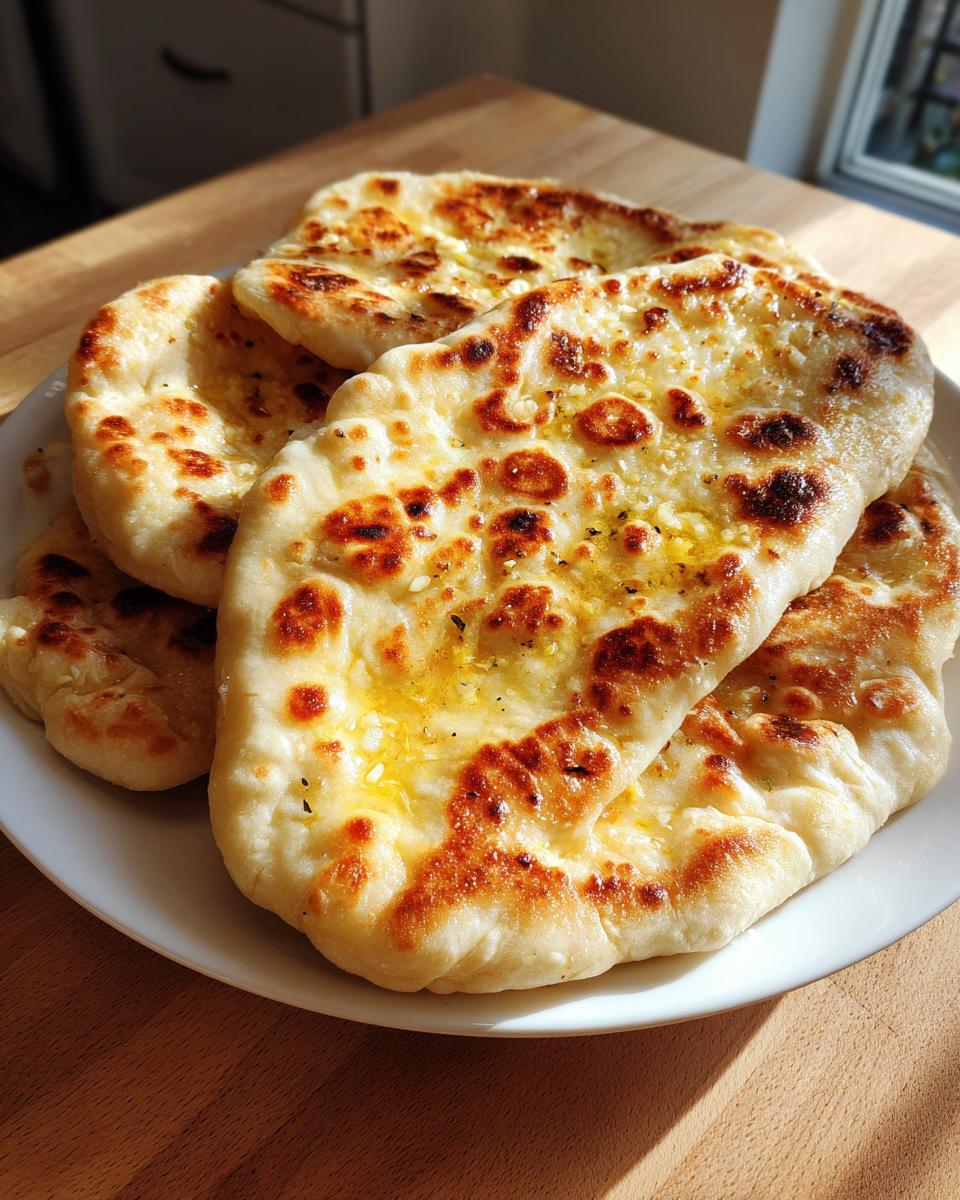
This is where we fake the tandoor! Grab your cast-iron skillet—seriously, use cast iron if you have it—and put it on medium-high heat. **It needs to be screaming hot before the dough even touches it.** Do *not* add any oil to the pan for this step! Once it’s hot, gently punch down your dough and divide it into 8 equal pieces. Roll each one out into that classic oval shape, maybe about a quarter-inch thick. Lay one piece on the bare, hot skillet. You’ll see bubbles form immediately! Cook it for just 1 to 2 minutes until the underside has nice golden spots. Then, flip it fast and cook the other side for about a minute more. This quick, intense heat ensures you get that lovely puff and the charred spots that define great **Skillet Naan Bread** when you’re making **No Tandoor Naan** at home.
If you’re looking for a totally different kind of flatbread experience, check out how I make a base for a quick Mexican pizza—sometimes you just need carbs under cheese, right?
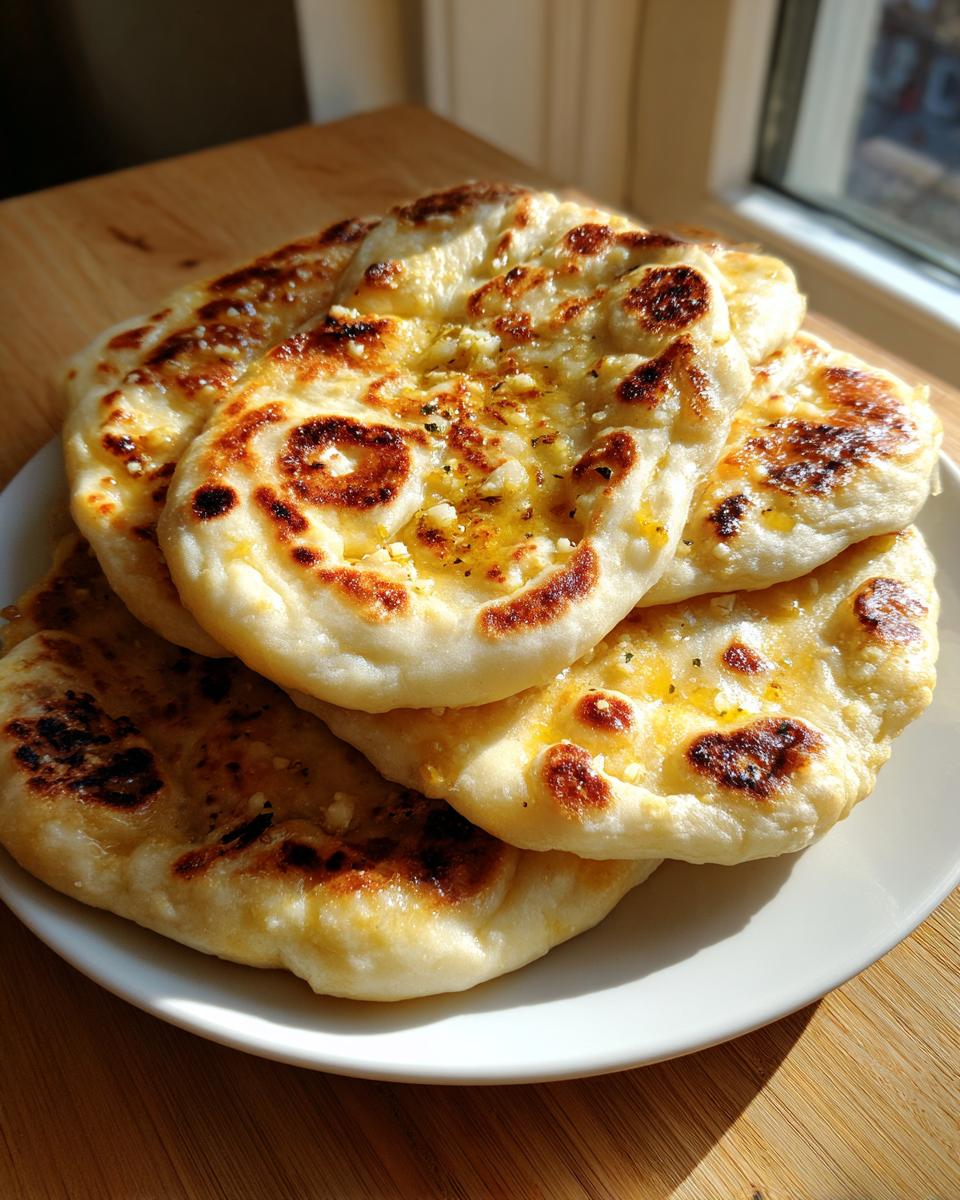
Transforming Your Naan Bread into Garlic Naan Recipe
You’ve got your beautiful, soft, pillowy flatbreads coming off the skillet, and they look incredible—but we are elevating these beauties right now! This step turns our excellent base dough into the famous **Garlic Naan Recipe** everyone raves about. If you skipped the initial prep, now is the time to quickly combine your melted butter and minced garlic in that little bowl we set aside. I promise, the smell alone when you brush this on is going to make your kitchen smell like the best Indian restaurant you’ve ever visited.
As each piece of naan comes off that hot pan, it needs a bath immediately. That retained heat is what helps the garlic flavor really integrate into the bread. Use a pastry brush—or even just the back of a spoon if you’re embracing the chaos like I sometimes do—and brush generously with that garlic butter mixture. Seriously, don’t be shy! This is what delivers that unbelievably rich, **buttery flavor** that makes this bread addictive. Layer them up on a serving platter, brushing each new piece as it comes off the heat, and watch how the butter soaks right in. This simple application guarantees you end up with the most satisfying **buttery naan bread** you’ve ever tasted. If you’re making a big meal, be sure to check out my favorite garlic herb roasted chicken to go alongside these!
Tips for Success Making Your Best Indian Flatbread
You have the recipe, you have the method, but sometimes a little extra insider knowledge is what gets you from good to the very best. When I was first trying to perfect this **Best Indian Flatbread**, I learned a few tricks that I just have to pass along. These aren’t in the main recipe steps because they are more about technique and trust—trusting your ingredients and trusting the process!
One thing I always emphasize is the role of moisture control. If you want that amazingly soft texture we keep talking about, pay attention to your yogurt. As noted in the ingredients section, I always grab the full-fat plain yogurt. The fat content in that yogurt is crucial; it really coats the flour particles and helps keep the final texture tender. Don’t be tempted by thin, watery substitutes if you can help it! That little bit of acidity and fat is what helps break down the gluten just enough before the yeast gets going.
Another thing that often trips people up is knowing when the dough is ready to shape after the rise. You should look for it to have doubled in size, yes, but also gently poke it with a finger. If the dent slowly springs back but doesn’t vanish completely, you’re golden. If it sinks immediately, it might have over-proofed, and we might lose some of that desired fluffiness. If it springs back instantly, give it another 15 minutes. It’s all about feeling the dough, that intuition that makes cooking fun!
And lastly, I know some of you are in a hurry, and you might look at that rise time and panic. If you are truly short on time, you *can* look into yeast-free versions, like the one my friend shared over at Veggie Desserts, but be warned—the texture will be completely different; denser, more like a quick bread or tortilla than classic naan. For this recipe, sticking with the yeast and the full rise time is the path to chewy, restaurant-quality results. If you need a break after all that kneading, my no-bake grasshopper pie is the perfect, stress-free dessert reward!
Serving Suggestions for Your Naan Bread
Now that you have this incredible, warm, soft **naan bread**, what are you going to do with it? Honestly, you could just sit here and eat it plain, brushed with garlic butter straight off the skillet, and I wouldn’t blame you! But this bread is made to be a star side dish, especially when paired with hearty, flavorful meals.
The first and most obvious destination for this bread is with any incredible curry you have simmering on the stove. Seriously, nothing beats using a piece of this chewy bread to soak up every last drop of sauce. Whether it’s a rich butter chicken, a vibrant vegetable korma, or even my favorite creamy white chicken lasagna soup (don’t knock it till you try it!), this naan is the perfect vehicle for flavor.
But don’t limit yourself to saucy dishes! This leftover naan bread, or even the fresh kind, makes the absolute best base for a quick lunch. Think about turning it into a **Naan Pizza Base Recipe**! Brush it lightly with some olive oil, spoon on some tomato sauce, sprinkle with mozzarella and whatever leftover veggies or grilled chicken you have lying around, and pop it under the broiler for three minutes. Boom! Instant, satisfying pizza.

And for dipping? Oh my goodness. This bread is phenomenal with classic hummus or baba ghanoush. If you’re looking for even more flavor inspiration, you can see how my friend Lola uses her garlic naan over at Cooking Lola—her ideas are wonderful!
Basically, think of this **naan for curry** as your new favorite side dish. It’s chewy, it’s buttery, and it disappears way too fast every time I make it!
Storage and Reheating Instructions for Naan Bread
I know you want to eat this entire batch of **naan bread** right now, but sometimes life happens, and you have leftovers. The good news is that this bread reheats beautifully and stays soft, provided you don’t let it dry out first! I always tell people that the freezer is your best friend when it comes to keeping flatbread fresh past day one.
So, here’s my big rule: Try your best to avoid the refrigerator. Seriously, don’t do it! Like most breads, the fridge dries them out and makes them stiff way faster than room temperature does. If you have leftovers that you plan to eat within about 24 hours, just store them wrapped snugly in foil or plastic wrap at room temperature. They stay surprisingly soft this way. If you are making a big batch to go with something like my easy crockpot potato soup later in the week, freezing is the way to go.
If you need to keep them longer than that, you’ll want to freeze them. Let the naan cool completely first—this is super important! Once cool, wrap individual pieces tightly in plastic wrap, then pop them into a freezer bag or an airtight container. They keep wonderfully for up to two months this way.
Reheating for That Fresh-From-the-Skillet Softness
The goal when reheating your **Homemade Naan Recipe** is to wake up that internal moisture and bring back that lovely softness without making the outside crispy like a cracker. You have two fantastic options here, and neither involves a microwave, which always makes bread chewy in a bad way!
Option 1: The Skillet Revival (My Favorite!). This works quickly and brings back some of those beautiful toasted spots. Get that same cast-iron skillet or heavy-bottomed pan back on the stove over medium heat—medium, not medium-high like when you cooked it. Toss the cold naan right onto the dry pan for maybe 30 seconds per side. You just want it to warm through and maybe puff up a little again. Brush immediately with a tiny bit of melted butter (no garlic needed this time!) and serve. It’s almost as good as fresh!
Option 2: Oven Warming. This is great if you have a bunch to reheat at once. Preheat your oven to about 350°F. Wrap the stack of naan tightly in aluminum foil—this traps the steam and keeps the bread moist. Heat them in the foil for about 8 to 10 minutes, depending on how many you have. Then, unwrap them and let them sit on the counter for a minute before serving. They come out perfectly warm and fluffy every time!
Frequently Asked Questions About Homemade Naan Recipe
Can I make this without yeast? I need a truly Quick Naan Recipe.
That is such a common question when I suggest rising times! If you’re in a true rush, you *can* make a yeast-free **Quick Naan Recipe**, but I have to be honest—it will completely change the texture. Yeast provides the lift and the slight tang and chew that makes this bread special. If you skip it, you end up with something closer to a simple **Yogurt Flatbread** or a quick pita, which is denser and won’t have the same lovely air pockets. If you need something fast, try skipping the yeast, but you must skip the rise time, too, or the dough will deflate! For the texture advertised here, the yeast rest is non-negotiable.
How thick should I roll the naan dough before cooking?
This is a key piece of the puzzle for achieving that perfect puff! You want your dough pieces rolled out to about 1/8 of an inch thick, but definitely no thicker than 1/4 of an inch. If they are too thick, the center won’t cook through before the outside burns, and you miss out on that characteristic light, airy texture. If they are too thin, you risk them becoming crispy crackers instead of soft and fluffy! Aim for uniformity in thickness across your ovals; this helps every piece cook evenly on the hot skillet.
What if I don’t have plain yogurt? Can I use something else?
I mentioned this briefly in the tips, but it’s worth repeating because yogurt is so important for tenderizing the dough! If you truly don’t have plain yogurt for your **Homemade Naan Recipe**, your next best bet is sour cream. It has a similar richness and acidity. If you are forced to use something else, you could try mixing a tablespoon of lemon juice into milk to simulate buttermilk, but honestly, the results won’t be quite as tender. Since we aren’t using a lot of ingredients, try to stick close to the yogurt or sour cream for the best flavor and texture contrast with the baking soda/yeast.
I got zero bubbles when I cooked my naan! What went wrong?
Oh, I hate when that happens! It’s usually one of two things, and both relate back to heat. First, was your skillet hot enough? I mean, really hot? If you are using cast iron, let it sit on medium-high heat for a full 5 minutes before you drop the dough on. Second, did you oil the pan? Remember, for that initial puff, we cook the naan on a completely dry pan—no oil added until *after* we flip it for the butter brushing. That immediate blast of dry heat is what turns the internal moisture to steam and creates those beautiful bursts!
Can I make this naan bread recipe ahead of time?
You absolutely can! I prefer to make the dough, let it do its full rise, and then punch it down and divide it into the 8 balls right away. I roll them out, place them on a parchment-lined baking sheet, cover them well, and let them rest in the fridge for up to 24 hours. This slow, cold proof actually deepens the flavor! When you are ready to eat, let them sit on the counter for 20 minutes to warm up slightly, then cook them exactly as directed. It’s a great way to prep ahead for dinner guests. If you’re looking for more make-ahead wonders, check out my recipe for easy banana pancakes—they freeze great too!
Estimated Nutritional Data for Naan Bread
Okay, now for the numbers! I always try to keep my baking simple, which means using ingredients I recognize, but I know you still want a general idea of what you’re eating when you enjoy this wonderful **naan bread**. Please remember that these figures are estimates based on the ingredients listed in the recipe. If you substitute yogurt brands or use a different type of flour, these values will shift slightly, so take this as a good guideline for enjoying your meal!
When we look at what’s in one piece of this soft, fluffy bread, here’s the breakdown. Since we brush it with that glorious garlic butter topping, the fat content is a little higher, which is where all that amazing flavor comes from!
Here is the estimated nutritional information breakdown:
- Serving Size: 1 piece
- Calories: 210
- Fat: 7g
- Saturated Fat: 4g
- Carbohydrates: 33g
- Sugar: 2g
- Protein: 6g
- Sodium: 350mg
See? Pretty reasonable for a treat that tastes this decadent! That little bit of sugar comes mostly from the tiny bit we use to wake up the yeast, and the fat content is primarily coming from the wonderful unsalted butter we brush on top. It’s truly the perfect **Best Side Dish Bread** to go alongside any curry without making you feel heavy. If you love knowing the details of homemade goodness, you might enjoy comparing these stats to my fluffy pancakes recipe—those are easy to adjust for lower fat, too!
PrintEasy Garlic Naan Bread: Soft, Buttery, and Made Without a Tandoor

Learn how to make soft, fluffy, and chewy homemade naan bread using only your stovetop skillet. This simple recipe delivers restaurant-quality results perfect for pairing with your favorite curries.
- Prep Time: 20 min
- Cook Time: 15 min
- Total Time: 1 hour 45 min
- Yield: 8 servings 1x
- Category: Side Dish
- Method: Skillet Cooking
- Cuisine: Indian
- Diet: Vegetarian
Ingredients
- 1 ½ cups warm water (about 105°F to 115°F)
- 1 tablespoon granulated sugar
- 2 ¼ teaspoons active dry yeast
- 3 cups all-purpose flour, plus more for dusting
- 1 teaspoon salt
- 2 tablespoons plain yogurt (full fat recommended)
- 2 tablespoons olive oil, plus more for brushing
- 4 tablespoons unsalted butter, melted (for brushing)
- 2 cloves garlic, minced (for garlic butter topping)
Instructions
- Activate the yeast: In a large bowl, combine the warm water, sugar, and yeast. Let this mixture sit for 5 to 10 minutes until it becomes foamy. This shows the yeast is active.
- Mix the dough: Add the flour, salt, yogurt, and 2 tablespoons of olive oil to the yeast mixture. Mix with a wooden spoon until a shaggy dough forms.
- Knead the dough: Turn the dough out onto a lightly floured surface. Knead for 5 to 7 minutes until the dough is smooth and elastic. It should be slightly tacky but not sticky.
- First rise: Lightly oil a clean bowl. Place the dough in the bowl, turning it once to coat. Cover the bowl with plastic wrap or a clean kitchen towel. Let the dough rise in a warm spot for 1 to 1.5 hours, or until it has doubled in size.
- Prepare the topping: While the dough rises, combine the melted butter and minced garlic in a small bowl. Set aside.
- Shape the naan: Gently punch down the risen dough. Divide it into 8 equal pieces. Roll each piece into an oval or teardrop shape, about 1/8 to 1/4 inch thick.
- Cook the naan: Heat a cast-iron skillet or heavy-bottomed pan over medium-high heat until it is very hot. Do not add oil to the pan.
- Cook each piece: Place one piece of naan dough onto the hot, dry skillet. Cook for 1 to 2 minutes until large bubbles form on the surface and the underside is lightly browned.
- Flip and finish: Flip the naan and cook the second side for about 1 minute until golden spots appear. If you see a large bubble, gently press it down with a spatula to help the bread cook evenly.
- Brush with garlic butter: Immediately transfer the cooked naan to a plate. Brush generously with the prepared garlic butter mixture.
- Serve warm: Repeat with the remaining dough pieces, stacking the cooked naan and brushing each layer with butter. Serve your soft, chewy naan immediately with curry or dips.
Notes
- For the softest texture, use full-fat plain yogurt. The acidity helps tenderize the dough.
- If you prefer plain naan, skip the garlic and use plain melted butter for brushing.
- If you do not have active dry yeast, you can substitute instant yeast, but you can skip the initial proofing step and mix it directly with the dry ingredients.
- To get those signature charred spots without a tandoor, make sure your skillet is hot before placing the dough down.
Nutrition
- Serving Size: 1 piece
- Calories: 210
- Sugar: 2
- Sodium: 350
- Fat: 7
- Saturated Fat: 4
- Unsaturated Fat: 3
- Trans Fat: 0
- Carbohydrates: 33
- Fiber: 1
- Protein: 6
- Cholesterol: 15