
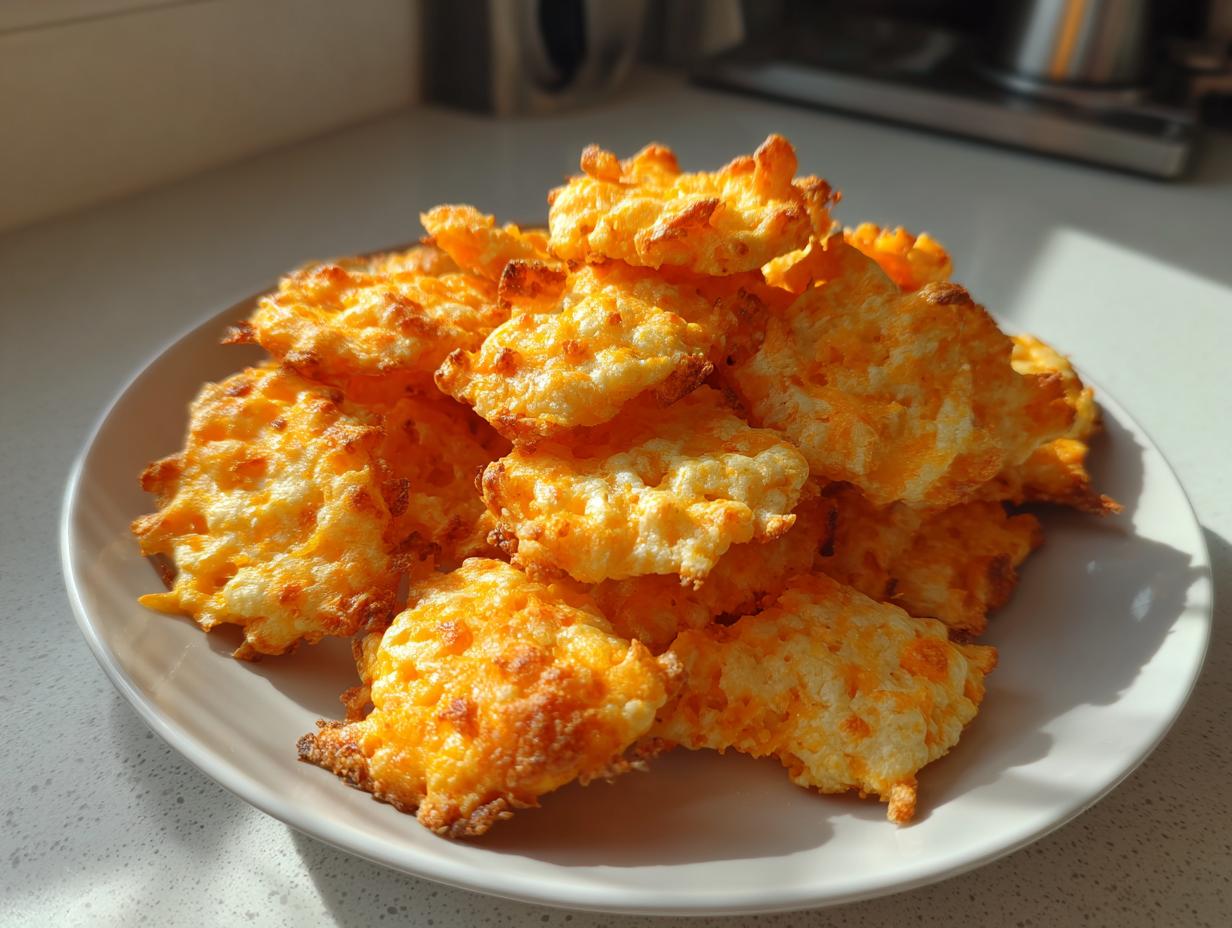
Oh, that afternoon slump hits, doesn’t it? You know the one—when all you want is that specific, addictive, salty crunch that only comes from a box. Well, I have wonderful news for you! We are officially banishing boring, overly processed snacks from our pantries. I’ve spent weeks testing and tweaking to bring you these Homemade Cheese Crackers that are, genuinely, better than store-bought. Yes, even better! And the best part? They only use four simple ingredients. That’s not a typo. You get incredible, sharp cheddar flavor and the most satisfying crunch you can imagine, all made right here in your home kitchen. It’s proof that extraordinary snacks don’t need complicated steps. Trust me, once you taste this simple savory cracker, you’ll never look back.

- Why These Homemade Cheese Crackers Beat the Box (The Taste This Plate Promise)
- The Simple Ingredients for Your 4 Ingredient Cheese Crackers
- Step-by-Step Instructions for Perfect Homemade Cheese Crackers
- Tips for Success When Making Cheese Crackers
- Making Variations of Your Simple Savory Crackers
- Serving Suggestions for Your Cheesy Homemade Snacks
- Storage and Reheating Instructions for Homemade Cheese Crackers
- Frequently Asked Questions About Making Cheese Crackers
- Estimated Nutritional Data for These Cheese Crackers
- Share Your Perfect Cheese Crackers Creation
Why These Homemade Cheese Crackers Beat the Box (The Taste This Plate Promise)
I know you love the convenience of the box, but hear me out—these Better Than Store Bought Crackers are on another level. When we started developing this Easy Cheese Cracker Recipe, my goal wasn’t just to match the original; it was to surpass it in flavor and texture. We want that perfect snack for your next party or just an afternoon craving!
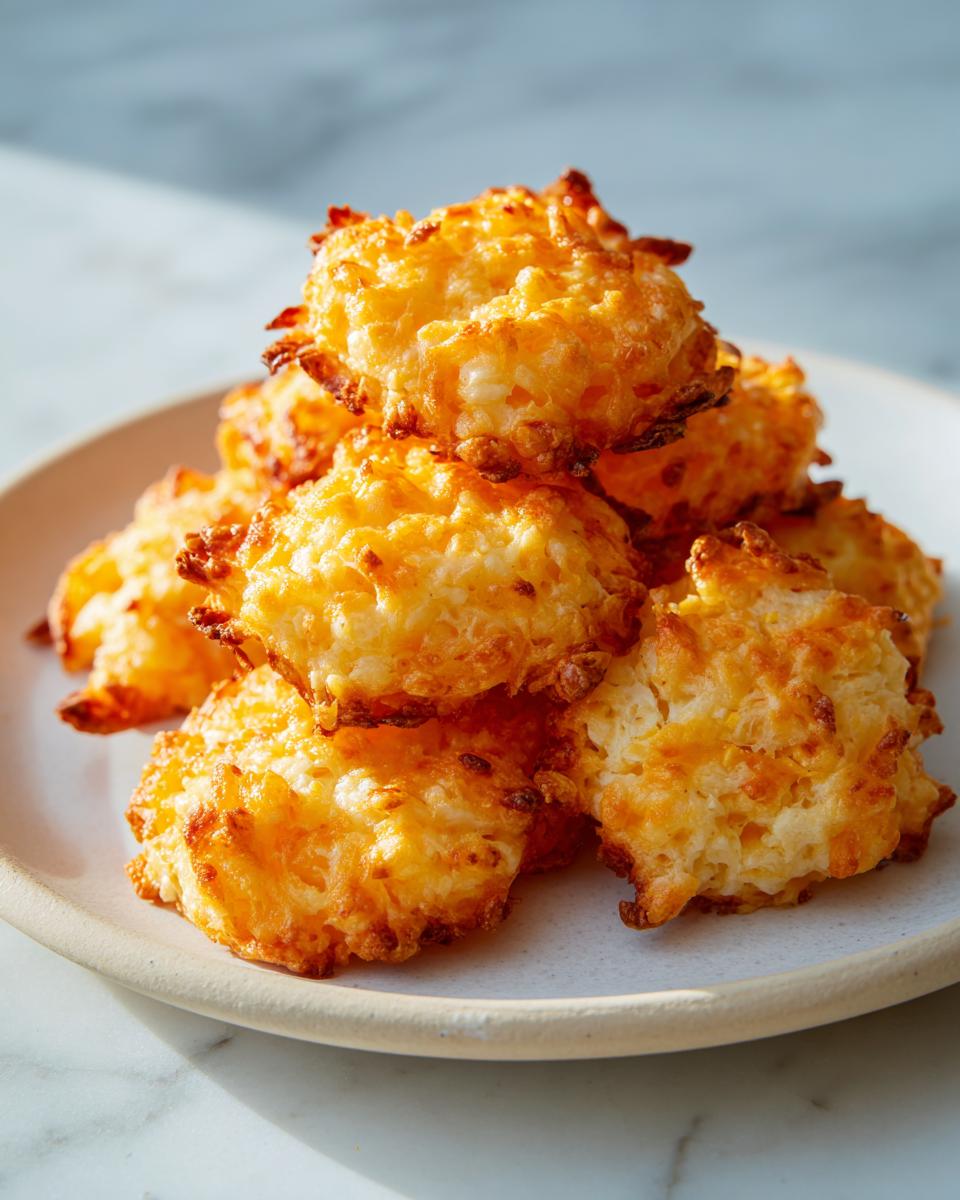
- Flavor Intensity: We use sharp cheddar, not mild! The cheese flavor actually sings in these little bites.
- Texture that Pops: Forget those slightly stale crackers! Ours provide a truly loud, satisfying Crunchy Savory Food experience.
- Ingredient Control: You know exactly what’s going into them, which is the best part about creating Cheesy Homemade Snacks.
Achieving the Ultimate Crispy Cheese Crackers Texture
Texture is everything when it comes to a great cracker, right? The secret here lies in two simple things: keeping your butter ice cold and rolling that dough baby thin! Cold butter creates little pockets of steam when it hits the oven, which gives us that airy lift and crunch. Seriously, for the best Crispy Cheese Crackers, you want to roll this dough until you can almost see your countertop through it. Thin equals crisp! That’s the key to amazing Homemade Cheese Crackers.
The Simple Ingredients for Your 4 Ingredient Cheese Crackers
When I say this is an Easy Cheese Cracker Recipe, I mean it! We are keeping things incredibly focused because, honestly, when you have four ingredients that taste this good together, why mess with it? This list is your ticket to making the best batch of cheese crackers you’ve ever had. You don’t need specialty shops, just a quick trip to the regular grocery store. This method proves that incredible flavor doesn’t require a mile-long ingredient list.
Here is exactly what you’ll need:
- 1 cup all-purpose flour
- 1/2 cup cold unsalted butter, cut into small pieces
- 1 cup sharp cheddar cheese, finely shredded
- 1/4 teaspoon salt
Ingredient Notes and Substitutions for Your Cheese Crackers
Let’s talk about that cheese for a second. You must use sharp cheddar! Mild cheese just melts away and you lose that big, bold, savory flavor we are aiming for. Also, please—please—shred your own cheese. Pre-shredded has anti-caking agents that keep it from melting smoothly into our dough. If you want to try adapting this for, say, a gluten-free household, you can swap the flour but expect the texture to be less sturdy. Since this is our base recipe, sticking to the all-purpose flour gives you that supreme crispiness we love!
Step-by-Step Instructions for Perfect Homemade Cheese Crackers
Now for the fun part! Turning those four simple ingredients into golden, addictive little squares. Watch how quickly this comes together. We want to treat the ingredients kindly here, especially the butter, because that’s what keeps our cheese crackers light and not dense bricks. Trust me, rushing this process is the quickest way to lose that crunchy texture we worked so hard to achieve in the mixing stage. For more ideas on pairing cheesy baked goods, check out my recipe for Ham and Cheese Sliders!
Mixing the Dough for Crispy Cheese Crackers
Grab a bowl and let’s mix the dry stuff first—that’s the flour and the salt. Now, for the cold butter! Use a pastry blender or just your very clean fingertips—I prefer my hands because I can feel the texture better. Work that butter into the flour until it looks like coarse crumbs, maybe some pea-sized bits remaining. Next, stir in all that shredded cheddar. Do NOT overmix here. When you start adding the ice water, add it slowly, maybe only two or three tablespoons at most, just until the dough barely holds together when you squeeze it. If it feels sticky or wet, you’ve gone too far!
Chilling and Rolling Your Cheese Cracker Dough
Once the dough is cooperating, form it into a flat disk—this helps it chill faster, which is important. Wrap it up tight and toss it in the fridge for at least 30 minutes. This resting time lets the gluten relax, making rolling so much easier. While that’s chilling, go ahead and preheat your oven to 375°F (190°C) and line those baking sheets with parchment paper. Parchment is non-negotiable for easy cleanup! After chilling, the real magic happens: roll that dough out thin. I’m talking about 1/16 of an inch thick if you want those Better Than Store Bought Crackers results. Thinner is crisper, remember?
Baking and Cooling Your Homemade Cheese Crackers
Cut your thin dough into whatever shapes make you happy—squares are classic, but circles are fun too! Before they hit the tray, take a fork and prick each cracker a couple of times. This stops them from puffing up too much. Space them out on the sheet and pop them into the hot oven for 10 to 14 minutes. Rotate those pans halfway through baking so you get even golden spots everywhere. They might look slightly soft when you pull them out, but don’t worry! The real secret to their crunch comes when they cool completely on the hot pan afterward. Seriously, let them sit before you try to sample them, or they’ll crumble into dust.
Tips for Success When Making Cheese Crackers
You’ve got your ingredients, you know the steps, but I want to share a few little secrets that take these Simple Savory Crackers from good to absolutely unforgettable. These are the small details that make all the difference between a standard snack and a tray of Cheesy Homemade Snacks that people fight over at parties. I learned these tricks through plenty of trial and error, so skip my messy learning curve!
- Always roll the dough as thin as you possibly can manage. If you want those airy, store-bought crunch levels, 1/16 inch is the sweet spot. If you prefer a slightly softer bite, you can go up to 1/8 inch, but you lose some of that snap.
- If you happen to be using a higher-moisture cheese (like freshly block-shredded Monterey Jack instead of sharp cheddar sometimes is), you might need just a tiny splash—I mean half a teaspoon—more flour in the dough to keep it workable before the chill.
- Don’t skip the chilling time! Seriously. Cold dough is what prevents the butter from melting into the flour before it bakes. That guarantees you get those beautiful, light pockets of air instead of flat bullets.
- For the best texture retention, make sure they are totally cooled on the baking sheet. They continue to firm up outside the oven, which seals in that amazing crunch.
Making Variations of Your Simple Savory Crackers
While these four ingredients create phenomenal cheese crackers right out of the gate, I love to see you all get creative! Customizing your Simple Savory Crackers is half the fun. You can elevate these significantly just by adding things to the dry mixture with the flour. Try a teaspoon of smoked paprika, a pinch of dried rosemary, or maybe some garlic powder for an extra kick. Feel free to swap the cheddar for Gruyère or Monterey Jack for a different melt factor.
I know many of you look for Low Carb Cheese Crackers or ways to use up that active starter. While this recipe is flour-based, if you are looking specifically for those super-popular Sourdough Discard Crackers, you’ll want a specialized recipe that swaps out the flour for cheese and almond flour. But for now, stick to adding spices to this version for amazing flavored cheese crackers!
Keto Cheese Crackers Recipe Adaptation Note
If you’re strictly counting carbs, you’ll definitely need a targeted Keto Cheese Crackers Recipe, because this recipe relies on wheat flour. It just won’t give you the results you want if you cut out all the carbs! I’ve seen some great methods out there that swap the flour entirely for almond flour and maybe an egg to bind everything. If you are dedicated to that very low-carb life, definitely search for a dedicated Keto version so you can enjoy that cheesy flavor guilt-free!
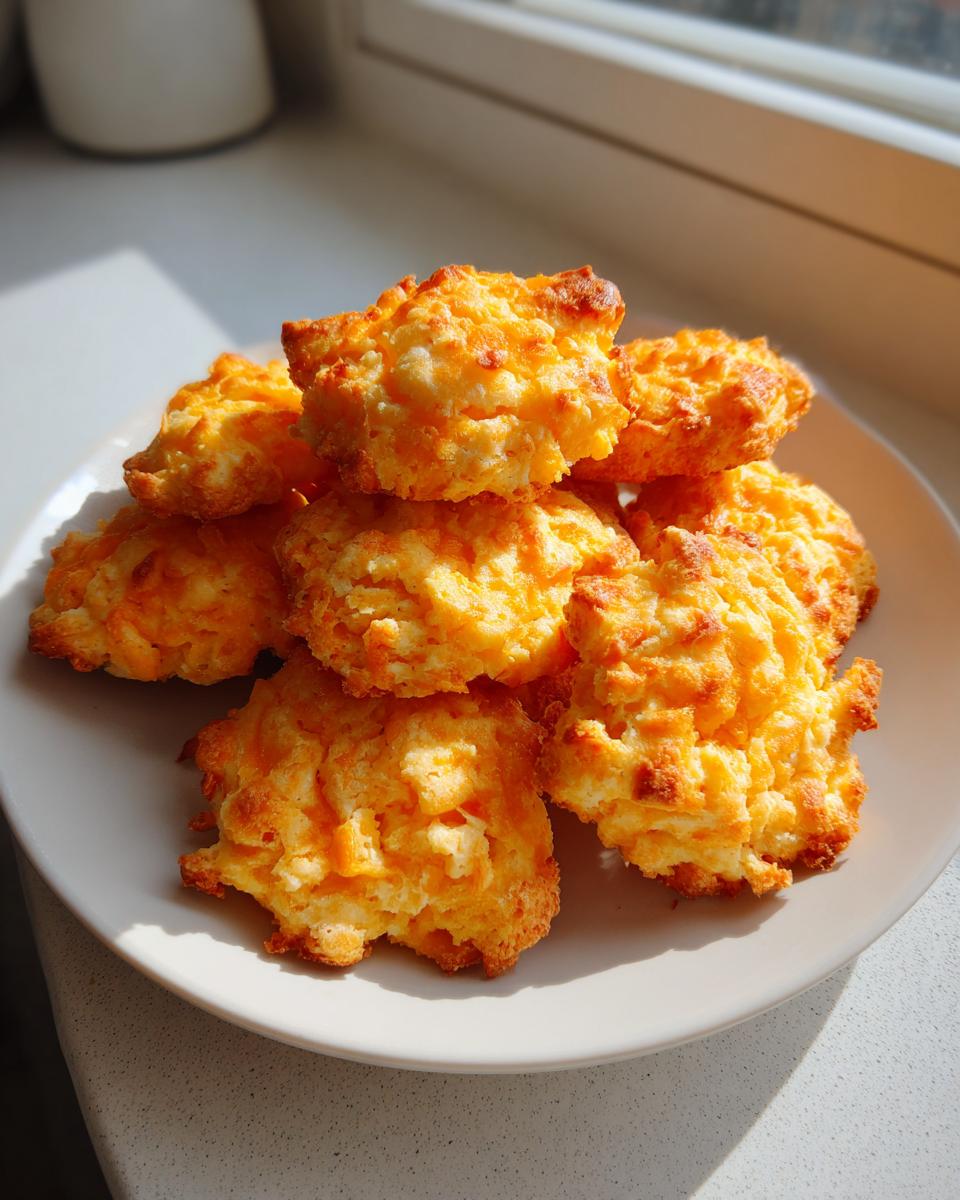
Serving Suggestions for Your Cheesy Homemade Snacks
Now that you have tins full of addictive, crunchy cheese crackers, the fun really begins! These are one of the most versatile snacks we’ve ever made. They are obviously fantastic eaten plain straight from the cooling rack, but think bigger! Pack them up in little containers—they are perfect Lunchbox Friendly Snacks that put the packaged stuff to shame. For grown-up gatherings, these make the absolute best appetizer crackers.
Try crushing a few up to use as a topping instead of breadcrumbs on a casserole, or serve them alongside my creamy Jalapeño Popper Dip. They are also wonderful crumbling over a fresh salad that needs an extra hit of saltiness, maybe even replacing croutons in a goat cheese salad like the one I make with Avocado Toast with Feta. Enjoy these delicious Cheesy Homemade Snacks!

Storage and Reheating Instructions for Homemade Cheese Crackers
These homemade cheese crackers are so good, I doubt you’ll have many leftovers! But if you do, don’t stress. The recipe notes mentioned they keep well for about a week, which is amazing for quick snack recipes.
Just store them in an airtight container at room temperature. That’s it! It’s important they are fully cooled before you seal the lid, or you’ll trap moisture.
If they accidentally sit out too long and lose a tiny bit of their spectacular crunch, don’t throw them out! Just pop them back on a baking sheet for 3 to 4 minutes at 350°F. They’ll crisp right back up perfectly.
Frequently Asked Questions About Making Cheese Crackers
I get so many questions about these little guys, and honestly, I love hearing how much everyone enjoys making these Simple Savory Crackers! Here are a few things I usually tell folks who are new to making their own cheese crackers at home.
What cheese works best for the sharpest flavor?
Hands down, you want sharp cheddar. I mention it in the notes, but I can’t stress this enough: sharp cheddar gives you that intense, salty, cheesy punch that makes these Better Than Store Bought Crackers actually superior. Avoid pre-shredded cheese if you can, as the additives—even though minor—can affect how smoothly the dough comes together.
Is the chilling time really necessary for these homemade cheese crackers?
Yes, absolutely! I know when you are whipping up a Quick Snack Recipe, chilling feels like an annoying extra step, but it’s vital for crispiness. If you skip chilling the dough for at least 30 minutes, the butter will be too soft when you roll it out. Soft butter melts instantly in the oven instead of making those little steam pockets, and you end up with something closer to a flat, dense cookie instead of a Crispy Cheese Cracker.
How thin should I roll the dough for the best crunch?
For that true, satisfying, loud crunch—the kind you want in your favorite stovetop mac and cheese topping!—aim for 1/16 of an inch. You should honestly be able to see the shadow of your counter through the dough when you hold it up. It feels fragile, but that thinness is what bakes up dry and perfectly crisp. If you like them a little softer, like a soft biscuit, go up to 1/8 inch, but I prefer the cracker snap!
Can I use these to make Keto Cheese Crackers?
That’s a great question, especially since so many people are looking for low-carb options! Since this specific recipe uses one cup of all-purpose flour, it’s not considered a Low Carb Cheese Crackers recipe. If you need strict keto crackers, you’ll need a recipe specifically formulated with almond flour or coconut flour, as swapping the flour here will dramatically change the texture due to the lack of gluten.
Estimated Nutritional Data for These Cheese Crackers
As a home cook who prioritizes transparency, I want you to know exactly what you’re sharing with your family and friends when you make these wonderful cheese crackers. Remember, because we are using real, high-quality cheddar and butter—not highly processed ingredients—the nutrition profile is quite different from what you find in the bright orange boxes at the store!
Please keep in mind that this is just an honest estimate based on the ingredients listed above. If you start adding extra spices or swapping cheese types, those numbers will shift slightly. This data is calculated based on a standard serving size of 5 crackers, which is usually plenty because they are so rich and satisfying!
Here is what you can generally expect from about five of our deliciously Crunchy Savory Food bites:
- Serving Size: 5 crackers
- Calories: About 85
- Fat: 6g (with 3.5g being Saturated Fat from that lovely butter and cheese)
- Carbohydrates: 5g
- Protein: 3g
- Sodium: 120mg
- Sugar: Practically none—just 0.1g!
I personally feel much better about serving these Homemade Cheese Crackers knowing we control the ingredients, even if the fat content comes from real butter and cheese. They really are the best! When you make a batch, stop by and let me know what you think of the flavor payoff!
Share Your Perfect Cheese Crackers Creation
Well, that’s it! You’ve gone from zero to having a stack of the best homemade cheese crackers you’ve ever had. Isn’t that just the best feeling? Taking simple things like flour, butter, and cheese and turning them into something truly special for your family is why I started sharing recipes here at Taste This Plate. It truly is joyful baking, not stressful cooking!
I absolutely love hearing from you all when you try a recipe. Did you get that super-thin crisp you were hoping for? Did your kids devour the whole batch before you could put them in the lunchbox? Please take a minute to rate this recipe right below and leave a little note in the comments. Telling me what worked for you—or even what experiment you tried with an added herb—helps me and others feel confident about jumping into the kitchen.
Don’t forget, we are all learning together; you can always find out more about my philosophy on simple home cooking over on my About Page. Happy crunching, and I can’t wait to see your pictures of these incredible cheese crackers!
PrintEasy 4-Ingredient Crispy Cheddar Cheese Crackers (Better Than Store-Bought)

Make addictive, crispy homemade cheese crackers using just four simple ingredients. This easy recipe delivers cheesy flavor that surpasses anything you buy in a box, perfect for snacks or appetizers.
- Prep Time: 20 min
- Cook Time: 14 min
- Total Time: 64 min
- Yield: About 4 dozen 1x
- Category: Snack
- Method: Baking
- Cuisine: American
- Diet: Vegetarian
Ingredients
- 1 cup all-purpose flour
- 1/2 cup cold unsalted butter, cut into small pieces
- 1 cup sharp cheddar cheese, finely shredded
- 1/4 teaspoon salt
Instructions
- Combine the flour and salt in a medium bowl.
- Cut the cold butter into the flour mixture using a pastry blender or your fingertips until the mixture resembles coarse crumbs.
- Stir in the shredded cheddar cheese until it is evenly distributed.
- Add 2 to 3 tablespoons of ice water, one tablespoon at a time, mixing until the dough just comes together. Do not overmix.
- Form the dough into a disk, wrap it in plastic wrap, and chill it in the refrigerator for at least 30 minutes.
- Preheat your oven to 375°F (190°C). Line two baking sheets with parchment paper.
- On a lightly floured surface, roll the dough out very thinly, aiming for about 1/16 inch thickness for maximum crispiness.
- Use a small cookie cutter or a knife to cut the dough into small squares or desired shapes. Prick each cracker a few times with a fork.
- Transfer the crackers to the prepared baking sheets, leaving a small space between them.
- Bake for 10 to 14 minutes, rotating the sheets halfway through, until the crackers are golden brown and crisp.
- Let the homemade cheese crackers cool completely on the baking sheets; they will crisp up further as they cool.
Notes
- For extra flavor, substitute half the flour with almond flour for a low-carb option, though texture will change slightly.
- Roll the dough as thinly as you can manage; this step is key to achieving that satisfying crunch better than store-bought versions.
- If you want a slightly softer cracker, roll the dough to 1/8 inch thickness.
- Store leftover crispy cheese crackers in an airtight container at room temperature for up to one week.
Nutrition
- Serving Size: 5 crackers
- Calories: 85
- Sugar: 0.1
- Sodium: 120
- Fat: 6
- Saturated Fat: 3.5
- Unsaturated Fat: 2.5
- Trans Fat: 0
- Carbohydrates: 5
- Fiber: 0.3
- Protein: 3
- Cholesterol: 15