

Oh, my dear friend, if you’ve ever stood watching those gorgeous chocolate croissants behind a glass case at a fancy French bakery, I know exactly what you’re thinking: “I could never make that at home.” Well, I’m here to tell you that you absolutely can! Forget about the stressful, multi-day process of traditional lamination. We’re taking the easy route today, the way I rely on when I want something stunning without dedicating my entire weekend to the kitchen.
This is my go-to shortcut because it delivers that incredible flaky, buttery texture that screams bakery quality, but uses your freezer’s best friend: store-bought puff pastry. This recipe proves you don’t need to be a professional chef to create a truly memorable French breakfast pastry. Trust me, this turns ordinary mornings into something special, and it’s shockingly fast. If you’re looking for decadent treats without the fuss, you are definitely in the right place. You can see how I sometimes simplify other breakfast classics, like this stuffed French toast, when time is tight!
- Why You Will Love This Quick Chocolate Croissant Recipe
- Ingredients for Your Easy Chocolate Croissants
- Equipment Needed for Puff Pastry Croissants
- How to Make Chocolate Croissants (The Puff Pastry Shortcut)
- Tips for the Best Chocolate Croissant Recipe Results
- Variations: Beyond the Classic Chocolate Croissant
- Serving Suggestions for French Breakfast Pastries
- Storage and Reheating for Flaky Pastry Recipe Leftovers
- Frequently Asked Questions About Making Homemade Pain Au Chocolat
- Sharing Your Chocolate Croissant Creations
Why You Will Love This Quick Chocolate Croissant Recipe
I developed this method specifically because I wanted that flaky pastry satisfaction without spending eight hours chilling dough! It’s all about getting that amazing payoff for minimal effort. You’ll love how quickly these come together, making them perfect for those mornings when you want to spoil the family.
- You get those impossibly light, flaky layers typically reserved for professional bakers.
- They bake up beautifully golden and buttery in less than 40 minutes, start to finish.
- The warm, melted chocolate center is pure bliss every single time.
Achieving Bakery Style Croissants At Home Fast
The secret here is definitely the shortcut, bless store-bought puff pastry! It has all the necessary butter layers already folded in. Pop these babies into a 400°F oven, and watch them puff up dramatically. It’s high heat that gives us that fantastic lift and crisp exterior. Honestly, it’s hard to beat this speed when you’re craving French breakfast pastries.
Perfect for Weekend Brunch Ideas
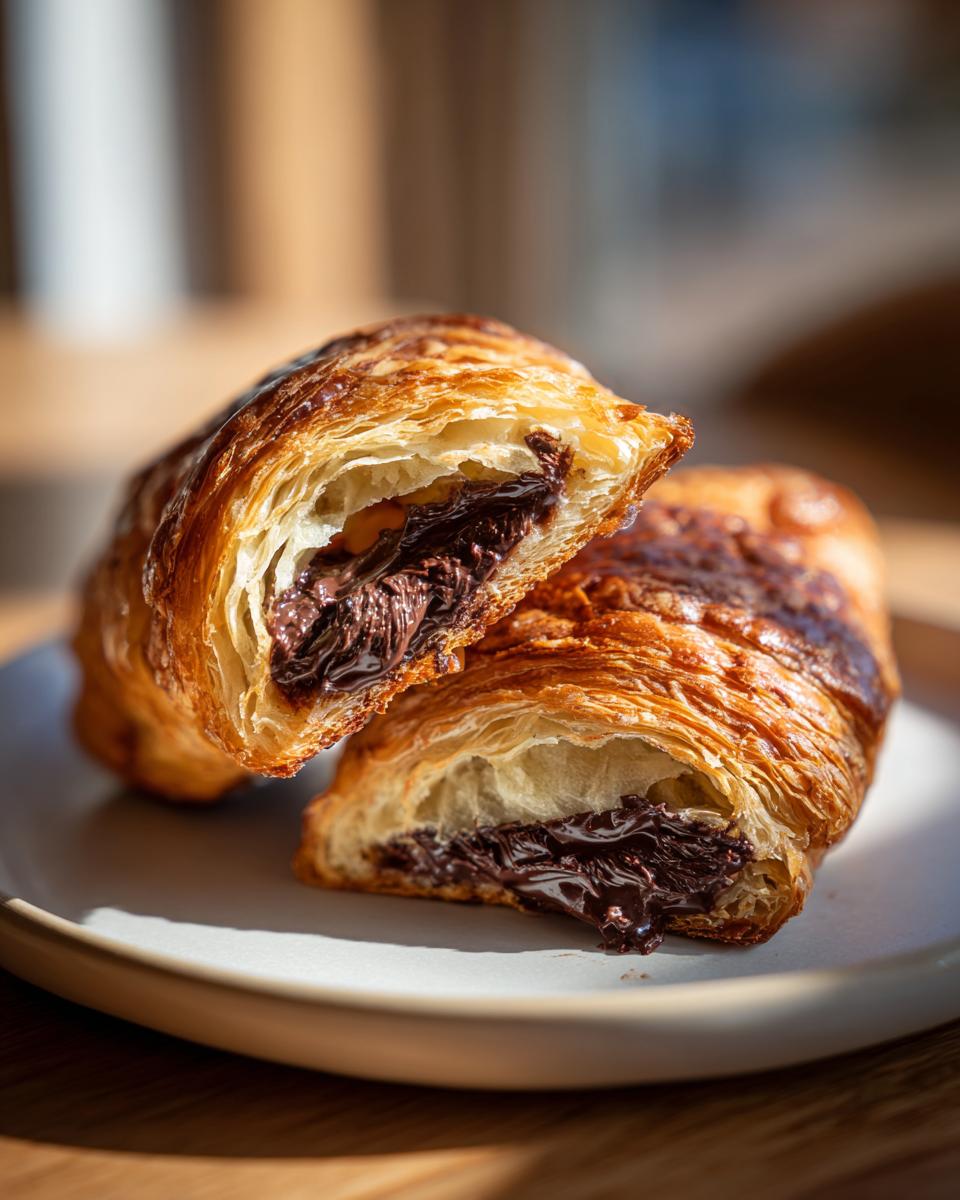
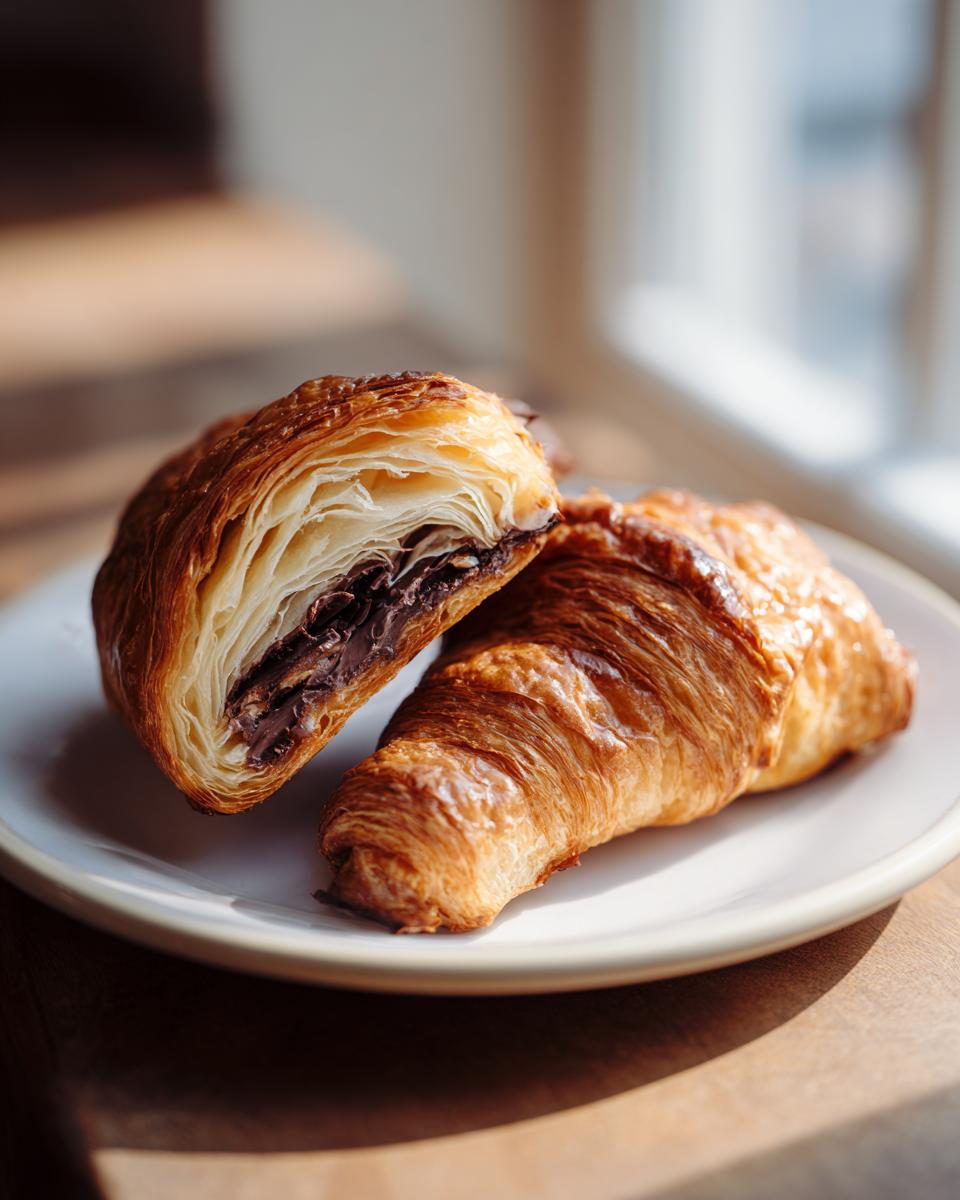
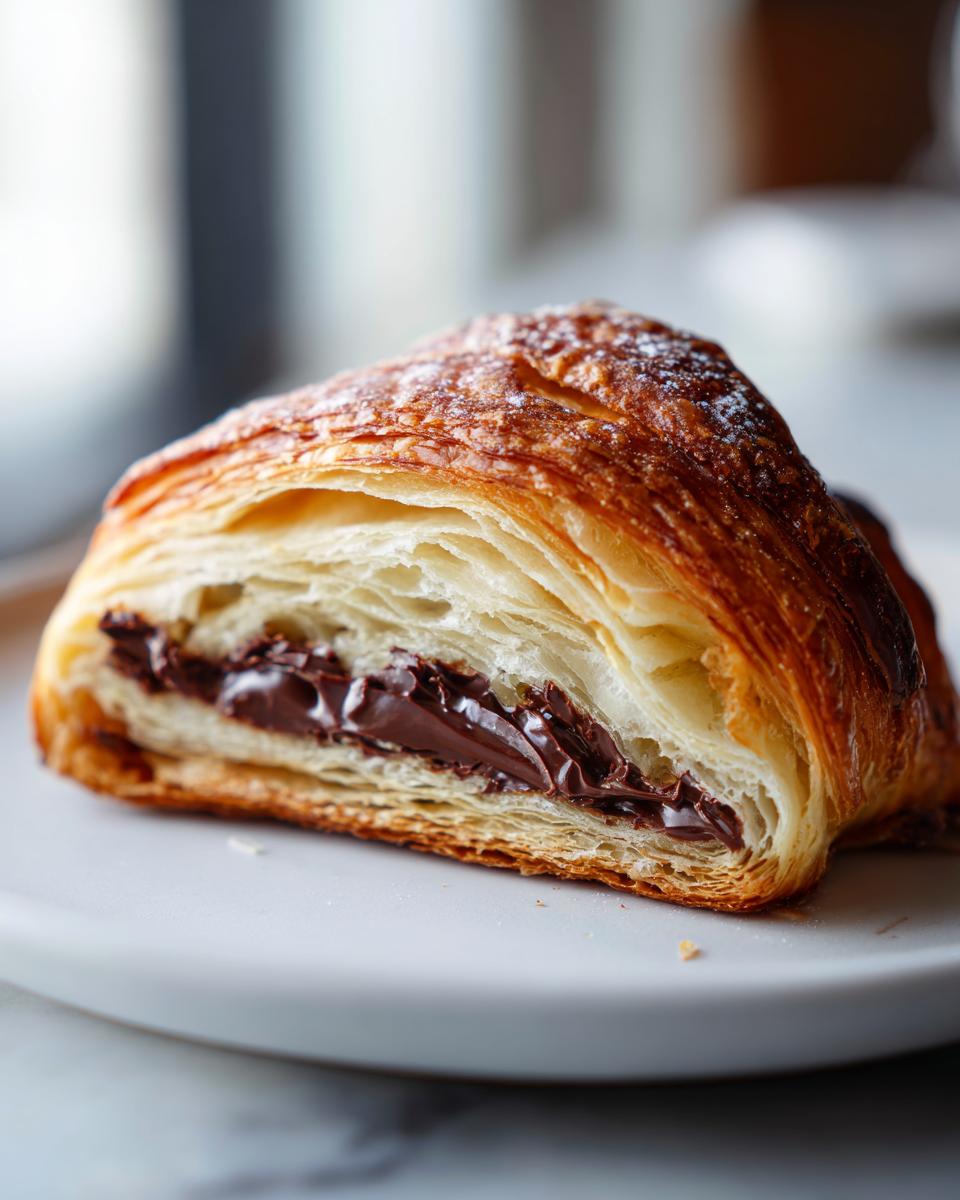
If you need an impressive centerpiece for your weekend brunch ideas, these are it. They look like you spent all morning fussing over them! The richness of the chocolate filling makes them feel like a real treat, not just a quick snack. Just imagine slicing one open—that’s the moment you know you nailed it!
Ingredients for Your Easy Chocolate Croissants
Okay, let’s talk about what you need. Since this recipe is all about speed, we are relying on one main star from the freezer aisle. Don’t worry, I’ll make sure you know exactly how to handle it! Getting the ingredients right, even the shortcuts, is key to getting those magnificent flaky layers.
You’ll need:
- One package of frozen puff pastry—and listen to me, you must thaw it correctly. I usually leave it in the fridge overnight; if you rush it on the counter, the butter melts, and we lose our flakiness!
- About 4 ounces of good quality bittersweet or semi-sweet chocolate. I insist you cut this into sticks or small batons, not chocolate chips. The sticks melt perfectly within the layers when you roll them up.
- One large egg mixed with one tablespoon of water for the egg wash. This gives us that professional, shiny brown top.
- Optional: A little granulated sugar to sprinkle on top for extra crunch, but only if you like it sweet!
If you’re looking for other easy baked goods that use common pantry items, check out my oatmeal muffin recipe. It’s another quick winner!
Equipment Needed for Puff Pastry Croissants
You don’t need any fancy pastry equipment for this trick, which is why I love it so much! We are keeping things simple, using standard items you definitely already have sitting in a drawer.
Here is what you’ll want on hand before you start rolling your dough:
- Two large baking sheets. Since we’re using store-bought pastry, they puff up quite a bit, so give them space! You don’t want them touching in the oven.
- Parchment paper. This is non-negotiable, folks. It keeps the butter from sticking to the pan when it melts, which it absolutely will.
- A rolling pin, even if you’re just gently flattening the pastry square a bit more.
- A sharp knife or pizza cutter for slicing the dough neatly into those long strips.
- A small bowl and a pastry brush (or even just the back of a spoon!) for applying that beautiful egg wash on top.
That’s it! No specialized cutters or anything intimidating required whatsoever. Just good, honest kitchen tools!
How to Make Chocolate Croissants (The Puff Pastry Shortcut)
Alright, this is where the magic happens! I know making **chocolate croissants** sounds way fancier than it is, especially when we’re using that amazing shortcut pastry. The entire process moves pretty fast once the pastry is thawed, so you want to have everything ready to go. Remember, the colder the environment, the better the puff—the butter in the dough needs to stay solid for those flaky layers!
Preparing the Puff Pastry and Chocolate
First things first: thawing. If you haven’t already, make sure your puff pastry is thawed correctly. Usually, about 40 minutes on the counter is enough, but it should still feel cool to the touch, not greasy or floppy. Preheat your oven right now to 400°F (200°C). Line two baking sheets with parchment paper—you’ll thank me later when cleanup is a breeze!
Gently unfold your pastry sheets. If they are squares, give them a tiny roll just to make them a bit more rectangular. Now, take your sharp knife and slice each sheet lengthwise into three even strips. You should end up with six long pieces perfect for rolling.
Rolling and Sealing Your Buttery Chocolate Pastries
Here is the technique that makes these feel like they came from a French bakery! Take one piece of your chocolate baton and place it right near one end of a strip. Roll the pastry over that chocolate one full turn. Now, place your next piece of chocolate near the new edge, and roll again. Keep repeating this process—chocolate, roll, chocolate, roll—until you’ve made about three turns on that strip. This ensures you have chocolate trapped inside every layer. If you want to see exactly how other people master this delicate rolling technique, check out this great resource on bakery style croissants at home!
Lay your finished **buttery chocolate pastries** seam-side down on the parchment paper, giving them plenty of room to expand sideways. Then, quickly whisk that egg and water together for your wash. Brush the tops and sides generously. If you like a bakery-style shine, dust lightly with sugar. Don’t skip the wash, folks; it makes all the difference!
Baking for Flaky Perfection
Into the oven they go! Bake these beauties at 400°F for about 15 to 20 minutes. My kitchen smells incredible when these are in here! You aren’t just looking for set dough; you are looking for deeply golden brown, beautifully puffed layers. If they look pale, give them an extra two minutes—we want color for crispness.
Once they are perfect, take them out and let them sit on that baking sheet for just five minutes before moving them to a rack. If you try to move them too soon, they might deflate a bit. For the absolute best flavor, serve these warm. If you can’t wait, grab a cup of my creamy hot chocolate to dip them in while you wait for them to cool slightly!
Tips for the Best Chocolate Croissant Recipe Results
We’ve got the shortcut down, but now let’s talk about those little details that take these from “pretty good” to “I bought these at a fancy patisserie.” When you’re relying on pre-made dough, those extra touches really matter to maximize your flakiness and flavor. These tips are the difference between a decent pastry and one that truly wows your family.
Remember, even though this is an easy chocolate croissants recipe, putting in a moment of thought on the quality of your filling pays off huge dividends! And if you’re looking for other ways to use shortcuts in baking, check out the clever approach on this other quick recipe!
Chocolate Selection and Quality
Please, please do not use standard chocolate chips here. They are designed to hold their shape, and we want the opposite—we want glorious, melty pools of chocolate! I always use bittersweet chocolate sticks because they hold their shape better than chips during the initial rolling, ensuring a rich pocket of melted chocolate in every single bite. If you can’t find sticks, chop a high-quality bar; it’s worth the extra minute of prep.
The Role of the Egg Wash
You can absolutely skip the egg wash if you’re in a huge rush, but I wouldn’t recommend it for a special weekend treat. That simple mixture of one egg and a splash of water brushed over the top is what gives you that beautiful, deep golden sheen you see in the bakery. It traps in moisture and creates that irresistible crust. If you’re into perfecting beautiful toppings, you might also enjoy my recipe for fluffy vanilla buttercream—it’s all about the finish!
Variations: Beyond the Classic Chocolate Croissant
While these simple chocolate croissants are fantastic just as they are, sometimes a batch lasts longer than I expect, or maybe I just want to turn this into a full-on, cozy family meal. It’s fun to play with what you’ve got! The beauty of using puff pastry is how adaptable it is to other baking formats.
If you happen to have a few leftover pastries, or if you just want to turn this into a casserole for a crowd—which is always a good idea, right?—you can transform them easily. For more indulgent sweet ideas, you absolutely have to check out my chocolate pecan pie, though that one takes a bit more commitment!
Creating a Chocolate Croissant Breakfast Bake
This is my favorite way to use up any extra pastry! You just cut the baked croissants (or even raw ones if you adjust your liquid amount) into chunks. Toss those chunks right into a buttered casserole dish. Then, pour over a simple custard base—think whisked eggs, milk, a little vanilla, and sugar.
It bakes up into this creamy, custardy, chocolate-laced bread pudding situation. It smells incredible, and it’s the definition of an indulgent breakfast treat. It’s surprisingly simple, and everyone thinks you spent hours preparing a special brunch when really, you just repurposed yesterday’s pastries!
Serving Suggestions for French Breakfast Pastries
Now that you have these glorious, flaky chocolate croissants cooling, what do you serve them with? You can’t just eat a masterpiece like this alone! Since these are rich and buttery chocolate pastries, I like to keep the sides light and complementary.
A hot cup of strong coffee or a creamy latte is absolutely essential—the slight bitterness cuts through the richness perfectly. If this is for a proper brunch, bringing in some fresh, brightly colored fruit like raspberries or sliced oranges adds a nice visual pop and a needed acidic element. Or, if you want to lean into the indulgence, whip up my favorite classic peach Bellini!
Honestly, though? Sometimes, pulled straight from the oven, they just need nothing at all. That’s the sign of a truly great quick croissant recipe!
Storage and Reheating for Flaky Pastry Recipe Leftovers
If, by some miracle, you have any of these incredible chocolate croissants left over the next day, we need to treat them gently. Puff pastry is delicate, and we want to restore that glorious crispness we worked so hard for!
Do not, under any circumstances, try to microwave these. I repeat: the microwave turns flaky pastry into sad, soft rubber! If you must reheat them quickly, the toaster oven is your best friend. Set it to about 325°F and warm them for just 3 to 4 minutes until they are gently warmed through and you hear that little bit of crackle return to the layers.
For longer storage, keep them in an airtight container at room temperature for up to two days. If you’re freezing them, wrap each one tightly in plastic wrap first, then put them in a freezer bag. That way, they won’t absorb any freezer odors. When you’re ready, thaw on the counter and then pop them into the oven!
Frequently Asked Questions About Making Homemade Pain Au Chocolat
I know when you’re trying a quick croissant recipe for the first time, all sorts of questions pop up! It’s totally normal. I’ve gathered the ones I get asked most often about bypassing the lamination process to give you the confidence to make these easy chocolate croissants perfectly every time. We want that bakery result without any kitchen stress!
Can I use refrigerated crescent roll dough instead of frozen puff pastry for this chocolate croissant recipe?
This is a common question! Yes, you absolutely can if you are in a true, five-alarm baking emergency! However, I need to be upfront: the results won’t be the same. Refrigerated dough is usually very thin and has fewer fat layers than true frozen puff pastry. You’ll get a soft, buttery, chocolate-filled roll, which is delicious, don’t get me wrong! But you won’t get that high, airy, flaky shatter that we associate with a classic homemade Pain Au Chocolat. If you use it, know that it’s a wonderful shortcut, just not the *flakiest* shortcut.
Why did my easy chocolate croissants come out flat?
Oh, this one hurts the most! Flat croissants usually mean the butter in your puff pastry got too warm before or during baking. Puff pastry needs those distinct layers of cold butter to create steam and puff up dramatically in the oven! The two main culprits are: 1) You let your thawed pastry sit out too long, turning it greasy instead of cool and pliable; or 2) You didn’t preheat your oven long enough. The initial blast of high heat—we use 400°F—is what sets those layers instantly. Make sure your oven is fully heated before those beauties go in!
What is the best way to get that deep golden color on my puff pastry croissants?
We talked about the egg wash earlier, and this is where it earns its keep! For that real, deep golden color that makes your puff pastry croissants look like they came straight from Paris, make sure your egg wash is thorough. Don’t just dab the very top middle; brush all exposed dough gently but completely.
If you want an even deeper, richer mahogany color, try adding just a tiny dash of milk or even a pinch of sugar *into* your egg wash. The sugar caramelizes beautifully. I sometimes even go back in about halfway through baking (when they are already puffed up) for a very light second coat of wash. It gives them an extra level of professional shine that I just adore. It’s worth the extra 30 seconds!

If you’re enjoying exploring these easier recipes that make your regular morning routine a little brighter, I think you’ll love the other tips in my general breakfast and brunch category!
Sharing Your Chocolate Croissant Creations
Honestly, for me, the best part of sharing a recipe like this isn’t the baking—it’s seeing the joy when someone else makes it! It connects us, you know? That’s the whole point of gathering around the table, whether it’s just me and my immediate family or our big extended group.
If you whipped up these chocolate croissants and they made your morning extra special, I would absolutely love to hear about it! Please leave a rating down below—it helps other home cooks know if this easy shortcut is right for them. And if you snapped a picture of those golden, flaky layers, tag me! You can always send your kitchen snapshots right through my contact page, and maybe I’ll feature your amazing bakery-style pastry on my socials next week!
PrintEasy Chocolate Croissants Using Store-Bought Puff Pastry

Create bakery-style chocolate croissants at home without the fuss of making dough from scratch. This simple recipe uses store-bought puff pastry to achieve flaky, buttery layers filled with rich chocolate. It is perfect for an indulgent weekend brunch or a quick, impressive breakfast treat.
- Prep Time: 15 min
- Cook Time: 20 min
- Total Time: 35 min
- Yield: 6 servings 1x
- Category: Breakfast
- Method: Baking
- Cuisine: French
- Diet: Vegetarian
Ingredients
- 1 package (14.1 ounces) frozen puff pastry, thawed
- 4 ounces bittersweet or semi-sweet chocolate, cut into sticks (or use chocolate batons)
- 1 large egg
- 1 tablespoon water
- 1 tablespoon granulated sugar (optional, for sprinkling)
Instructions
- Thaw the puff pastry according to package directions, usually in the refrigerator overnight or on the counter for about 40 minutes. Preheat your oven to 400°F (200°C). Line two baking sheets with parchment paper.
- Unfold the thawed pastry sheets onto a lightly floured surface. If the pastry is square, gently roll it into a slightly larger rectangle. Cut each sheet lengthwise into three equal strips, giving you six long strips total.
- Place one piece of chocolate near one end of a strip. Roll the pastry over the chocolate one time, then place a second piece of chocolate near the new edge, and continue rolling until you reach the end of the strip. You should have about three rolls per croissant, with chocolate inside each layer.
- Place the rolled croissants seam-side down on the prepared baking sheets, spacing them a few inches apart.
- In a small bowl, whisk together the egg and water to create an egg wash. Brush the tops and sides of each chocolate croissant lightly with the egg wash. If you like a slightly crisp, sweet top, sprinkle lightly with granulated sugar.
- Bake for 15 to 20 minutes, or until the croissants are puffed, golden brown, and flaky.
- Remove from the oven and let them cool on the baking sheet for 5 minutes before moving them to a wire rack. Serve warm for the best texture.
Notes
- Using high-quality chocolate makes a noticeable difference in the final flavor of these buttery chocolate pastries.
- If you want a quicker prep time, you can skip the egg wash, but the wash helps achieve that deep, golden bakery-style finish.
- For a chocolate croissant breakfast bake, you can cut the croissants into chunks and toss them with custard ingredients before baking in a casserole dish.
Nutrition
- Serving Size: 1 croissant
- Calories: 350
- Sugar: 12g
- Sodium: 280mg
- Fat: 22g
- Saturated Fat: 13g
- Unsaturated Fat: 9g
- Trans Fat: 0.5g
- Carbohydrates: 32g
- Fiber: 2g
- Protein: 5g
- Cholesterol: 50mg