
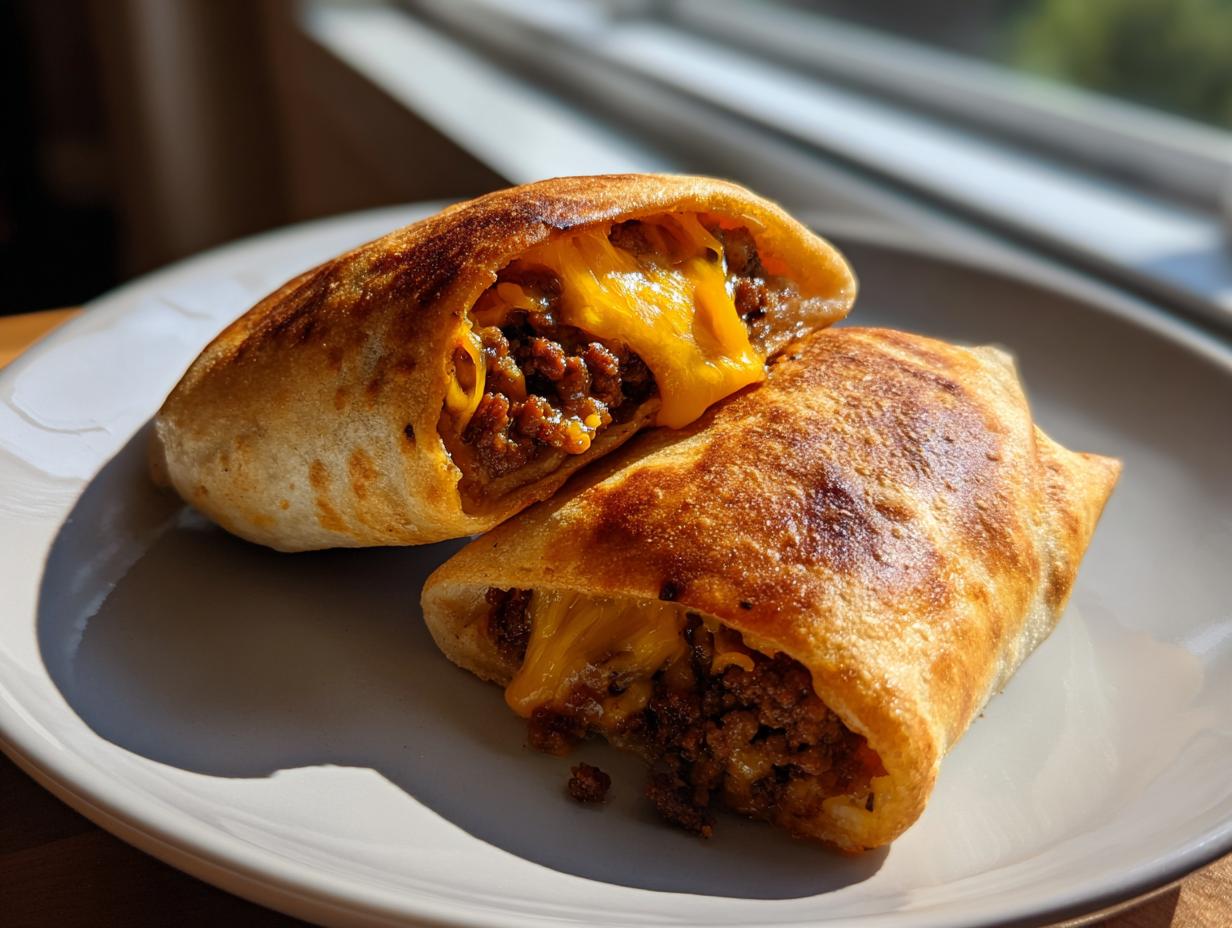
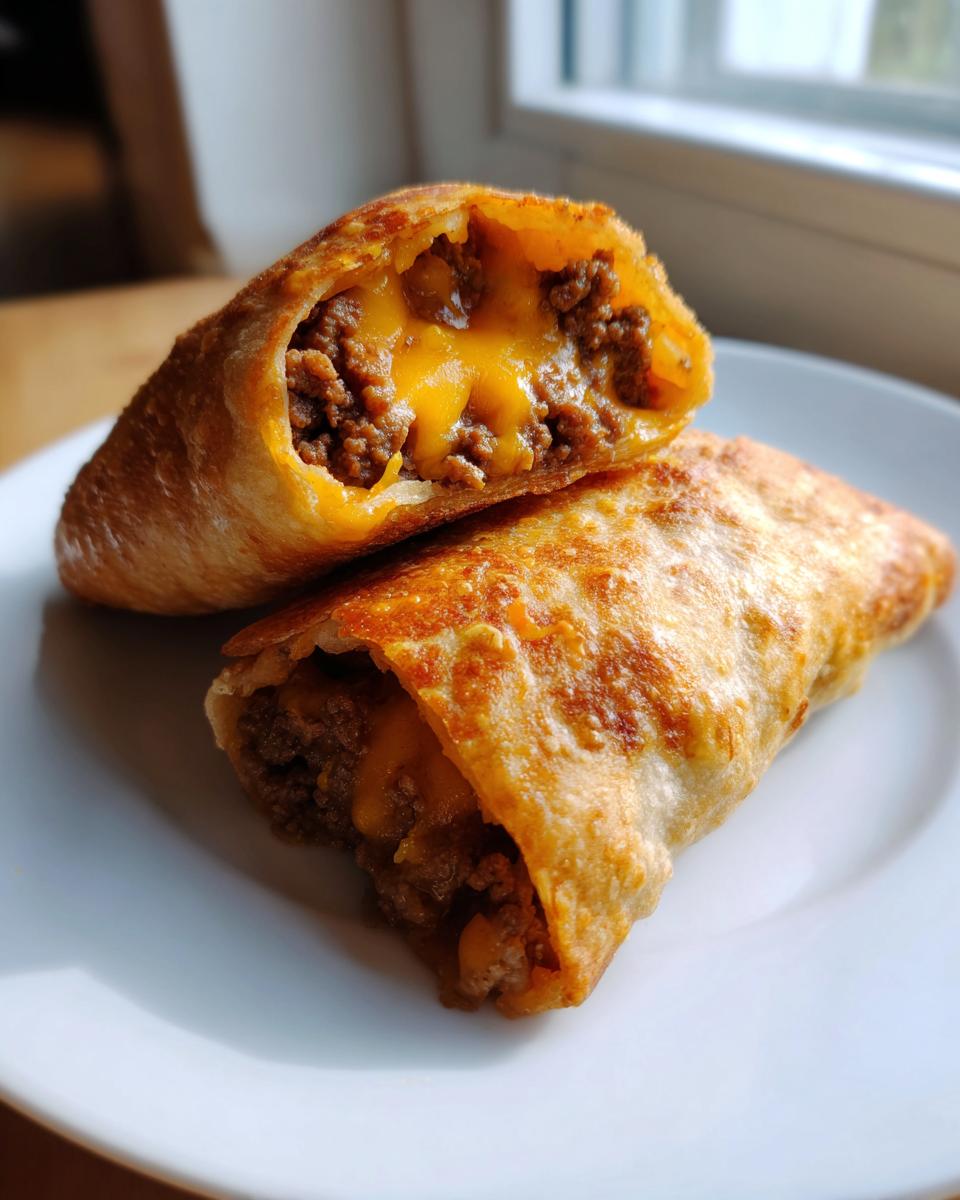
Sometimes you just need that deep comfort food hug, right? Life gets busy, but that doesn’t mean we have to skip out on the flavor we crave. That’s why I’m thrilled to share this recipe for our Crispy Cheesy Beef Chimichangas (Air Fryer Method). Yes, we are talking about those amazing, crunchy, fried-tasting wraps, but without all the oil! These Air Fryer Chimichangas are truly a weeknight miracle. Here at Taste This Plate, Kate Reilly and I are dedicated to bringing you tested recipes that fit into real life. This one comes together faster than takeout, proving that cozy Tex-Mex dinners don’t have to stress you out.
- Why You Will Make These Crispy Beef Chimichangas Weekly
- Ingredients Needed for Your Cheesy Beef Chimichangas
- Step-by-Step Instructions for Easy Chimichangas
- Expert Tips for Perfect Crispy Chimichangas Every Time
- Making Variations of These Flavorful Chimichangas
- Storage and Reheating Instructions for Leftover Chimichangas
- Serving Suggestions for Your Homemade Chimichangas
- Frequently Asked Questions About Crispy Chimichangas
- Share Your Ultimate Crunch Recipe Experience
Why You Will Make These Crispy Beef Chimichangas Weekly
I promise you’re going to bookmark this recipe right now. Why? Because we nailed that perfect balance everyone wants without sacrificing taste or sanity! These easy chimichangas deliver big flavor fast.

- Ready in Under 30 Minutes: Seriously, you can pull this Tex Mex dinner together quicker than delivery will arrive.
- The Ultimate Crunch: We get that satisfying, golden-brown crispiness without ever diving into a pot of hot oil. Trust me, the air fryer does all the heavy lifting here!
- Family Approved Flavor: It’s seasoned ground beef smothered in melty cheese. It’s basically perfection wrapped up in a tortilla.
If you love quick comfort meals, you might also want to check out my easy burrito bake when you need a big casserole alternative!
Ingredients Needed for Your Cheesy Beef Chimichangas
When I write recipes for busy weeknights, I always aim for ingredients you already have or can snag easily. You won’t need to raid a specialty store for this! Below is exactly what you need to pull together these delicious chimichangas. Remember, using a high-quality taco seasoning packet makes a huge difference, or if you’re ambitious, try whipping up your own blend!
- 1 tablespoon olive oil
- 1 pound ground beef (85/15 or 90/10 works great)
- 1 packet (1 ounce) taco seasoning mix
- 1/2 cup water
- 1 cup shredded cheddar cheese (sharp or mild, your call!)
- 1 cup shredded Monterey Jack cheese
- 8 large flour tortillas (make sure they are burrito size!)
- Cooking spray (essential for that crisp finish)
Tips for Perfect Chimichangas Filling Ingredients
The blend of cheddar and Monterey Jack is intentional—it melts beautifully and gives you that perfect cheese pull without becoming greasy. For the tortillas, please, please use the large burrito size. They need that extra wrapping room so you can get a really tight seal when rolling. Loose chimichangas will definitely unroll on you in the air fryer!
Step-by-Step Instructions for Easy Chimichangas
Okay, this is where we put it all together! The process is super straightforward, but pay attention to a few key points, especially regarding the meat, because that’s the secret to getting a sturdy filling that won’t leak out when you try to crisp these beauties up. We’re aiming for Easy Chimichangas here, so keep your movements efficient! If you are serving these with a side, may I suggest whipping up some easy butter rice while the beef simmers?
Preparing the Flavorful Beef Filling for Your Chimichangas
First things first: flavor! Heat that olive oil in your skillet and brown the ground beef over medium heat. Make sure you break it up really well while it cooks so you don’t end up with giant chunks in your chimichangas. Crucially, you must drain off every bit of excess grease once it’s browned. Soggy fat equals soft tortillas, which we absolutely do not want! Then, stir in the taco seasoning and water and let it bubble away until that liquid mostly evaporates, making a rich, flavorful base for your filling.
Rolling and Sealing Your Chimichangas Tightly
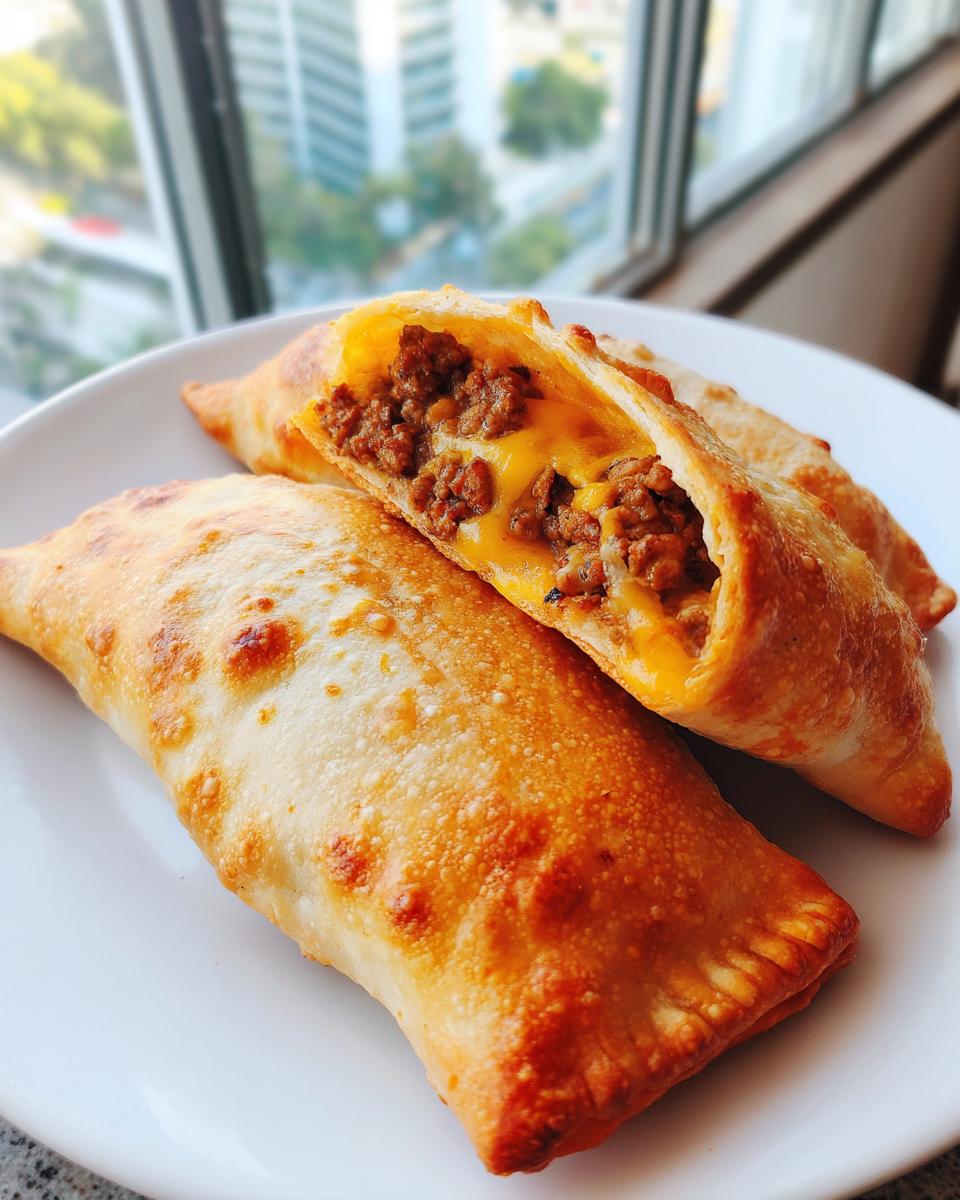
This folding part is important for structural integrity! Take your slightly cooled meat mixture and toss it with the shredded cheeses. Lay your tortilla flat and put about a quarter cup of that beefy mixture near the bottom edge. You need to fold the two opposite sides inward over the filling first—think like you are closing an envelope. Then, roll it up tightly from the bottom, just like a proper burrito. If you’re nervous about blowouts when frying or air frying, use a toothpick right in the seam to hold those delicate chimichangas shut.
Achieving Crispy Chimichangas in the Air Fryer
Now for the magic! Preheat your air fryer to 375 degrees Fahrenheit. This temperature is what gives you that perfect golden exterior without burning. Give the outside of each filled tortilla a generous spritz of cooking spray—this helps it crisp up beautifully. Place your wrapped chimichangas in a single layer in the basket; do not let them touch, or they will steam instead of crisp! Air fry for about 8 to 10 minutes total, flipping them halfway through. They’ll come out unbelievably golden and totally satisfyingly crispy.
Expert Tips for Perfect Crispy Chimichangas Every Time
You know I test everything here in my own kitchen, and I’ve learned a few little tricks that make these chimichangas go from good to absolutely unforgettable. The biggest thing affecting your crunch? The tortillas themselves! If your tortillas are stiff or day-old, they crack easily. Try microwaving them for just 15 seconds before rolling; it makes them supper pliable!
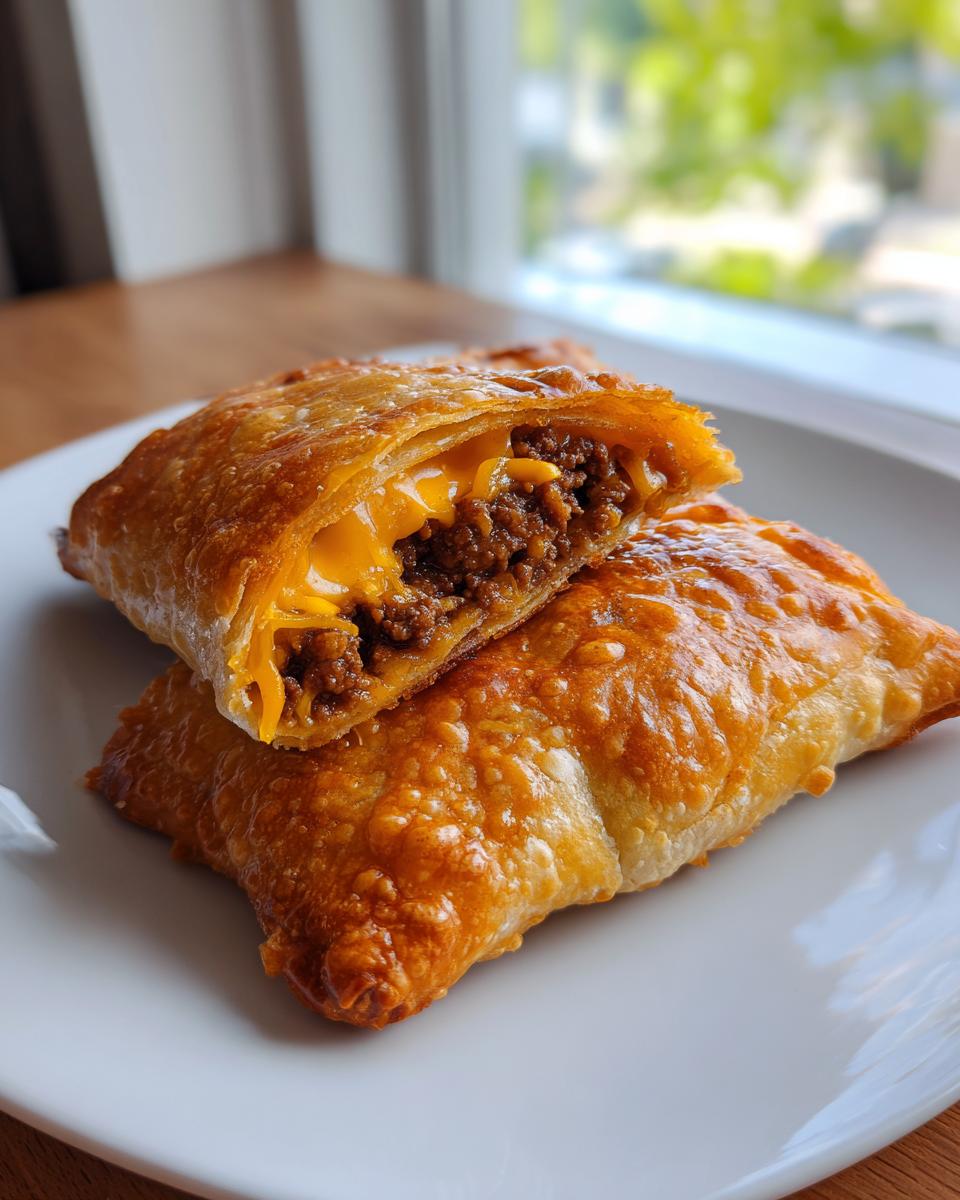
If your air fryer basket is small, you absolutely must work in batches. Overcrowding is the enemy of crispiness, so give those babies space. If you don’t have an air fryer, don’t sweat it! You can definitely make these in the oven. Just place your sprayed chimichangas on a sheet pan—I often use parchment paper for easy cleanup, similar to how I prep my oven chicken thighs—and bake them at 400 degrees Fahrenheit for about 15 to 20 minutes, flipping them once.
I also noticed that when I use tortillas warmed slightly on a dry skillet for just 10 seconds per side before filling, they hold up even better. If you want to see how someone else makes a fantastic version, check out this great recipe I found for Beef and Cheese Chimichangas!
Making Variations of These Flavorful Chimichangas
While this ground beef version is my absolute go-to for a quick Tex-Mex night, the filling is so versatile! If you were looking for a Chicken Chimichanga, you can totally pivot here. Simply take 1 pound of cooked, shredded chicken—rotisserie chicken works in a pinch!—and mix it with the taco seasoning and cheese instead of the ground beef. I promise it will still be delicious.
If you are trying to lighten things up even further, swapping the beef for ground turkey definitely helps cut down on fat and moves this closer to a Healthy Chimichanga Recipe. Either way, you get that amazing crunch factor because we are still using the air fryer method! These are perfect to pair with a fresh, vibrant side, like my quick Southwest salad when you need something bright to cut through the richness.
Storage and Reheating Instructions for Leftover Chimichangas
One of the best things about these chimichangas is that they are fantastic for meal prepping! If you happen to have any leftovers, or if you just want to make a massive batch to save time later, you’re in luck because these are wonderfully freezer friendly meals. Once the cooked chimichangas have cooled completely—this is super important to prevent ice crystals—wrap each one individually tightly in plastic wrap. Then, bag them all up together in a sturdy freezer bag. They keep beautifully for about three months!
When it’s time to reheat those frozen beauties, skip the microwave entirely if you want that crunch back. Pop the frozen chimichangas straight into your preheated air fryer set to 375°F. You’ll need to add a little extra time, usually around 12 to 15 minutes total, flipping them halfway through, until they are piping hot and crispy all the way through again. It’s honestly like making them fresh!
Serving Suggestions for Your Homemade Chimichangas
Okay, what’s a perfect, crispy, cheesy chimichanga without the right supporting cast? Not much of a party, that’s what! You absolutely need the classics here: plenty of fresh salsa, a big dollop of sour cream, and, of course, good guacamole. Don’t skip the toppings; they cut through the richness perfectly.
To turn this crunchy treat into a full, hearty family dinner, I always serve mine alongside a substantial side. My simple, one-pot Mexican rice casserole is fantastic because it’s low effort but brings all those comforting flavors. Refried beans on the side also work wonders!
Frequently Asked Questions About Crispy Chimichangas
I know you might have a few lingering questions before you dive into making this batch of chimichangas. It’s totally normal when trying a new method, especially when you’re used to the deep-fried way! We want you to feel super confident about hitting that perfect crispiness on a busy night and still getting a fantastic result.
Can I make these Beef Chimichangas without an air fryer?
Oh, absolutely! While the air fryer is my favorite for speed and that ultimate crunch, you can certainly use your oven. Just follow the instructions in my Expert Tips section: place them sprayed on a sheet pan and bake at 400 degrees Fahrenheit for about 15 to 20 minutes, flipping them halfway through until they look golden brown.
What makes these Easy Chimichangas healthier than traditional ones?
The biggest health upgrade comes from skipping that big pot of oil! By using cooking spray and the air fryer, we cut way back on added fat while keeping the texture fantastic. Plus, since the prep and cook time clocks in under 30 minutes, these make for a perfect, stress-free Weeknight Chimichanga meal instead of ordering out!
If you’re looking for another super-fast option, my quick Chinese pepper steak always saves the day!
For more air fryer love, I always refer back to this great demonstration on achieving the crispy air fryer chimichangas recipe any time I need a visual reminder!
Share Your Ultimate Crunch Recipe Experience
I really hope you loved making these cheesy chimichangas as much as I love sharing them with you! Down below, please leave a rating and tell me how that air fryer crunch turned out. Did you use your favorite toppings? I can’t wait to hear all about your success with this delicious recipe!
PrintCrispy Cheesy Beef Chimichangas (Air Fryer Method)

Make satisfying, crispy beef and cheese chimichangas using your air fryer. This recipe offers a lighter alternative to deep-frying while delivering the crunch and flavor you expect from this Tex-Mex favorite. It is a quick dinner idea.
- Prep Time: 15 min
- Cook Time: 10 min
- Total Time: 25 min
- Yield: 8 servings 1x
- Category: Dinner
- Method: Air Frying
- Cuisine: Tex-Mex
- Diet: Vegetarian
Ingredients
- 1 tablespoon olive oil
- 1 pound ground beef
- 1 packet (1 ounce) taco seasoning mix
- 1/2 cup water
- 1 cup shredded cheddar cheese
- 1 cup shredded Monterey Jack cheese
- 8 large flour tortillas (burrito size)
- Cooking spray
Instructions
- Heat the olive oil in a large skillet over medium heat. Add the ground beef and cook until browned, breaking it up with a spoon. Drain off any excess grease.
- Stir in the taco seasoning mix and water. Bring the mixture to a simmer and cook for 5 to 7 minutes, or until most of the liquid has evaporated. Remove from heat and let the beef cool slightly.
- In a bowl, mix the cooled seasoned beef with the cheddar cheese and Monterey Jack cheese until combined. This is your filling.
- Lay a tortilla flat. Place about 1/4 cup of the beef and cheese mixture slightly below the center of the tortilla.
- Fold the sides of the tortilla inward over the filling. Then, tightly roll the tortilla up from the bottom, creating a sealed burrito shape. Secure the seam with a toothpick if necessary. Repeat with the remaining filling and tortillas.
- Preheat your air fryer to 375 degrees Fahrenheit (190 degrees Celsius). Lightly spray the outside of each chimichanga with cooking spray.
- Place the chimichangas in the air fryer basket in a single layer, ensuring they do not touch. You may need to work in batches.
- Air fry for 8 to 10 minutes, flipping them halfway through, until they are golden brown and crispy.
- Remove the toothpicks before serving. Serve your crispy beef chimichangas immediately with your favorite toppings like salsa, sour cream, or guacamole.
Notes
- For an oven-baked option, place the sprayed chimichangas on a baking sheet and bake at 400 degrees Fahrenheit (200 degrees Celsius) for 15 to 20 minutes, flipping halfway, until golden.
- You can substitute ground turkey or shredded cooked chicken for the ground beef to make a different flavor variation.
- These chimichangas freeze well. Cool them completely, wrap them individually in plastic wrap, and place them in a freezer bag for up to three months. Air fry directly from frozen, adding a few extra minutes to the cook time.
Nutrition
- Serving Size: 1 chimichanga
- Calories: 380
- Sugar: 2
- Sodium: 550
- Fat: 18
- Saturated Fat: 8
- Unsaturated Fat: 10
- Trans Fat: 0
- Carbohydrates: 35
- Fiber: 2
- Protein: 20
- Cholesterol: 65