
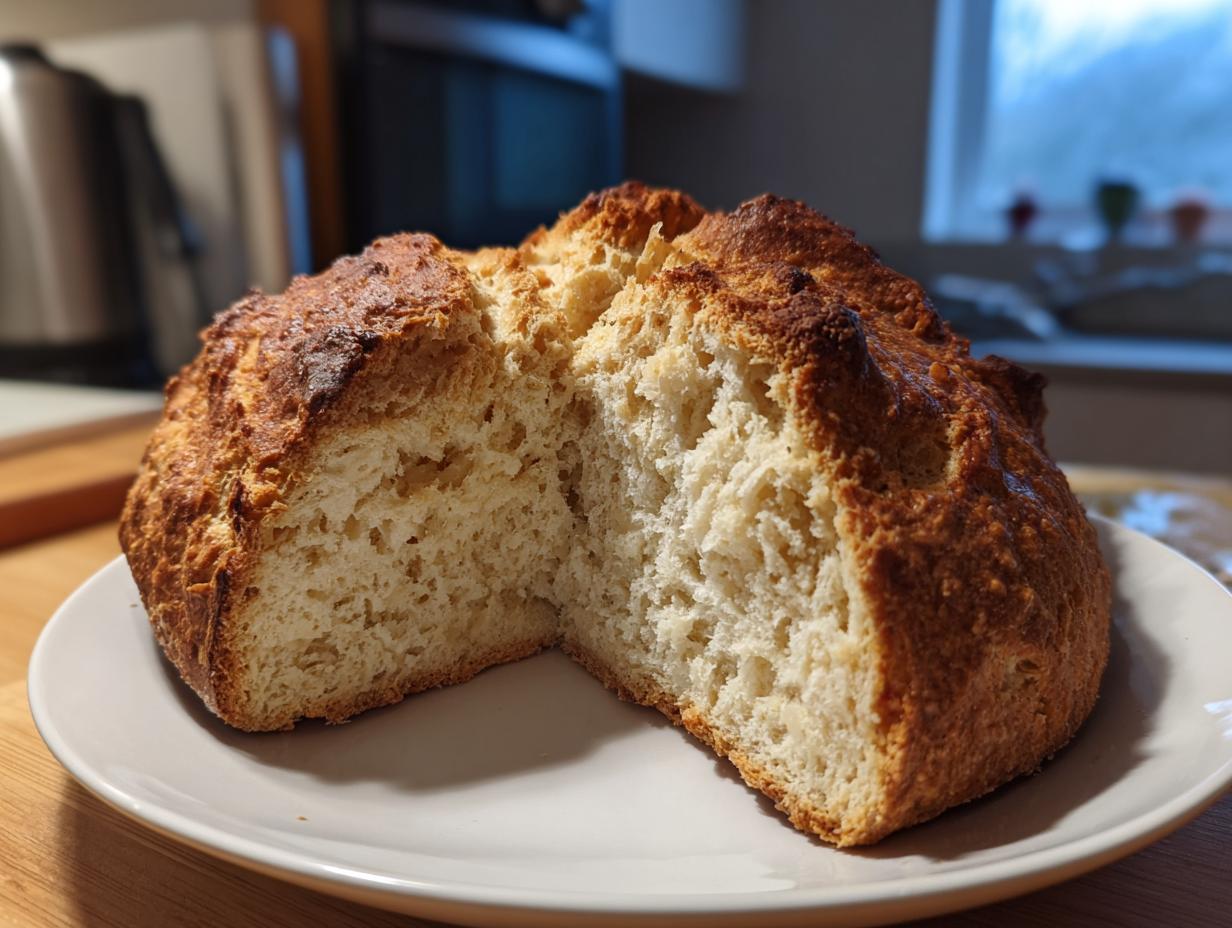
There is nothing, absolutely nothing, that beats the smell of fresh bread filling your home. It’s comforting, it’s simple—it’s the purest form of showing love in the kitchen, right? If you’ve ever been intimidated by loaves that need kneading for hours, forget all that noise! My mission here is to give you incredible results without the stress, and this easy homemade bread is the perfect place to start. I’m sharing my absolute go-to: the Classic and Easy Irish Soda Bread Recipe. Because it uses baking soda instead of yeast, it’s a total champion of No Yeast Bread. Seriously, you mix it, shape it, and bake it—that’s it! You get that wonderful, crackly, crusty exterior and the softest inside, all ready to serve in under an hour. Trust me, this is your new weeknight hero.
- Why This Classic Soda Bread Recipe Works Every Time
- Ingredients for Your Easy Homemade Bread Soda Bread
- Step-by-Step Instructions for Perfect Soda Bread
- Tips for Success Making Traditional Baking Soda Bread
- Savory Bread Recipes: Cheddar Herb Soda Bread Variation
- Serving Suggestions for Your Fast Dinner Side Dish Bread
- Storage and Reheating Instructions for Soda Bread
- Frequently Asked Questions About Soda Bread
- Share Your Homemade Soda Bread Creations
Why This Classic Soda Bread Recipe Works Every Time
When I first tried making soda bread, I was convinced it was going to fail. Why? Because I was so used to waiting for yeast to bubble and bloom! This recipe is different, and that’s why it’s so wonderfully reliable. It’s truly the definition of a quick bread recipe because we’re using chemistry instead of time to get our rise.
The power couple here is the baking soda and the buttermilk. Baking soda needs an acid to activate, and the lactic acid already present in the buttermilk is the perfect partner. When they meet, you get an instant chemical reaction that creates tiny bubbles. That’s what lifts your loaf! I remember the first time I saw how fast that batter came together—it felt like cheating, but it’s just good, simple science working hard for us.
The Magic of Buttermilk Bread
Listen to me: don’t skip the buttermilk if you can help it! It’s non-negotiable for getting that signature tang and the perfect rise in your homemade soda bread. The acid is crucial for reacting with the baking soda. Now, if you’re staring at your fridge and you’re out, don’t panic! You can totally fake it. Just take your regular milk—a cup and three-quarters should do it—and stir in one tablespoon of white vinegar or lemon juice. Let it sit on the counter for five minutes until it looks a tiny bit curdled. That acidic milk will work just as beautifully! Trust the process; it’s what makes this bread so easy.
Ingredients for Your Easy Homemade Bread Soda Bread
I love this recipe because when you look at the ingredients list, you instantly realize you probably have everything you need right now. No specialty flours, no weird oils—just staples for your Easy Homemade Bread. Grab a big bowl! We are making classic Irish soda bread, and keeping it simple is the key to that amazing crusty loaf we want.
- 4 cups all-purpose flour
- 1 teaspoon baking soda
- 1 teaspoon salt
- 1 3/4 cups buttermilk
- 1 tablespoon sugar (optional, for slight sweetness)
- 1 tablespoon melted butter (for brushing top)
Ingredient Notes and Substitutions
Remember what I said about the buttermilk? It’s the acid we need! If you truly don’t have buttermilk on hand, go ahead and mix one and three-quarters cups of regular milk with one tablespoon of white vinegar or fresh lemon juice. Let it sit for about five minutes until it looks a little clabbered—that’s your substitute buttermilk ready to go. Also, that tablespoon of sugar is totally optional. If you want a savory loaf that’s perfect for dipping into stew, just leave it out. Zero stress here!
Step-by-Step Instructions for Perfect Soda Bread
Okay, here are the mechanics. This is where we make sure that your loaf turns out like a wonderful, crusty delight and not a dense puck! Since we aren’t messing around with yeast, the mixing process is incredibly fast, which is why this baking without yeast method is so popular. The key word here is *fast*. Get everything ready to go before you even touch the buttermilk.
First things first: make sure your oven is screaming hot at 400°F (200°C) and you’ve got your baking sheet lined with parchment or just lightly floured. We need that blast of heat for that beautiful crackly exterior on our soda bread.
Mixing and Shaping Your Crusty Homemade Loaf
Once your dry ingredients are whisked in a big bowl, pour in all that buttermilk at once. Grab a fork—or even just your clean hands—and mix it together until it *just* comes together. I mean it, stop as soon as the flour disappears. You want a shaggy, slightly sticky mess. If you keep mixing, you develop too much gluten, and boom—your soft interior turns tough. Don’t worry if it looks messy!
Tip the dough onto a lightly floured surface. Now, you only knead 3 or 4 times. Seriously, just fold it over on itself gently to get it into a rough, round disc shape. That’s it! Over-handling is the enemy of tender texture here.
Baking Time for a Golden Soda Bread Finish
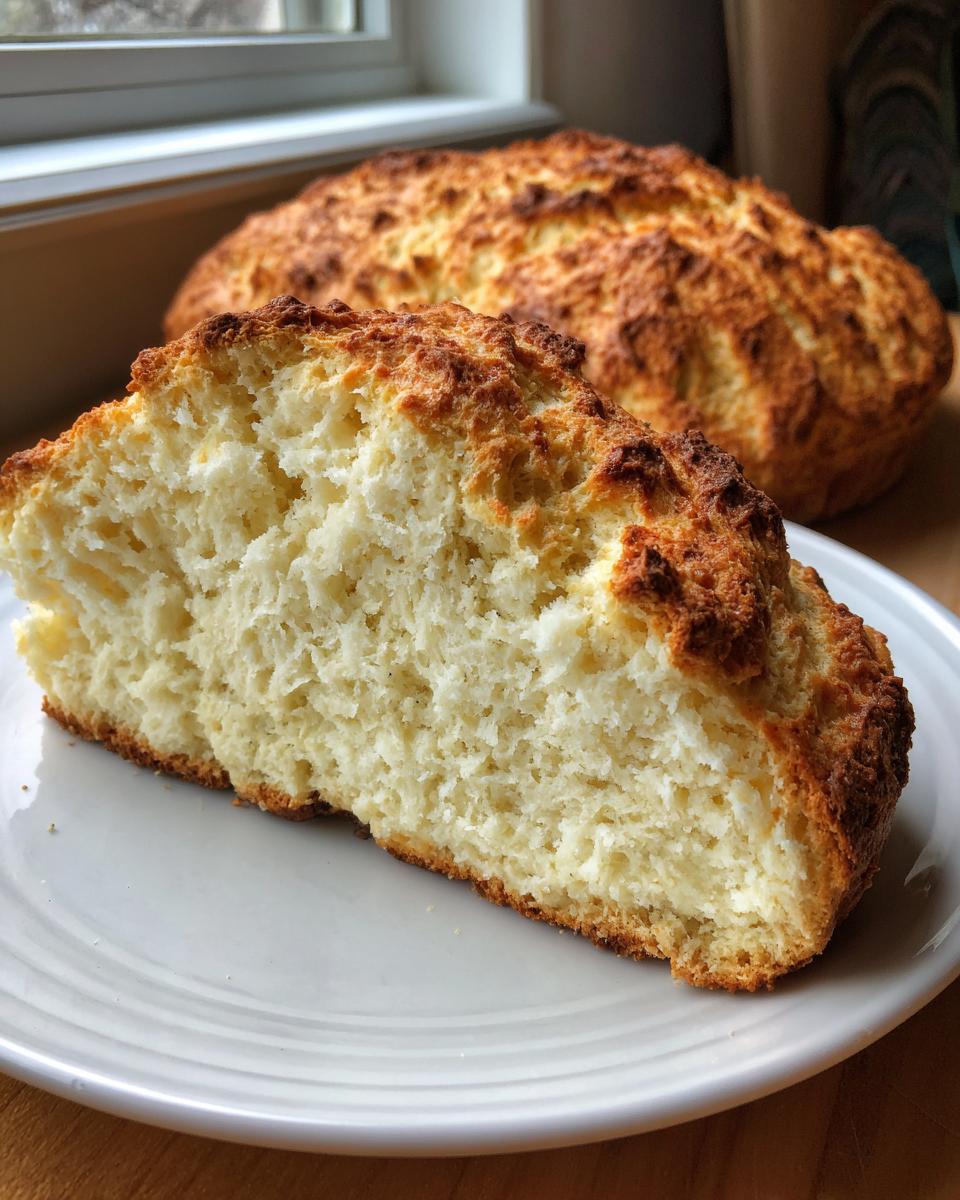
Before it hits the oven, you must cut that deep cross into the top—about an inch deep. Tradition says this helps the fairies get out, but really, it just helps the center bake properly! Brush it with a little melted butter for that gorgeous shine. Bake for about 35 to 45 minutes. You’re looking for a deep, rich golden brown color, not pale beige. When you pull it out, tap the bottom. If it sounds truly hollow, like knocking on wood, it’s done. It’s your perfect crusty homemade loaf, ready to go!
Tips for Success Making Traditional Baking Soda Bread
We’ve done the mixing, now let’s talk about the finish line! Making great soda bread is all about respecting the high heat and giving your loaf room to breathe afterward. First, make sure your oven is fully preheated, and I mean *actually* preheated. Throwing this bread into a lukewarm oven is the quickest way to get a dense, flat failure because the baking soda won’t react fast enough. Keep that oven door closed once it’s in there until you’re almost done!
Once it comes out golden and sounds hollow—that satisfying *thunk*—you have to resist cutting into it immediately. I know, I know, the temptation is huge, especially when it smells like pure Irish comfort food. But you must transfer it straight to a wire rack. This lets the steam escape from the bottom, keeping that beautiful crust crisp instead of getting soggy. Seriously, this advice comes from someone who has ruined a few perfect loaves by leaving them on the counter! For the very best texture, eat this wonderful example of Irish food staples the day you bake it. If you need ideas for using up leftovers, take a peek at how I serve it with hearty stews over our favorite Irish soup recipes!
Savory Bread Recipes: Cheddar Herb Soda Bread Variation
Now, while the simple, slightly sweet classic loaf is totally wonderful, one of my favorite ways to change things up—especially when I’m serving it with a big bowl of chili or a hearty roast—is to turn it into something wonderfully savory. If you are looking for ways to expand your repertoire of savory bread recipes, you have to try the Cheddar and Herb variation of this soda bread. It takes just about two minutes of extra effort, but the payoff is huge!
To adapt, follow the exact same recipe instructions up until the liquid goes in. When you whisk your dry ingredients together—the flour, baking soda, and salt—this is when you toss in about a cup of sharp, good-quality cheddar cheese, shredded. I also love adding about two tablespoons of finely chopped fresh herbs. Rosemary, chives, or even a little thyme works magic. Gently mix those into the flour first. Then, proceed with adding the buttermilk and mixing *just* until combined. The cheese melts beautifully during baking and gives you these incredible pockets of salty goodness throughout your loaf, which I spotted on this great recipe. It’s amazing!
Serving Suggestions for Your Fast Dinner Side Dish Bread
What is the point of quick bread if you can’t eat it immediately? Honestly, I think this soda bread has a very short attention span—it’s best eaten warm, right away! If you made the classic version without the cheese, it is the ultimate companion to heavy winter meals. I’m talking piping hot bowls of stew or a creamy tomato soup. You absolutely need something sturdy to soak up every last drop, and this crusty loaf does the job perfectly—check out my favorite soup recipes for pairing ideas!
But let’s not forget the simple pleasures! If you’re having it for breakfast or just as a plain afternoon snack, just slice a thick piece while it’s still warm and slather it with good salted butter. A little homemade jam is fantastic too. It’s that simple, satisfying comfort food we all crave.

Storage and Reheating Instructions for Soda Bread
Because this soda bread relies on that immediate chemical reaction for its amazing texture, it really does insist on being eaten the day it comes out of the oven. I won’t lie; it gets a bit dense the next day. If you have leftovers, wrap the remaining loaf tightly in plastic wrap and then tuck it into an airtight container. Don’t try refrigerating it; trust me, that just makes it sad!
To bring that lovely crust back to life, slice what you need and pop the pieces directly onto a baking sheet. Put it in a 350°F oven for about 5 to 7 minutes. That little trip back to the heat will firm up the outside beautifully and make it taste almost fresh-baked again. It’s the best way to handle any leftover soda bread!
Frequently Asked Questions About Soda Bread
Can I use regular milk instead of buttermilk in this soda bread?
Oh, that’s the most common question! If you’re halfway through and realize you’re totally out of that wonderful buttermilk, please don’t stress out and run to the store. You can totally make a substitute right in your kitchen! Just grab your normal milk—we need about a cup and three-quarters for this batch—and stir in one tablespoon of white vinegar or fresh lemon juice. Let that mixture sit on the counter for about five minutes. You’ll see it start to curdle a bit, and that’s perfect! That slightly soured milk acts exactly like buttermilk in this soda bread recipe, making sure the baking soda reacts beautifully.
How long does homemade soda bread stay fresh?
Here’s a little truth bomb about this quick bread: it’s definitely at its absolute peak on the day it comes out of the oven. The crust is crackly, the inside is tender, and it just sings when sliced warm! It will still be perfectly fine and tasty the next day, maybe up to two days max, but you’ll notice the texture firms up a bit because it’s a crusty bread, not a highly enriched loaf. That’s why I always say, plan on eating most of it the day you bake it! If you have leftovers, that reheating trick in the oven I mentioned earlier is magic for bringing back some life.
Is this recipe truly a ‘No Yeast Bread’?
Yes! That’s what makes this Irish Soda Bread Recipe such an amazing lifesaver for weeknights! There is absolutely no yeast involved here. We skip the long rising times entirely because the lift comes entirely from the fast-acting reaction between the baking soda and the buttermilk acid. It’s instant, it’s quick, and it’s why we can go from mixing bowl to dining table in less than an hour. It’s the ultimate in Baking Without Yeast! You never have to worry about a dough not rising again.
Share Your Homemade Soda Bread Creations
Now that you’ve baked up your own batch of this fantastic, fast and easy Irish Soda Bread Recipe, I truly want to see it! Baking should be a shared experience, and honestly, nothing makes me happier than hearing that one of my tried-and-true recipes made it onto your family table.
Did you keep it simple and classic, or did you try that savory Cheddar Herb version? Let me know how it went! Please take a moment to leave a rating right below the recipe card—it really helps other home cooks feel confident trying this traditional baking technique for the first time. And if you snapped a picture of that perfect, golden, crusty loaf, share it on social media! Tag me so I can see your work; I love seeing these simple ingredients turn into something memorable. If you have any burning questions that I didn’t cover, don’t hesitate to reach out through the contact page!
PrintClassic and Easy Irish Soda Bread Recipe (No Yeast Needed)
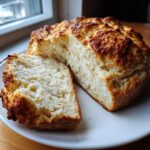
Make this traditional Irish Soda Bread with simple pantry ingredients. It bakes quickly, resulting in a crusty exterior and a soft, tender interior, perfect alongside soup or with butter.
- Prep Time: 10 min
- Cook Time: 40 min
- Total Time: 50 min
- Yield: 1 loaf (8 servings) 1x
- Category: Side Dish
- Method: Baking
- Cuisine: Irish
- Diet: Vegetarian
Ingredients
- 4 cups all-purpose flour
- 1 teaspoon baking soda
- 1 teaspoon salt
- 1 3/4 cups buttermilk
- 1 tablespoon sugar (optional, for slight sweetness)
- 1 tablespoon melted butter (for brushing top)
Instructions
- Preheat your oven to 400°F (200°C). Line a baking sheet with parchment paper or lightly flour it.
- In a large bowl, whisk together the flour, baking soda, and salt. If using, whisk in the sugar now.
- Make a well in the center of the dry ingredients and pour in the buttermilk all at once.
- Use a fork or your hands to quickly mix the ingredients until just combined into a shaggy dough. Do not overmix; a sticky dough is fine.
- Turn the dough out onto a lightly floured surface. Gently knead it 3 or 4 times—just enough to bring it together into a round loaf shape.
- Place the dough round onto your prepared baking sheet. Use a sharp knife to cut a deep cross (about 1 inch deep) into the top of the loaf.
- Brush the top of the loaf lightly with the melted butter.
- Bake for 35 to 45 minutes, or until the crust is deep golden brown and the loaf sounds hollow when tapped on the bottom.
- Transfer the loaf to a wire rack to cool slightly before slicing. Serve warm.
Notes
- If you do not have buttermilk, mix 1 3/4 cups of regular milk with 1 tablespoon of white vinegar or lemon juice. Let it sit for 5 minutes before using.
- For a sweeter, more traditional loaf, you can add 1 cup of raisins or currants to the dry ingredients before adding the buttermilk.
- This bread is best eaten the day it is baked for the best texture.
Nutrition
- Serving Size: 1 slice
- Calories: 250
- Sugar: 2
- Sodium: 350
- Fat: 3
- Saturated Fat: 2
- Unsaturated Fat: 1
- Trans Fat: 0
- Carbohydrates: 50
- Fiber: 2
- Protein: 7
- Cholesterol: 10