
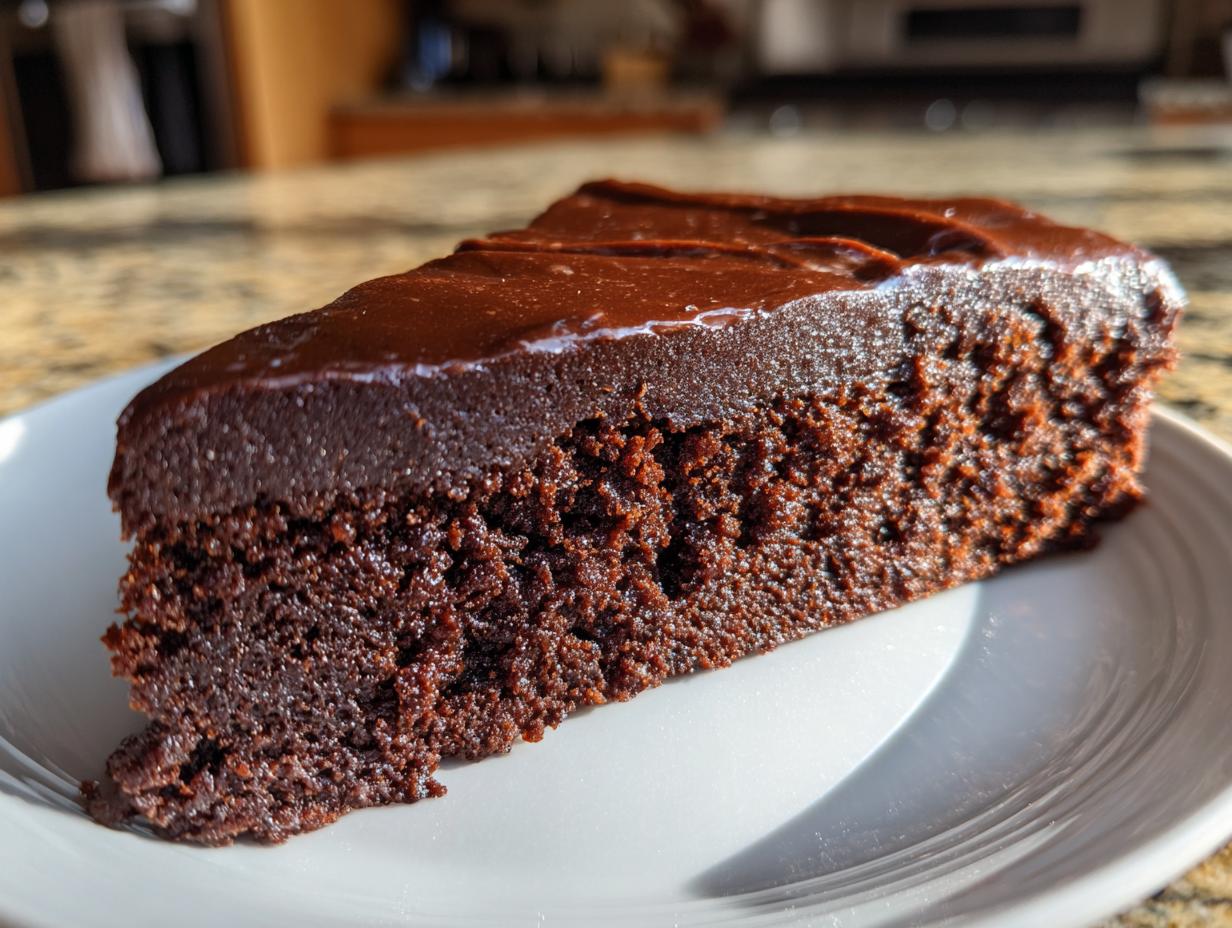
When a craving hits for something truly indulgent, I mean really decadent, nothing beats a deep, dark, intensely chocolatey dessert. Forget fussy layers or complicated techniques! I knew when developing my recipe collection here at Taste This Plate that we needed a show-stopper that felt fancy but didn’t require ten specialty ingredients. That’s why this **flourless chocolate cake** is one of my absolute favorites to share.
It’s ridiculously rich, melt-in-your-mouth fudgy, and guess what? It comes together beautifully in just one bowl, making cleanup a breeze. As someone who loves simplifying classics, just like I aim to do with everything from weeknight meals to holiday bakes, this recipe proves you don’t need any wheat flour to achieve pure chocolate perfection. It’s naturally gluten-free, fast to prepare, and guaranteed to impress at any gathering. Trust me; this is the ultimate comfort bake!
If you’re looking for other simple yet satisfying recipes, you should check out my directions for easy layered apple pie dump cake!
- Why This Rich Chocolate Cake Recipe Works So Well
- Gathering Ingredients for Your Flourless Chocolate Cake
- Step-by-Step Instructions for the Flourless Chocolate Cake Recipe
- Baking and Cooling the Fudgy Chocolate Dessert
- Making the Silky Ganache for Your Chocolate Cake with Ganache Topping
- Tips for Success with Your Decadent Chocolate Dessert
- Serving Suggestions for this Simple Chocolate Dessert
- Storage and Reheating Instructions
- Frequently Asked Questions About This Gluten Free Dessert
- Nutritional Data Estimate
- Share Your Baking Success
Why This Rich Chocolate Cake Recipe Works So Well
Honestly, when I first tested this, I thought I was missing something because it seemed way too easy for how incredible the results were! But that’s the beauty of working with intense ingredients like good chocolate and eggs; they do all the heavy lifting for you. This isn’t just some random recipe; it’s structured to deliver maximum flavor with minimal fuss.
Here’s why I keep coming back to this specific combination when I need an impressive yet fudgy chocolate dessert:
Naturally Gluten Free: The Best Gluten Free Cake
This is my go-to when someone asks for an amazing chocolate cake for special occasions, and they happen to mention gluten restrictions. Because we skip the flour completely, the structure relies entirely on the whipped egg whites and the melted chocolate holding everything together. It’s the best gluten free cake because it *is* chocolate, pure and simple. No weird flours needed!
One Bowl Chocolate Cake Simplicity
I’m big on enjoying the process, but I’m not big on scrubbing ten pots afterwards! This truly is a one bowl chocolate cake success story. We melt the chocolate and butter, incorporate the yolks and sugars, and then carefully fold in the whites—all in that same bowl. Keeping it to one bowl really does streamline cleanup without sacrificing any of that deep, rich chocolate cake flavor we’re aiming for. It keeps the recipe feeling like a genuinely easy flourless cake.
Gathering Ingredients for Your Flourless Chocolate Cake
Okay, the magic for this spectacularly rich dessert happens because we use high-quality ingredients. Since there’s no flour to hide behind, every component needs to sing! Before we get into the assembly, let’s make sure you have everything ready to go, because this flourless chocolate cake comes together fast once you start. Having everything measured out makes the whole process fly by.
I always make sure to have my ingredients laid out on the counter before I even turn on the stove. It saves me from that frantic scrambling midway through mixing, which is where mistakes happen! If you love chocolate bakes as much as I do, you should check out my recipe for classic chocolate chip cookies—they’re just as simple!
Ingredients for the Rich Chocolate Cake
For the cake base itself, the star is definitely the chocolate. You need the good stuff here:
- 8 ounces good quality bittersweet chocolate (make sure it’s at least 70% cacao—this really defines the depth of flavor in our flourless chocolate cake!)—chopped
- 1 cup (2 sticks) unsalted butter
- 1 cup granulated sugar
- 1/2 cup packed light brown sugar
- 5 large eggs, separated
- 1 teaspoon vanilla extract
- 1/4 teaspoon salt
- 1/2 cup unsweetened cocoa powder (we use this to dust the pan, which is a trick I learned to guarantee release!)
Ingredients for the Silky Ganache Topping
This simple topping is what takes this bake from great to absolutely divine. It turns our cake into a true decadent chocolate dessert that’s perfect for birthdays or romantic dinners.
- 4 ounces bittersweet chocolate, chopped
- 1/2 cup heavy cream
Step-by-Step Instructions for the Flourless Chocolate Cake Recipe
Alright, this is where the fun starts! Since we’re building structure without any flour, the method here is non-negotiable, but it’s still so quick—you’ll see results in less than an hour of active time. Don’t worry about timing too much; we’re aiming for that beautiful, slightly soft center that defines a perfect rich chocolate cake. When you’re ready for dinner, grab your springform pan and let’s get this delicious chocolate cake no flour masterpiece started!
If you’re looking for something savory to tide you over while this bakes, check out my recipe for beef garlic butter linguine; it’s always a winner!
Preparing the Pan and Melting the Chocolate Base
First things first: get that oven preheated to 350°F (175°C). Next, we prep the 9-inch springform pan. You need to grease it really well, line it with parchment on the bottom, and then dust the sides and bottom liberally with cocoa powder. This cocoa dusting is my secret weapon; it gives you way better insurance against sticking than flour ever could!
Now, melt your 8 ounces of chopped chocolate and the butter together over simmering water in a double boiler. My pro tip here? Make sure the bottom of your mixing bowl *doesn’t* actually touch the water. We just want gentle steam heat. Stir it until it’s utterly smooth, take it off the heat, and let it cool down for about five minutes before moving on. We don’t want to scramble those eggs!
Incorporating Eggs and Achieving the Right Batter Consistency
Once the chocolate is just warm, vigorously whisk in both the granulated and brown sugars. Once those are mixed in, add those five egg yolks one by one, mixing well after each addition, finishing with the vanilla extract. This creates our rich base!
In a completely separate, clean bowl—this is important!—you need to beat your five egg whites with the salt until you achieve stiff, glorious peaks. I mean they need to be firm enough so when you lift the whisk, the peak stands straight up without drooping at all. Volume equals structure here!
Folding Technique for a Perfect Flourless Chocolate Cake
This is the technical part, but stay calm; we do it gently! Take about a third of those beautiful stiff egg whites and stir them right into the chocolate base. This first addition is designed to lighten up the heavy chocolate mix so it’s ready to accept the rest of the airier whites.
Then, you gently fold in the remaining egg whites in two batches. Use a spatula and slice down the middle, scoop up the bottom, and fold it over the top. Keep repeating this motion until they are *just* combined. Seriously, if you see a few little white streaks left, that’s okay! Over-mixing here is the quickest way to deflate all that air, and we need that air to give our structure to this delicate chocolate cake no flour.
Baking and Cooling the Fudgy Chocolate Dessert
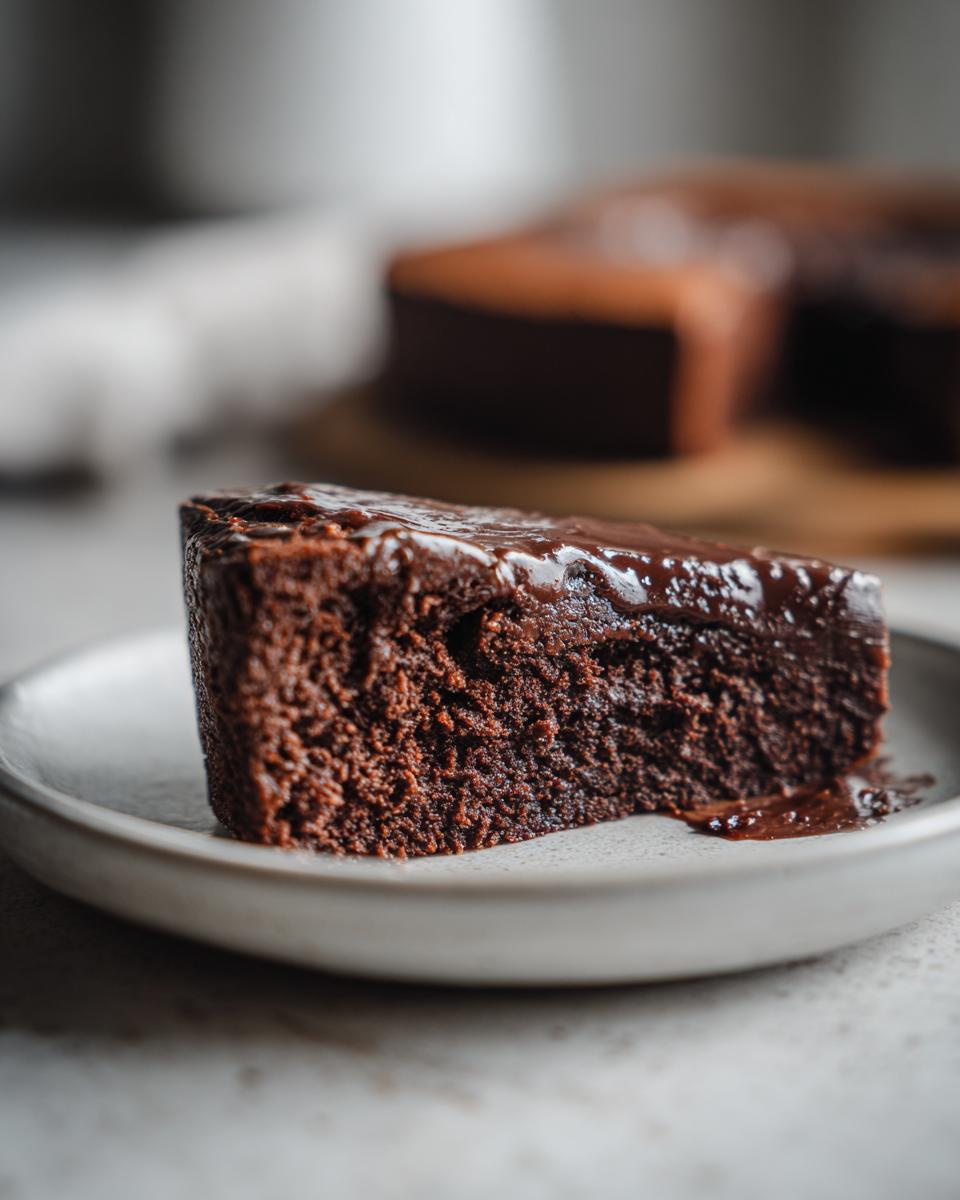
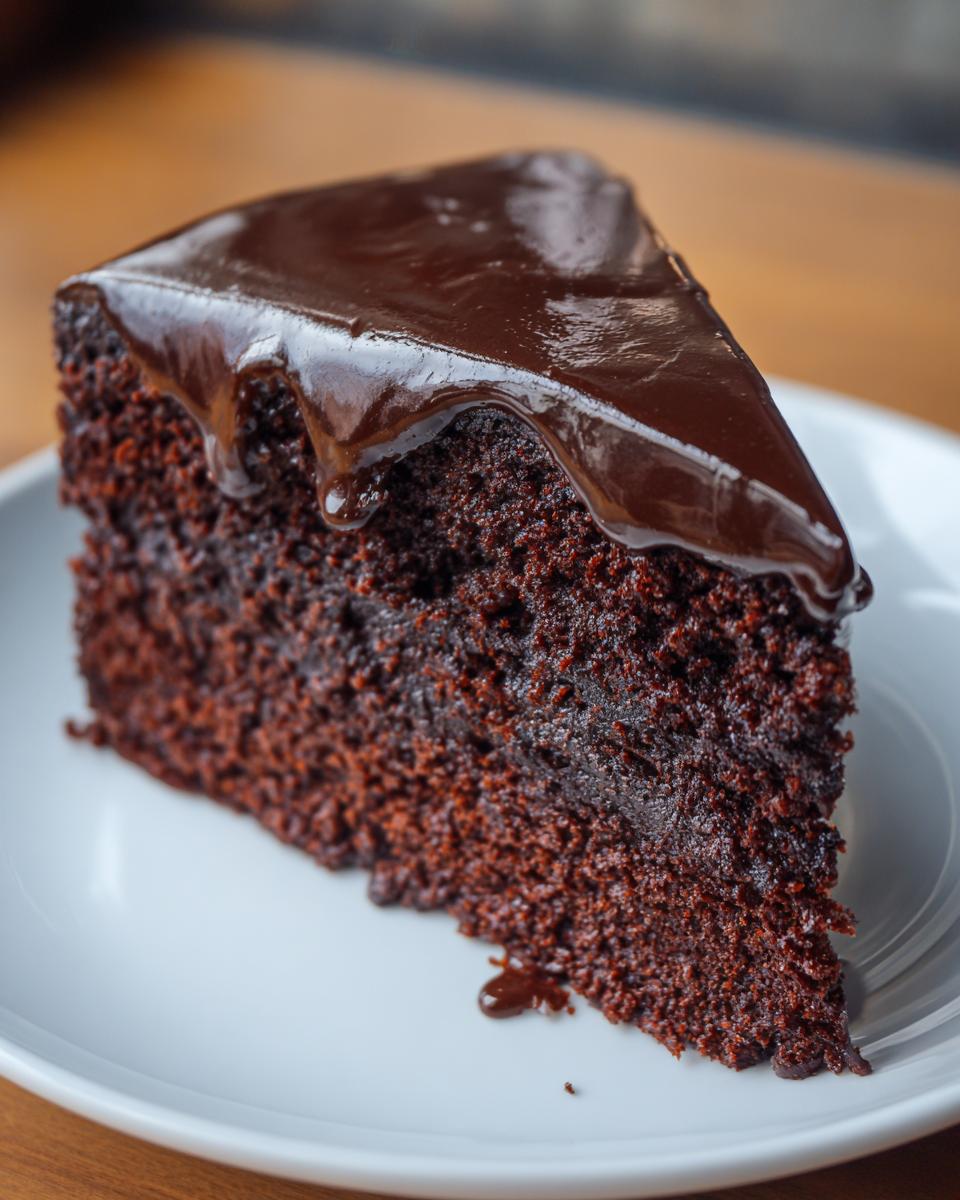
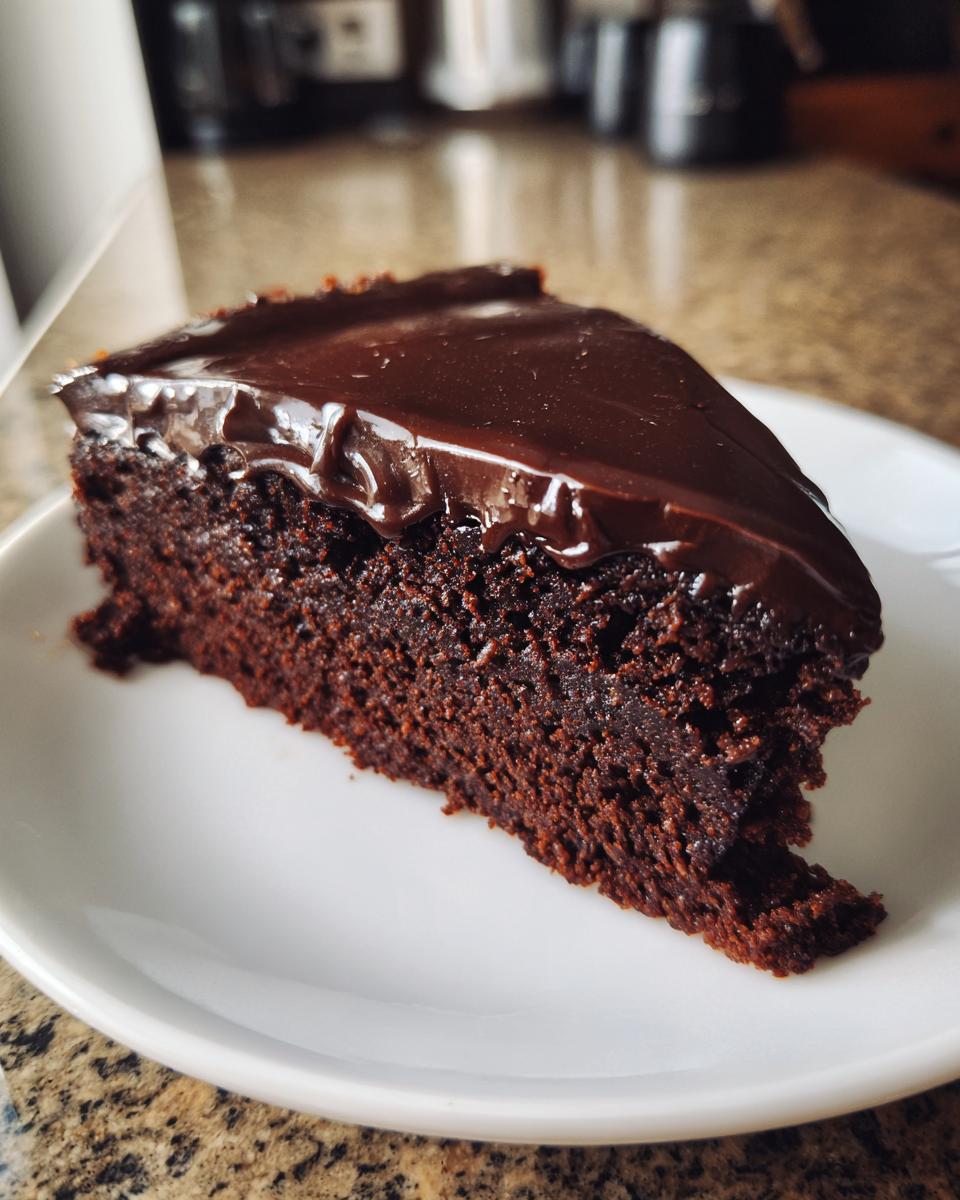
Now that we’ve got that gorgeous, airy batter folded together, it’s time to let the oven do its magic! Pour that batter into your beautifully prepped springform pan. We’re baking this at 350°F (175°C) for about 30 to 35 minutes. Remember, this cake is supposed to be intensely fudgy, so we aren’t looking for a completely dry center. You want the edges to look set, but the middle should still have a little wobble or softness to it.
When you test it, a toothpick inserted near the edge should come out with moist crumbs clinging to it—not wet batter, but definitely not perfectly dry either. If you want that crackly top that everyone loves on a fudgy chocolate dessert, the cooling process is key. As the cake cools down, it naturally sinks in the center. Don’t panic! That sinking is what creates that signature, gorgeously cracked surface.
Once it’s cooled down completely in the pan, maybe transfer it to a rack, but don’t try to release it yet! Patience is your best friend here. If you rush this cooling, you risk tearing that delicate interior. You can prepare your ganache while you wait, or maybe check out how I make my crispy potato wedges for something completely different!
Making the Silky Ganache for Your Chocolate Cake with Ganache Topping
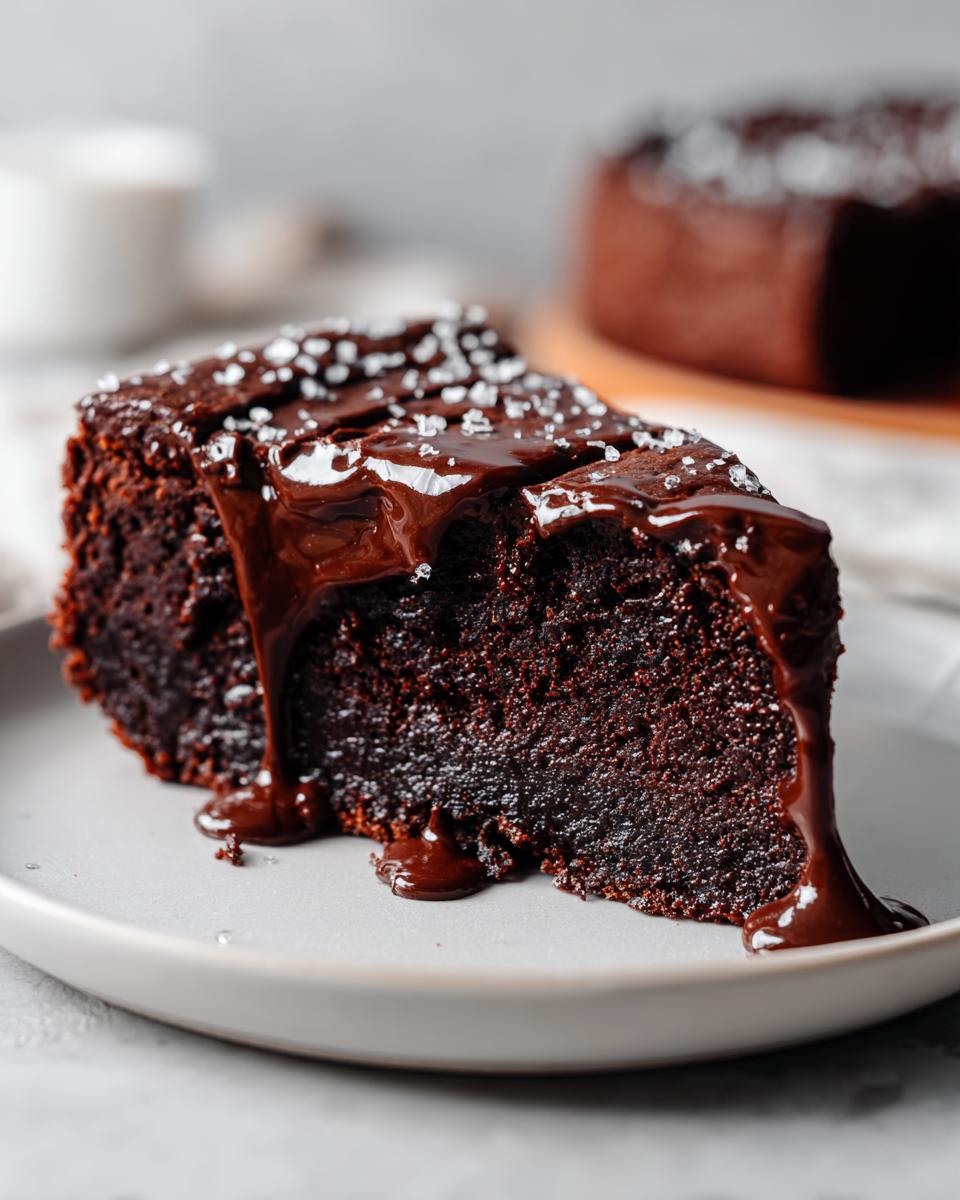
Okay, the cake is cooled down, slightly sunk, and looking beautifully rustic—now we make that professional-looking glossy topping! This is the best part because applying it makes the whole thing look like it came from a fancy bakery showcase. We are making a super simple ganache that will transform this rustic bake into the ultimate chocolate cake with ganache topping, giving you that rich finish every time.
While waiting for the main cake to cool, you can whip up the ganache in just a few minutes. While the ganache is setting up, you should absolutely take a look at my avocado toast with feta recipe if you need something light and savory to cleanse the palate first!
Here are the crucial steps for that perfect, smooth finish:
- Take your 4 ounces of chopped bittersweet chocolate and place it neatly in a small bowl. It’s already chopped, which saves cleanup time!
- In a tiny saucepan, heat up your heavy cream until you see little bubbles starting to simmer around the edges. It needs to be hot, but don’t let it boil over!
- Pour that hot cream right over the chopped chocolate in the bowl. Now, here is the most important part so we keep it silky: walk away! Let it sit there, undisturbed, for a full five minutes. This allows the heat to gently melt the chocolate from the inside out without shocking it.
- After those five minutes, grab a whisk and gently mix it starting from the center and working your way out until the whole thing is glossy and smooth. Whisking gently prevents you from whipping air into it, which creates tiny bubbles and ruins that beautiful, silky look we want.
Once the ganache is ready, simply pour it right over the top of your completely cooled cake. Let it sit for a little while until it firms up just enough so you can slice into it. Pure decadence achieved!
Tips for Success with Your Decadent Chocolate Dessert
I really want you to get that perfect, impossibly rich result every single time you make this, so let me share a few things I learned through my trial and error. This decadent chocolate dessert isn’t hard, but it does benefit from a couple of key non-negotiables, especially when it comes to temperature and ingredients. Follow these little tricks, and you’ll be making your guests swoon!
If you are looking for something savory to balance out all this richness, you have to try my maple mustard pork tenderloin recipe later this week!
The Importance of Chilling Before Serving
This is where patience pays off! While the cake smells amazing when it’s warm, the fudgy texture we’re aiming for really needs time to mature. I always recommend chilling this cake for at least two hours after the ganache is applied. Chilling lets that structure fully set up, making it so much easier to get those clean, beautiful slices. It goes from slightly soft to perfectly dense fudge when it’s cold!
Ingredient Quality for this Flourless Chocolate Cake
Because this recipe has so few moving parts, the quality of your chocolate matters immensely. Don’t use chocolate chips if you can help it; they have stabilizers meant to help them keep their shape in cookies, which we absolutely do not want here. You need good quality bittersweet chocolate, aiming for that 70% cacao or higher. Since this is essentially a dense chocolate meringue pie without the crust, that dark, intense flavor from good chocolate is what defines the entire experience of this flourless chocolate cake.
Serving Suggestions for this Simple Chocolate Dessert
Even though this cake is incredibly rich on its own, it’s fun to dress it up for guests or just for a special Tuesday night treat! Remember, food is about celebration, even if the celebration is just surviving the week.
Since the cake is so intensely dark, I love serving it with something bright or light on the side. Fresh raspberries or strawberries cut through that richness beautifully. A simple dollop of unsweetened whipped cream is also my favorite way to serve this—it lets the deep chocolate flavor really shine without adding more sweetness.
And, of course, you absolutely must serve a slice alongside a strong cup of hot coffee or maybe even a cool, bubbly drink like my sparkling honey lemon lemonade soda for a perfect contrast.
Storage and Reheating Instructions
This cake keeps surprisingly well, which is great because you’ll definitely want leftovers of this magnificent thing! Since all that richness comes from the butter and chocolate, you must store any uneaten pieces sealed tightly in the refrigerator. The ganache topping gets nice and firm when chilled, which is fine for eating cold, but I think it’s best slightly softened.
If you want that perfect, ultra-fudgy texture back, just pull your slice out of the fridge about 20 minutes before serving. That little bit of time lets the chill come off and the chocolate soften up just enough. It pairs perfectly with a tall, cold glass of my homemade honey lemon pink soda!
Frequently Asked Questions About This Gluten Free Dessert
I always get so many questions about this recipe because people are amazed at how simple it is to create such a show-stopping dessert! Since this is the perfect quick chocolate dessert for when you need something special fast, here are the most common things folks ask me before they bake it.
Can I make this cake ahead of time for a special occasion?
Absolutely, yes! In fact, I highly encourage it. This is one of those wonderful recipes that tastes even better the next day after the flavors have really settled into that dense, fudgy texture. You can assemble it, chill it completely, and keep it covered in the fridge for up to two days before your party. Just let it sit out on the counter for about 20 minutes to take the chill off before you slice it!
What if I don’t have bittersweet chocolate?
If you can’t find the 70% cacao bittersweet chocolate, don’t stress out! You can definitely use a high-quality dark chocolate that has a minimum of 60% cacao. Just remember, the lower the cacao percentage, the sweeter your final product will be. Since this recipe is designed to be intensely chocolatey, avoid milk chocolate entirely if you can—it just won’t give you that deep, luxurious base flavor you get from the darker versions.
Can I skip the ganache and just dust with sugar?
Of course you can! Grandma always kept things simple, and a light dusting of powdered sugar or even just an extra sift of unsweetened cocoa powder works beautifully, especially if you’re looking for an even faster finish. However, I have to tell you, that silky ganache really locks in the moisture and gives you that smooth, luxurious mouthfeel that sets this apart when serving it for a special occasion. If you skip it, you might want to check out my other ideas for simple toppings, too!
If you end up with extra batter for some reason, you can always whip up a batch of my seasonal cranberry orange punch!
Nutritional Data Estimate
Now, I know not everyone tracks their macros, but for those of you who do, I always like to provide a general baseline for what you’re looking at here. Since this is a truly decadent piece of work—all chocolate and butter, after all—it’s naturally richer than your standard cake! Don’t forget, these numbers are just estimates based on the standard ingredients listed above and a generous serving size, which for this cake, I’m defining as one slice.
You are getting intense flavor from that high-quality dark chocolate, so enjoy every bite! If you decide to add extra toppings or use different chocolate percentages, these numbers will shift a bit, just so you know.
- Serving Size: 1 slice
- Calories: 450
- Sugar: 35g
- Sodium: 150mg
- Fat: 32g
- Saturated Fat: 19g
- Unsaturated Fat: 13g
- Trans Fat: 0.5g
- Carbohydrates: 38g
- Fiber: 4g
- Protein: 7g
- Cholesterol: 180mg
Share Your Baking Success
I pour my heart into these recipes, and nothing makes me happier than knowing you’ve brought them to your own table! Once you’ve tried this easy flourless chocolate cake and realized just how simple it is to create something so intensely satisfying, I’d love to hear about it. Did you stick to the silky ganache, or did you top it with fresh raspberries?
Did you find this to be the perfect chocolate cake for special occasions? Tell me your thoughts!
Please take a moment to leave a review and a star rating below. It helps other bakers know they can trust this recipe for their next quick chocolate fix. And if you snapped a picture of your crackly-topped masterpiece—truly the best part!—I’d be thrilled if you shared it with me on social media. You can always reach out directly using my contact page if you have any specific questions about this simple chocolate dessert.
Happy baking, friends. I can’t wait to see what you create!
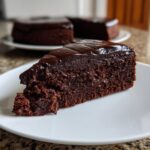
PrintRich & Fudgy One-Bowl Flourless Chocolate Cake with Silky Ganache
Create a decadent, naturally gluten-free chocolate cake that is rich and fudgy. This simple, one-bowl recipe comes together fast, making it perfect for special occasions or when you crave a truly satisfying dark chocolate dessert.
- Prep Time: 20 min
- Cook Time: 35 min
- Total Time: 55 min
- Yield: 8 servings 1x
- Category: Dessert
- Method: Baking
- Cuisine: American
- Diet: Gluten Free
Ingredients
- 8 ounces good quality bittersweet chocolate (at least 70% cacao), chopped
- 1 cup (2 sticks) unsalted butter
- 1 cup granulated sugar
- 1/2 cup packed light brown sugar
- 5 large eggs, separated
- 1 teaspoon vanilla extract
- 1/4 teaspoon salt
- 1/2 cup unsweetened cocoa powder (for dusting pan and topping)
- For the Ganache: 4 ounces bittersweet chocolate, chopped; 1/2 cup heavy cream
Instructions
- Preheat your oven to 350°F (175°C). Grease a 9-inch springform pan well. Line the bottom with parchment paper, then dust the sides and bottom generously with cocoa powder, tapping out any excess. This step prevents sticking.
- Place the chopped bittersweet chocolate and butter in a heatproof bowl set over a saucepan of simmering water (a double boiler). Stir occasionally until completely melted and smooth. Remove from heat and let cool slightly, about 5 minutes.
- Whisk the granulated sugar and brown sugar into the melted chocolate mixture until combined. Whisk in the egg yolks one at a time, mixing well after each addition. Stir in the vanilla extract.
- In a separate clean, dry bowl, beat the egg whites with the salt until stiff peaks form. You want them firm enough to hold their shape.
- Gently fold about one-third of the beaten egg whites into the chocolate mixture to lighten it. Then, carefully fold in the remaining egg whites in two additions until just combined. Do not overmix; some streaks of white are acceptable.
- Pour the batter into the prepared springform pan. Bake for 30 to 35 minutes. The edges should look set, and the center should still be slightly soft and fudgy. A toothpick inserted near the edge should come out with moist crumbs, not wet batter.
- Let the cake cool completely in the pan on a wire rack. The cake will sink slightly as it cools; this creates the signature crackly top.
- While the cake cools, make the ganache. Place the 4 ounces of chopped chocolate in a small bowl. Heat the heavy cream in a small saucepan until it just begins to simmer around the edges. Pour the hot cream over the chocolate. Let it sit undisturbed for 5 minutes, then whisk until smooth and glossy.
- Pour the ganache over the cooled cake. Let the ganache set slightly before slicing and serving.
Notes
- This cake tastes best when chilled for at least 2 hours before serving, allowing the fudgy texture to fully set.
- For a beautiful presentation, dust the top of the cooled cake with a thin layer of cocoa powder before adding the ganache, or dust with powdered sugar after the ganache has set.
- If you prefer a less intense chocolate flavor, you can use 60% cacao chocolate instead of 70%.
Nutrition
- Serving Size: 1 slice
- Calories: 450
- Sugar: 35
- Sodium: 150
- Fat: 32
- Saturated Fat: 19
- Unsaturated Fat: 13
- Trans Fat: 0.5
- Carbohydrates: 38
- Fiber: 4
- Protein: 7
- Cholesterol: 180