
You know that smell? That incredible, yeasty, warm aroma that only fresh bread baking can produce? That’s the smell of a fantastic weekend morning, and trust me, you can absolutely create it without sacrificing your whole day!
When I started Taste This Plate, I vowed to break down why recipes work; I wanted to reveal the simple secrets my grandmother used to show love through food. You can read a bit more about my baking philosophy on the About Page. That desire for approachable perfection leads us right here: to the truly easy, no-knead method for making the absolute best homemade english muffins.
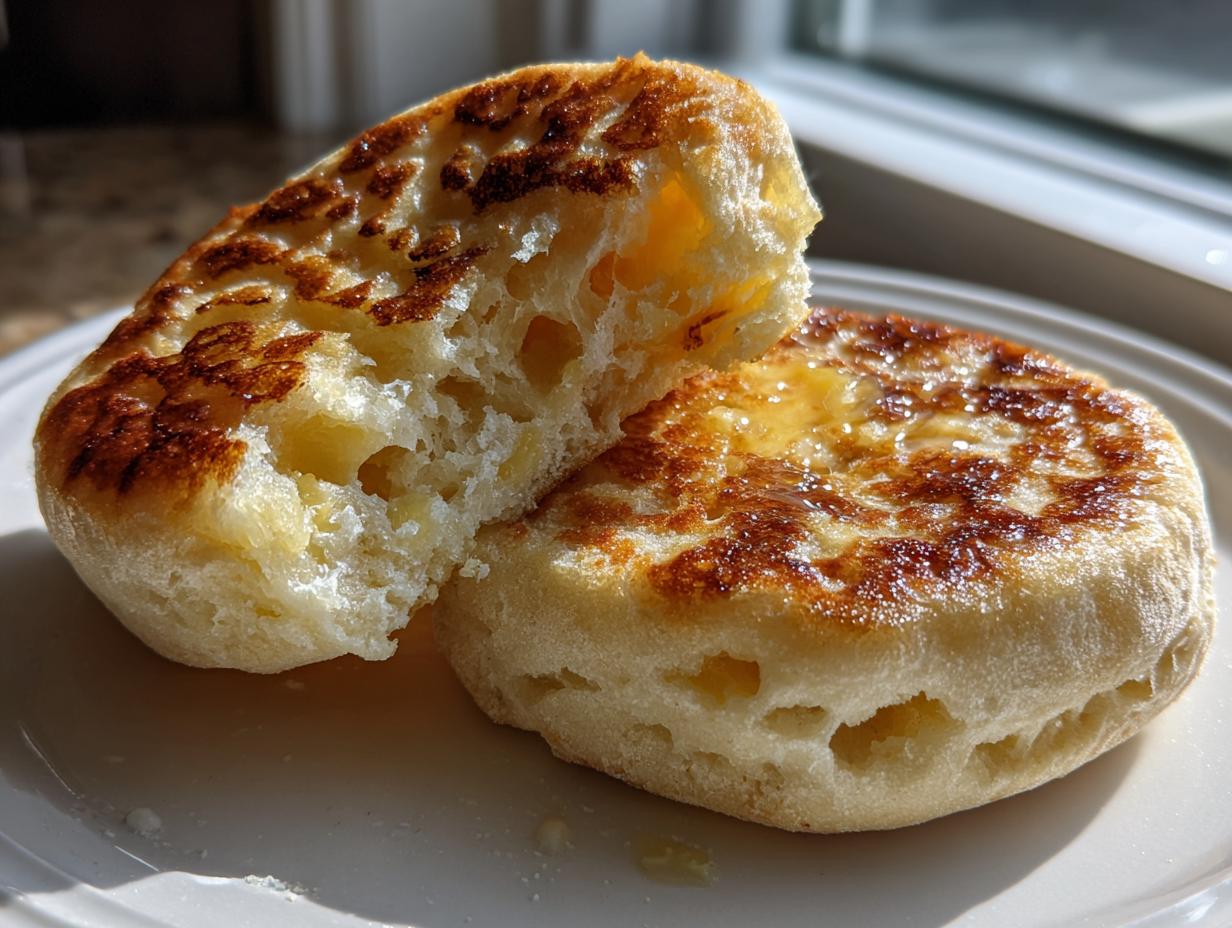
We are getting those iconic, buttery-sponge pockets—the famous ‘nooks and crannies’ everyone chases—using standard pantry ingredients and just a skillet. Forget complicated machinery; this recipe is designed to fit right into your regular kitchen routine!
- Why This is the Best English Muffin Recipe for Home Bakers
- Gathering Ingredients for Fluffy English Muffins
- How to Prepare Your Homemade English Muffins Step-by-Step
- Expert Tips for Perfect Homemade English Muffins
- Ingredient Notes and Substitutions for Homemade English Muffins
- Serving Suggestions for Your Homemade English Muffins
- Storage and Reheating Instructions for Homemade English Muffins
- Frequently Asked Questions About Making English Muffins
- Estimated Nutritional Data for Homemade English Muffins
- Share Your Homemade English Muffins Experience
Why This is the Best English Muffin Recipe for Home Bakers
I’ve messed up so many bread recipes trying to follow what felt like overly fussy directions. But these homemade english muffins? These are reliable, friends. My goal here at all times is to give you recipes you can trust, and this one delivers flakey perfection every time, even if you’re a beginner.
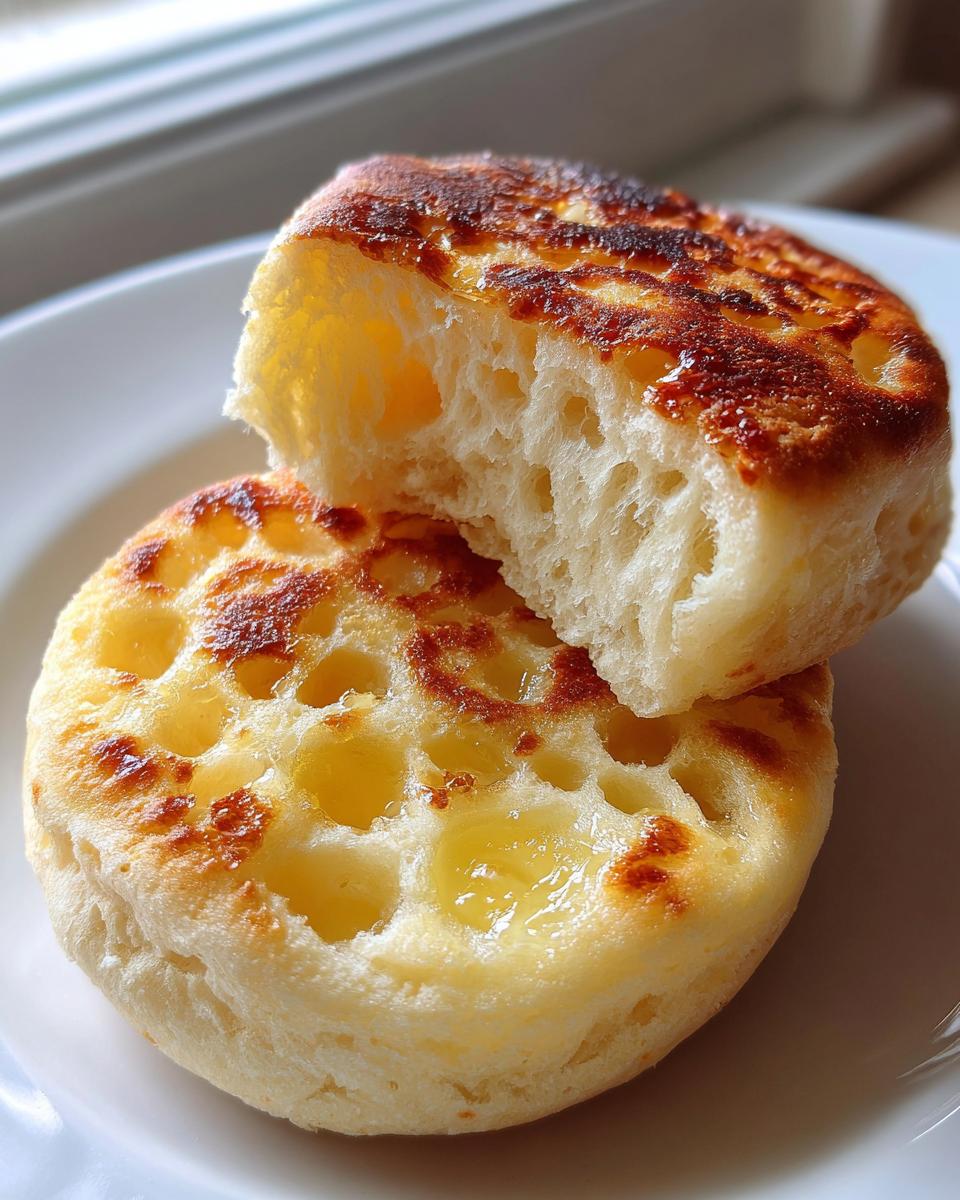
- They are unbelievably fluffy inside when you finally split them open.
- It uses simple, accessible ingredients—no trips to specialty stores needed!
- The dough is no-knead, which means less work for you on your weekend baking projects.
Achieving Signature Nooks and Crannies Muffins
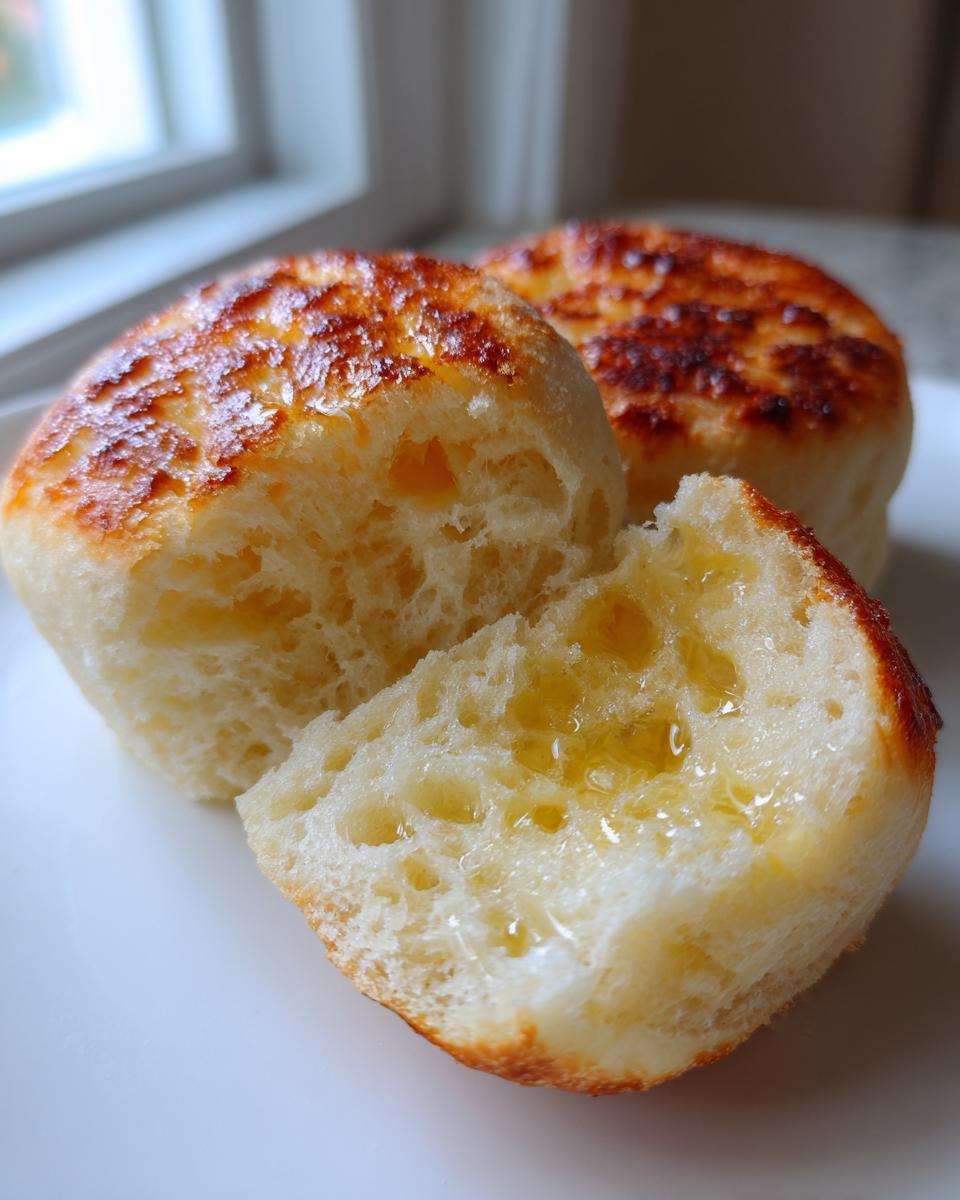
If you’re here, you want the holes, right? You want those Nooks and Crannies Muffins that trap melting butter like a tiny sponge. That magic happens entirely in the cooking phase. Because we cook them low and slow on a dry skillet and absolutely refuse to squash them down with the spatula, the steam stays trapped and creates those wonderful airy pockets inside.
Simple Steps for Homemade English Muffins
Honestly, this is what wins me over. We’re talking one bowl and zero kneading time required! That sticky dough does all the hard work rising on its own. It’s the perfect entry point if you’ve been nervous about diving into from scratch baking. Set it, forget it for an hour, and come back to beautiful dough ready for cutting.
Gathering Ingredients for Fluffy English Muffins
Okay, before we get into the fun part—the cooking—we need our supplies ready. This is where trusting the recipe really starts. Since this recipe is so simple, the quality and state of your ingredients matter a lot! We are using pantry staples, but we need to be precise about two things, which makes all the difference between flat discs and fluffy english muffins.
Here is what you need to pull together. I always measure everything out twice before starting, just like my grandmother taught me. You can find the full list in the recipe card, but let’s chat about the specifics now so you nail the prep work.
- 1 1/2 cups warm milk (about 105-115°F)
- 2 1/4 teaspoons active dry yeast
- 1 tablespoon granulated sugar
- 3 1/2 cups all-purpose flour, plus more for dusting
- 1 teaspoon salt
- 1/4 cup cornmeal, for dusting
Ingredient Preparation Notes
Let’s talk about the milk temperature first, because this is Make-or-Break for your yeast! You need the milk to be genuinely warm—think bathwater temperature—so aim for that sweet spot between 105-115°F. If it’s too cold, the yeast will sleep forever. Too hot, and you’ll kill it! We want that foamy confirmation that the yeast is awake and ready to work its magic.
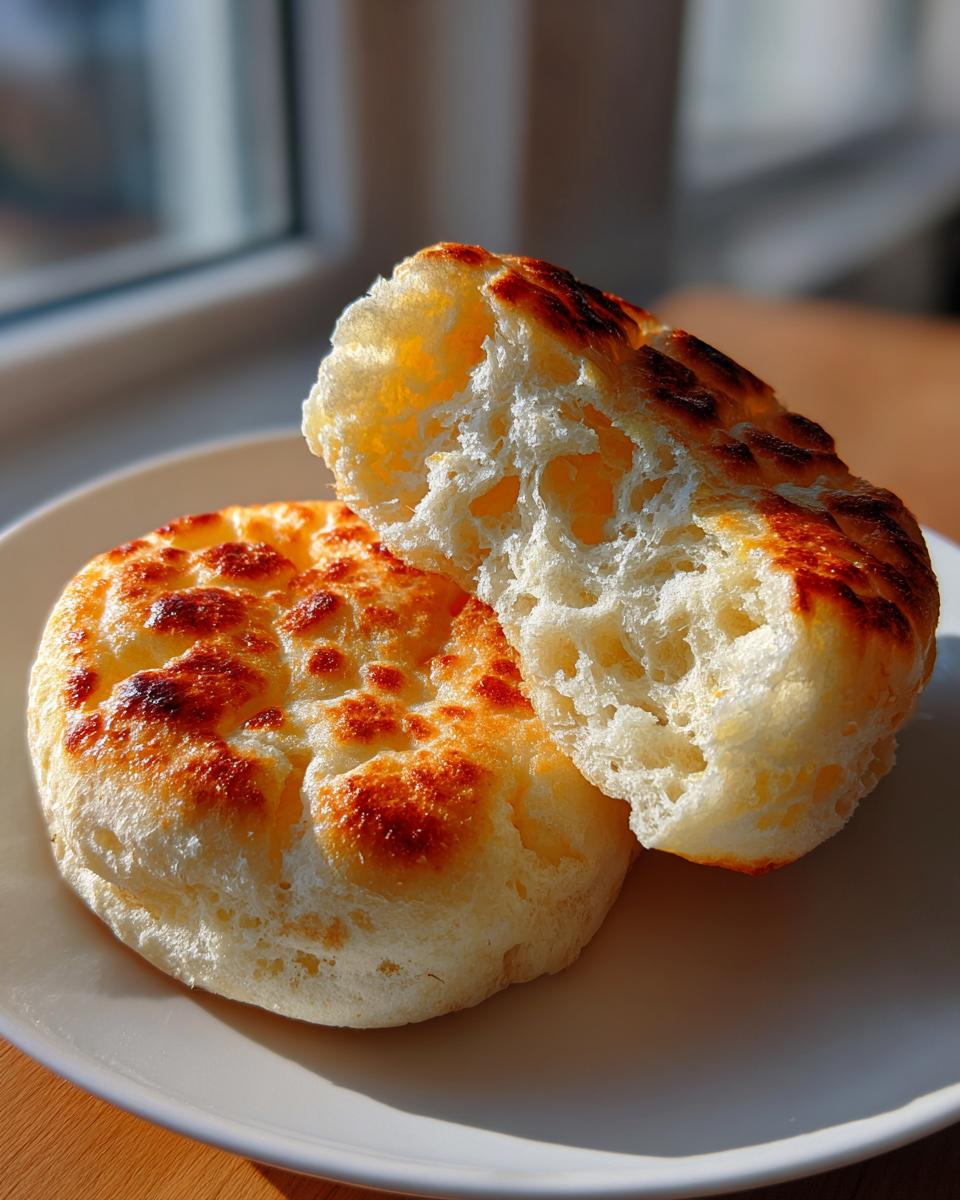
The second thing I want to make sure you pay attention to is the cornmeal. This isn’t just added flavor, though it is nice! We use it generously to dust the pan later. The cornmeal is key because it prevents sticking on that dry skillet, but more importantly, it gives you those tiny, slightly crisp edges that add texture when you bite into your finished homemade english muffins.
How to Prepare Your Homemade English Muffins Step-by-Step
Now for the fun part, where we turn that warm milk mixture into actual breakfast heroes! Don’t look at the time too hard during the rising stage; that’s where most people get anxious. Remember, good things take a little patience, especially when dealing with yeast. This whole process is designed to be super straightforward, turning out gorgeous homemade english muffins.
Activating Yeast and Mixing the Dough
First thing’s first: get that yeast happy! Pour your warm milk—remember that 105 to 115°F sweet spot—into your bowl, sprinkle in the sugar, and then whisper sweet nothings to the yeast by sprinkling it on top. Wait about five minutes. If it gets foamy and frothy, great! Your yeast is ready for action. If it’s flat, you need warm water and fresh yeast, because the old batch is officially asleep.
Next, dump in the salt and all that flour all at once. Grab your wooden spoon—no electric mixer needed here—and just stir everything until it comes together into a shaggy, sticky mess. I mean it, a sticky mess! This is where people panic because they think they need to knead it like traditional bread. Nope! Don’t touch it! Cover that bowl up and let it hang out somewhere warm for at least an hour, maybe 90 minutes—you want it doubled in size. Then, gently dust your counter, and use a scraper or soft spatula to scrape the dough out onto the floured surface. Pat it gently into a rough ¾-inch thick shape. Use your 3-inch cutter to stamp out the rounds. Place those little dough guys on a sheet generously dusted with cornmeal and let them rest again for 30 minutes. Seriously, don’t skip that second rest!
Cooking Your Skillet English Muffins
Okay, this cooking step is everything. Grab your cast iron skillet—you want a dry pan, no butter or oil added! Heat it over medium-low. I can’t stress this enough: medium-low! If the pan smokes, it’s too hot, and your outside will burn before the inside cooks well enough to form those crannies. If you’re keeping a batch of my homemade granola on hand, you know I like to keep my recipes simple, and this is no exception. The low heat is the secret weapon here.
Gently set your dough rounds onto the hot, dry surface. They need about 8 to 10 minutes on the first side until they look beautifully golden brown. Then, flip them carefully. The absolute MUST DO here is to resist the urge to smash them down with your spatula to make them look perfect. If you press them, you squeeze out all that precious, airy structure we worked so hard to build! Cook the second side for another 8 to 10 minutes until nicely browned all over. They should feel soft but springy. After they cool slightly on a rack, you’re ready for the grand finale! You can see more neat tips over at Simply Savory Kitchen!
Expert Tips for Perfect Homemade English Muffins
I’ve been tweaking this homemade english muffins recipe for ages, and trust me, these professional tips are what turn a good muffin into the Best English Muffin Recipe you’ll ever try. They sound small, but they make a huge difference when you’re going for that iconic texture!
The biggest, most important tip involves how you open the muffin after it’s cooked. You simply cannot use a knife. If you slice these babies open, you seal up the edges and flatten the interior structure. You have to use a fork! Seriously, pierce the edges all the way around and gently pull the muffin apart. That’s what exposes those beautiful, airy pockets ready to soak up all the butter.

Another thing that saves tons of time and heartache is being patient with the heat. If you’re looking for ways to serve them once they are done, I highly recommend putting them on top of some salty feta avocado toast, but only after they are split and toasted! If you want some other great ideas for using your fresh bread, check out the tips on Chef Savvy.
Ingredient Notes and Substitutions for Homemade English Muffins
Even though this is my super simple recipe for homemade english muffins, I always get reader questions about ingredients, and that’s totally fair! Baking is chemistry, and sometimes we run out of things on a random Tuesday morning. My whole philosophy here is about building trust, so let’s clear up a couple of potential swaps right now so you feel totally confident when you mix up that dough.
The ingredients—milk, yeast, sugar, flour, salt, and cornmeal—are basic, but knowing what happens if you change one piece is important for getting that perfect texture we talked about. We’ve established that the timing of your yeast is everything, but what about the foundation, the flour?
Flour Choice for From Scratch Baking
I use all-purpose flour here, and I love it because it’s foolproof. It has enough protein content to give us structure without going overboard. Remember, we are actively trying *not* to knead this dough, which means we aren’t trying to develop a ton of gluten!
Now, if you absolutely only have bread flour on hand for your from scratch baking project, go ahead and use it! Just know that bread flour has higher protein, so it’s going to give you a slightly chewier muffin. That’s not bad, mind you, but it might lead to a slightly less melt-in-your-mouth soft inside compared to using AP flour. If you use bread flour, just mix until *just * combined, and don’t let that dough over-proof while it rests!
Serving Suggestions for Your Homemade English Muffins
Toast them until they are golden and you can practically hear the cornmeal crackle just a bit—that’s when these are ready to eat! Of course, a smear of real butter and maybe some jam works every single time. But since these are so perfect for your next Brunch Ideas Homemade spread, let’s jazz them up a little bit!
They make the absolute best base for E-Z breakfast sandwiches—think fried egg, a slice of crispy bacon, and maybe some sharp cheddar cheese melting all over the nooks. They are also fabulous topped with smoked salmon and cream cheese. Or, if you want something sweet and fun, try them split and dipped in my Blueberry Breakfast Quesadilla filling!
Storage and Reheating Instructions for Homemade English Muffins
So you made a giant batch because that’s just how you roll when you bake bread, right? Good! These homemade english muffins freeze wonderfully, but even just making enough for one morning means you need to know how to keep the leftovers soft.
If you have muffins you plan to eat within two or three days, I just keep them in a standard airtight container on the counter—no need to refrigerate! Refrigeration actually speeds up staling in bread products, which is the last thing we want for our fluffy interior. Just make sure that container seals tightly so they don’t dry out.
For longer storage, freezing is your best friend! Once they are completely cool (and I mean totally cool, heat trapped inside makes them gummy!), slice them in half first. Yes, slice them now, even though I told you to use a fork later! Slicing them before freezing makes toasting much faster later on. Lay them flat on a cookie sheet for about an hour to flash-freeze them so they don’t all stick together in the bag. Once they’re hard, transfer them into a heavy-duty freezer bag. They stay perfect for about two months.
When you’re ready for a quick breakfast, you don’t even need to thaw them out! Just pop those homemade english muffins straight into the toaster, or lay them cut-side up on a baking sheet in a warm oven (about 300°F) for just five minutes. That little bit of heat brings back that fantastic soft texture, making them ready for your fork-splitting ritual!
Frequently Asked Questions About Making English Muffins
I get so many questions when people first dive into homemade bread baking! Since this recipe is pretty specific about using a skillet, I want to quickly clear up the most common hesitations I hear, especially from people looking for the absolute Best English Muffin Recipe available.
Here are the things I hear most often. Hopefully, this helps you feel super confident when you start mixing!
Can I bake these *Skillet English Muffins* instead?
You totally can, and it’s a great alternative if your stove top just isn’t cooperating! However, you have to understand the trade-off. These fluffy english muffins get that distinctive slight crust—that soft inside/crisp outside contrast—because the dry heat of the cast iron skillet cooks them from the bottom up. If you bake them in the oven, they will cook more evenly, resulting in a softer crust all around, more like a regular roll. For the true classic texture, stick to the skillet!
Another common question about yeast: Yep, you can usually swap active dry yeast for instant yeast, but just skip the proofing step! Add the instant yeast right into the flour and salt mixture before mixing wet into dry. It’s even easier!
If you’re looking for other great Easy Breakfast Recipes that come out fast, you should check out my recipe for Bacon Gruyere Egg Bites. They’re perfect for quick morning grab-and-go meals!
Estimated Nutritional Data for Homemade English Muffins
Okay, let’s talk nutrition for these amazing treats. Because we aren’t adding a ton of oil or butter during the cooking process—we use a dry skillet, remember?—these tend to be easier on the fat content than a lot of other homemade breads out there. That’s a definite win!
I pulled the estimates from standard ingredient databases, so take these numbers with a grain of salt—literally! Every brand of flour or milk you use changes things slightly, so this is just a good ballpark idea for one muffin split open and ready for butter.
- Calories: Around 180 per muffin
- Fat: Just about 1.5 grams (Whew!)
- Carbohydrates: Roughly 36 grams
- Protein: About 6 grams
- Sugar: Very low, around 2 grams, mostly from the yeast activation.
See? That’s really not bad for something so unbelievably satisfying! If you’re pairing these beauties with eggs or smoked salmon, you’re bumping up the protein, making a perfectly balanced breakfast sandwich, which is one of the most popular ways everyone uses their homemade english muffins!
Share Your Homemade English Muffins Experience
That’s it! You’ve done it! You’ve officially conquered the store-bought muffin aisle for good. Seriously, I’m so excited for you to sit down with your first batch of warm, fork-split, golden homemade english muffins!
I truly want to hear all about it! Did you manage that perfect low-and-slow cooking temperature? Did you resist the urge to press them down on the skillet? Did your kids immediately devour their share? Please, let me know! Leave a comment below telling me how this English Muffin Recipe turned out for you. Your successes and even your little kitchen oopsies help me keep making sure my recipes are easy to follow for everyone.
If you snapped a picture of those gorgeous, hole-filled insides, I’d love to see them! Tag us if you share on social media. Building this community where we share simple, great food is why I started this whole thing. If you have any lingering questions or just want to say hi, you can always reach out through the Contact Page.
Happy toasting, friends, and thank you for letting me share my favorite breakfast secret with you!
PrintEasy Homemade English Muffins with Perfect Nooks and Crannies

Make classic, fluffy homemade English muffins using a simple, no-knead method. These skillet-cooked muffins have the signature nooks and crannies perfect for toasting and butter.
- Prep Time: 20 min
- Cook Time: 25 min
- Total Time: 1 hour 55 min
- Yield: 8 to 10 servings 1x
- Category: Breakfast
- Method: Skillet Cooking
- Cuisine: American
- Diet: Vegetarian
Ingredients
- 1 1/2 cups warm milk (about 105-115°F)
- 2 1/4 teaspoons active dry yeast
- 1 tablespoon granulated sugar
- 3 1/2 cups all-purpose flour, plus more for dusting
- 1 teaspoon salt
- 1/4 cup cornmeal, for dusting
Instructions
- Combine the warm milk, yeast, and sugar in a large bowl. Let stand for 5 minutes until foamy. This activates the yeast.
- Add the flour and salt to the yeast mixture. Stir with a wooden spoon until a shaggy, sticky dough forms. Do not knead.
- Cover the bowl with plastic wrap and let the dough rise in a warm place for 1 to 1.5 hours, or until doubled in size.
- Lightly dust a clean surface with flour. Scrape the dough out onto the surface. Gently pat the dough into a rough rectangle about 3/4 inch thick. Avoid overworking the dough.
- Use a 3-inch round cutter (or the rim of a glass) to cut out rounds. You should get about 8 to 10 muffins. Gather scraps, gently press together, and cut out any remaining rounds.
- Generously dust a baking sheet or large cutting board with cornmeal. Place the cut dough rounds on the cornmeal, spacing them slightly apart.
- Cover the muffins loosely with a clean kitchen towel and let them rest for 30 minutes.
- Heat a large, dry cast iron skillet or griddle over medium-low heat. The temperature must be low to cook the inside without burning the outside.
- Carefully place the dough rounds onto the hot, dry skillet, leaving space between them. Cook for 8 to 10 minutes per side, until golden brown. Do not press them down with a spatula.
- Remove the cooked muffins and place them on a wire rack. Repeat with the remaining dough.
- To achieve the signature texture, use a fork to split the muffins open horizontally. Do not use a knife. Toast them lightly before serving warm with butter.
Notes
- Use a fork, not a knife, to split the cooked muffins. This action creates the famous nooks and crannies that hold melted butter.
- Cook these low and slow. If your heat is too high, the outside will burn before the inside cooks through.
- For best results, use a thermometer to check your milk temperature when proofing the yeast.
Nutrition
- Serving Size: 1 muffin
- Calories: 180
- Sugar: 2
- Sodium: 250
- Fat: 1.5
- Saturated Fat: 0.3
- Unsaturated Fat: 1.2
- Trans Fat: 0
- Carbohydrates: 36
- Fiber: 2
- Protein: 6
- Cholesterol: 5