

If you’re anything like me, the holidays—or any good excuse for a celebration, really—demand something sweet made by hand. I’m Kate Reilly, and here at the Plate, we believe baking shouldn’t feel like a high-stakes science experiment. It should feel like showing love! That’s why I spent years breaking down classic American treats to make them truly foolproof for you. Today, we are tackling the absolute icon of holiday baking: the classic kiss cookies. Forget complicated steps; this Peanut Butter Blossoms recipe is the trustworthy starting point for all your festive baking adventures. It’s simple, it’s chewy, and it carries that perfect little piece of chocolate heaven right in the middle.

- Why You Will Love These Classic Kiss Cookies
- Essential Ingredients for Perfect Peanut Butter Kiss Cookies
- Expert Tips for Making Flawless Kiss Cookies
- Step-by-Step Instructions for Peanut Butter Blossoms Kiss Cookies
- Storage and Reheating Instructions for Your Kiss Cookies
- Variations on Classic Kiss Cookies
- Serving Suggestions for These Festive Kiss Cookies
- Frequently Asked Questions About Baking Kiss Cookies
- Nutritional Estimate for One Peanut Butter Kiss Cookie
Why You Will Love These Classic Kiss Cookies
Honestly, I think these cookies are popular for a reason! They are the definition of easy dessert recipes that pack a huge flavor punch. You get that wonderful salty-sweet combo of peanut butter and chocolate wrapped up in one bite. They look way more complicated than they are, which is always a bonus when you’re entertaining!
- They bake up perfectly soft and chewy every single time—that’s a promise!
- The dough comes together so quickly; they are one of my favorite reliable holiday cookie ideas.
- They require very little decorating skill, unless you count pressing a chocolate kiss into the center!
- You end up with that fantastic crackled sugar coating which signals true, homemade soft and chewy cookies.
Essential Ingredients for Perfect Peanut Butter Kiss Cookies
When I promise you simple ingredients, I mean it! Baking with quality components makes your life easier, and that’s the heart of my philosophy here. I want you to trust this recipe the first time you try it, so let’s talk about what you need. For the base, you’ll grab the usual suspects:
- 1 ½ cups all-purpose flour
- ¾ teaspoon baking soda
- ½ teaspoon salt
Now for the flavor makers. I stick firmly to creamy peanut butter—the source data suggests JIF works great for consistency, and I agree! Your fat component needs to be real dairy, so grab ½ cup of unsalted butter, and please make sure it is very soft. We need that creaming power!
For the sweetness, we use both granulated sugar for coating and light brown sugar to pack in that classic caramel depth. Don’t forget the flavor anchors: 1 large egg, which must be at room temperature, and 2 teaspoons of pure vanilla extract. You can find my thoughts on why room temperature eggs matter so much when whipping butter in my guide to melt-in-your-mouth butter cookies.
And finally, the star topping! You need 28 Hershey’s Kiss candies, and this is non-negotiable: they must be unwrapped and frozen solid before you even start baking. Trust me on this step!
Expert Tips for Making Flawless Kiss Cookies
Getting these Peanut Butter Blossoms right is all about technique—it’s not just about the ingredients. I learned this the hard way when my first batches spread into one giant, flat sheet of sugary goo! The beauty of these Hershey Kiss Cookies is their soft center, and we protect that with a few key moves.
The Secret to Soft and Chewy Kiss Cookies Dough
When you mix in the flour, you are looking for *just* combined. If you keep mixing once you see those dry streaks disappear, you’re developing gluten, and that’s what turns a wonderfully soft and chewy cookie into something tough. Mix it low and slow until the flour disappears, then stop immediately. Don’t worry about any tiny bits left over; they’ll incorporate when you roll the dough balls.
Why We Freeze the Hershey’s Kiss Candies
This is the move that separates a nicely decorated cookie from a perfect Blossom. You *have* to freeze your Kisses! If you press a room-temperature chocolate piece into a piping hot cookie, it melts instantly, bleeding everywhere and sinking too deep into the dough. Freezing them guarantees they stay firm, allowing them to gently soften the dough just enough to create that iconic crater shape without melting into a total chocolate puddle.
Step-by-Step Instructions for Peanut Butter Blossoms Kiss Cookies
Okay, now that you have your frozen Kisses ready and your ingredients measured, it’s time to put it all together! These steps are tried and true, meaning if you follow the order, you’ll end up with those beautiful, classic cookies everyone expects. Remember, baking is about showing love, not stress, so take your time blending the dough.
First things first: get organized! Preheat your oven to 375°F (190°C). We want it hot and ready. Line your baking sheets with parchment paper. I’ve spent years trying to scrape off burnt bottoms, and honestly, parchment paper is a non-negotiable helper if you want easy cleanup and perfect bottoms.
Next, we bring those wet and dry components together properly. In one bowl, make sure your flour, baking soda, and salt are whisked well. In the big bowl, cream that softened butter, peanut butter, and sugars until they look happy and fluffy—this is crucial for that soft center we love.
Beat in your room temperature egg and vanilla, just until everything looks married. Then, add the dry mix slowly, keeping that mixer speed low, just until the dough comes together. Remember what I said about not overmixing? Do that here!
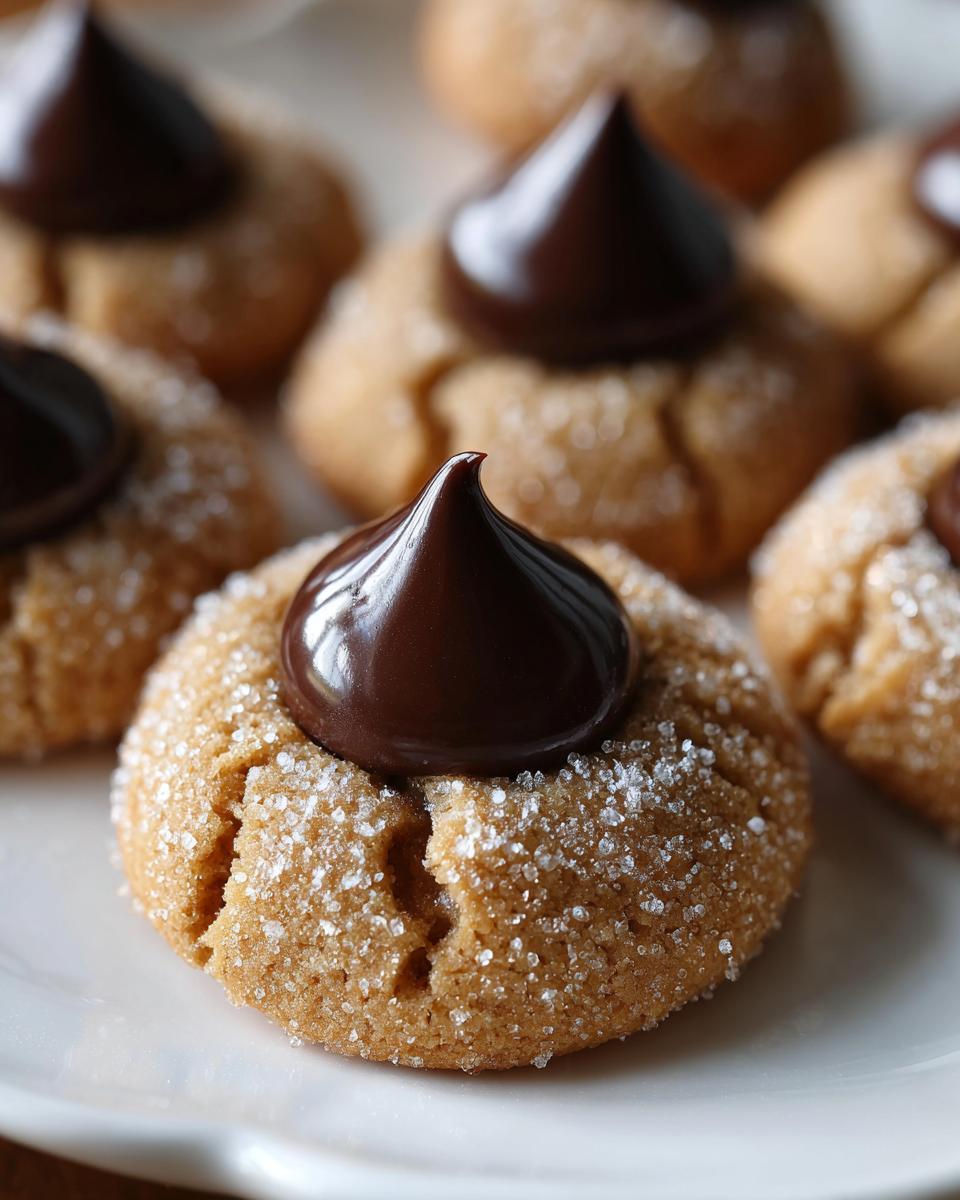
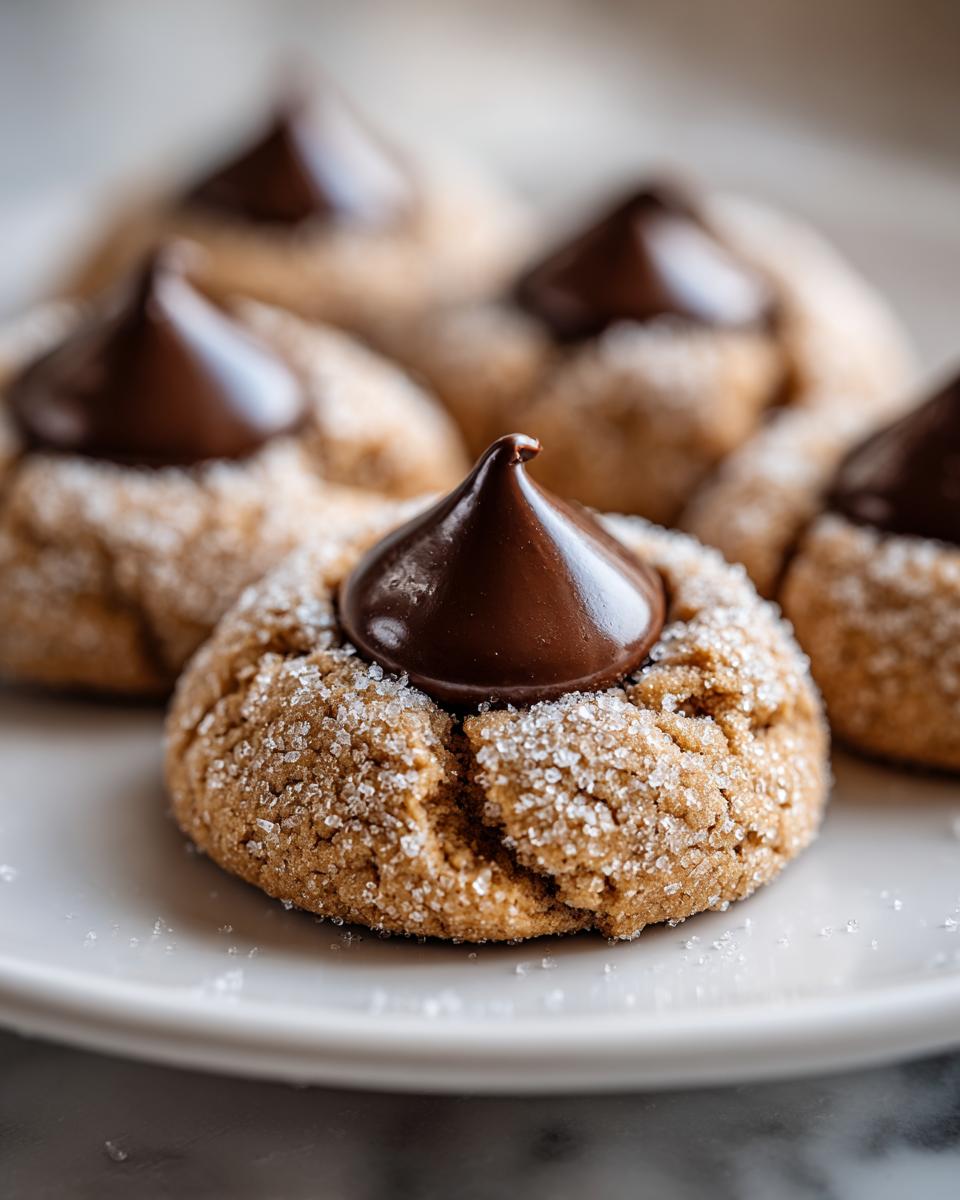
Now for the fun part that makes these kiss cookies so recognizable! Pour the reserve ½ cup of granulated sugar into a shallow dish. Roll those dough balls carefully into about 1-inch spheres—I use a cookie scoop sometimes to keep them uniform—and then roll them thoroughly in the sugar until they are completely coated. That sugary shell gives you the signature crackle.
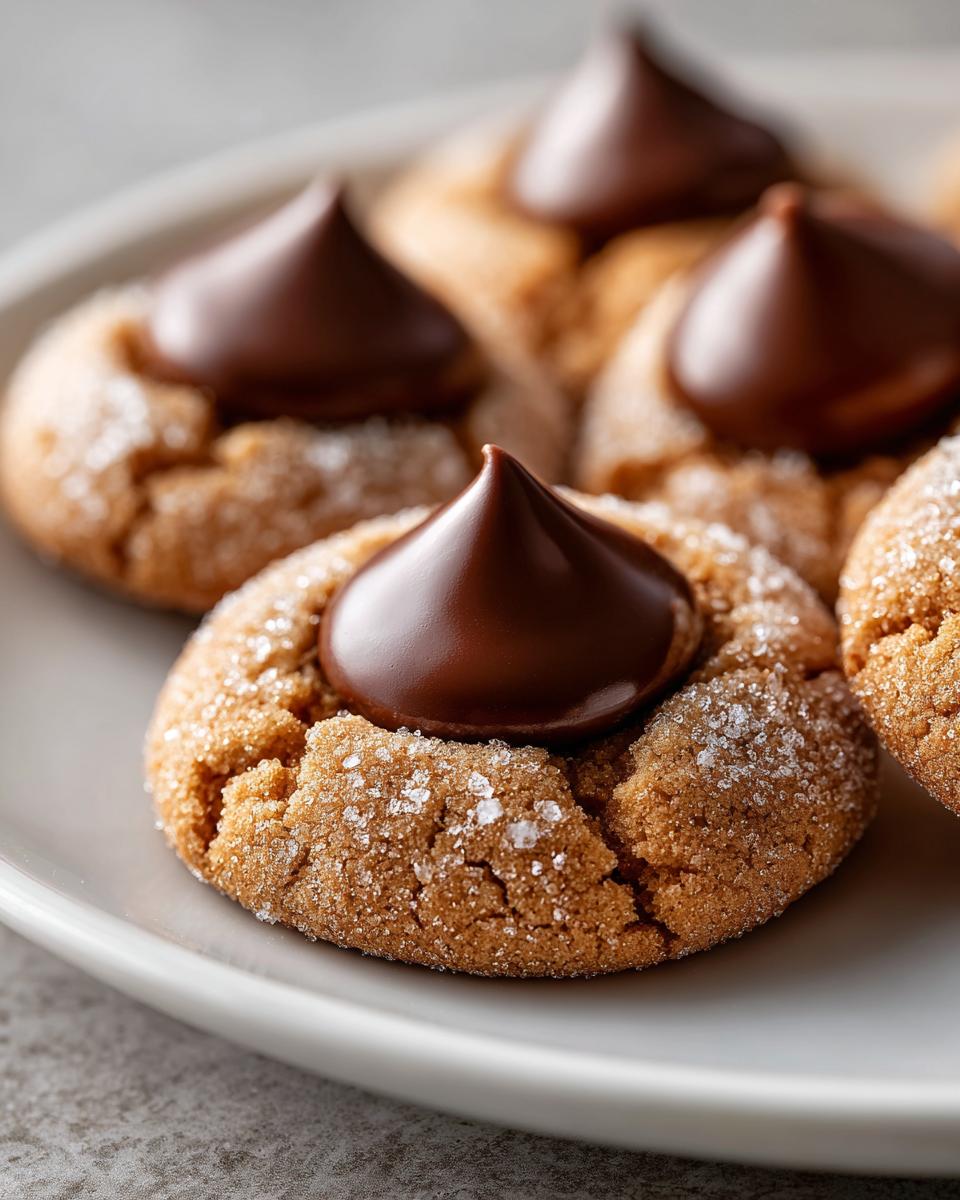
Place the sugared dough balls about 2 inches apart on your prepared sheets. Pop them into that hot oven for 8 to 10 minutes. You’re looking for set edges, but the center should still look a little soft or pale. They don’t brown a ton, so keep an eye on them!
The final, magical step happens right when they come out. Immediately take one of those frozen Kisses and gently press it right into the center of each warm cookie. Don’t push so hard that the cookie dough rises up the sides! Let them sit on the hot tray for 5 minutes—this lets the chocolate soften just enough. Then, carefully transfer them to a wire rack to cool completely. As they cool, that Kiss sets up perfectly. If you need more chocolate cookie inspiration after this, check out this gooey peanut butter cup cookie recipe!
Storage and Reheating Instructions for Your Kiss Cookies
Keeping these melt-in-your-mouth cookies perfect is easy, which makes them great for baking ahead! Store your finished Kiss Cookies in an airtight container at room temperature. Seriously, they are great just sitting on the counter, and they usually stay wonderfully soft for about 4 or 5 days. I don’t bother with the fridge unless it’s super humid where you live.
If you want that chocolate Kiss center to be perfectly gooey again, don’t microwave them whole, or the cookie can get tough! Just pop one or two cookies onto a plate and microwave for about 5 to 7 seconds. That light warmth is just enough to soften the chocolate nicely without drying out the surrounding peanut butter cookie.
Variations on Classic Kiss Cookies
Now, while the Peanut Butter Blossoms recipe is king in my book, I completely understand wanting to mix things up, especially around the holidays! These cookies travel so well, making them perfect for festive cookie swaps. The core idea—a soft cookie with a chocolate kiss pressed in—really works with almost any base dough you love.
If someone is looking for something different than peanut butter, this is where you get creative! We’ve seen amazing Peppermint Kiss Cookies made by adding extract right into a sugar cookie base, or even using shortbread. They smell incredible, I tell you!
Trying Chocolate Kiss Cookies Bases
My favorite alternative has to be diving into Chocolate Kiss Cookies. Instead of the peanut butter dough, you can take a really good, rich chocolate sugar cookie dough—maybe something bordering on a brownie texture—roll that sucker in sugar, and press the Kiss in. The resulting cookie is intensely chocolatey, and when paired with the semi-sweet chocolate center, it’s just decadent. If you’re looking for a different kind of minty chocolate hit, you might want to compare this technique to my peppermint chocolate chip cookies base!
Serving Suggestions for These Festive Kiss Cookies
Because these are just so wonderfully iconic, they make the star of any cookie tray! For big Christmas cookie recipes gatherings or a simple after-school treat, they pair beautifully with something warm. I love serving them alongside a tall glass of ice-cold milk, of course, but they are even better dunked slightly into a mug of hot cocoa.
If you’re making a dessert spread for Valentine’s Day cookies, set them out next to a bowl of fresh strawberries or try them with a frothy glass of my homemade eggnog. You just can’t go wrong when you pair peanut butter and chocolate with something creamy like classic eggnog!
Frequently Asked Questions About Baking Kiss Cookies
Now, I know you might have a few lingering questions after diving into this recipe. That’s perfectly normal! When I started baking these years ago, I had a million questions, too. My goal is always to make sure you feel confident walking into your kitchen, so let’s clear up the most common things people ask concerning these wonderful kiss cookies.
Can I use regular Hershey’s Kisses instead of frozen ones for my kiss cookies?
Okay, this is a big one! I strongly recommend freezing them. You’ll get that gorgeous, distinct shape when you press them into the hot cookie. If you absolutely must use room temperature Kisses because you’re in a pinch, you need to be fast and gentle. Press them down quickly right out of the oven, and don’t twist or push too hard, or you risk them melting right out of the cookie. They won’t look quite as perfect, but hey, they’ll still taste amazing!
What is the difference between Kiss Cookies and Peanut Butter Blossoms recipe?
This is a great clarification point! Think of it this way: Kiss Cookies is the family name for any soft cookie that gets topped with a Hershey’s Kiss after baking. The Peanut Butter Blossoms recipe, the one we just made, is the most famous and classic member of that cookie family—the original, if you will! So, all Peanut Butter Blossoms are kiss cookies, but not all kiss cookies are peanut butter ones (like the Chocolate Kiss Cookies we mentioned earlier).
How do I prevent my kiss cookies from spreading too much?
Spreading is usually a temperature issue or an overmixing issue. Remember how I stressed not over-mixing the flour? That keeps gluten development low, which helps maintain a nice, thick cookie texture, getting you closer to that desirable ‘no spread cookie dough’ concept. Also, make sure your fats (butter and peanut butter) aren’t too warm when you mix them in. If the mix is too soft before baking, they will definitely flatten out in the heat of the oven!
Nutritional Estimate for One Peanut Butter Kiss Cookie
When we’re making treats at home, we’re generally focused on joy and flavor, not counting every little thing, right? That said, since this is such a classic, people often wonder what’s in that wonderful swirl of peanut butter and chocolate. Please know that these numbers are just an *estimate* for one cookie based on the specific ingredients I listed—homemade baking is always a little variable!
- Serving Size: 1 cookie
- Calories: 160
- Fat: 9g
- Carbohydrates: 18g
- Protein: 4g
- Sugar: 12g
It’s a good amount of energy for a holiday bake, but honestly, they are worth every single bite. Enjoy them responsibly, and maybe take a walk afterward!
PrintClassic Peanut Butter Blossoms (Kiss Cookies)
Make the classic Peanut Butter Blossoms, a soft and chewy peanut butter cookie topped with a melted Hershey’s Kiss. This simple recipe is perfect for holiday baking and creates a memorable treat.
- Prep Time: 15 min
- Cook Time: 10 min
- Total Time: 25 min
- Yield: 28 cookies 1x
- Category: Dessert
- Method: Baking
- Cuisine: American
- Diet: Vegetarian
Ingredients
- 1 ½ cups all-purpose flour
- ¾ teaspoon baking soda
- ½ teaspoon salt
- ¾ cup creamy peanut butter
- ½ cup unsalted butter, very soft
- ⅓ cup granulated sugar (for dough)
- ½ cup granulated sugar (for rolling)
- ⅓ cup light brown sugar, packed
- 1 large egg, room temperature
- 2 teaspoons vanilla extract
- 28 Hershey’s Kiss candies, unwrapped and frozen
Instructions
- Preheat your oven to 375°F (190°C). Line baking sheets with parchment paper.
- In a medium bowl, whisk together the flour, baking soda, and salt. Set this dry mixture aside.
- In a large bowl, use an electric mixer to beat the peanut butter, soft butter, ⅓ cup granulated sugar, and brown sugar until the mixture is creamy.
- Beat in the egg and vanilla extract until just combined. Do not overmix.
- Gradually add the dry ingredient mixture to the wet ingredients, mixing on low speed until a soft dough forms.
- Place the remaining ½ cup of granulated sugar into a shallow dish.
- Roll the cookie dough into 1-inch balls. Roll each ball thoroughly in the reserved granulated sugar to coat completely.
- Place the sugared dough balls about 2 inches apart on the prepared baking sheets.
- Bake for 8 to 10 minutes, or until the edges are set but the centers still look slightly soft.
- Immediately after removing the cookies from the oven, gently press one frozen, unwrapped Hershey’s Kiss candy into the center of each warm cookie. The heat will soften the chocolate slightly.
- Let the cookies cool on the baking sheet for 5 minutes before transferring them to a wire rack to cool completely. The Kiss will set as the cookie cools.
Notes
- Freezing the Hershey’s Kisses before pressing them into the warm cookies helps them hold their shape better and prevents them from melting completely into the dough.
- For the softest cookies, make sure your butter is truly at room temperature, not melted.
- This recipe yields about 28 cookies, making it great for cookie swaps.
Nutrition
- Serving Size: 1 cookie
- Calories: 160
- Sugar: 12g
- Sodium: 95mg
- Fat: 9g
- Saturated Fat: 4g
- Unsaturated Fat: 5g
- Trans Fat: 0g
- Carbohydrates: 18g
- Fiber: 1g
- Protein: 4g
- Cholesterol: 15mg