
Do you ever host a gathering where you need an appetizer so good, so ridiculously easy, that people actually stop mid-sentence to ask you what’s in it? I live for those moments! Forget complicated layering or messy assembly; we are elevating the humble sandwich roll into something truly spectacular. I’m talking about my famous pizza sliders made right on sweet Hawaiian rolls. Seriously, these are guaranteed party-stoppers. As Kate Reilly, I promise you that every recipe here, including this one, has been tested rigorously in my kitchen so you get a flawless, melty result on your first try. These party appetizer sliders are pure magic.
- Why These Hawaiian Roll Pizza Sliders Are the Best Slider Recipe Ever
- Gathering Ingredients for Your Pizza Sliders
- Expert Tips for Assembling Flawless Pizza Sliders
- Step-by-Step Instructions for Delicious Pizza Sliders
- Serving Suggestions for Your Party Appetizer Sliders
- Storage and Make Ahead Party Food Tips
- Frequently Asked Questions About These Easy Pizza Sliders
- Estimated Nutritional Data for These Pizza Bites
- Share Your Home-Cooked Memories
Why These Hawaiian Roll Pizza Sliders Are the Best Slider Recipe Ever
Listen, I know you’re busy. That’s why I live for recipes that taste like they took hours but actually take minutes. These easy pizza sliders are the standard by which I judge all other party food. They are unbelievably reliable because I tested every single measurement—seriously, I made five batches just to make sure the bottom didn’t get soggy on Batch Number Four!
What makes them a winner? Well, they are the ultimate party appetizer sliders, combining all that savory pizza goodness with a soft, slightly sweet bread base. It’s just non-negotiable perfection.
Quick Slider Recipes for Any Occasion
These sliders are the definition of fast food, made right in your oven! You only need about 10 minutes of actual hands-on assembly time, and the total time clocks in under 35 minutes. That’s faster than calling your local pizza place! They’re perfect for last-minute game day sliders, or even when you need a super quick slider recipes idea for a weeknight dinner when everyone is demanding something fun.
The Magic of Pull Apart Pizza Sliders
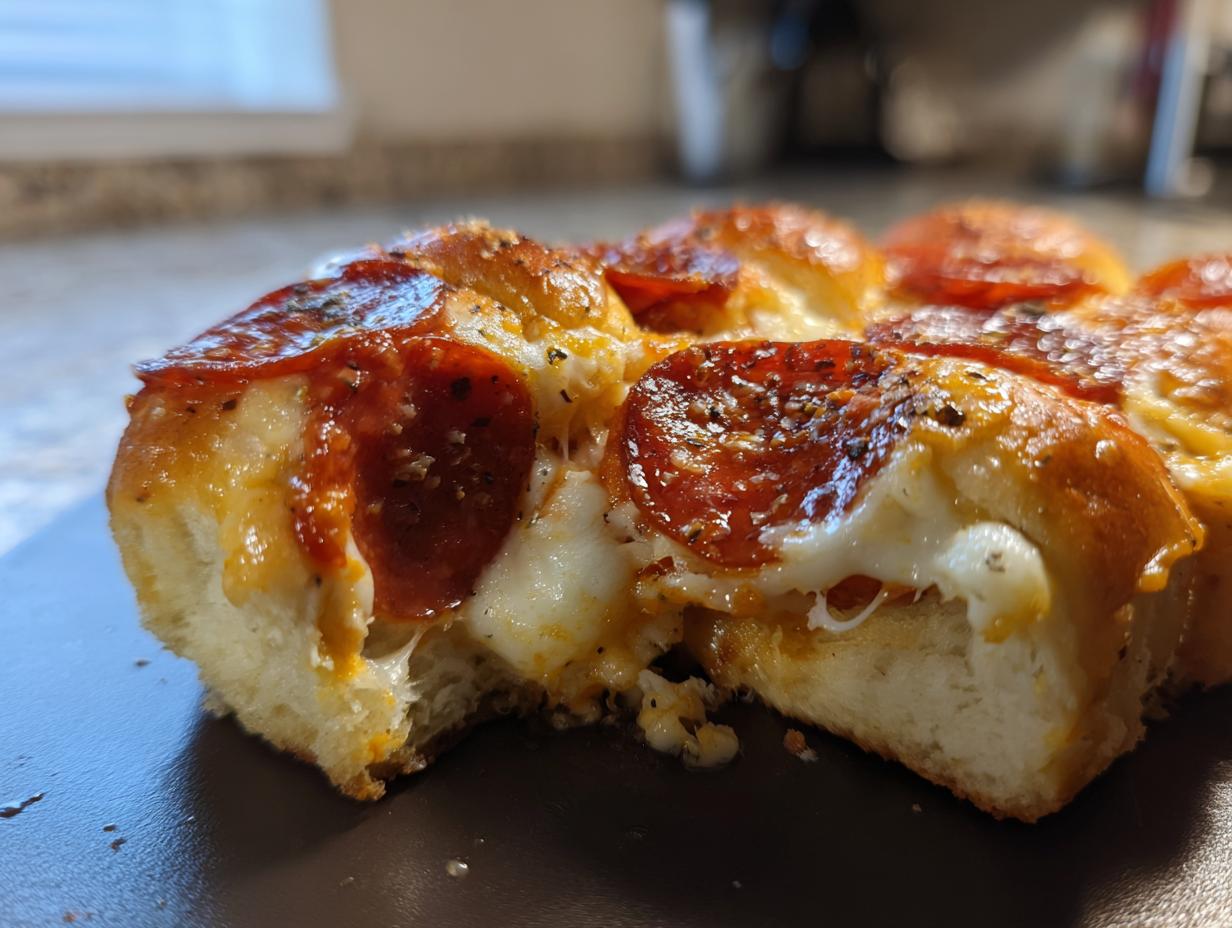
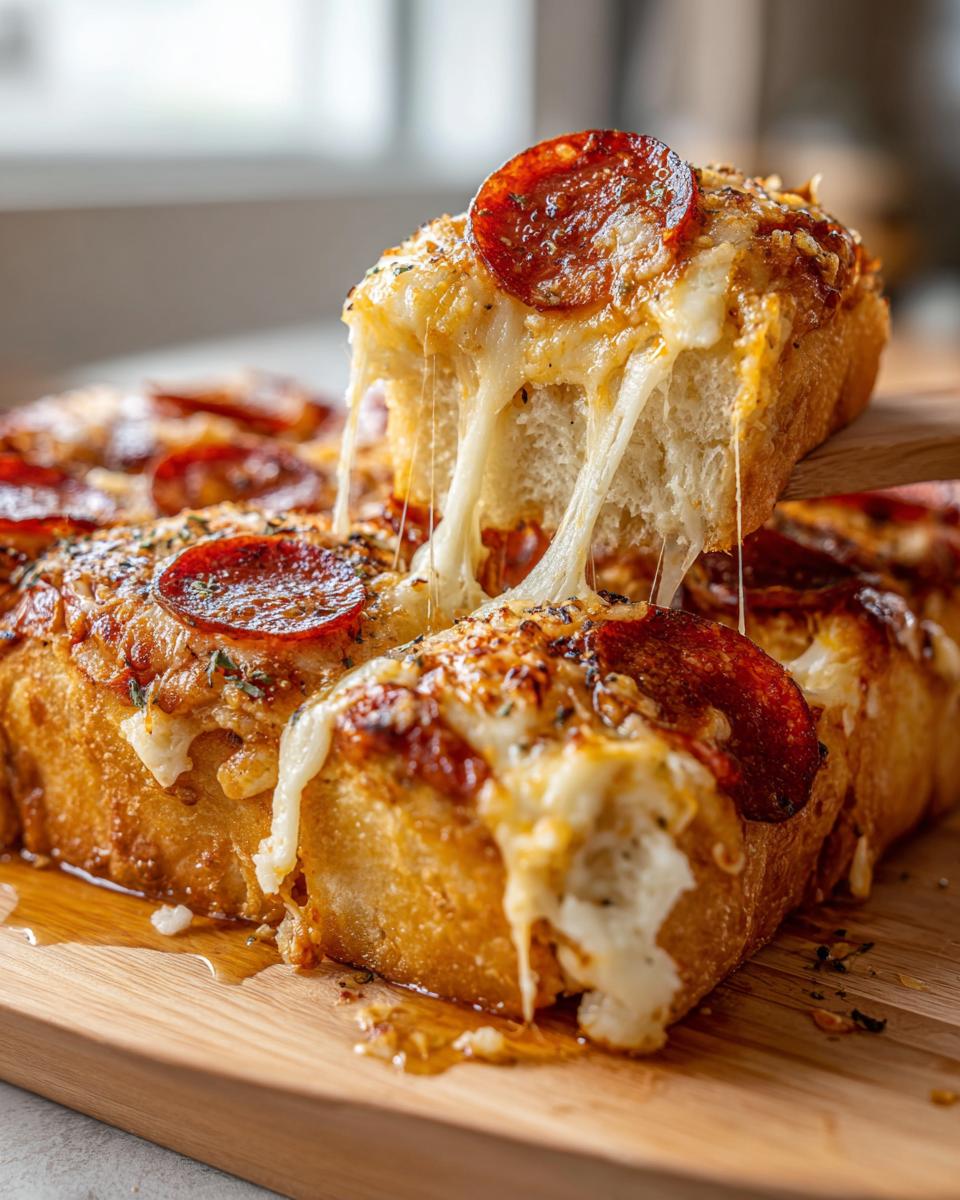
Honestly, my favorite part is the texture and ease of serving. Because we use the original package of sweet rolls, they bake into one giant, unified sheet of cheesy goodness. You don’t need plates or forks!
- The sweet Hawaiian roll is the perfect counterpoint to salty pepperoni and tangy marinara. They’re basically savory pull apart rolls dressed up for pizza night.
- When they come out hot, you just slice down the seams. Everyone grabs their own little square of cheesy heaven—that’s the joy of pull apart pizza sliders!
Gathering Ingredients for Your Pizza Sliders
Okay, let’s get shopping! The beauty of these pizza sliders is that you likely have half of these ingredients sitting in your pantry already. We keep this super streamlined because the goal is speed, right? But don’t worry, even with simple things like mozzarella and pizza sauce, the right balance makes all the difference. This is definitely a recipe built around accessibility.
Essential Components for Perfect Pizza Sliders
When you head to the store, I need you to grab these few things. Remember, these are our building blocks for the ultimate hawaiian roll pizza sliders. The rolls do most of the heavy lifting here, I promise!
- One full package (12 count) of those sweet, soft Hawaiian rolls. They are totally non-negotiable for this recipe!
- About 1 cup of your favorite pizza sauce—don’t go too thin, we want some body here.
- 2 cups of shredded mozzarella cheese. I use whole milk, but whatever you have works.
- 1/2 cup of sliced pepperoni, or feel free to use more if you’re making these for a crowd of hungry football fans!
- For the topping magic: 1/4 cup of melted butter, mixed with 1 teaspoon of garlic powder and 1/2 teaspoon of Italian seasoning.
- And lastly, 1/4 cup of grated Parmesan cheese to sprinkle on top for that little extra salty bite.
Expert Tips for Assembling Flawless Pizza Sliders
I’ve learned over the years that even the easiest recipes need a few little tricks up their sleeve to go from good to absolutely unbelievable. Preparing these pizza sliders is fast, but the small considerations we take now prevent any possible disappointment later. The biggest fear everyone has when making these is ending up with a watery mess at the bottom of the pan, right? No thank you! We want fluffy, buttery tops and perfectly cooked insides on all our game day sliders.
Preventing Soggy Bottoms on Your Pizza Sliders
If you only take away one piece of advice from this whole post, make it this one! Remember how I said these are easy pizza sliders? Well, this one optional step bumps them up to professional level. Before you even think about adding sauce, take that bottom half of the Hawaiian rolls—the one that’s going directly into the pan—and pop it into the 350°F oven by itself for just three minutes. Trust me on this! It allows some of the surface moisture in the bread to evaporate before the wet sauce hits it. It creates a tiny barrier so the sauce sinks in just enough without soaking straight through to the bottom. This quick toast keeps your pull apart pizza sliders structurally sound!
Topping Customization for Cheesy Pizza Bites
Part of the fun here is making these your own personal cheesy pizza bites! The pepperoni recipe is the classic, but if you’re dealing with picky eaters or want something gourmet, you can absolutely mix it up. I often throw in finely diced, pre-cooked Italian sausage or sautéed mushrooms and bell peppers. Just make sure whatever additions you use aren’t dripping wet with liquid; they need to be relatively dry before layering them between that cheese. If you want to try that spicy variation I mentioned? Just fold a teaspoon of red pepper flakes right into that glorious garlic butter mixture before brushing it on top!
Step-by-Step Instructions for Delicious Pizza Sliders
Alright, deep breath! This is where the magic turns into reality. Don’t feel intimidated by the layers; we are assembly-line experts now. Get your 9×13 dish ready and your oven preheated to 350 degrees Fahrenheit—that’s the sweet spot for melting the cheese without incinerating the rolls. Remember what I always say: organization is flavor insurance!
Preparation and Layering the Sandwiches
First things first: take your entire package of Hawaiian rolls and, using a long serrated knife, slice them straight across horizontally. You want them to stay connected in one big piece, like one giant, rectangular roll. Place the bottom half gently into that greased dish.
Now for the toppings! Spread that pizza sauce evenly over the bottom layer. Don’t dump it all in the middle; use the back of a spoon to gently coax it out to the edges. Next, sprinkle on exactly half of your mozzarella. Then, lay down all your pepperoni slices—make sure they cover as much surface area as possible, because you want pepperoni in every bite! Finish that layer with the remaining mozzarella. Finally, carefully place the top half of the rolls right back on top. Don’t smoosh it down yet; we need space for the air!
The Garlic Butter Topping and Baking Process
This topping is non-negotiable for these pizza sliders; it brings the savory, garlicky punch. In a tiny bowl, whisk together that melted butter, the garlic powder, and the Italian seasoning until it looks beautifully combined. Brush this generously—and I mean generously—all over the top surface of the rolls. After that drizzle, sprinkle on the Parmesan cheese. Cover the whole thing tightly with aluminum foil.
Bake covered like this for 15 minutes. This steam-baking melts the ingredients together beautifully. Then, you need to remove the foil and let them bake uncovered for another 5 to 10 minutes until the cheese is bubbly and the tops are kissed golden brown. Seriously, don’t skip the last part!
When they come out, let them rest on the counter for a solid five minutes. This allows the cheese to set up just enough so you don’t burn your mouth off or unravel the whole thing trying to pull them apart. Then, slice them down the seams and serve them warm!
Serving Suggestions for Your Party Appetizer Sliders
These party appetizer sliders are delicious all on their own, but serving them warm with a little extra something on the side just seals the deal. Since they are already rich, cheesy, and packed with flavor, you want dips that offer a nice contrast or layer on a little extra tang.
Marinara sauce is a must! I always put a small bowl of warm pizza sauce right next to the platter for dipping—it’s simple, yet everyone goes back for seconds. If you’re aiming for something a little bolder, a creamy, cool dip, like my homemade jalapeno popper dip, offers a fantastic temperature and flavor contrast against the hot, savory sliders. Just make sure everything stays warm!
Storage and Make Ahead Party Food Tips
These make ahead party food friendly pizza sliders can definitely be prepped in advance, which is a lifesaver when you’re getting ready for a big game day spread! If you need more ideas for those big events like the Super Bowl, I always scroll through recipes like those found over at urbanfarmie.com for inspiration.
Here is my hard-and-fast rule: you can assemble everything—the sauce, the cheese, the pepperoni—all the way up to the point where you brush on that beautiful garlic butter topping. Assemble the whole stack in the baking dish, cover it tightly with plastic wrap, and stick it in the fridge. It will keep perfectly like that for up to 24 hours. Then, when your guests arrive, just brush on the butter, sprinkle the Parmesan, and bake according to directions!
If you happen to have leftovers (which, honestly, rarely happens in my house!), just wrap the remaining sliders well in foil. You can reheat them in a 350°F oven for about 10 minutes. If they seem a little dry, a tiny splash of water under the foil helps bring that moisture right back. Nobody wants a dry slider, right? For freezing leftovers, I recommend slicing them apart before freezing, then reheating in the microwave or oven from frozen.
Frequently Asked Questions About These Easy Pizza Sliders
I always get questions once people realize just how addictive these kid friendly dinner sliders are! Since these recipes are so straightforward, people sometimes worry about substitutions, but don’t stress. Baking is an exact science, sure, but these easy pizza sliders are surprisingly flexible.
Can I use regular slider buns instead of Hawaiian rolls?
You certainly can use regular soft slider buns if that’s what you have on hand, but I highly recommend sticking to the Hawaiian rolls if you can find them. The slight sweetness in the Hawaiian rolls is what balances out the zesty pizza sauce and the salty pepperoni. It cuts through the richness and makes the whole experience just pop. If you use regular buns, you might find the final result tastes a little too much like a standard pizza sandwich bite instead of the magical pizza sliders experience everyone raves about!
How do I make these ‘hot honey pizza sliders’ variation?
Oh, I love that spicy-sweet trend! Making a version of hot honey pizza sliders is incredibly simple, and it adds such a fantastic twist. The easiest way to do this is right in the topping. When you are whisking together your melted butter, garlic powder, and Italian seasoning, just whisk in about one to two teaspoons of hot honey, depending on how punchy you like it. If you don’t have hot honey, just mix a teaspoon of honey with a tiny dash of red pepper flakes or your favorite hot sauce right into that garlic butter. Brush it on top like normal, and you’ve instantly upgraded your game day sliders!
If you have any other burning questions about these slider recipes for a crowd, drop them in the comments below! I love hearing what variations you all come up with!
Estimated Nutritional Data for These Pizza Bites
I always get asked about the nutrition facts for these addictive pizza sliders, and I want to be totally transparent here. These are definitely a party food favorite, not an everyday thing, so they carry that cheesy, buttery goodness!
Based on the recipe breakdown—using one full serving size of one cheesy pizza bite—here is the estimated breakdown:
- Calories: About 280
- Fat: 14g (with 7g saturated; be mindful of that butter melting!)
- Carbohydrates: 28g
- Protein: 12g
Now, remember, because we are working with bread, cheese, and butter, these numbers can change based on the brand of Hawaiian rolls you buy or if you load up on extra pepperoni. These are just good estimates for planning purposes!
Share Your Home-Cooked Memories
Well, that’s it! You’ve successfully made the easiest and most satisfying pizza sliders ever. I really hope these turn into a tradition at your house, whether it’s for a massive Super Bowl party or just an easy Tuesday night.
When you try them out, please come back here and give them a rating—five stars if they deserved it! I absolutely love seeing how these recipes travel from my kitchen to yours. Knowing you enjoyed them is truly the best part of running this site. If you have questions or fun topping variations, don’t hesitate, just leave a comment below or reach out to me via my contact page. Happy cooking!
PrintEasy Pull-Apart Pizza Sliders on Hawaiian Rolls
Make these simple pizza sliders using Hawaiian rolls for a quick, cheesy, and crowd-pleasing appetizer perfect for game day or a fast weeknight dinner.
- Prep Time: 10 min
- Cook Time: 25 min
- Total Time: 35 min
- Yield: 12 sliders 1x
- Category: Appetizer
- Method: Baking
- Cuisine: American
- Diet: Vegetarian
Ingredients
- 1 package (12 count) sweet Hawaiian rolls
- 1 cup pizza sauce
- 2 cups shredded mozzarella cheese
- 1/2 cup sliced pepperoni (or more for topping)
- 1/4 cup melted butter
- 1 teaspoon garlic powder
- 1/2 teaspoon dried Italian seasoning
- 1/4 cup grated Parmesan cheese
Instructions
- Preheat your oven to 350 degrees Fahrenheit. Lightly grease a 9×13 inch baking dish.
- Carefully slice the entire package of Hawaiian rolls horizontally, keeping the rolls connected in their original shape. Place the bottom half of the rolls into the prepared baking dish.
- Spread the pizza sauce evenly over the bottom layer of rolls.
- Sprinkle half of the mozzarella cheese over the sauce.
- Arrange the pepperoni slices over the cheese layer.
- Top with the remaining mozzarella cheese.
- Place the top half of the rolls over the cheese and pepperoni layer. Do not press down firmly.
- In a small bowl, whisk together the melted butter, garlic powder, and Italian seasoning. Brush this mixture evenly over the top of the rolls.
- Sprinkle the grated Parmesan cheese over the buttered top.
- Cover the baking dish tightly with aluminum foil.
- Bake for 15 minutes covered.
- Remove the foil and bake for an additional 5 to 10 minutes, or until the cheese is fully melted and the tops are lightly golden brown.
- Let the sliders rest for 5 minutes before slicing between the rolls and serving warm.
Notes
- To prevent soggy bottoms, lightly toast the bottom half of the rolls in the oven for 3 minutes before adding sauce and toppings.
- You can customize these easy pizza sliders with your favorite toppings like cooked sausage, mushrooms, or bell peppers.
- For a spicier kick, add a dash of red pepper flakes to the garlic butter topping.
- These are excellent served with extra marinara sauce for dipping.
Nutrition
- Serving Size: 1 slider
- Calories: 280
- Sugar: 8
- Sodium: 650
- Fat: 14
- Saturated Fat: 7
- Unsaturated Fat: 7
- Trans Fat: 0.5
- Carbohydrates: 28
- Fiber: 1
- Protein: 12
- Cholesterol: 35