
There is simply nothing better than slicing into a loaf of bread you made entirely from scratch. That chewy crust, the airy crumb—it feels like magic! But everyone knows that magic begins with the culture, the heart of every true artisan loaf. If you’ve been nervous about starting your own sourdough starter, please don’t be. I spent years breaking down complicated baking science into easy, achievable steps so you don’t have to stress. This is the ultimate, foolproof guide to creating your very first robust sourdough starter from scratch, guaranteed to give you the confidence you need!
- Why This Easy Sourdough Starter Recipe is Your Sourdough Bread Foundation
- Gathering Ingredients for Your Sourdough Starter From Scratch
- The Day by Day Sourdough Starter Timeline: How to Make Sourdough Starter
- Sourdough Starter Feeding Schedule for Long-Term Success
- Sourdough Starter Troubleshooting: Common Issues and Solutions
- Expert Sourdough Baking Tips Using Your New Culture
- Making an Active Sourdough Starter Ready for Baking
- Frequently Asked Questions About Your Sourdough Starter
- Next Steps in Your Sourdough Journey
Why This Easy Sourdough Starter Recipe is Your Sourdough Bread Foundation
Listen, when you’re looking for a beginner sourdough guide, the first thing you need is a starter that works. Period. A lot of folks get scared off because they think they need fancy equipment or exotic flours, but trust me, that’s not true. This straightforward, flour and water starter method is designed to build a truly healthy sourdough starter without any added gimmicks.
When we nail this foundation, everything else—the beautiful rise, the complex flavor—just falls into place. This groundwork is essential if you want to succeed at sourdough for beginners. Once you see the first signs of life, that little jar of bubbling goodness becomes incredibly rewarding. It’s the very heart of your bread!
Building Your Sourdough Culture Maintenance Plan
Think of your starter not as an ingredient, but as a tiny, wild pet you’re nurturing. It’s a living culture, and like any pet, it needs regular attention to thrive! That’s why consistency in the early days is so important. We’re basically building up a strong army of wild yeast and bacteria that will eventually lift your bread dough high into the air.
Once those bubbles show up consistently, we shift gears into maintenance mode. Don’t worry, I break down the straightforward sourdough starter feeding schedule later on, but know this now: that strong initial culture makes the routine feedings so much easier. You’ll be ready to try my simple artisan bread recipe before you know it!
Gathering Ingredients for Your Sourdough Starter From Scratch
Before we start bubbling, we need to grab our simple supplies. Honestly, you only need two things—flour and water—but the *type* of flour you grab first makes a huge difference! For the initial week of activation, I insist you start with whole wheat or rye flour. Why? Those whole grains have all the natural yeast and bacteria clinging to the bran that we need to kickstart this whole culture thing.
Also, please don’t skip the tip about your water. Tap water is usually fine, but sometimes the chlorine they add to keep it safe for drinking can actually kill off the wild yeast we are trying to cultivate. So, if you can, grab filtered or unchlorinated water, and make sure it’s just room temperature—not cold from the fridge, okay?
Ingredient Clarity: Flour and Water Starter Specifics
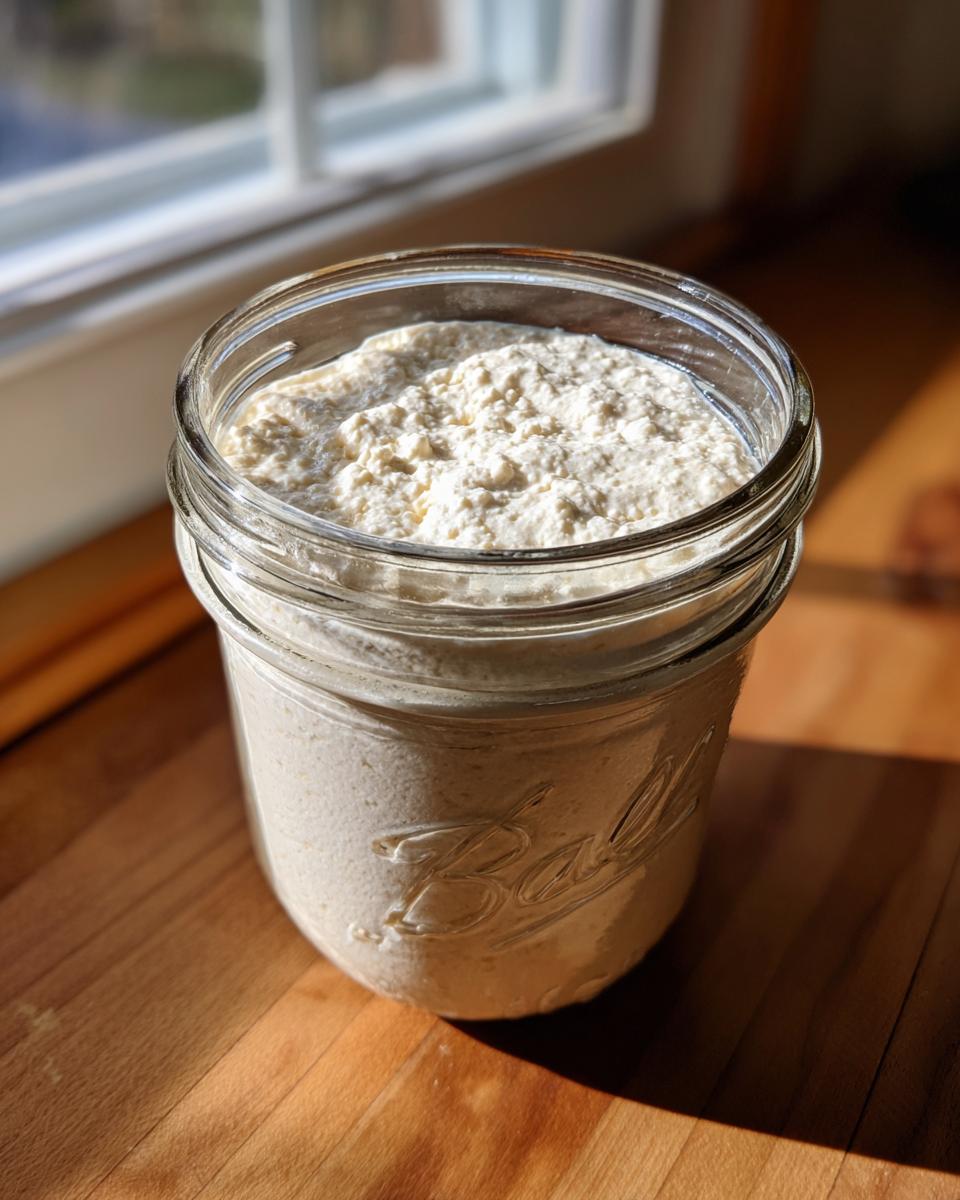
For the pure, initial mixing on Day 1, we are using 50 grams of that whole grain flour and 50 grams of that room temperature water. Keep your mixing vessel (a clean, clear glass jar works best!) ready for business. We are using equal parts water and flour by weight here, which is the secret to getting reliable, predictable results.
Once the initial activation is over, we switch over to unbleached all-purpose flour for maintenance feeding. But for these first few days, that rye or whole wheat is our microbial gold mine! Having everything pre-measured makes the daily task of feeding so much faster, leaving you more time to dream about your first loaf of amazing artisan bread.
The Day by Day Sourdough Starter Timeline: How to Make Sourdough Starter
Okay, this is where the action starts! We are moving from gathering supplies to actually cooking—well, fermenting! Setting aside about five minutes a day for this process is all it takes, but remember consistency is key. We’re following the schedule outlined in my trusted recipe guide because it reliably builds a strong culture. This timeline is your roadmap to a perfectly active sourdough starter.
Days 1-3: Activating Your Flour and Water Starter
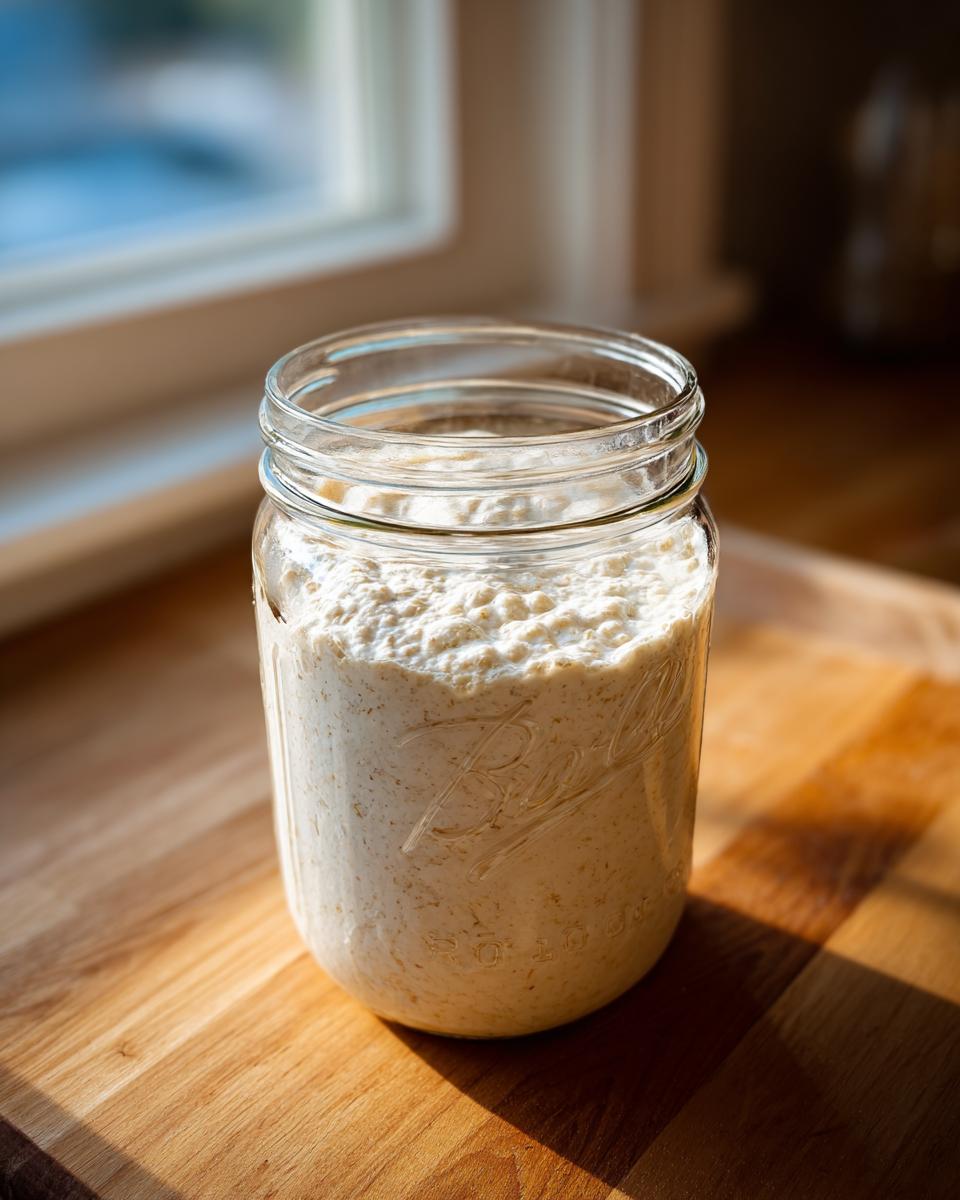
On Day 1, you’re just mixing 50 grams of your whole grain flour with 50 grams of water in that clean glass jar. Stir it up until it’s smooth—no dry clumps allowed! You need to cover it loosely—I just use a paper towel secured with a rubber band—and leave it on the counter for 24 hours. Don’t panic if Day 2 looks exactly the same! Sometimes nothing happens, and that’s totally normal. If you see tiny bubbles, that’s a great sign! On Day 2 and Day 3, the routine is the same: dump half of what you have, then feed the remainder with 50g AP flour and 50g water. We discard because we need to keep the total volume manageable while concentrating those happy microbes!
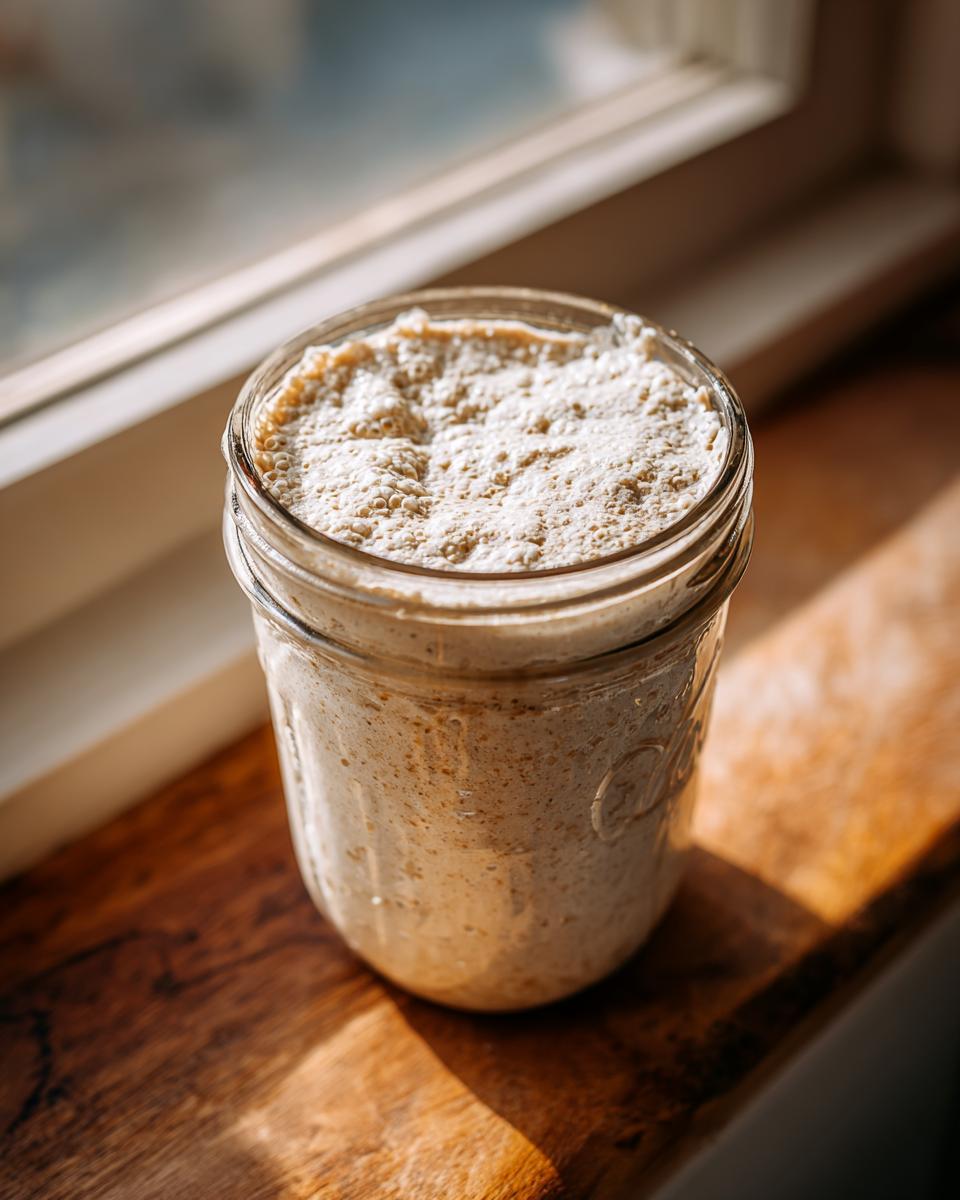
Days 4-7: Achieving a Creating a Bubbly Sourdough Starter
By Day 4, you should start seeing some real activity! If your kitchen is warm, you might need to switch to a sourdough starter feeding schedule of twice a day, feeding every 12 hours instead of 24. Just repeat that discard-half, feed-50g/50g, mix-and-wait routine.
The goal by Day 7 is to have a culture that reliably doubles in size within four to eight hours after you feed it. When it does that consistently, you’ve successfully created your first sourdough culture maintenance setup! It’s ready to make your first loaf! Before you start your dough, make sure you have a fresh feed in it, maybe try making my garlic naan bread since it uses starter too!
Sourdough Starter Feeding Schedule for Long-Term Success
Congrats! You’ve got an active starter, which means the hard part—the creation—is over. Now we move into the fun, easy part: maintenance! You’ve done the rough work of building up the microbes, so now we just need a reliable sourdough starter feeding schedule to keep them happy.
Once your culture is robust, you’ll generally discard down to just 50 grams of starter before feeding. That small amount needs a full refresh! My standard ratio is 100 grams of flour and 100 grams of water for every 50 grams of old starter. It sounds like a lot of food, but it keeps the dough nice and loose for easy mixing.
Now, where you keep it depends entirely on how much you bake. If you’re baking daily or every other day, keeping your starter on the counter at room temperature is best, fed once every 24 hours. If you’re more like me and only bake on the weekends, pull that jar of goodness into the fridge after feeding. Cold temperatures slow down their munching significantly. When you pull it out to bake, just give it a couple of feeds at room temperature to wake it up first. You can read more helpful tips about its care over at this beginner guide, and then you’ll be ready to try out sourdough discard pizza dough!
Sourdough Starter Troubleshooting: Common Issues and Solutions
Even when following the steps perfectly, your wild culture can sometimes throw you a curveball! When you’re doing sourdough starter troubleshooting, the absolute most important thing to remember is not to panic. Your starter is resilient. If you see dark, greyish liquid sitting on top—what bakers call ‘hooch’—that just means your culture is hungry! Stir that liquid right back in for extra tang, or carefully pour it off, then feed your starter right away. It’s yelling at you that it needs more food!
The only time you need to truly stress is if you see fuzzy spots or actual mold. If that happens? I’m sorry, but you have to toss the whole batch and start over. It’s never worth the risk! But hey, since you’ve done this once, starting again is so much faster.
What to Do When Your Sourdough Starter Isn’t Bubbling
If your starter seems sluggish or just won’t bubble up, it usually comes down to temperature or water quality. Remember, yeast likes it warm—ideally 70–75°F. If your kitchen is cold, the yeast just takes a long nap. Try moving the jar to the top of your fridge or near a pilot light, just for a few hours while it feeds. If temperature isn’t the issue, try swapping back to that whole wheat or rye flour for a couple of feedings; the extra nutrients often give it the necessary jolt to get lively again!
Expert Sourdough Baking Tips Using Your New Culture
Now that you have this beautiful, active sourdough starter humming along, you’re officially ready to bake! But making an incredible loaf isn’t just about mixing ingredients; it’s about timing. The biggest tip I can possibly give you is to only ever use your starter when it’s at its absolute peak, right after it has doubled in size and before it starts to sink back down.
When it’s at this floating, bubbly peak, that’s when your culture is full of energy and ready to give your dough the best possible lift. If you wait too long and it deflates, your bread will be much flatter. So, plan your feeds around your baking schedule—feed it when you wake up, and aim to mix your dough a few hours later!

This is the real secret that separates the folks who just *make* sourdough from those who *master* it. Think about using that freshly fed starter for something easier first, like my fluffy sourdough pancakes; they use up a smaller amount and you get instant gratification! Once you see how much lift it provides in pancakes, you’ll be so much more confident heading into that first loaf of bread. You can check out some great techniques for creating the perfect loaf over at this excellent guide, too!
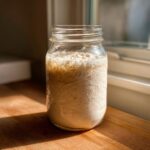
Making an Active Sourdough Starter Ready for Baking
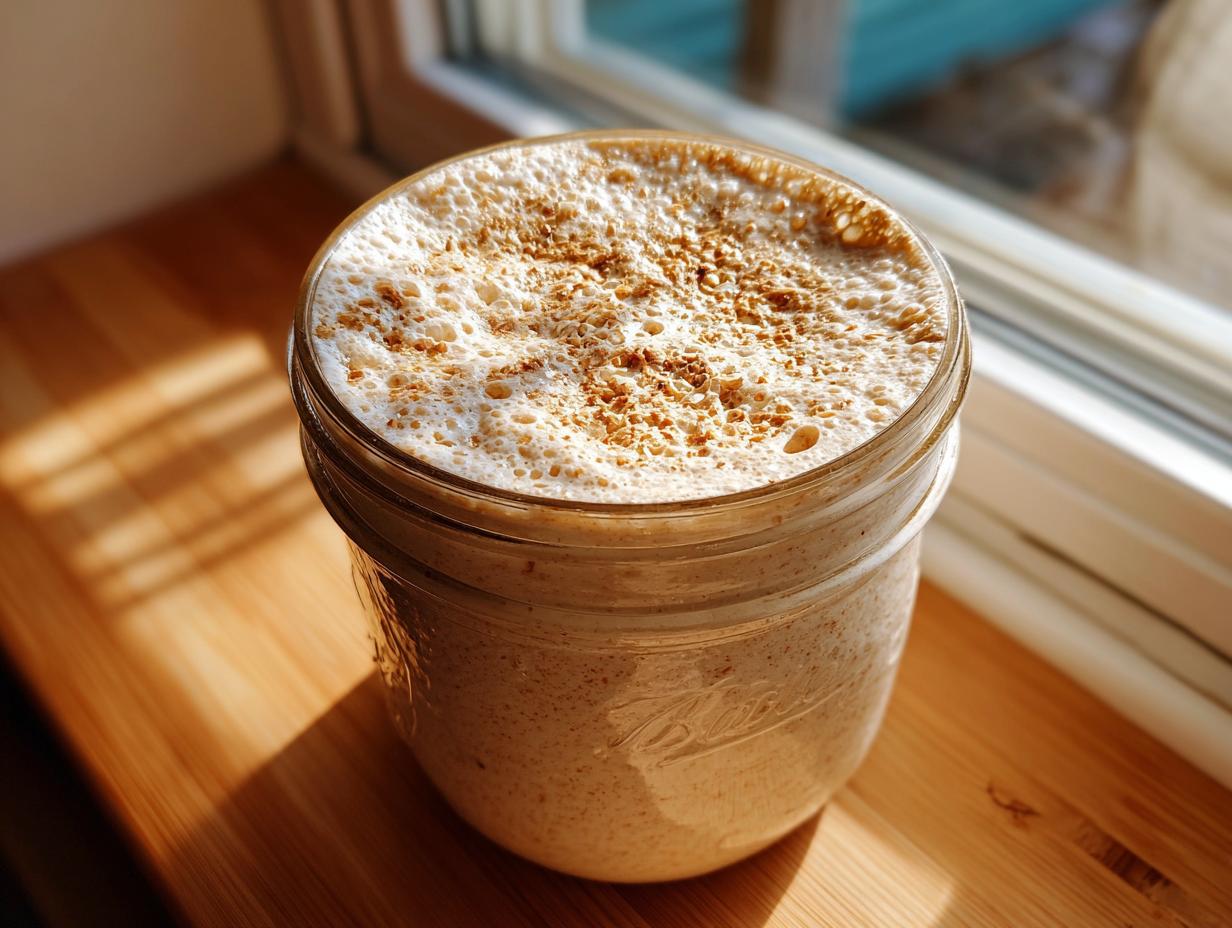
So, how do you know when you can finally ditch the recipe steps and start loafing? You’re looking for visual confirmation that you have built a truly active sourdough starter! The jar should look dramatically different than it did on Day 1. When I want to bake, I look for two things: massive bubbles throughout the entire jar, not just on top, and a reliable doubling.
If your starter consistently doubles in volume within four to eight hours after a feeding, you nailed it! It should have a slightly domed top when it peaks. That means your wild yeast population is happy, hungry, and ready to do some heavy lifting in your dough. Now that you have this powerhouse culture, you can try out my easy sourdough discard rolls!
Frequently Asked Questions About Your Sourdough Starter
I know starting out can bring up a ton of little questions, even after following the steps perfectly. Don’t worry, that’s completely normal! Dealing with a sourdough starter from scratch feels weird at first because it’s alive, right? Let’s tackle a few things that might still be puzzling you about the sourdough culture maintenance process.
How long does it take to get an active sourdough starter?
If you follow our day-by-day guide, you should see consistent, reliable doubling—meaning your culture is truly active—between Day 5 and Day 7. Now, if your kitchen is cooler, it might take a full 10 days, and that’s okay! This is where patience comes in. Don’t rush it or try to bake until it triples! You want that robust activity before you start feeding it for bread dough.
What is the proper smell for a healthy sourdough starter?
That’s one of the biggest clues! In the first few days, your starter might smell a bit like stinky gym socks or strong vinegar—that’s just the initial bacteria fighting it out. But once it settles into a great sourdough starter feeding schedule, the smell should become pleasantly tangy, almost like yogurt or a mild cider. If it smells overwhelmingly sharp, it just needs feeding faster! If you end up with extra feedings, you can always use that overflow in my sourdough discard pizza dough!
Remember, this easy method means you’re creating a no yeast bread starter that will last you forever, so a little attention in the first week is such a small price to pay for future homemade loaves!
Next Steps in Your Sourdough Journey
See? That wasn’t scary at all! You just created the foundation for a lifetime of incredible homemade bread. Now that you have your robust, bubbling culture, I’d absolutely love to hear about it! Hop over to my contact page and let me know what you named your new starter. If you have any lingering questions once you start baking, please leave them below!
PrintThe Ultimate Beginner’s Guide: How to Make a Robust Sourdough Starter From Scratch
Learn the simple, step-by-step process to create your own active sourdough starter using only flour and water. This guide explains the daily feeding schedule needed to build a healthy culture for your artisan bread baking.
- Prep Time: 5 min
- Cook Time: 0 min
- Total Time: 7 days
- Yield: One active starter culture
- Category: Baking Foundation
- Method: Fermentation
- Cuisine: American
- Diet: Vegetarian
Ingredients
- 100g Whole Wheat Flour or Rye Flour (for initial activation)
- 100g Unbleached All-Purpose Flour (for maintenance)
- 100g Unchlorinated Water (room temperature)
Instructions
- Day 1: Mix 50g of whole wheat or rye flour with 50g of room temperature water in a clean glass jar. Stir until fully combined. Cover loosely and let it sit at room temperature (ideally 70-75°F) for 24 hours.
- Day 2: You may see a few bubbles or nothing at all. Discard half of the mixture. Add 50g of all-purpose flour and 50g of water to the remaining starter. Mix well, cover loosely, and wait 24 hours.
- Day 3: You should see more activity now. Discard half. Feed with 50g of all-purpose flour and 50g of water. Mix and wait 24 hours.
- Day 4: Discard half. Feed with 50g of all-purpose flour and 50g of water. At this stage, you might start feeding twice a day if your kitchen is warm (every 12 hours).
- Day 5 – 7: Continue the discard and feed process every 12 to 24 hours, using only all-purpose flour and water. Your starter is ready when it consistently doubles in size within 4 to 8 hours after feeding and has many bubbles throughout.
- Maintenance: Once active, maintain your sourdough starter by discarding all but 50g, then feeding it with 100g of flour and 100g of water. Store at room temperature if you bake daily, or in the refrigerator if you bake weekly.
Notes
- Use filtered or unchlorinated water; chlorine can inhibit yeast growth.
- A consistent feeding schedule is the secret to a healthy, active sourdough starter.
- If you see dark liquid (hooch) on top, stir it in or pour it off, then feed your starter immediately.
- If you see mold, discard the entire starter and begin again.
Nutrition
- Serving Size: 100g culture
- Calories: 180
- Sugar: 0.5
- Sodium: 1
- Fat: 0.5
- Saturated Fat: 0.1
- Unsaturated Fat: 0.4
- Trans Fat: 0
- Carbohydrates: 37
- Fiber: 2
- Protein: 5
- Cholesterol: 0