
Oh, my friend, when I think about creating something truly show-stopping—something that just melts in your mouth and makes everyone stop talking when they take the first bite—it has to be cheesecake. But not just any cheesecake! We are talking today about the ultimate creamy white chocolate raspberry cheesecake. Believe me, after testing and re-testing classics (just like I learned to do when trying to perfect my grandmother’s sweet recipes!), I cracked the code on getting that perfect, silken texture every single time.
This recipe is my foolproof method. You follow these steps, especially the cooling part, and I promise you’ll have a luxurious, velvety, crack-free masterpiece sitting on your counter. Forget dry, cracked dessert tops—we are aiming for pure decadence here!
- Why This White Chocolate Raspberry Cheesecake is Your New Showstopper Dessert
- Gathering Ingredients for Your White Chocolate Raspberry Cheesecake
- Step-by-Step Instructions for the White Chocolate Raspberry Cheesecake
- Mastering the Raspberry Swirl Dessert Technique
- Tips for Your White Chocolate Raspberry Cheesecake Success
- Serving Suggestions for This Elegant Dessert Recipes
- Storage and Reheating Instructions for White Chocolate Raspberry Cheesecake
- Frequently Asked Questions About Making White Chocolate Raspberry Cheesecake
- Estimated Nutritional Data for Your Indulgent Fruit Cheesecake
- Share Your White Chocolate Raspberry Cheesecake Creations
Why This White Chocolate Raspberry Cheesecake is Your New Showstopper Dessert
If you’re looking for showstopper dessert ideas that actually taste like they came from a fancy restaurant—but without all the stress—this is it! This isn’t just a cheesecake; it’s a culinary achievement. We are talking about that impossible-to-get, unbelievably smooth, silken texture cheesecake that people usually only dream about. And the best part? We get that texture by using techniques that I’ve personally mastered to eliminate those awful cracks. When you serve this up, people will assume you spent days perfecting it!
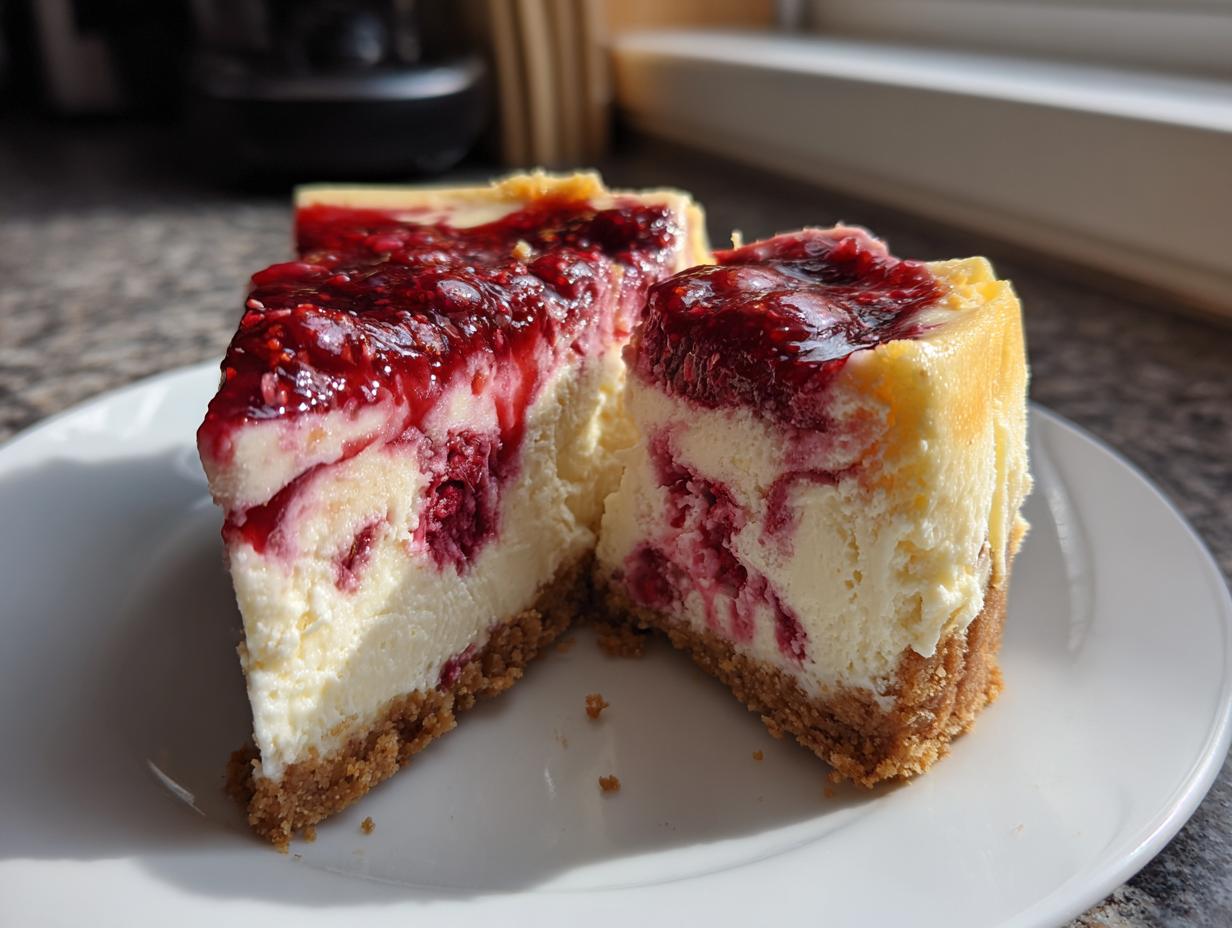
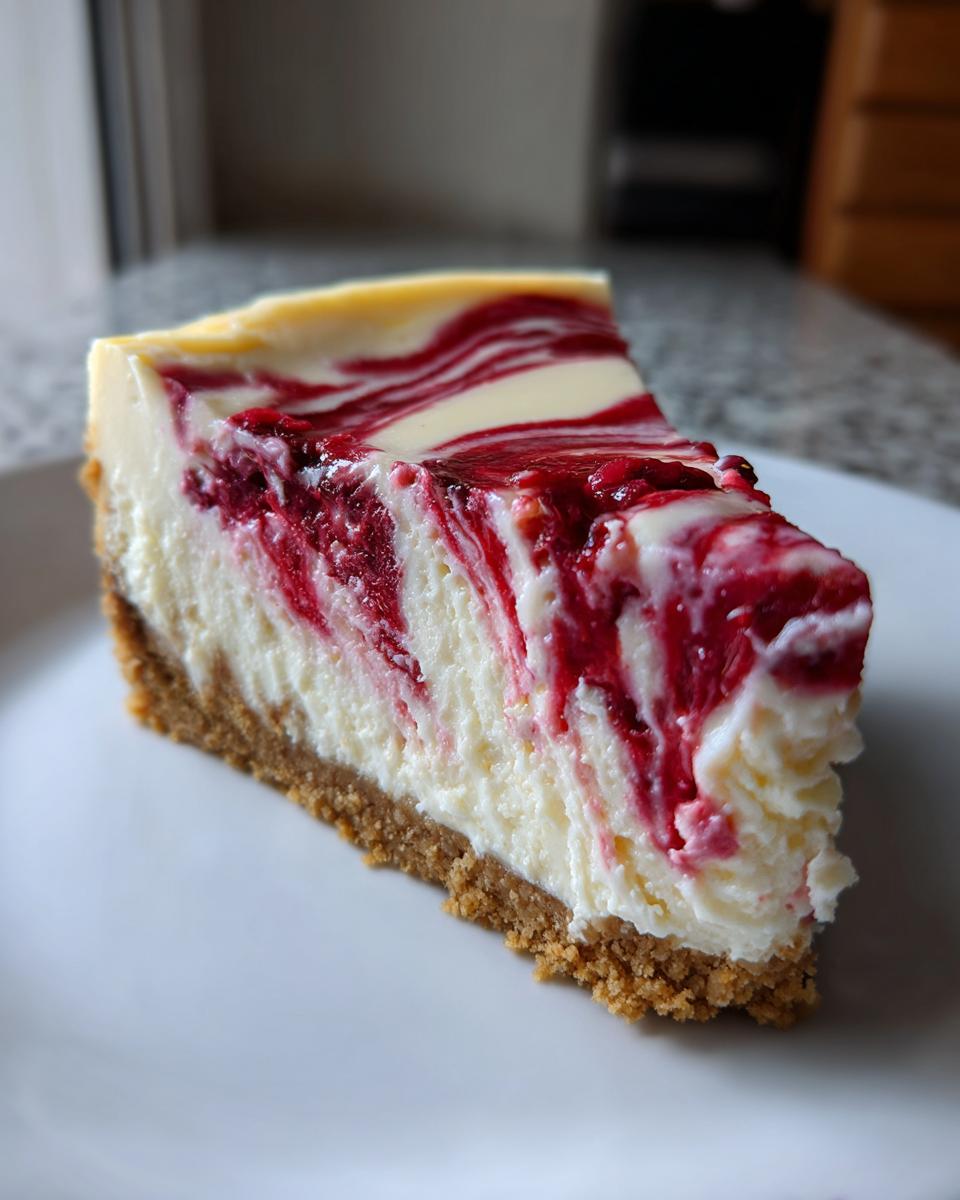
That restaurant quality comes from respecting the process, especially the water bath. Trust me on this—the water bath isn’t just extra fuss. It’s how we apply gentle, even heat, which is absolutely essential for a perfect bake. Check out how beautiful this swirl looks; that color contrast is what makes it a winner for any holiday table or special night. You can find more special occasion recipes over at my desserts section, too!
Achieving a Perfectly Creamy Cheesecake Recipe Texture
The entire magic behind a truly creamy cheesecake recipe lies in the starting line! If your ingredients are cold, you’re fighting a losing battle before you even turn the mixer on. You absolutely need your cream cheese, eggs, and sour cream to stage a relaxed arrival on your counter at room temperature. This lets them blend together without needing aggressive mixing. Aggressive mixing adds air, and air is the enemy of smooth cheesecake!
The No Crack Cheesecake Method Explained
I know everyone fears the crack! That’s why we use the specific no crack cheesecake method that involves slow cooling. Step 10 in the instructions is non-negotiable: once baking time is up, you turn the oven *off*, prop the door open just a tiny crack, and let the cheesecake sit in that gentle, residual heat for a full hour. This gradual temperature change prevents the cheesecake from shrinking too fast, which is exactly what causes those dreaded surface cracks. It’s a simple trick, but it’s my personal guarantee based on years of testing!
Gathering Ingredients for Your White Chocolate Raspberry Cheesecake
One thing I always want people to know about these recipes is that they are built on simple, accessible ingredients. You won’t need to drive to some specialty shop for this one! Everything you need for this gorgeous white chocolate raspberry cheesecake can be found right at your standard American grocery store. We need quality ingredients, yes, but nothing too fussy. You can see an example of beautiful, accessible baking over at Baker by Nature if you need inspiration!
Crust Components: Graham Cracker Crust Dessert Base
We start with the base, and I stick to the classic, buttery graham cracker crust for this recipe. It tastes fantastic and offers the perfect crunchy counterpoint to the rich filling. You’ll just need about 1 1/2 cups of graham cracker crumbs, 1/4 cup of sugar, and 6 tablespoons of melted butter to press down firmly into that springform pan. Now, if you’re thinking about switching it up, you absolutely can! If you prefer that deep chocolaty note, go right ahead and swap the graham crackers out for crushed Oreos!
Filling Ingredients for Decadent White Chocolate Treat
This is where the flavor really develops, making it a true decadent white chocolate treat. Remember that crucial tip about room temperature ingredients? It applies Triple-A here! Your 3 blocks of full-fat cream cheese, the 3 large eggs, and that 1/2 cup of sour cream all need to be soft and pliable before they even see the mixer. Cold dairy equals lumpy cheesecake, and we are not doing lumps today! You’ll also need 1 1/2 cups of sugar, some vanilla, salt, and of course, the star: 1 cup of melted white chocolate that has cooled down just a bit.
Step-by-Step Instructions for the White Chocolate Raspberry Cheesecake
Okay, now that we have the best ingredients lined up, we get to the fun part: putting it all together! If you follow the order I list here, you are guaranteeing yourself an easy cheesecake technique that leads to incredible results. Remember, we are making a beautiful, decadent dessert, so let’s take it one easy step at a time. I always link out to my other favorite simple recipes when I can, like this easy apple crumble, because baking should be fun, not homework!
Preparing the Graham Cracker Crust Dessert
First things first: the base! We are talking about Step 1 here. Take your crumb mixture—the graham cracker crumbs, the crust sugar, and that melted butter—and mix it up until it looks like wet beach sand. Use the bottom of a measuring cup or a flat glass to really press that mixture down firmly and evenly into the bottom of your 9-inch springform pan. We want this crust to hold up against that heavy filling! Once it’s packed tight, pop that whole pan into the fridge to chill out for a solid 30 minutes. That chill time helps it set beautifully before we pour on the filling for our white chocolate raspberry cheesecake.
Mixing the Silken White Chocolate Filling
Time to make the magic happen, but patience is key! First, beat that softened cream cheese until it’s totally smooth. Then, add that main pile of sugar, the vanilla, and the salt. Mix it just until it’s combined—this is important! Next, slowly pour in your slightly cooled, melted white chocolate. Remember, if it’s too hot, it can scramble the eggs later on, so make sure it’s just warm to the touch. After that, add your eggs one at a time, and I mean *one at a time*. Mix only until you see the yolk disappear. Seriously, stop mixing! If you beat the eggs too much, you introduce air that will make the cake puff up and crack later. Finish by folding in the sour cream gently. We want smooth, not fluffy!
Baking and Cooling the Perfectly Baked Cheesecake
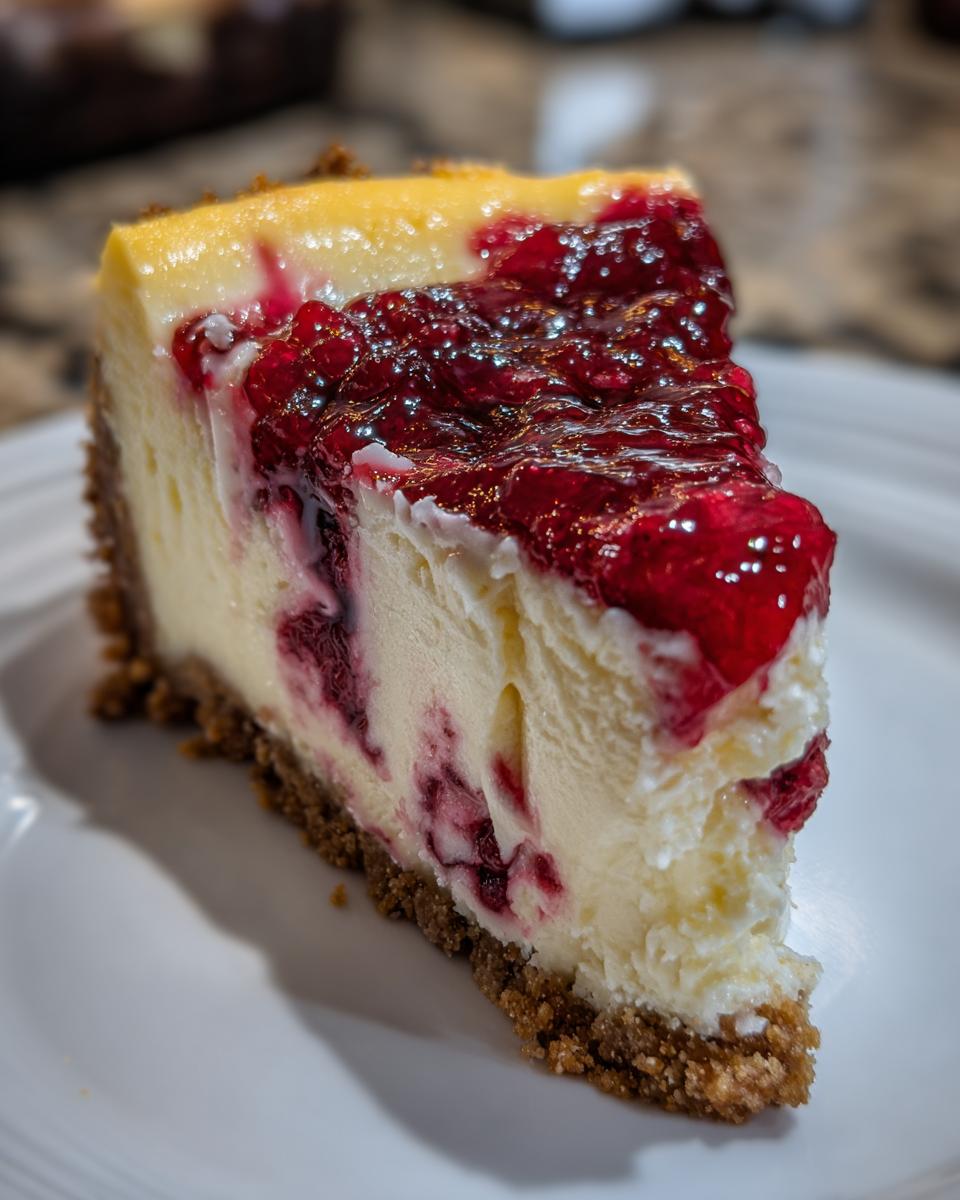
This part is where we become masters of the baked cheesecake guide. Before the batter goes in, you’ve got to wrap that springform pan really well in heavy-foil—two or three layers on the bottom and sides—to keep sneaky water out. Place that wrapped pan inside a big roasting pan. Now, pour hot water into the *roasting pan* until it comes halfway up the sides of your cheesecake pan. It looks dramatic, I know! Bake it at 325°F for about 60 to 75 minutes. You’re looking for set edges and just a slight wiggle in the very center. Then comes my favorite secret trick for a perfectly baked cheesecake: turn the oven completely off, crack that door open just a touch, and leave it in there for a full hour to cool down slowly. After that hour, take it out of the water bath, let it sit an hour more on the counter, and *then* you refrigerate! That two-stage cooling is everything. If you want to see a perfect example of how this turns out, check out this gorgeous finished product!
Mastering the Raspberry Swirl Dessert Technique
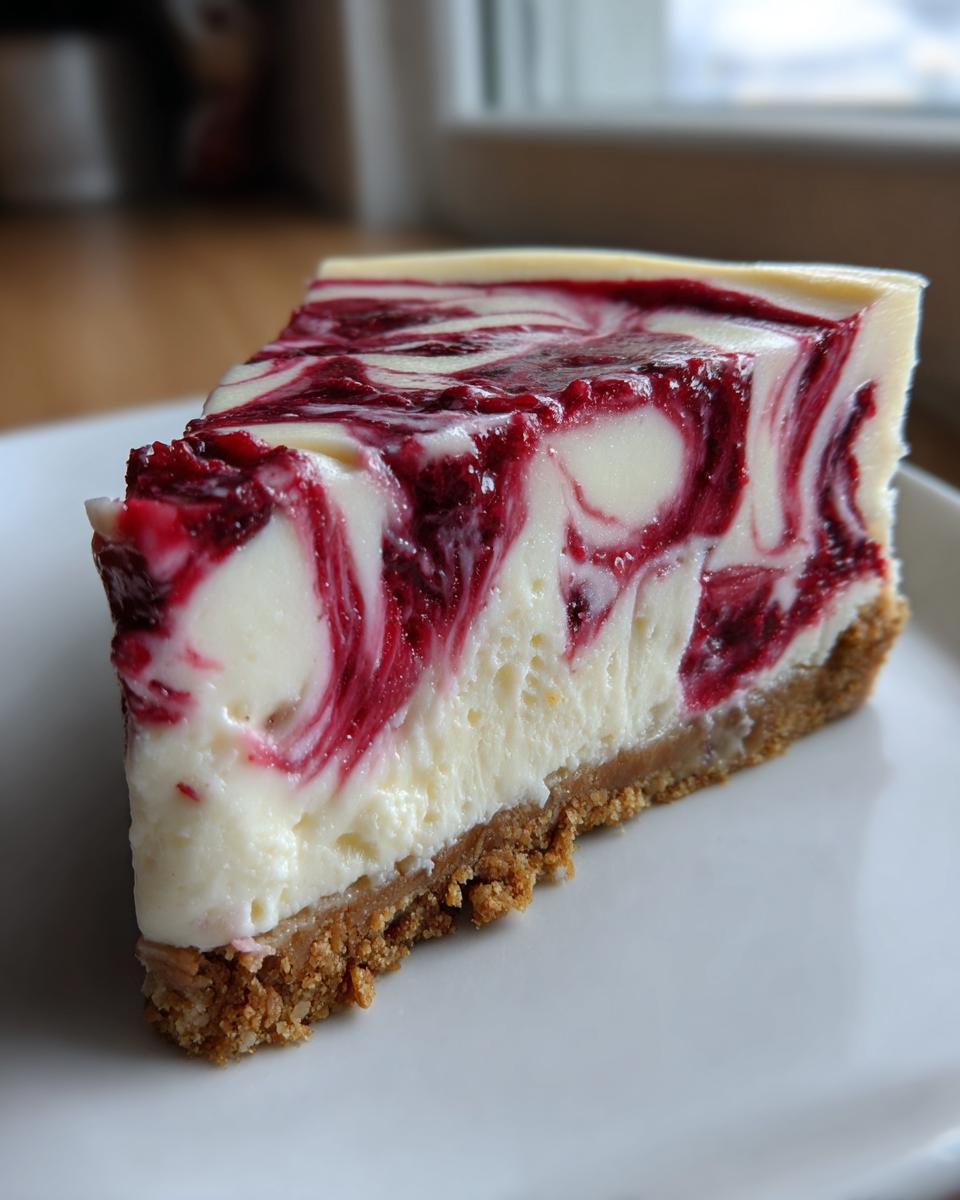
We’ve got the smooth, rich, white chocolate base ready to go, and honestly, that alone would be amazing. But we owe it to ourselves to make this a true visual masterpiece, right? This is all about Step 7: creating that beautiful, elegant raspberry swirl dessert effect. It’s surprisingly simple, but the placement matters!
Instead of pouring the raspberry sauce all over the top at once, you want to create random dollops—think maybe teaspoon-sized blobs—scattered across the surface of the batter. Don’t aim for perfect spacing; randomness is what makes it look organic and stunning, like something you’d see in a bakery window. You definitely don’t want to blend it in completely; we are looking for that sweet and tangy contrast against the pale white chocolate background.
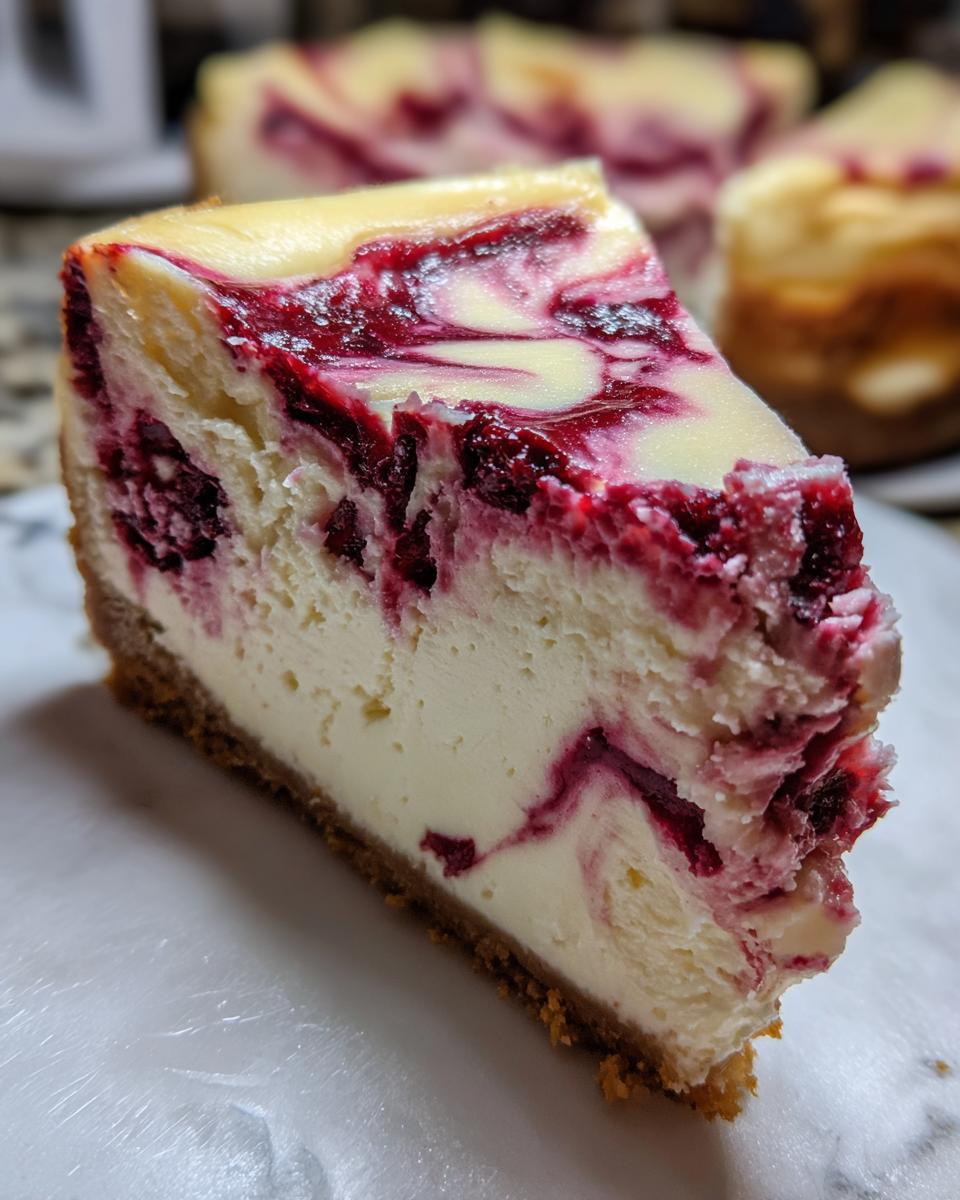
Once your sauce spots are placed, grab a thin knife or even a wooden skewer—whatever you have handy. Gently drag that knife through the batter about an inch deep, using a figure-eight or gentle S-shape pattern. A light touch keeps everything light! You’re just kissing the surface to marble the two batters together. If you drag too hard or too many times, you end up with pink cheesecake, not swirled cheesecake. Remember that elegance in elegance comes from restraint! If you ever need a fantastic fruit sauce recipe that’s homemade, I have a great one for blueberry that uses a similar technique over here.
Tips for Your White Chocolate Raspberry Cheesecake Success
Even with perfect instructions, sometimes the little details make the difference between a great cake and the best cheesecake recipe ever. I’ve learned that focusing on component quality really pays off here. Don’t skimp when it comes to the white chocolate! Since white chocolate is a primary flavor driver in this white chocolate raspberry cheesecake, use a good quality brand. The cheap stuff often has stabilizers that don’t melt as smoothly, and we need pure silk.
Also, I know the recipe says chill for a minimum of six hours, but if you can manage it—and I highly suggest you do—let this hang out in the fridge overnight. That extra time allows the filling to fully firm up and lets all those amazing flavors—the creamy white chocolate, the tangy raspberry—really meld together. Trust me, the extra patience here makes all the difference for that perfect texture. For more general advice on tricky baking situations, I put together some general baking tips you might find helpful!
Ingredient Temperature Matters for Smoothness
I’ve said it before, but I’m saying it again because it’s that important for a truly smooth, lump-free white chocolate raspberry cheesecake filling! If your cream cheese is cold, it fights the sugar and creates little hard bits that never dissolve. If your eggs are ice-cold, they can actually curdle the cream cheese mixture when added in. Make sure everything dairy and egg is out on the counter warming up for at least an hour before you start mixing. It’s the simplest technique, but it’s fundamental to achieving a supreme texture!
Serving Suggestions for This Elegant Dessert Recipes
Wow, look at you! You’ve made a stunning, rich gourmet cheesecake flavors creation. This white chocolate raspberry cheesecake is so indulgent that you don’t need heavy sauces or piles of whipped cream dragging it down. We want accompaniments that balance that intense richness and complement that lovely fruit swirl we worked so hard to achieve.
Because it’s naturally so sweet and creamy, pairing it with something that offers a little tartness makes the whole slice sing. Think light and bright! A tiny side of fresh raspberries or thinly sliced strawberries would be absolutely perfect for adding that extra pop of color and fresh flavor. This cuts through the richness beautifully, turning it into the ultimate sweet and tangy dessert experience.
If you are looking for a beverage pairing, skip the heavy coffee or dark wine. I love serving a slice of this alongside something bubbly and refreshing. I actually have a recipe for a Sparkling Honey Lemonade that has just enough brightness from the lemon to refresh your palate between bites of that decadent white chocolate filling. It really makes the whole dessert feel lighter, even though we both know cheesecake is anything but!
Storage and Reheating Instructions for White Chocolate Raspberry Cheesecake
Okay, the hardest part is over—it’s baked and cooled! Now we need to protect that gorgeous, silken texture cheesecake we worked so hard to achieve. Cheesecake is definitely a chilly-weather dessert, meaning it needs plenty of time in the fridge to set up properly so it slices beautifully.
You simply must follow the minimum chilling time: A minimum of 6 hours, but honestly? If you can cover that pan loosely with plastic wrap after it hits room temperature and leave it in the refrigerator overnight, do it! That extra time solidifies everything perfectly. It helps the creamy white chocolate flavor deepen, too.
When it comes to storing leftovers, keep it covered tightly in the fridge. It holds up wonderfully for about four or five days. And I have to be upfront with you—cheesecake does not like to be warmed up. If you try to reheat cheesecake, you just melt the wonderful structure we built with the water bath. Trust me, serve it cold, straight from the fridge! That’s when this white chocolate raspberry cheesecake is at its absolute peak in texture and flavor.
Frequently Asked Questions About Making White Chocolate Raspberry Cheesecake
Even when you think you’ve got a foolproof recipe, questions pop up! That’s totally normal when you’re creating something this special. I’ll answer the top things I hear about this gorgeous white chocolate raspberry cheesecake so you can bake with total confidence. If you’re looking for video insight, sometimes seeing it baked helps, so feel free to check out this video tutorial example!
Can I make this white chocolate raspberry cheesecake without a water bath?
Oh, that water bath question! Look, technically, you *could* skip it. But honestly? If you skip the water bath, you are skipping the absolute key to getting that luxurious, silken texture cheesecake we are aiming for. The water bath creates that gentle steam environment that cooks the filling evenly and slowly, which is what prevents cracks and drying out. I truly, truly recommend you don’t skip it if you want that perfectly smooth top!
How does this compare to a Restaurant Style Cheesecake?
That’s the goal! This recipe is absolutely designed to give you a restaurant style cheesecake experience. We use the full-fat cream cheese and sour cream combination, and we focus heavily on minimal mixing to keep the batter dense and super rich—just like those high-end places that charge a fortune for a slice. This is my version of a truly top-tier, copycat cheesecake recipe!
Can I use frozen raspberries instead of fresh ones for the swirl?
Yes, frozen raspberries work perfectly for the raspberry swirl dessert component! If you use frozen ones, just thaw them slightly and mash them gently, maybe reducing them down just a tiny bit on the stove if they release a ton of extra liquid. You don’t want soup in your batter, but frozen fruit works just fine!
Do I have to chill this for a full 6 hours?
For the best possible result, yes! Remember how much we talked about making sure everything sets up? That chilling time is when the cheesecake truly firms up after being baked. Less time and it might be gooey; overnight means you get that perfect sliceability for your elegant dessert recipes.
Estimated Nutritional Data for Your Indulgent Fruit Cheesecake
Alright, let’s talk about the numbers, though honestly, a slice of heaven like this white chocolate raspberry cheesecake shouldn’t really be counted! I’ve pulled together the estimated nutritional breakdown based on how we made this gorgeous indulgent fruit cheesecake using the standard ingredients listed—no swapping out for low-fat everything here, though!
Keep in mind that since we are making something this rich and decadent, these numbers reflect a standard generous serving size. If you cut smaller slices, the numbers will drop, naturally! This is just a ballpark guide, but it gives you a sense of the delicious indulgence we are talking about.
- Serving Size: 1 slice
- Calories: 450
- Sugar: 38g (Worth every single gram!)
- Fat: 28g
- Protein: 8g
- Carbohydrates: 42g
It’s a treat, for sure! But when you look at what goes into it—real cream cheese, rich white chocolate, and fresh fruit puree—you know you’re getting high-quality stuff. Enjoy every bite because you absolutely earned this perfect slice!
Share Your White Chocolate Raspberry Cheesecake Creations
You did it! You’ve conquered the water bath, mastered the swirl, and chilled your way to the most incredible white chocolate raspberry cheesecake. Now, here’s the best part of my job: seeing what you all create in your kitchens! Remember how I started this site because I wanted to prove to people they *could* make amazing things? This is where you prove me right!
When you finish chilling that beauty and slice into it—carefully, so you can admire that clean line—I desperately want to see photos! Tag me on social media or send a picture through the contact page. I love seeing how your swirls turned out; maybe you got a more dramatic marble than mine did this batch! Every success story you share reminds me why we do all this recipe refinement.
And please, please leave a rating and a comment right here below the recipe. Did this no crack cheesecake method work for you? Did you use the graham cracker crust or try the Oreo swap? Your feedback not only makes me feel connected to you, my readers, but it also helps everyone else who comes along later feel confident they can achieve this level of decadent dessert success. Happy sharing, and thank you for bringing this creamy cheesecake recipe into your home!
PrintUltimate Creamy White Chocolate Raspberry Cheesecake with Graham Cracker Crust
Make a showstopper dessert with this creamy white chocolate raspberry cheesecake. This recipe uses a water bath and specific cooling method to guarantee a silken texture without cracks, featuring a buttery graham cracker crust and a vibrant raspberry swirl.
- Prep Time: 30 min
- Cook Time: 75 min
- Total Time: 180 min
- Yield: 12 servings 1x
- Category: Dessert
- Method: Baking
- Cuisine: American
- Diet: Vegetarian
Ingredients
- 1 1/2 cups graham cracker crumbs
- 1/4 cup granulated sugar (for crust)
- 6 tablespoons unsalted butter, melted
- 3 (8 ounce) packages full-fat cream cheese, softened
- 1 1/2 cups granulated sugar (for filling)
- 1 teaspoon vanilla extract
- 1/4 teaspoon salt
- 1 cup white chocolate, melted and slightly cooled
- 3 large eggs, room temperature
- 1/2 cup sour cream, room temperature
- 1 cup raspberry sauce or puree (for swirl)
Instructions
- Prepare the crust: Combine graham cracker crumbs, 1/4 cup sugar, and melted butter. Press mixture firmly into the bottom of a 9-inch springform pan. Chill the crust for 30 minutes.
- Prepare for water bath: Wrap the outside of the springform pan tightly in heavy-duty aluminum foil, covering the bottom and sides completely to prevent water entry.
- Make the filling: Beat the softened cream cheese in a large bowl until smooth. Gradually add 1 1/2 cups sugar, vanilla extract, and salt, mixing until just combined. Do not overmix.
- Incorporate white chocolate: Slowly mix in the slightly cooled melted white chocolate until smooth. Scrape down the sides of the bowl.
- Add eggs: Beat in the eggs one at a time, mixing only until each egg is incorporated. Mix in the sour cream last.
- Pour batter: Pour the cream cheese batter over the chilled crust in the springform pan.
- Create the swirl: Dollop the raspberry sauce randomly over the top of the batter. Use a knife or skewer to gently swirl the sauce into the batter, creating a marbled effect.
- Bake using a water bath: Place the foil-wrapped springform pan into a larger roasting pan. Carefully pour hot water into the roasting pan until it reaches halfway up the sides of the springform pan.
- Bake at 325°F (160°C) for 60 to 75 minutes, or until the edges are set and the center has a slight jiggle.
- Cool slowly (No Crack Cheesecake Method): Turn off the oven, crack the oven door open slightly, and let the cheesecake cool inside the oven for 1 hour.
- Remove the cheesecake from the water bath and foil. Let it cool completely on a wire rack at room temperature for another hour.
- Chill: Cover the cheesecake and refrigerate for at least 6 hours, or preferably overnight, before serving.
Notes
- Use high-quality white chocolate for the best flavor in this decadent white chocolate treat.
- Ensure all dairy ingredients (cream cheese, eggs, sour cream) are at room temperature to prevent lumps and achieve a silken texture.
- For a restaurant style cheesecake, chill thoroughly before slicing.
- If you prefer an Oreo crust, substitute Oreo crumbs for graham cracker crumbs.
Nutrition
- Serving Size: 1 slice
- Calories: 450
- Sugar: 38g
- Sodium: 300mg
- Fat: 28g
- Saturated Fat: 17g
- Unsaturated Fat: 11g
- Trans Fat: 0.5g
- Carbohydrates: 42g
- Fiber: 1g
- Protein: 8g
- Cholesterol: 110mg