
Oh, I know this struggle so well. You put the chicken in the oven, crossing your fingers, and what comes out is something resembling leather. It’s the number one reason people avoid making baked chicken breast at home! But here at Taste This Plate, we decided that wasn’t good enough. Home cooking should bring joy, not stress, especially when it comes to mastering a weeknight staple. After testing countless temperatures and seasoning combinations in my kitchen—trying to unlock that chef-level tenderness—I finally cracked the code. This isn’t just another recipe; this is the foolproof method for a genuinely juicy oven chicken breast that will save your dinners from dryness forever. Trust me, once you nail this simple technique, you’ll be making this protein multiple times a week!
- Why This Is the Best Baked Chicken Breast Recipe You Will Ever Make
- Ingredients for Your Juicy Oven Chicken Breast
- How to Prepare the Foolproof Chicken Breast Recipe
- Tips for Success with Baked Chicken Breast
- Make-Ahead & Storage for Meal Prep Chicken Breast
- Serving Suggestions for Your Simple Baked Chicken
- Frequently Asked Questions About Baked Chicken Breast
- Estimated Nutritional Data for Baked Chicken Breast
- Share Your Perfectly Cooked Chicken Breast Experience
Why This Is the Best Baked Chicken Breast Recipe You Will Ever Make
I promise you, this simple baked chicken will change your life. We took all the guesswork out of the equation because the number one request I get in my kitchen is, simply, “How do I get a juicy oven chicken breast?” This particular technique delivers every single time, making it my go-to foolproof chicken breast recipe for busy friends and family.
Here’s why you should trust this method:
- It addresses the biggest killer of chicken breast—uneven thickness! Our prep work ensures everything cooks perfectly together.
- Minimal fuss! You mix a simple dry rub, slather on some rich garlic butter, and pop it in the oven. Seriously, that’s almost it!
- We include a link to my favorite gravy recipe, should you want to turn this into an even more comforting meal later on. We even have a quick gravy recipe for dipping!
Guaranteed Tender Chicken Breast Tutorial
The secret weapon against dryness, right at the start, is evening out your cutlets. Chicken breast meat naturally tapers from thick to thin, meaning by the time the thick end is cooked through, the thin end is totally dried out! We tackle this by gently pounding the thicker parts down to match the thinner parts. This ensures that every single bite of your moist baked chicken breast is cooked to that perfect internal temperature simultaneously. It’s a literal game-changer for learning how to bake chicken breast without drying it out.
Quick Chicken Breast Dinner Ready in Under 35 Minutes
Who has hours for dinner on a Tuesday? Not me! This method is designed for speed. By cranking the oven up to a nice hot 400 degrees Fahrenheit, we sear the seasoning and butter beautifully while quickly bringing the internal temp up safely. Including the 10 minutes of prep and the crucial rest time, you’re looking at having this quick chicken breast dinner on the table in under 35 minutes total. It’s perfect for when you need an easy protein dinner idea fast!
Ingredients for Your Juicy Oven Chicken Breast
When you’re aiming for the best baked chicken breast, the ingredients list has to be straightforward but flavorful. I never want you hunting down obscure spices! Everything here is what I keep stocked for my weekly meal prep chicken breast sessions. We break these down into two parts: the amazing seasoning blend that gives it that savory edge, and the little bit of magic to keep it moist on top.
For the Simple Baked Chicken Seasoning Rub
This combination is my favorite go-to oven baked chicken seasoning. It’s simple, but the paprika and thyme give it such a wonderful warmth. Remember, these measurements are for four standard 6-8 ounce breasts:
- 1 teaspoon salt (don’t skip this, it helps the texture!)
- 1 teaspoon black pepper
- 1 teaspoon garlic powder
- 1 teaspoon onion powder
- 1 teaspoon paprika (I use sweet, not smoked, for this one)
- 1/2 teaspoon dried thyme
For the Garlic Butter Finish
This garlic butter is what takes your simple baked chicken from good to “Wow, what’s in this?” It melts down over the seasoned surface as it cooks, basting the meat and locking in flavor. Make sure your butter is actually soft—not melted, just ready to move!
- 4 tablespoons unsalted butter, softened
- 2 cloves garlic, minced
Also, don’t forget these essentials: 1 tablespoon of olive oil to coat the outside before seasoning, and, of course, your 4 boneless, skinless chicken breasts that you’ve already taken the time to pound evenly!
How to Prepare the Foolproof Chicken Breast Recipe
Okay, deep breath! This is where the magic happens, and I promise it’s so simple. Since we’ve prepped our ingredients, we just need to follow the flow. This isn’t complicated science; it’s just good technique to make sure you get that perfectly cooked chicken breast every single time. Grab your baking dish and let’s get these seasoned and in the oven!
Prep Work: Pounding for Even Baked Chicken Breast
If you skipped the step of evening out your chicken, please stop right now and go do it! Seriously. Place your chicken between two sheets of plastic wrap—I love using parchment paper since it feels cleaner—and grab that meat mallet. You need to gently pound the thicker end until the whole breast is about 3/4 of an inch thick all the way across. Why? Because if one part is half an inch thick and the other is an inch thick, the thin side will dry out long before the thick side is safe to eat. This simple trick is essential for achieving a tender chicken breast tutorial result!
Mixing the Oven Baked Chicken Seasoning and Rubbing
Now that they are uniform, it’s time for flavor! Mix up all your dry rub components—that salt, pepper, paprika, and the rest—in a small bowl. Next, drizzle everything with just a tablespoon of olive oil; this helps the seasoning stick beautifully. After that, sprinkle your seasoning mixture generously over both sides of the chicken. Don’t just drop it on top; gently press it in so that rub adheres well. When you’re done, this should look like a beautiful coating, ready for the heat.
Baking the Chicken Breast to Juicy Perfection
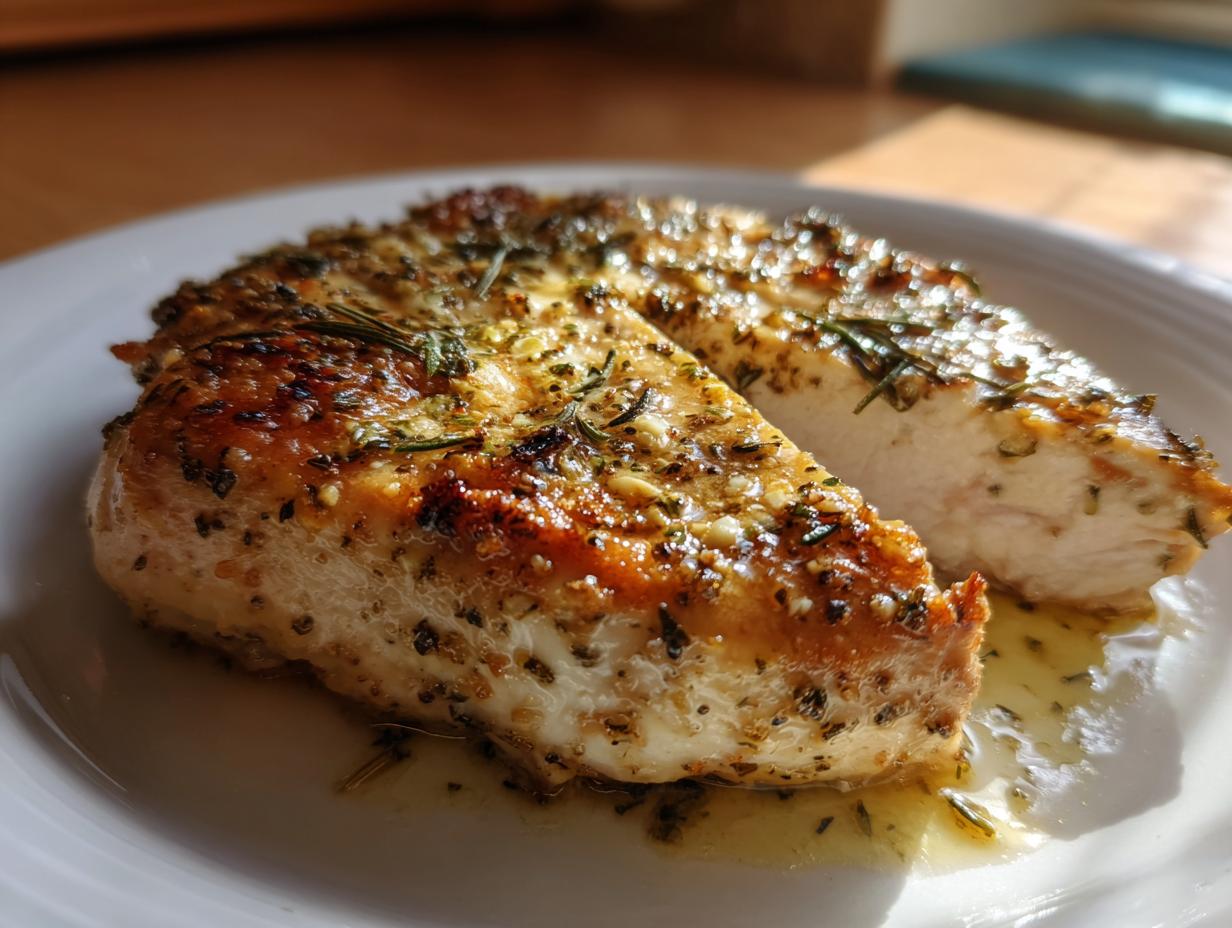
Preheat your oven to 400 degrees Fahrenheit first—nice and hot. Place the seasoned chicken breasts into your dish. Remember that fragrant garlic butter? Drop a small dollop right on top of each breast. Pop it into that hot oven and set your timer for 18 minutes. When the timer goes off, use your instant-read thermometer! This is the most crucial part of any baked chicken breast recipe; you must hit 165 degrees Fahrenheit (74 Celsius) in the thickest spot. Don’t guess! Safety first, then we move on to juiciness.

The Critical Step for Moist Baked Chicken Breast: Resting
You pulled them out at 165°F. Congratulations! Now, resist the urge to slice into them right away. I know, it’s hard when they smell this good! But you have to transfer the chicken to a clean cutting board and let it rest, covered loosely with foil, for a good 5 to 10 minutes. This lets all those precious juices—which were jostling to escape during baking—redistribute back into the meat fibers. Skip this 10 minutes, and the juices run out onto your plate. Trust me, resting is non-negotiable for getting that moist baked chicken breast we are aiming for.
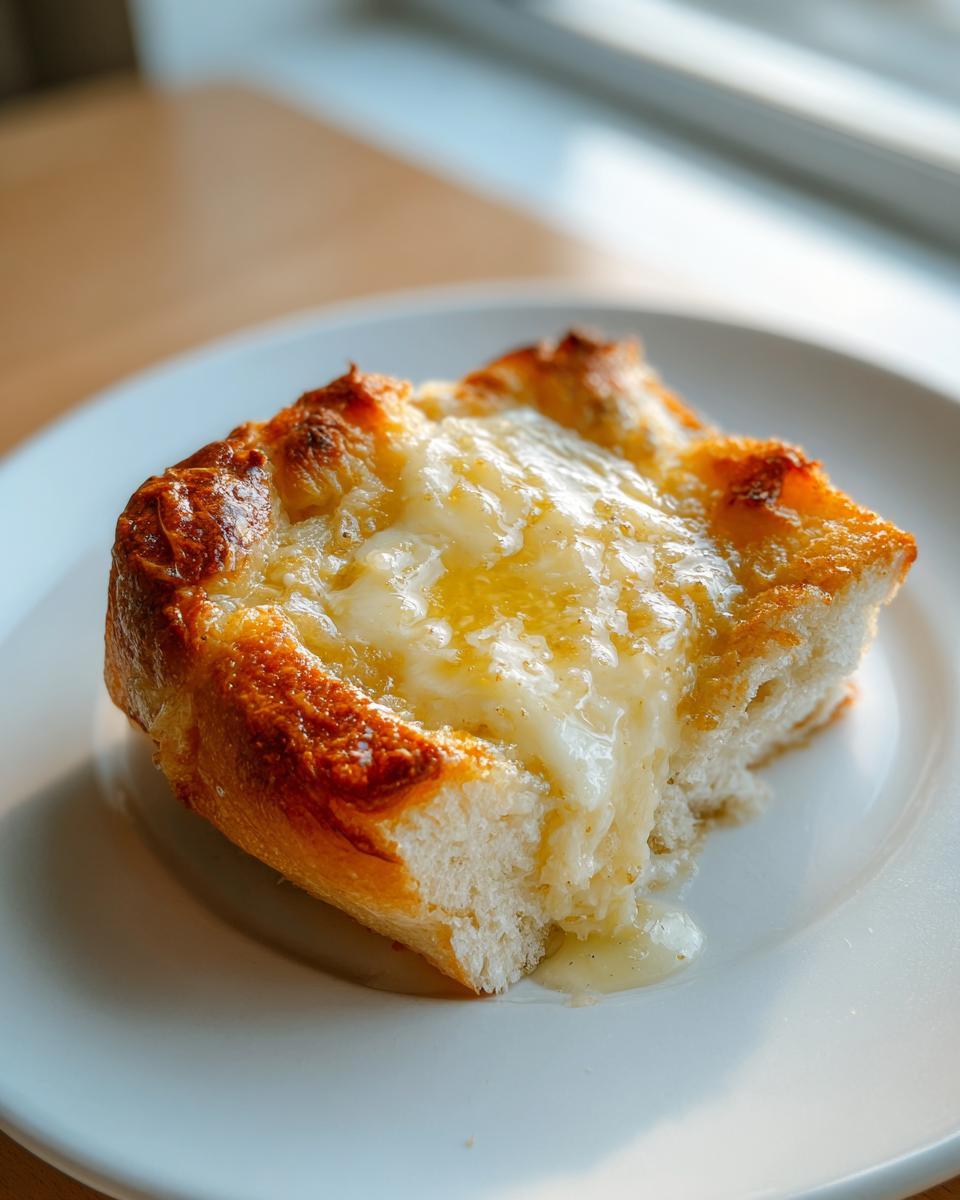
You can even make some delicious garlic naan while the chicken is resting if you want something great to soak up any leftover pan juices!
Tips for Success with Baked Chicken Breast
I’ve made this recipe so many times that I start doing it on autopilot, but there are a few little things I have learned over the years that elevate this from just a good recipe to the absolute best way to handle this cut of meat. We’ve handled the texture by pounding, but now let’s talk about making sure you get that perfect internal result every single time. Mastering these small techniques helps build my confidence as a cook, and I know it will help yours too!
Temperature Control for Tender Chicken Breast Tutorial
If you take away only one thing from this whole guide, please let it be this: stop guessing and start measuring! You simply cannot guarantee a tender chicken breast tutorial result without knowing the internal temperature. Remember how we said we stop baking at 165 degrees Fahrenheit (74 Celsius)? That’s the magic number for safety and juiciness, but if you bake it past that, those muscle fibers tighten up, and that moisture we worked so hard to keep inside rushes right out. I keep my trusty meat thermometer right next to my spice rack. A quick check in the thickest part—right before the end of the cooking time—is the best way to know exactly how to bake chicken breast without drying it out.

If you’re worried about overcooking but don’t want to use a thermometer constantly, watch the juices: when you cut into the thickest part slightly, the juices should run clear, not pink. But honestly, a thermometer really is your best friend for this healthy baked chicken endeavor.
Achieving a Golden Top Finish
Sometimes, even with that nice, hot 400-degree oven, the very top of the chicken breast doesn’t quite get that beautiful golden-brown crust I love. We want rich color, not pale meat, right? This is an easy fix that adds a slightly gourmet touch without adding any extra time to your main cook.
For the last minute or two of baking—and I mean just one or two—move your rack up closer to the broiler element. Keep your eye glued to it, because the broiler works fast! You just want that garlic butter to sizzle and the seasoning to toast up nicely. Don’t walk away while broiling, or you’ll trade dry chicken for burnt chicken in a flash! For more ideas on handling poultry, you might enjoy my recipe for easy garlic herb roasted chicken, which uses a similar hot-then-rest method.
If you want to see another great approach to perfectly cooked chicken, check out what my friends over at Finger Licking Recipes do for their standard bake! See their tips right here.
Make-Ahead & Storage for Meal Prep Chicken Breast
So, you made four perfectly juicy baked chicken breasts, and now you have leftovers! First of all, good job—but don’t let that beautiful protein go to waste. This recipe is absolutely fantastic for meal prep chicken breast because it holds its moisture so well, even after a few days in the fridge. It’s one of my favorite tricks for ensuring I have easy protein dinner ideas ready when I’m too tired to cook later in the week.
The trick really comes down to cooling and storing it properly. You absolutely cannot put warm chicken into an airtight container; the trapped steam will turn that beautiful texture soggy, and we fought too hard to avoid dry chicken for that to happen!
Make sure the chicken has cooled completely to room temperature—this usually takes about an hour on the counter or a little faster if you spread the pieces out on a clean rack. Once it’s fully cool, you can slice it or store it whole. I prefer slicing it because it thaws faster.
Store everything in a single layer (if possible) in an airtight container in the refrigerator. Honestly, this baked chicken breast stays tender for about 3 to 4 days if you keep it sealed up tight. If you want ideas on how to shred it and turn it into a completely different meal, like a great salad topping, you should check out my recipe for creamy avocado chicken salad—it’s amazing using leftovers!
When you’re ready to eat it later in the week, you don’t need to reheat it much, especially since we cooked it perfectly the first time! If you do want it warm, just microwave it for 30-second bursts until it’s just warmed through. If you’d rather see how the pros handle their meal prep, check out the tips over at FitFeastly for even more strategies for keeping poultry moist!
They have some great pointers on batch cooking too.
Serving Suggestions for Your Simple Baked Chicken
Now that you have perfected the art of the baked chicken breast—tender, juicy, and fragrant with garlic butter—the next step is deciding what to serve it with! Because this chicken is so incredibly versatile and carries a lovely, savory flavor from the simple rub and fat, you can dress it up or down easily. It’s really the perfect canvas for almost any side dish you can think of.
If you’re looking for something rich and comforting to pair with that garlic butter finish, you absolutely cannot go wrong with potatoes. I personally love serving this alongside a big scoop of creamy, cheesy mashed potatoes. The sauce from the chicken mingles perfectly with the potato starch! You can find my absolute favorite recipe for Garlic Parmesan Mashed Potatoes right here.
For something lighter, this works wonderfully sliced thin over a big green salad, or served simply with quick-roasted vegetables like asparagus or green beans. Since the chicken itself is already seasoned richly, you don’t need complicated sauces for your sides. It’s truly one of the best easy weeknight chicken dishes because you can throw together almost any side, and it always tastes like a winner. Enjoy those beautifully cooked breasts!

Frequently Asked Questions About Baked Chicken Breast
I get so many questions about this recipe, which just proves how many people are struggling with dry poultry! That’s okay, that’s why I’m here to help you get that perfectly cooked chicken breast every time. Here are the top things folks ask me when they try this simple formula for the first time.
Can I use frozen chicken breasts for this baked chicken breast recipe?
Oh, I really wish you could, but for this specific method, no, you shouldn’t start with frozen chicken for your baked chicken breast recipe. The critical first step we take—the one that guarantees the juice—is pounding the chicken to an even thickness. You can’t properly pound meat that’s partially frozen or hard, and if the thickness isn’t even, you’ll end up with one end overcooked while the other is still catching up. If you must use frozen, you have to thaw them completely in the fridge first. Then you can proceed with the pounding step! If you are rushing, maybe try my chicken scampi recipe instead, which uses quickly cooked cubed chicken!
What is the best internal temperature for juicy oven chicken breast?
This is the golden question, and it’s the biggest giveaway for getting a truly juicy oven chicken breast. The USDA recommends 165 degrees Fahrenheit (74 Celsius) for safety, and that’s exactly what we aim for. But here’s the key: you need an instant-read thermometer! You must check the temperature right at the thickest part of the breast. Once it hits 165°F, pull it out immediately and let it rest. If you leave it in for even five more minutes while you’re doing something else, it will absolutely dry out. Measuring that temperature is the difference between good chicken and the best baked chicken breast you’ve ever made.
How can I adapt this oven baked chicken seasoning for different flavors?
That dry rub is pretty darn perfect as is, if I do say so myself, but one of the great things about having a simple baked chicken recipe down pat is how easy it is to change up the flavor profile for variety! If you want something with a little more depth or spice, try adding a half teaspoon of chili powder or cayenne pepper to the mix. That little bit of heat really sings next to the garlic butter. Or, if you’re making this for kids, you can swap the paprika out for an extra teaspoon of onion powder for a milder roast flavor. For even more ideas on how versatile baked poultry can be, take a peek at this article over at Diethood!
Estimated Nutritional Data for Baked Chicken Breast
I always keep nutrition in mind, especially if I’m making a big batch for meal prep chicken breast throughout the week. Since this recipe uses simple ingredients like chicken, olive oil, and butter, it’s a great choice for a filling yet relatively low-carb, high-protein meal. Remember that the exact numbers can shift slightly depending on the exact size of your chicken breasts, but this should give you a great idea of what you’re working with for one serving!
Here is the breakdown based on the recipe details. This is what you can expect from one serving of this healthy baked chicken:
| Nutrient | Amount (per serving) |
|---|---|
| Calories | 280 |
| Protein | 40g |
| Fat | 12g |
| Saturated Fat | 6g |
| Carbohydrates | 2g |
| Sugar | 1g |
| Sodium | 450mg |
Please take these numbers as guidelines! The amount of oil absorbed or residual butter melting off while resting can slightly change the final count for your baked chicken breast.
Share Your Perfectly Cooked Chicken Breast Experience
I truly hope these steps help you make the most incredibly tender chicken breast tutorial experience right in your own oven! Getting that moist baked chicken breast used to take me years of guesswork, but now that you have my foolproof system down, I want to see what you create. Home cooking should be a shared celebration, not a solitary task!
If you followed along and ended up with the most delicious, juicy baked chicken breast you’ve ever had, please let me know! I love hearing how these recipes fit into your busy weeknight rotation or how you used the leftovers for lunch.
Head down to the comments section below, leave a star rating—I hope it’s five stars!—and tell me how long you cooked yours for and what side dish you paired it with. Did you stick to the garlic butter, or did you sneak in some of those extra spices we talked about?
If you have any lingering questions about temperature or technique that I didn’t cover, please don’t hesitate to ask! You can always reach out directly through my contact page as well. There are no silly questions when we’re learning to conquer tricky cuts of meat. Happy cooking, friend, and I can’t wait to see your perfectly cooked results!
PrintThe Ultimate Foolproof Juicy Oven Baked Chicken Breast Recipe
Create tender, moist baked chicken breast every time with this simple recipe featuring a savory dry rub and garlic butter finish. This foolproof method is perfect for quick weeknight dinners or meal prepping.
- Prep Time: 10 min
- Cook Time: 20 min
- Total Time: 35 min
- Yield: 4 servings 1x
- Category: Dinner
- Method: Baking
- Cuisine: American
- Diet: Low Fat
Ingredients
- 4 boneless, skinless chicken breasts (about 6–8 oz each)
- 1 tablespoon olive oil
- 1 teaspoon salt
- 1 teaspoon black pepper
- 1 teaspoon garlic powder
- 1 teaspoon onion powder
- 1 teaspoon paprika
- 1/2 teaspoon dried thyme
- 4 tablespoons unsalted butter, softened
- 2 cloves garlic, minced
Instructions
- Preheat your oven to 400 degrees Fahrenheit (200 degrees Celsius). Position an oven rack in the center.
- Prepare the chicken: Place the chicken breasts between two sheets of plastic wrap or parchment paper. Use a meat mallet or rolling pin to gently pound the thickest part of the breast until the thickness is even, about 3/4 inch. This step is key for even cooking.
- Make the dry rub: In a small bowl, combine the salt, pepper, garlic powder, onion powder, paprika, and dried thyme.
- Season the chicken: Rub the olive oil over all sides of the chicken breasts. Sprinkle the dry rub mixture evenly over both sides of the chicken, pressing gently so the seasoning adheres.
- Prepare the garlic butter: In another small bowl, mix the softened butter with the minced garlic until well combined.
- Place the seasoned chicken breasts in a baking dish or on a rimmed baking sheet. Place one teaspoon of the garlic butter mixture on top of each chicken breast.
- Bake the chicken: Place the dish in the preheated oven. Bake for 18 to 22 minutes. The exact time depends on the thickness of your breasts.
- Check the temperature: Use a meat thermometer to check the internal temperature at the thickest part. The chicken is done when it reaches 165 degrees Fahrenheit (74 degrees Celsius).
- Rest the chicken: Remove the chicken from the oven and transfer it to a clean cutting board. Tent loosely with foil and let it rest for 5 to 10 minutes before slicing or serving. This resting period allows the juices to redistribute, guaranteeing a moist result.
Notes
- For the juiciest results, ensure your chicken breasts are uniform in thickness before seasoning.
- If you prefer a crispier top, place the chicken under the broiler for the last 1-2 minutes, watching closely to prevent burning.
- This perfectly cooked chicken breast is excellent for meal prep; store cooled, sliced chicken in an airtight container in the refrigerator for up to 4 days.
Nutrition
- Serving Size: 1 breast
- Calories: 280
- Sugar: 1
- Sodium: 450
- Fat: 12
- Saturated Fat: 6
- Unsaturated Fat: 6
- Trans Fat: 0
- Carbohydrates: 2
- Fiber: 0
- Protein: 40
- Cholesterol: 110