
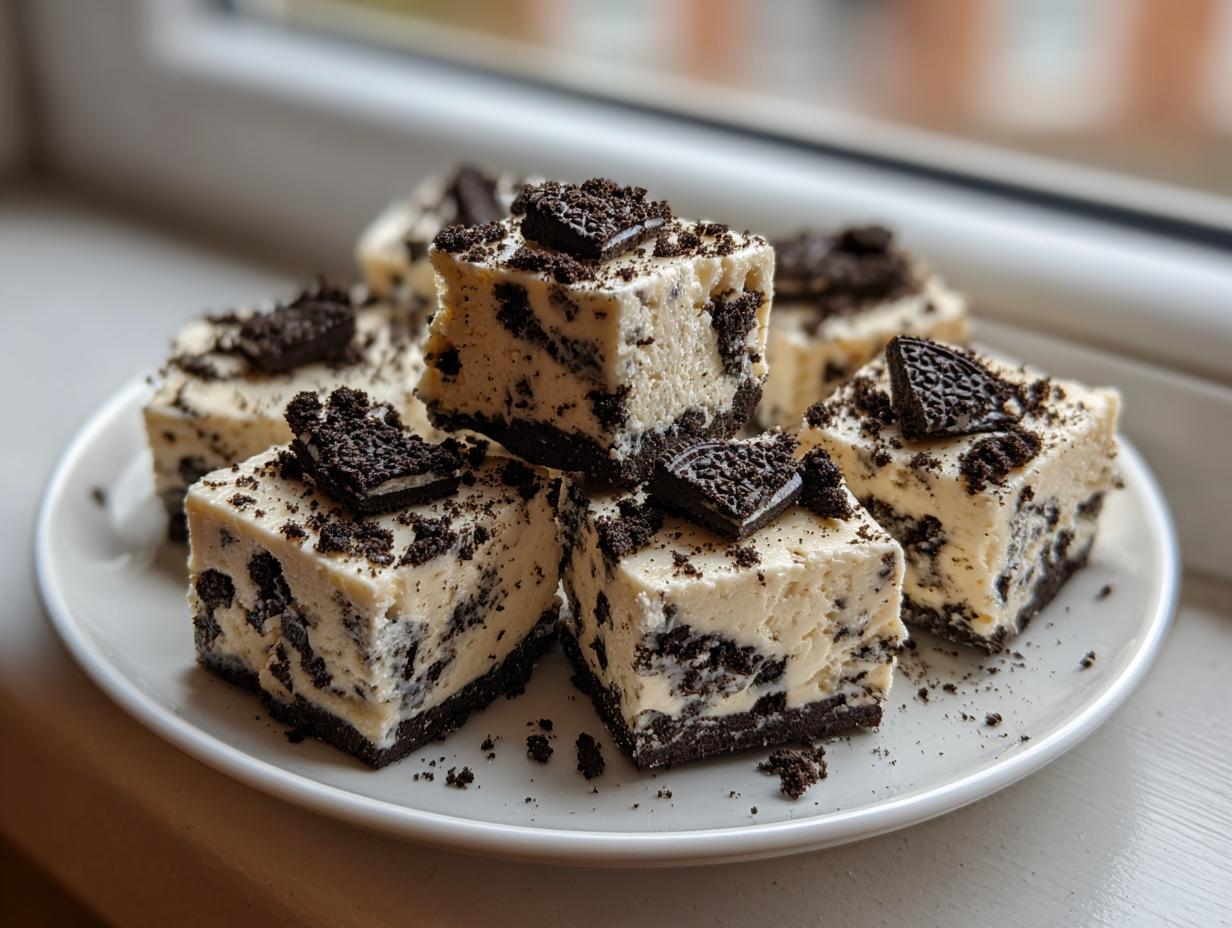
You know my philosophy here at Taste This Plate: making memories shouldn’t require complicated steps or hours in the kitchen. Sometimes, you just need an absolutely show-stopping, decadent treat, and you need it fast. That’s why I’m so excited to share this recipe with you today. Forget slogging over a candy thermometer; we are making the easiest ever 3-ingredient Oreo fudge. Seriously, this rich, creamy cookies and cream dream comes together in about ten minutes of actual work, making it my go-to when I want something that tastes like I spent all afternoon on it, but I really didn’t.
When I first tested this shortcut fudge, I was astounded. It’s proof that you don’t need ten ingredients to achieve that perfect, velvety texture people crave in oreo fudge. This recipe relies on the magic combination of just three simple components to deliver that nostalgic, crunchy, sweet bite every single time. It’s simple, it’s effective, and it’s going to be your new secret weapon for last-minute gifts or sudden sweet cravings!

- Why This 3-Ingredient Oreo Fudge Recipe Works So Well
- Gathering Ingredients for the Best Oreo Fudge
- Step-by-Step Instructions for No Bake Fudge
- Tips for Success When Making Homemade Fudge
- Variations for Your Oreo Fudge Recipe
- Serving Suggestions and Gifting Your Oreo Fudge
- Storage and Reheating for Fresh Oreo Fudge
- Frequently Asked Questions About This Oreo Fudge Recipe
- Nutritional Estimates for This Simple Dessert
Why This 3-Ingredient Oreo Fudge Recipe Works So Well
I get it; when you hear the word ‘fudge,’ you probably picture stirring something constantly on the stovetop for what feels like forever. Not here! That’s the beauty of this no bake fudge method. We are completely skipping the messy, high-stress cooking steps. This is truly a quick candy recipe that you make almost entirely in the microwave, and the results are incredibly professional. You’ll feel like you cheated!
If you love effortless treats, you might want to check out my recipe for easy no-bake Oreo balls, too—it uses a similar magic, but in ball form!
Achieving Creamy Fudge Texture with Minimal Effort
The secret sauce here is relying on sweetened condensed milk. When you melt that with the white chocolate chips, you create an instant, perfectly smooth, and slightly thick base. There’s no need to worry about sugar crystallization or getting the right temperature. It melts beautifully, yielding that wonderfully creamy fudge texture everyone wants!
The Role of Oreos in Your Oreo Fudge
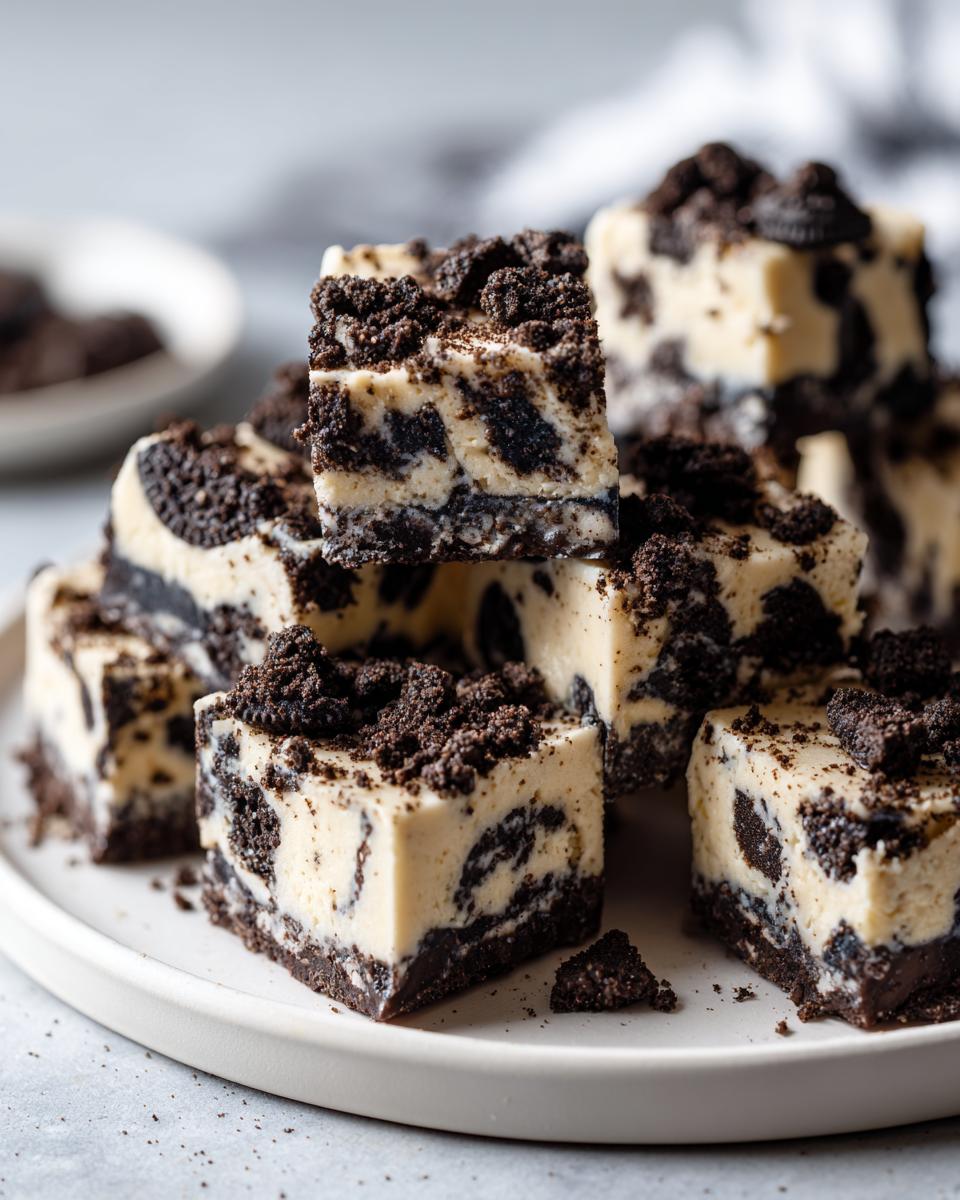
Honestly, the cookies are the star as much as the chocolate base is! This is what makes it a genuine cookies and cream fudge experience. You need that crunch against the soft, rich base. When you crush the Oreos, try not to pulverize them too finely. You want a mix of powders and small, recognizable cookie chunks running through the whole batch.
Gathering Ingredients for the Best Oreo Fudge
You only need three things for this recipe, which is why it’s so brilliant! It truly is the power couple of sweetened condensed milk fudge and white chocolate making this easy magic happen. When I shop for this, I try to grab the best quality white chips I can find, as they really do shine through in this simple treat. Resist the urge to add more; trust me, three ingredients are all we need for the best Oreo fudge.
Ingredient Clarity: Specific Measurements for Oreo Fudge
For perfect results every time—which is always my goal here—make sure your pantry matches these specific amounts. This isn’t the time to guess on the can size or cookie weight!
- 1 (14 ounce) can sweetened condensed milk
- 2 cups white chocolate chips
- 1 package (about 14.3 ounces) Oreo cookies, fully crushed
That’s it! You have the makings of incredible white chocolate fudge that requires zero baking skill.
Step-by-Step Instructions for No Bake Fudge
This is where the magic happens lightning fast! Because this is a no bake fudge recipe, the whole assembly process barely takes any time at all. I like to have everything measured out and ready to go before I even turn the microwave on. Trust me, once the white chocolate starts melting, things move quickly, and you won’t want to stop to find your parchment paper!
Preparing Your Pan for Easy Oreo Fudge Removal
First things first: your landing strip! You need an 8×8 inch pan ready to go. Take a sheet of parchment paper and line it in the pan, but here’s the important part: leave a few inches hanging over the sides on two opposite edges. These overhangs become your handles later, which is key for lifting the entire block of oreo fudge out perfectly intact. Give that parchment a tiny spritz of cooking spray or a very light rub of butter just to make sure nothing sticks, just in case!
Melting White Chocolate and Condensed Milk Correctly
Grab a microwave-safe bowl—not too deep, you want that easy stirring access. Toss in your 2 cups of white chocolate chips and the entire can of sweetened condensed milk. Now, listen closely, because this is the most important tip for silky, creamy fudge: run the microwave on 50% power for 30-second bursts. After every 30 seconds, pull it out and stir it really well, even if it doesn’t look melted yet. If you blast it on high, your white chocolate can seize up on you, and we absolutely do not want that disaster! Keep stirring and nuking briefly until it’s completely smooth, usually taking about a minute or two total.
Mixing and Setting Your Cookies and Cream Fudge
Once you have that beautiful, glossy mixture, take about three-quarters of your crushed Oreos and fold them right into the melted base. Mix gently until those cookie bits are evenly dotted throughout. Pour that glorious batter into your waiting 8×8 pan and use a spatula to spread it out evenly across the surface. Now, take those last reserved Oreos and sprinkle them right over the top. GENTLY press them down with the back of your spatula or even the bottom of a measuring cup—we want them stuck to the top layer, not knocked all the way to the bottom! Pop this pan right into the fridge for at least two hours until it’s nice and firm. You can read more about making perfect chocolate bars like these chocolate fudge bars while you wait!
Tips for Success When Making Homemade Fudge
Now that you’ve seen how this shortcut fudge comes together, let’s talk about making sure it’s absolutely flawless. We want this to be perfectly smooth, rich, and sliceable—not rough or sticky. Even though this is a simple recipe, a couple of tips from my testing ensure you get that ultra-luxurious, creamy fudge result every single time.
Preventing Graininess in Your Oreo Fudge
The biggest enemy of smooth white chocolate fudge is too much heat! When melting the white chocolate mixture, you must stir frequently, even if it doesn’t look melted yet. If you let the white chocolate sit in the microwave too long or use high power, it can suddenly turn grainy or seize up. Keep that power at 50% and stir often. That patient stirring is what keeps our glorious base looking like liquid silk, making this an amazing homemade fudge.
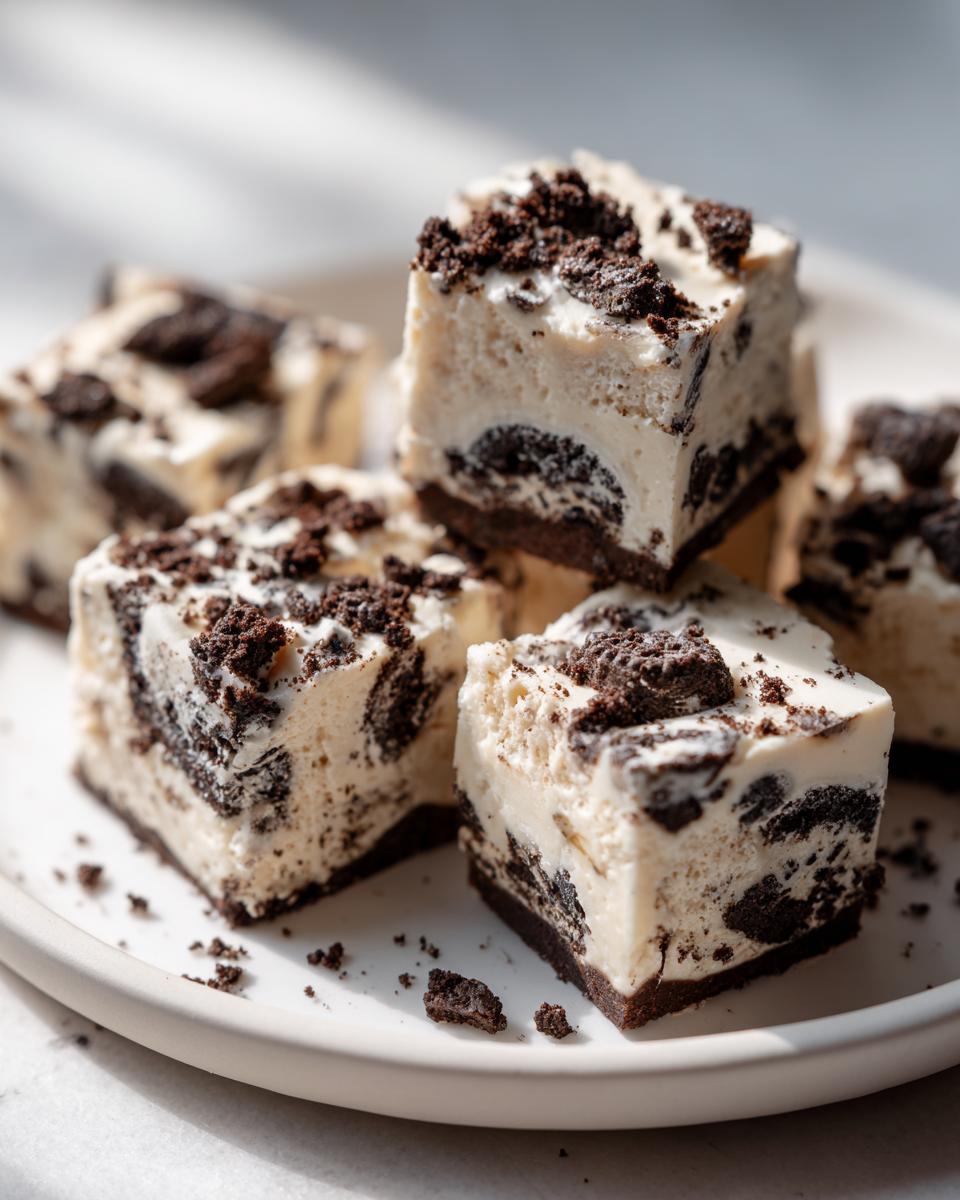
Achieving Clean Slices of Oreo Fudge
Patience during the chilling phase really pays off when you go to cut it. Don’t rush this part! You need a minimum of two full hours for the chilling process to really solidify that base properly. Once it’s firm, use those parchment paper handles we left hanging over the edge. Lift the entire block gently out onto a cutting board. This is so much easier than trying to pry it out later. Then, use a sharp, warm knife to cut through those thick squares. A small, clean cut is so much more satisfying!

For more tips on getting that professional finish on your no-bake treats, take a look at how I handle other smooth fillings in my easy creamy chocolate fudge recipe.
Variations for Your Oreo Fudge Recipe
One of the great things about relying on this simple base for your cookies and cream fudge is how easy it is to customize! When you need a show-stopping dessert for a holiday platter or just want to shake things up, this recipe is begging for your creativity. It’s a fantastic base for all sorts of party treats fudge experiments.
Adding Holiday Flavors to Oreo Fudge
The holidays are the perfect time to trick this recipe out a little bit! If you can find them, swap in some peppermint Oreos—they bake right into the structure and give you a beautiful little festive red and white look. If peppermint Oreos aren’t around, you can stir about a teaspoon of pure peppermint extract right into your melted white chocolate mixture before you fold in the cookies. It makes this oreo fudge taste exactly like a candy cane! It’s a fun way to elevate it for gifting, too. You can find more festive ideas in my peppermint chocolate chip cookies recipe for inspiration!
Changing the Chocolate Base in Your Fudge
While the classic look and creamy texture come from using all white chocolate, you can certainly experiment here! If you’re feeling adventurous, try swapping out half of your white chocolate chips for milk chocolate chips. You’ll get a slightly darker look and a deeper, moodier flavor profile. Just remember, swapping in darker chocolate might slightly change the overall melt, so make sure you stir well while melting! For more advanced tips on cookie and chocolate combinations, you can check out the great work over at SugarHero.
Serving Suggestions and Gifting Your Oreo Fudge
Because this oreo fudge sets up so beautifully firm, it makes the most incredible, impressive little gift! Remember how I said to cut them into small squares? That’s really the way to go. Since this is so rich and decadent, a little piece goes a long way. For parties, I love arranging them on a simple white platter so the contrast between the dark cookie pieces and the pale fudge really pops.
If you’re packaging these up as holiday fudge gifts, place 4 or 5 squares into small cellophane bags and tie them with a bright ribbon. They look so professional, and since they don’t require any baking, they are perfect for handing out to neighbors knowing they’ll be a huge hit. If you want some ideas for cute layered presentation bars, check out my post on buckeye brownies!
Storage and Reheating for Fresh Oreo Fudge
Since this is a truly rich treat, you shouldn’t have a hard time finishing it quickly, but if you do manage to have leftovers, storage is super simple. Keep your oreo fudge in an airtight container right there in the refrigerator. It stays perfectly fresh tasting for up to a week this way! Honestly, I don’t often bother with reheating it because the texture is best enjoyed straight from the fridge, but if you let a piece sit on the counter for about ten minutes before serving, it gets just slightly softer and even creamier.
Frequently Asked Questions About This Oreo Fudge Recipe
It’s natural to have a few questions when trying out a new, super-simple recipe, especially one as rich as this cookies and cream fudge! I’ve gathered the ones I hear most often to make sure your first batch of easy fudge is 100% successful. If you’re looking for quick solutions for other treats, take a peek at my creamy peanut sauce recipe—sometimes a savory sauce is just the answer!
Can I make this Oreo Fudge without white chocolate chips?
For this specific 3 ingredient dessert formula, I really, really recommend sticking to white chocolate chips. The fat content and the way white chocolate melts with the sweetened condensed milk are what create that signature, incredibly smooth, and stable base for this no bake fudge. If you use regular or dark chocolate chips instead, the results can be much softer, greasier, and it won’t set up into the firm fudge squares we are aiming for.
What is the best way to crush the cookies for the oreo fudge?
Oh, this matters! We don’t want dust, but we also don’t want giant cookie rocks. I suggest using a food processor for about 5 or 6 quick pulses. That gives you a lovely mix of fine crumbs (which fill in the gaps) and those satisfying, slightly larger cookie chunks. If you don’t have a processor, put them in a sturdy zip-top bag, seal it up, and use a rolling pin or the bottom of a heavy saucepan to smash them until you have that perfect texture for your oreo fudge.
Nutritional Estimates for This Simple Dessert
I always like to give a little rundown on what we’re putting into our bodies, even when it’s a super indulgent treat like this decadent fudge! Remember, this recipe is rich, being made mostly of chocolate and condensed milk, so a little goes a long way. These numbers are just estimates for one small square, based on the 36 servings we yield, so take them as a helpful guide rather than strict fact.
Because we are using simple ingredients here, it’s easy to see what gives this candy its kick! It’s definitely a ‘treat yourself’ moment, but you can feel good knowing you made this amazing cookies and cream fudge yourself instead of buying something packaged.
- Calories: Approximately 185 per square
- Sugar: About 21g (That’s the sweetness talking!)
- Fat: Around 10g
- Protein: A surprising 3g
- Carbohydrates: Roughly 23g
Enjoy every bite, knowing you whipped up this amazing, easy confection in practically no time!
PrintEasiest Ever 3-Ingredient Oreo Fudge

Create rich, creamy, and decadent Cookies and Cream Fudge using only three simple ingredients. This no-bake recipe is quick to prepare and perfect for holiday gifts or fast party treats.
- Prep Time: 10 min
- Cook Time: 2 min
- Total Time: 2 hours 12 min
- Yield: About 36 small squares 1x
- Category: Dessert
- Method: No Bake
- Cuisine: American
- Diet: Vegetarian
Ingredients
- 1 (14 ounce) can sweetened condensed milk
- 2 cups white chocolate chips
- 1 package (about 14.3 ounces) Oreo cookies, crushed
Instructions
- Line an 8×8 inch baking pan with parchment paper, leaving an overhang on two sides for easy removal later. Lightly grease the paper.
- Place the white chocolate chips and sweetened condensed milk in a microwave-safe bowl.
- Microwave on 50% power for 30-second intervals, stirring well after each interval, until the mixture is completely smooth and melted. This usually takes 1 to 2 minutes total. Do not overheat.
- Stir in about three-quarters of the crushed Oreo cookies into the melted chocolate mixture until they are evenly distributed.
- Pour the fudge mixture into the prepared pan and spread it evenly.
- Sprinkle the remaining crushed Oreos over the top of the fudge and gently press them into the surface.
- Refrigerate the fudge for at least 2 hours, or until firm enough to slice.
- Use the parchment paper overhang to lift the fudge out of the pan. Cut into small squares before serving.
Notes
- For a festive touch, use a mix of regular and peppermint Oreos, or add a teaspoon of peppermint extract to the melted chocolate mixture for peppermint fudge.
- If you prefer a slightly darker fudge, you can substitute half of the white chocolate chips with milk chocolate chips, but the classic cookies and cream look comes from using white chocolate.
- Store leftover fudge in an airtight container in the refrigerator for up to one week.
Nutrition
- Serving Size: 1 square
- Calories: 185
- Sugar: 21g
- Sodium: 95mg
- Fat: 10g
- Saturated Fat: 6g
- Unsaturated Fat: 4g
- Trans Fat: 0g
- Carbohydrates: 23g
- Fiber: 0.5g
- Protein: 3g
- Cholesterol: 10mg