

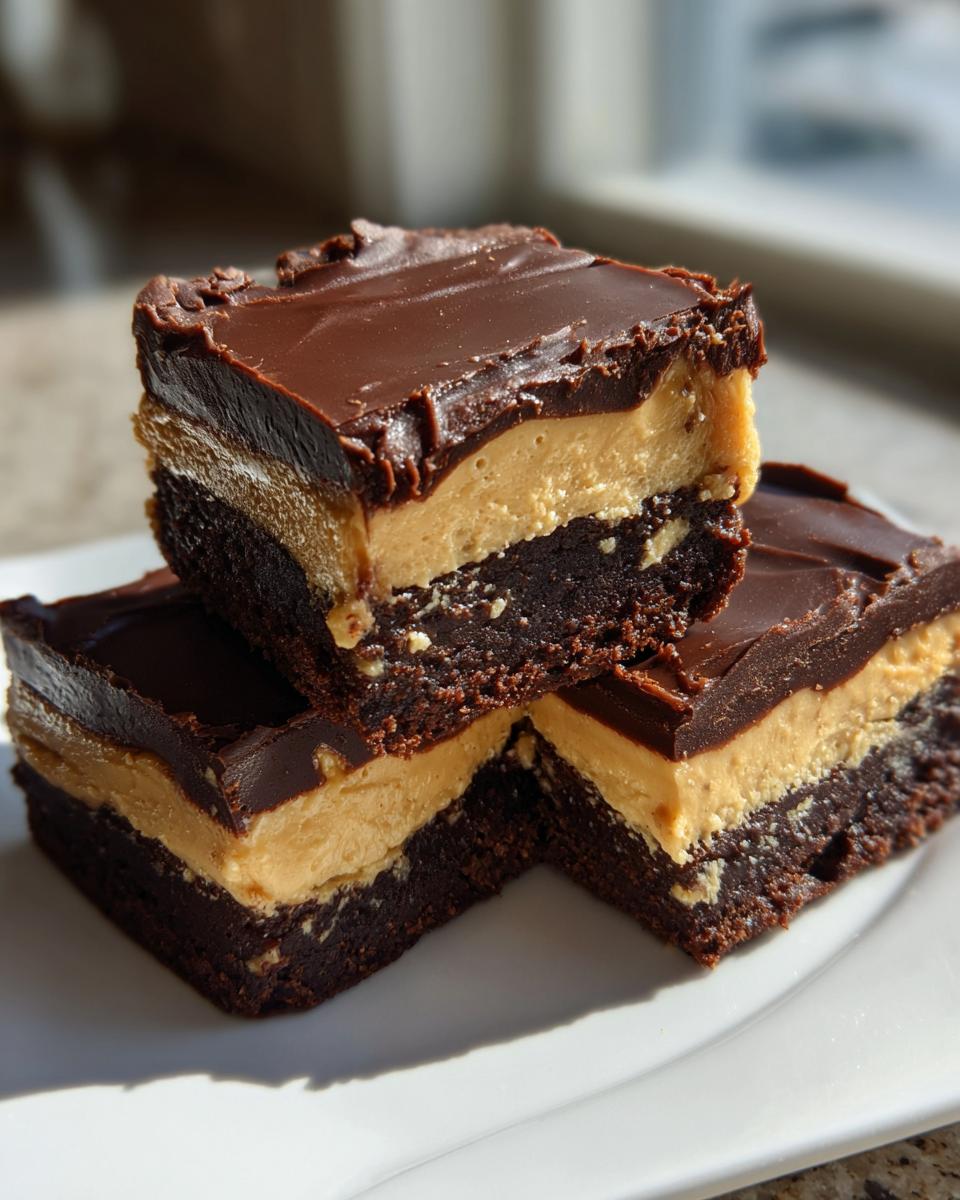
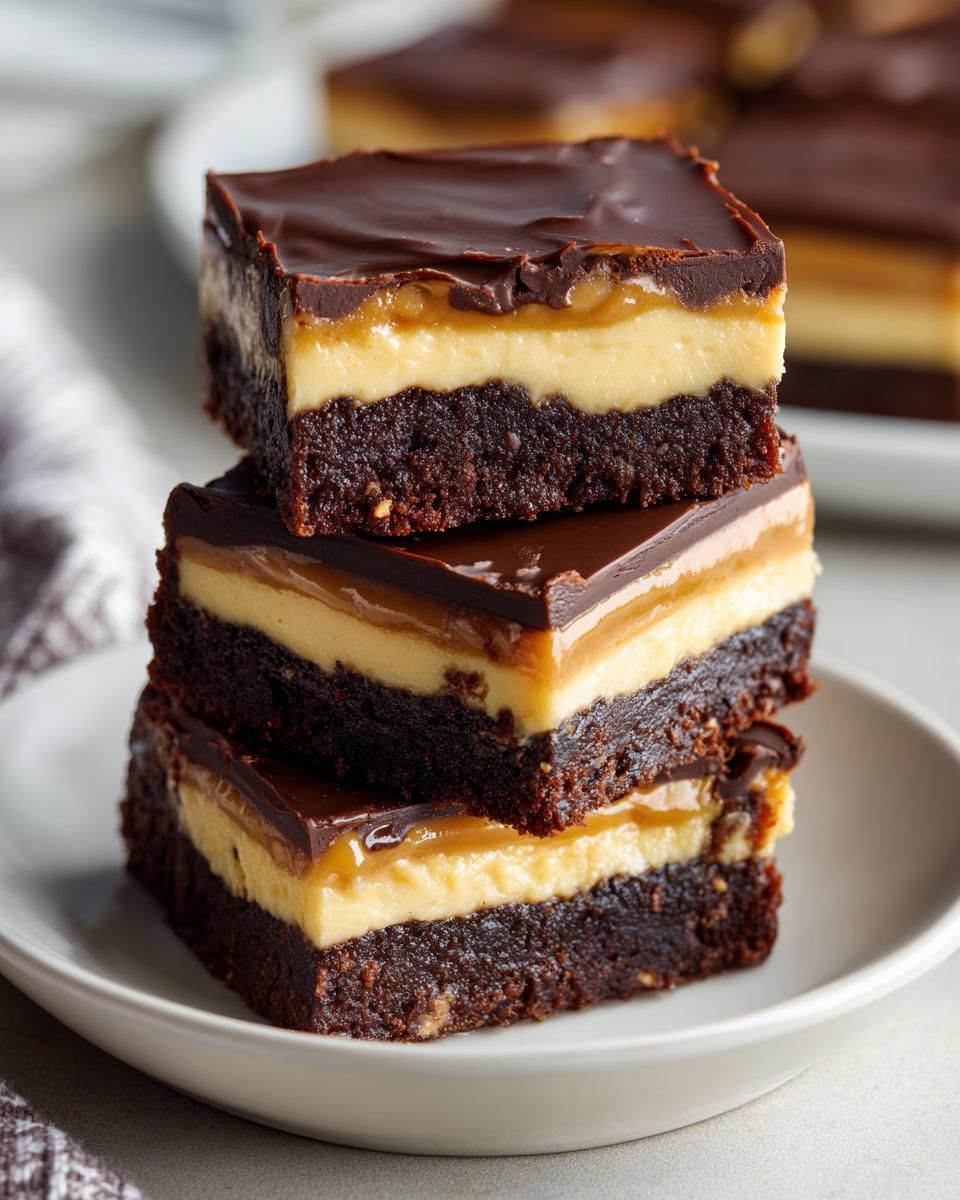
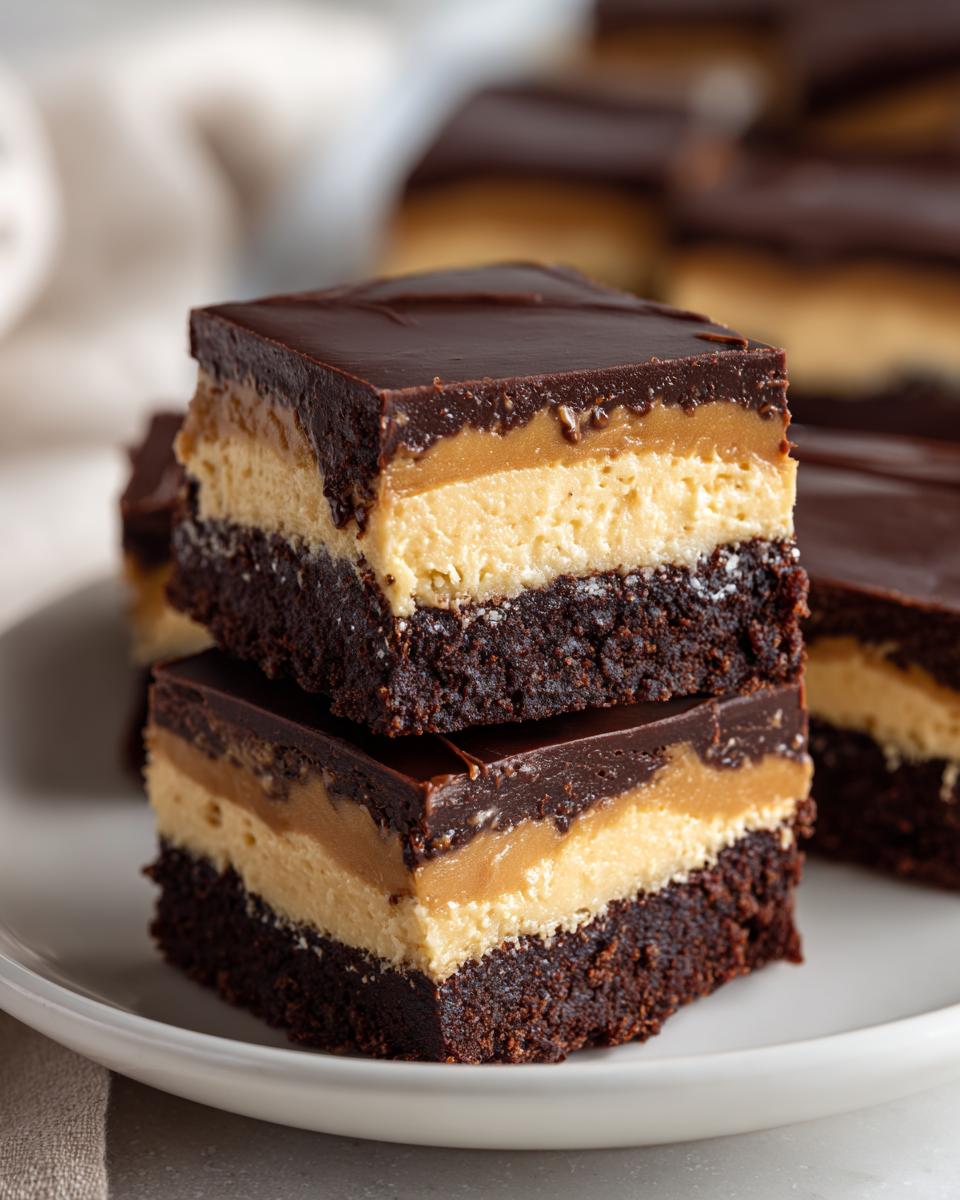
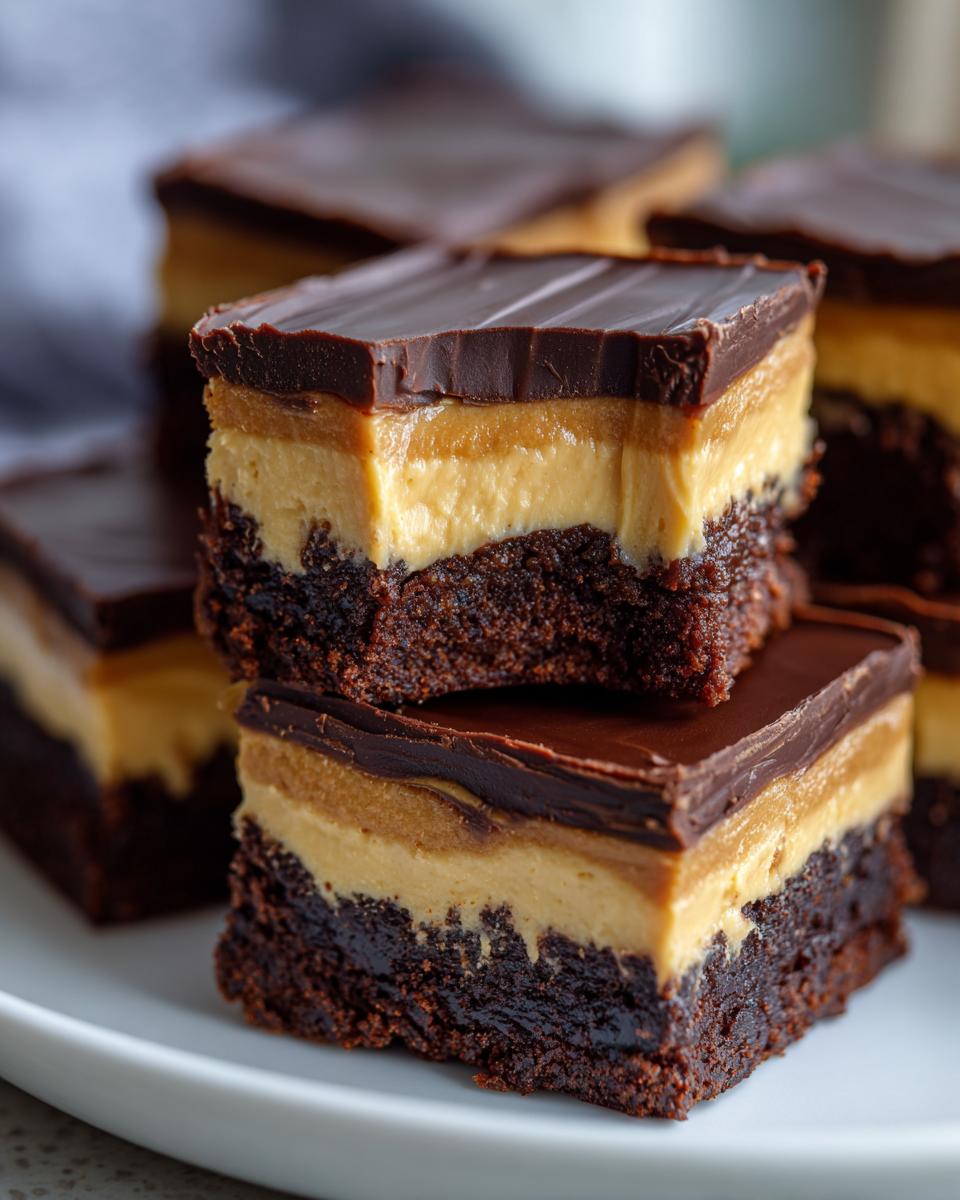
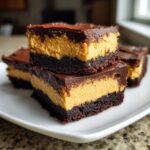
If you believe, like I do, that peanut butter and chocolate are a match made in heaven, then get ready for your new favorite obsession! We are diving deep into the world of buckeye brownies today. Seriously, who doesn’t love taking that perfect, classic buckeye candy flavor and turning it into something gloriously rich and chewy? I took my tendency to simplify recipes and married it with my need for maximum decadence. Trust me when I say this three-layer creation—fudgy base, creamy peanut butter center, and glossy chocolate top—is the ultimate showstopper. The best part? Even though these look incredibly fancy, I promise you, they are straightforward and achievable for any cook in their own kitchen. If you love these sweet and salty combinations, you should definitely check out my recipe for easy no-bake Oreo balls, too!
- Why You Will Love These Buckeye Brownies
- Gathering Ingredients for Your Buckeye Brownies
- How to Prepare the Ultimate Buckeye Brownies Layer by Layer
- Tips for Perfect Buckeye Brownies Every Time
- Ingredient Spotlight: Achieving the Best Creamy Peanut Butter Filling
- Storage and Reheating for Your Layered Peanut Butter Bars
- Serving Suggestions for Buckeye Brownies
- Frequently Asked Questions About Buckeye Brownies
- Share Your Homemade Buckeye Brownies
Why You Will Love These Buckeye Brownies
I developed this recipe because I wanted all the flavor of buckeye candy without all the hassle. And oh boy, did we succeed! You’re going to bake these because they are:
- Built for Speed: We start with a box mix, which cuts down on prep incredibly!
- Texture Heaven: That base is guaranteed fudgy, and the middle layer is just perfectly creamy.
- Sweet and Salty Perfection: It hits every craving spot imaginable between the chocolate and the peanut butter.
These are honestly the easiest decadent treats you’ll make all year, I promise!
Gathering Ingredients for Your Buckeye Brownies
Okay, this is where we tackle the shopping list! I know some recipes call for making everything from scratch, but to keep things simple and fast—because who has hours sometimes?—we are leaning on a good quality fudge brownie mix. Don’t feel guilty; we’re making up for it with that glorious, homemade peanut butter layer! When you head to the store, just make sure you grab the necessary extras to create all three stunning layers.
Before you start mixing, make sure you have a 9×13 inch baking pan ready. I always grease mine really well and maybe toss in some parchment paper for good measure, just because dealing with sticky, fudgy perfection trying to come out of a pan is never fun.
Here is what you need to focus on gathering for this three-part showstopper. If you’re looking for tips on making a simple icing to top things like sugar cookies, check out my post on easy sugar cookie icing that hardens—it’s a simple technique that really pays off!
Ingredients for the Fudgy Brownie Base
For this first layer, our focus is on making sure the box mix delivers on that fudgy texture we are after. You’ll need the boxed mix itself, of course, and then whatever ingredients the box calls for to prepare the batter for baking. Usually, for a fudgy result, you might swap the oil for melted butter, but stick to the box unless you want to experiment later!
Ingredients for the Creamy Peanut Butter Filling
This is the heart of the buckeye flavor! For this dreamy middle section, grab your creamy peanut butter—the quality matters here since it’s such a star component, so avoid anything too oily. You’ll also need unsalted butter, sifted powdered sugar (sifting is key to avoiding lumps!), vanilla extract, and milk. That smooth texture you want? That comes from balancing the fat and the sugar just right.
Ingredients for the Chocolate Ganache Brownies Topping
To seal the deal and give us that beautiful, glossy finish, we need chocolate chips—semi-sweet works beautifully here. But here’s a little secret: we also grab a bit of shortening or coconut oil. Adding that little bit of fat helps the chocolate set up nice and firm, giving you a clean finish when you slice through those chocolate peanut butter dessert bars.
How to Prepare the Ultimate Buckeye Brownies Layer by Layer
Alright, time to put on our baking hats! The secret to amazing buckeye brownies is patience between the layers. You can’t rush this; you have to let each component set up perfectly so they don’t just turn into a chocolate-peanut butter swirl mess, which would still taste good, but wouldn’t have that bakery look we’re aiming for! If you want to see how I get an incredible fudgy texture without the box mix, skip over to my fudgy brown butter brownies recipe later!
Step 1: Baking the Fudgy Brownie Base
First things first, let’s get that base going in your greased 9×13 pan. Mix up your box brownie batter exactly as the directions suggest. Now, here’s the crucial bit for that rich, decadent texture: pull them out of the oven about two minutes *before* the suggested time for a cake-like brownie. We want them slightly underbaked, meaning they’ll still have moist crumbs when you test them. Let those wonderfully fudgy brownies cool completely in the pan. I mean it—completely cool! If they are even slightly warm, the peanut butter layer will melt right into them, and we want distinct layers.
Step 2: Creating the Creamy Peanut Butter Filling
While the base is cooling, get that peanut butter layer whipped up! You’re going to beat together the melted butter, creamy peanut butter, sifted powdered sugar, vanilla, and that little bit of milk until it’s super smooth. It should look like glorious, thick frosting. Spread this mixture evenly right over those cooled brownies. Don’t press too hard, or you might disturb that fudgy bottom layer. Once it’s smoothed out, you *must* pop this into the refrigerator for at least one hour. This chilling time is non-negotiable; we need that center to be totally firm before we pour the chocolate on top.
Step 3: Finishing with the Chocolate Ganache Brownies Topping
Once the peanut butter is solid, it’s time for the grand finale! In a microwave-safe bowl, combine your semi-sweet chocolate chips and the shortening—that little bit of stabilizer makes all the difference in getting a nice, glossy set. Microwave it in short bursts, maybe 30 seconds at a time, and stir really well after every single round. Don’t walk away, or you’ll scorch those chips! When it’s glossy smooth, pour it right over that chilled peanut butter layer. Work quickly to spread it to the edges so you don’t drag it and mix the layers. Back into the fridge it goes for a final, long chill—at least two hours—until that chocolate topping is firm enough to hold its shape.
Tips for Perfect Buckeye Brownies Every Time
Even though we used a box mix for the base, nailing that three-layer perfection takes a few little tricks I picked up over the years testing these buckeye brownies. Remember, we are aiming for that wonderfully fudgy brownie texture, and that starts right in the oven temperature!
First, if you want an even richer base—far beyond what the box suggests—swap out whatever oil it calls for and use melted, cooled butter instead. It adds so much depth! Also, if you find your creamy peanut butter filling is just a touch too stiff after chilling, the secret is just adding an extra teaspoon of milk when you mix it next time. It makes a huge difference in spreadability.
Lastly, when it’s time to cut these beautiful bars, don’t just hack away! Take your knife, run it under hot water for a moment, and wipe it completely dry before making a cut. Repeat this cleaning process between every single slice. This prevents that chocolate top from dragging and cracking, giving you those gorgeous, clean slices of rich chocolate dessert you see in pictures. For another deeply satisfying chocolate treat, you might want to try my homemade chocolate pudding recipe next time you need something creamy!
Ingredient Spotlight: Achieving the Best Creamy Peanut Butter Filling
Let’s talk about the star middle child in this trio: that peanut butter layer! This is what makes these buckeye brownies taste exactly like the candy. Getting this right is critical, and it all comes down to the ratio of fat to sugar. If you use too much peanut butter, or not enough powdered sugar, this layer will be oily or crumbly instead of that perfect, smooth filling we want.
The recipe calls for two sticks of butter and a whole pound of powdered sugar for one cup of peanut butter. That ratio is what sets the structure. You have to beat it until it looks homogenous, almost whipped. If you try to use one of those natural peanut butters that separates a lot, you might need to gently melt your butter first rather than just softening it, and you might even need an extra tablespoon or two of powdered sugar to stabilize it. If you’re ever trying to recreate this texture in other treats, like my peanut butter Rice Krispie treats, remember that ratio is your best friend!
Now, I know some of you might not have creamy peanut butter on hand but have bags of peanut butter chips sitting around! If you try baking with peanut butter chips instead, you’ll need to melt them down very gently with a touch of oil or butter, but honestly, you risk the flavor being too sweet and losing that slight salty tang we need to cut through the richness of the chocolate. For the classic Buckeye flavor, stick to the creamy jarred stuff—it just melts better into that rich buttercream base!
Storage and Reheating for Your Layered Peanut Butter Bars
Now that you’ve gone through all the effort to make these stunning, decadent brownies, we have to talk about keeping them perfect! Because that peanut butter layer is made with butter and relies on being slightly firm to hold up to the chocolate topping, these are definitely *not* a counter-top dessert for more than a few hours.
You really need to keep these layered peanut butter bars stored in the refrigerator. Keep them in an airtight container. I find that if I stack them, putting a small piece of wax paper or parchment between the layers helps keep the chocolate tops from sticking to whatever you’re stacking next.
How long will they last? Honestly, they are best within the first three days, but they hold up well for nearly a week if kept chilled! People always ask if they can freeze them, and yes, you absolutely can! Wrap individual squares tightly in plastic wrap, and then place them all in a freezer-safe bag or container. They freeze beautifully for up to three months.
When you pull them out of the freezer, let them thaw in the fridge for a few hours first. If you are planning to serve them straight from the fridge, they will be firm—almost like fudge—which I personally love! If you let them sit on the counter for about 20 minutes before serving, they soften up just a tiny bit, making the peanut butter layer that glorious, creamy texture we created when we mixed it.
Serving Suggestions for Buckeye Brownies
Once you’ve managed to cut these perfect, chilled buckeye brownies, the hard part is over! Now, let’s talk about how to serve these indulgent beauties so they really wow your guests. Because of that intense sweet and salty flavor profile, they pair beautifully with simple, slightly less sweet sides.
If you’re taking these to a party or potluck, they immediately become one of those crowd pleasing dessert bars. They’re sturdy, travel well when chilled, and everyone loves the combination. I usually skip the extra fuss, but if you really want to dress them up, a tiny dollop of slightly tart whipped cream on the side works wonders to cut through the richness. It cleanses the palate beautifully between bites!
When it comes to drinks, they are fantastic with a strong cup of coffee or espresso—the bitterness is a perfect counterpoint to the sugar overload. For something colder, a tall glass of plain milk is classic, but if you’re serving these after dinner, try setting up a little dipping station. You could gently warm up some of my easy, creamy chocolate fondue, although be warned, dipping these bars means you’re going into dessert overload territory, which I fully endorse!
A simple garnish can make the serving tray look professional, too. A light dusting of coarse sea salt right before cutting can amplify that salty note in the peanut butter layer, or you can melt a few extra white chocolate chips and drizzle them haphazardly over the top for an extra layer of visual interest. Enjoy the compliments; you totally earned them!
Frequently Asked Questions About Buckeye Brownies
I get so many amazing questions whenever people try making these buckeye brownies for the first time! It’s natural when you’re working with three different layers that you want to make sure everything sets up just right. Most folks are asking about texture and ease, and I’m happy to jump in with my experiences from my kitchen to yours!
Can I make these buckeye brownies without using a box mix?
Oh, absolutely! If you have a favorite fudgy brownie recipe that you swear by—maybe one that uses melted butter and extra egg yolks—go for it! You just need to make sure that when you pour your homemade batter into the 9×13 pan, it bakes to be very dense and fudgy, not cake-like. The key thing to remember is that the baking time will certainly change. Box mixes are formulated to cook quickly; a homemade recipe for layered peanut butter bars might need 5 or 10 extra minutes. Taste your brownie base before you even think about adding the second layer; it needs to be fully cooled, not just slightly warm!
How do I get the peanut butter layer perfectly firm for the chocolate ganache brownies topping?
This is where patience pays off! If your filling seems too soft, it’s usually because the ratio of butter to powdered sugar got slightly out of whack, or you just didn’t give it enough time to chill. Remember, we need that layer firm enough so that when we pour the melted chocolate on top, it doesn’t sink in and cause a marbled swirl—we want those clean lines!
The magic is in the chilling. I insist on at least one full hour in the fridge for that peanut butter layer. If your kitchen is really warm, you might even push that to 90 minutes. Also, make sure you’re using the specified amount of powdered sugar. That sugar does a lot of structural work alongside the butter to keep that creamy peanut butter filling solid.
Are these considered a no-bake peanut butter layer brownie?
That’s a great question about method! Unfortunately, no, these aren’t entirely a no-bake option, only because that amazing chocolatey base has to be baked until it’s perfectly fudgy first. We do use the box mix for speed there, so that part is baked!
However, both the middle peanut butter layer and the top chocolate ganache layer are technically no-bake additions that set up in the fridge. So, you get the benefit of a fantastic baked brownie foundation, but the gooey, creamy parts are totally assembly-only! If you are specifically searching for a no-bake peanut butter layer brownie, you’d need a crust made from graham crackers or crushed cookies instead of baking that chocolate bottom layer.
I hope these answers help you create some truly incredible chocolate peanut butter dessert bars! If you’re looking for another easy layered bar recipe, don’t forget to check out my guide on easy layered brownies!
Share Your Homemade Buckeye Brownies
Well, we did it! We turned simple ingredients into these glorious, rich, three-layer buckeye brownies. I truly hope you loved making these as much as I love perfecting them in my kitchen. Food made at home is always better, and sharing these decadent homemade brownies with someone you love is the best reward!
Now, I love hearing from all of you! When you get a chance to make these crowd-pleasing dessert bars, please come back here and leave a rating. How fudgy was your base? Did your peanut butter layer set up perfectly? I read every single comment, and your feedback helps me keep refining these recipes for everyone.
If you snapped a picture of your finished chocolate peanut butter masterpiece—maybe they look perfect stacked up for a holiday tray—I would absolutely adore seeing them! Tag me on social media so I can share your success. It just makes my day seeing these recipes come to life in your homes.
Thank you so much for stopping by Taste This Plate today. If you are looking for more simple recipes that deliver extraordinary flavor without complication, please stick around! You can click over to my About Page to learn a little more about how we approach simple, delicious home cooking. Happy baking, and I hope to see you back at the table soon!
PrintUltimate Fudgy Buckeye Brownies with Creamy Peanut Butter Center
Create decadent, three-layer Buckeye Brownies featuring a rich, fudgy base, a smooth peanut butter filling, and a glossy chocolate topping. This recipe delivers the classic sweet and salty flavor combination in an easy-to-make bar dessert.
- Prep Time: 20 min
- Cook Time: 30 min
- Total Time: 2 hours 50 min
- Yield: 24 servings 1x
- Category: Dessert
- Method: Baking
- Cuisine: American
- Diet: Vegetarian
Ingredients
- 1 box (18.3 ounces) fudge brownie mix (plus ingredients listed on box for brownies)
- 1 cup (2 sticks) unsalted butter, melted
- 1 cup creamy peanut butter
- 3 cups powdered sugar, sifted
- 1 teaspoon vanilla extract
- 1/4 cup milk
- 1 1/2 cups semi-sweet chocolate chips
- 2 tablespoons shortening or coconut oil
Instructions
- Prepare the brownie layer: Follow the instructions on the brownie mix box to prepare the batter. Pour the batter into a greased 9×13 inch baking pan. Bake according to the box directions for a fudgy texture, usually slightly less time than directed for cake-like brownies. Let the brownies cool completely in the pan.
- Make the peanut butter layer: In a large bowl, beat together the melted butter, peanut butter, powdered sugar, vanilla extract, and milk until the mixture is smooth and creamy. Spread this peanut butter mixture evenly over the cooled brownie layer.
- Chill the peanut butter layer: Place the pan in the refrigerator for at least 1 hour, or until the peanut butter layer is firm enough to spread chocolate over without mixing.
- Prepare the chocolate topping: In a microwave-safe bowl, combine the chocolate chips and shortening (or coconut oil). Microwave in 30-second intervals, stirring well after each interval, until the chocolate is completely smooth and melted.
- Top the brownies: Pour the melted chocolate evenly over the chilled peanut butter layer. Spread quickly to cover the entire surface.
- Set the topping: Return the pan to the refrigerator and chill for at least 2 hours, or until the chocolate topping is firm.
- Cut and serve: Once set, remove the brownies from the pan and cut them into squares. These are the best buckeye brownie recipe bars you will make.
Notes
- For a richer brownie base, substitute the oil called for on the box with melted butter.
- If you prefer a firmer peanut butter layer, reduce the milk in the filling by one tablespoon.
- To get clean cuts, run your knife under hot water and wipe it dry between each slice.
Nutrition
- Serving Size: 1 bar
- Calories: 350
- Sugar: 35
- Sodium: 150
- Fat: 20
- Saturated Fat: 8
- Unsaturated Fat: 12
- Trans Fat: 0.5
- Carbohydrates: 40
- Fiber: 2
- Protein: 5
- Cholesterol: 25