
Life gets busy, doesn’t it? Sometimes you just need a sweet hit, and the last thing you want to do is wander into the kitchen and face a hot oven. That’s exactly when I turn to these incredible avalanche cookies. They are, hands down, the best cure for a sudden sugar craving!
When I started Taste This Plate, my mission was to share recipes that were simple but still felt special enough for company, and these fit the bill perfectly. There is zero baking involved—we melt, stir, drop, and walk away. These amazing clusters manage to look complicated and impressive while taking about fifteen minutes of active work. If you’re looking for ridiculously easy, crowd-pleasing avalanche cookies, welcome home, because this is the recipe you’ll be bookmarking.
You can find more of my favorite easy sweets right here: my collection of simple desserts!
- Why You Will Make These Avalanche Cookies Again and Again
- Essential Ingredients for Perfect Avalanche Cookies
- Tips for Making Your Avalanche Cookies Set Perfectly
- Step-by-Step Guide to No Bake Avalanche Cookies
- Creative Variations for Your Avalanche Cookies
- Storage and Serving Suggestions for Easy Avalanche Cookies
- Frequently Asked Questions About Avalanche Cookies
- Nutritional Estimate for These White Chocolate Treats
- Share Your Favorite Homemade Avalanche Cookies
Why You Will Make These Avalanche Cookies Again and Again
Honestly, these cookies are my go-to when I need a dessert fix but I’m short on time or energy. They just tick every single box. I’ve tested plenty of quick dessert recipes over the years, but these always win for reliability and flavor payoff. You’ll keep coming back to them because:
- They are completely no-bake! We skipped the oven entirely, which means less mess and instant gratification.
- Prep time is ridiculously fast—we’re talking about 15 minutes of actual work before they hit the counter to set.
- They are the ultimate crowd-pleaser sweets. Seriously, I take these to every potluck, and they disappear first.
- The combination of creamy peanut butter, sweet white chocolate, and that satisfying crunch is addictive.
- They store beautifully, making them perfect for making ahead of time for holiday candy trays.
- They rely on pantry staples, so you can usually whip them up on a whim—true fast dessert ideas!
Essential Ingredients for Perfect Avalanche Cookies
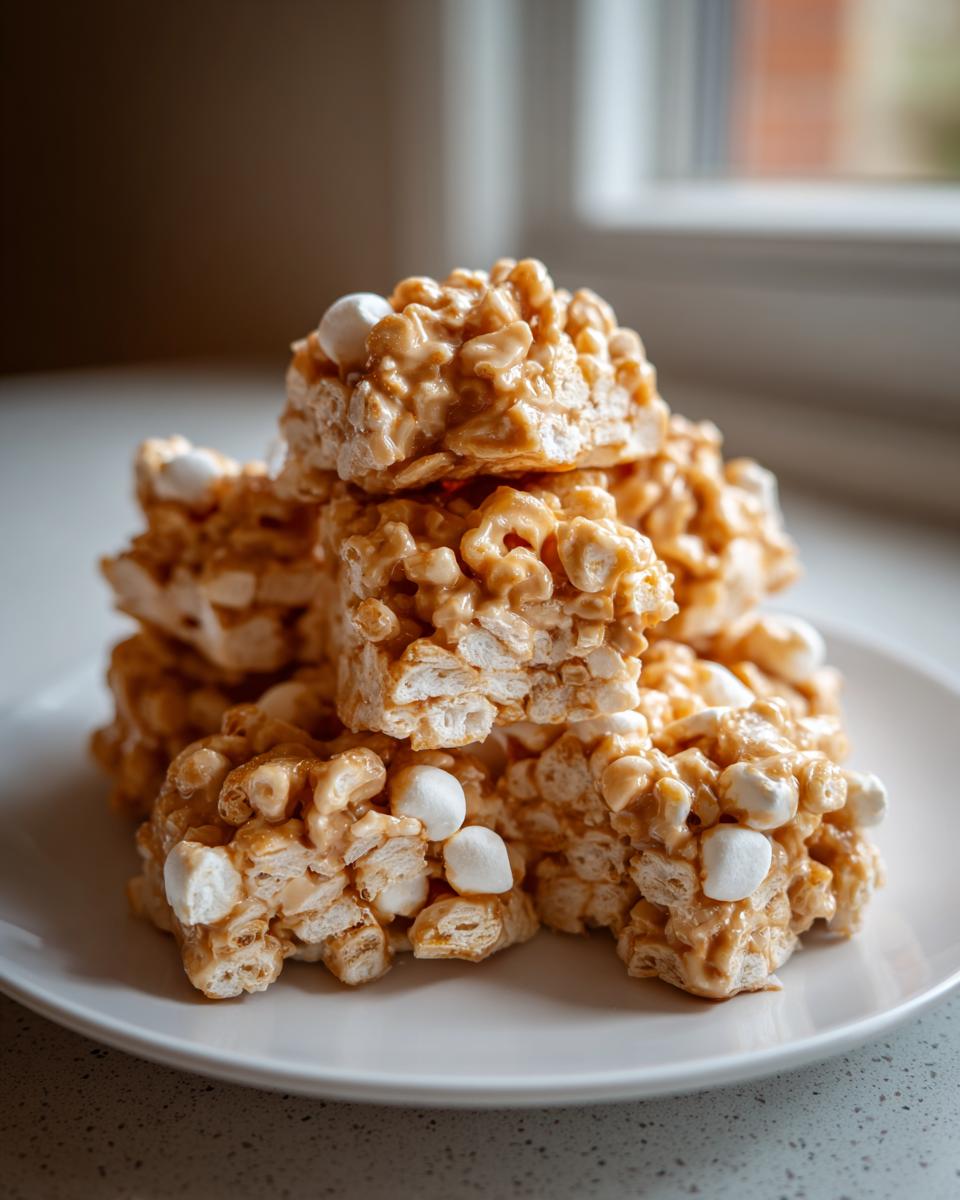
The beauty of these avalanche cookies is that the ingredient list is short, focused, and heavy on satisfying textures. You really just need four main components to get that signature cluster. Because we are relying on these few items for structure and flavor, the quality and type matter!
For this specific recipe, I insist on using creamy peanut butter—we need that ultra-smooth melt to bind everything together. If you prefer crunch, save that for your add-ins later. Here’s exactly what you need for about two dozen beautiful, snowy clusters:
- 12 ounces white chocolate chips (Yes, chips work best for melting!)
- 1 cup creamy peanut butter (Make sure it’s well stirred if it’s natural!)
- 6 cups crispy rice cereal (That familiar puffed rice is key for the crunch.)
- 4 cups mini marshmallows (Don’t skip these; they give the cookie its name!)
If you’re curious about other uses for peanut butter, check out my recipe for easy 5-minute creamy peanut sauce. Now, let’s talk technique!
Tips for Making Your Avalanche Cookies Set Perfectly
When you’re dealing with white chocolate and peanut butter, the consistency of your base is everything. We’re aiming for that perfect, slightly sticky, yet pourable coating that holds everything together. Since these are no oven recipes, the melting stage is where all the magic—or disaster—happens! A little prep goes a long way to making sure your final product is creamy perfection, not a hard, grainy mess.
Melting White Chocolate Without Seizing
White chocolate is notoriously fussy, and it seizes faster than you can blink. Don’t just blast it on high power! That heat shock is exactly what ruins it. For these avalanche cookies, I always use 50% power in the microwave. Heat it for 30 seconds, pull it out, stir it around even though it still looks chunky, and repeat. It’s a slow dance, but when that last little piece melts from the residual heat, you get perfectly smooth, glossy chocolate every time.
Achieving Even Coating of Cereal and Marshmallows
Once that glorious peanut butter mixture is ready, it’s time to fold in the cereal and marshmallows. You have to be gentle here—we’re not whipping cream! Use a large spatula and fold, fold, fold. If you stir too vigorously, you’ll crush the crispy rice cereal into dust, and you’ll definitely melt those pretty little marshmallows right into the chocolate, which ruins the texture of the final avalanche cookies. We want distinct textural pockets!
Step-by-Step Guide to No Bake Avalanche Cookies
Okay, now that we’ve got our melting technique down pat, putting these together is faster than brewing a pot of coffee! This is the easiest part of making No Bake Avalanche Cookies, and it’s why I love them as a last-minute gift idea. Remember, we aren’t using the oven at all, so our goal is just smooth mixing and quick setting.
First off, grab a sheet pan and line it with parchment paper. This keeps things clean and, more importantly, guarantees easy release later. Next, get that smooth white chocolate and peanut butter mixture ready, just like we talked about in the tips section.
Now, the fun part! Add your 6 cups of cereal and 4 cups of mini marshmallows directly into the melted chocolate and butter. You need to fold this together very carefully—remember what I said about gentle hands? You want everything coated, not pulverized. Once it’s mixed until there are no dry streaks left, use a spoon to drop spoonfuls onto that parchment paper. I usually make them about two tablespoons wide, just little mounds.
Here’s the final push to get these done: if you are impatient like me, pop them into the fridge for about 20 minutes. If you can wait, leaving them on the counter for an hour works just fine too. Once they are firm to the touch, they are ready! If you want more no-bake magic, check out my recipe for easy no-bake Oreo balls, but trust me, these are up next!
For more foolproof no-bake desserts, see what my friends are making over at Kitchen Fun With My 3 Sons.
Creative Variations for Your Avalanche Cookies
Even though these classic avalanche cookies are perfect as written, I love experimenting once I’ve mastered the base recipe. It’s fun to play around, especially if you’re making these for a big holiday cookie swap or just want to try something new. Since the ratios are so forgiving, you can sneak in some flavor bombs without messing up the texture too badly. Trust me, these tweaks just make them even more irresistible!
If you love layered sweets or rich chocolate, you absolutely have to look at my buckeye brownies recipe—it uses similar simple marrying of chocolate and peanut butter flavors!
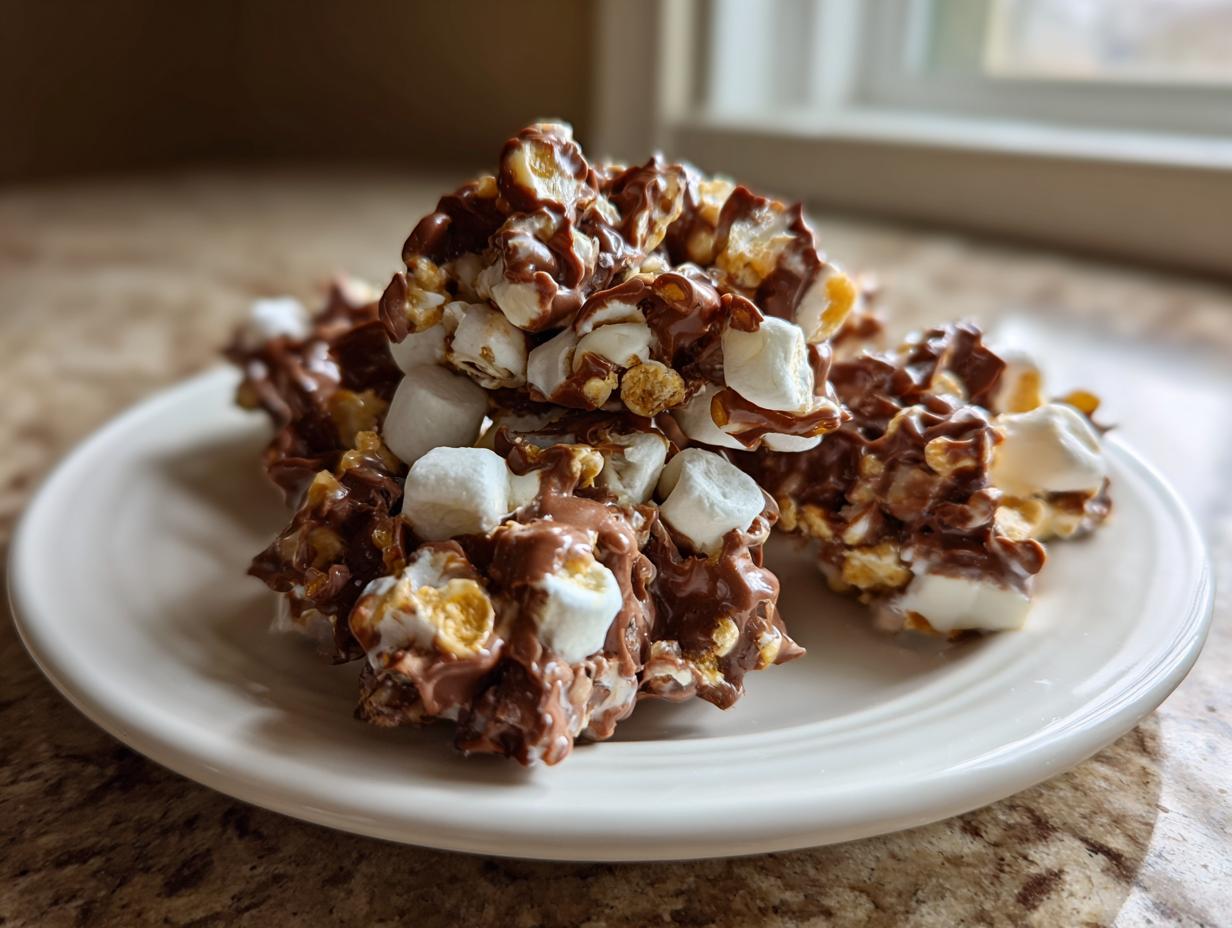
Making Chocolate Swirl Avalanche Cookies
White chocolate is delicious, but sometimes you want that darker, richer depth. I love creating a swirl effect instead of just plain white! After you’ve finished folding the peanut butter, cereal, and marshmallows into the melted white chocolate, melt about 4 ounces of milk chocolate chips separately (using the same gentle, low-power microwave method, of course). Drizzle that melted milk chocolate right over the tops of your already-dropped clusters. Don’t try to mix it in—just let it sit on top. When it sets, you get that beautiful, marbled look.
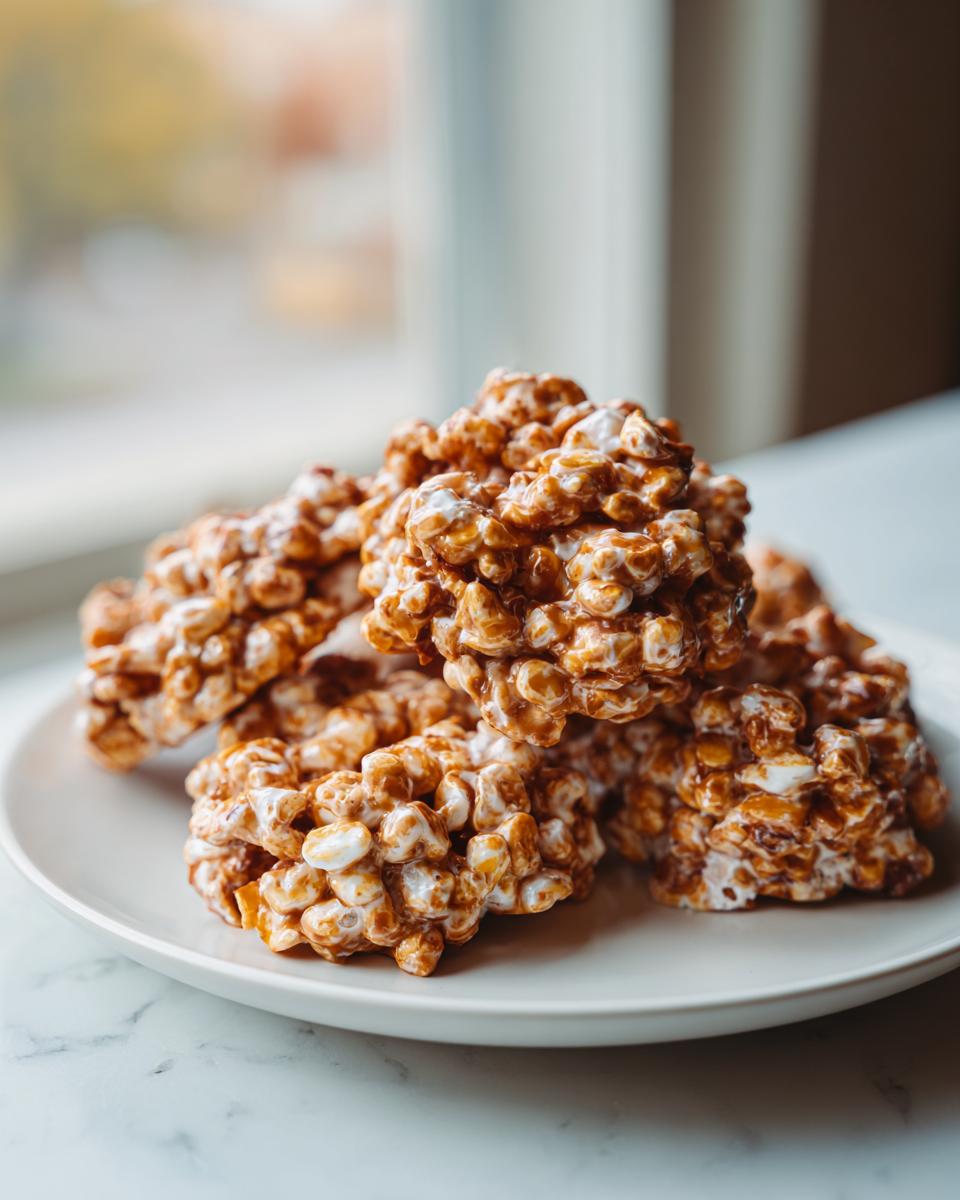
Adding Extra Crunch to Your Avalanche Cookies
The base recipe gives you that fantastic cereal crunch, but if you want to take these firmly into crunchy no bake cookies territory, adding a cup of something salty or extra savory is amazing. My favorite thing to toss in with the cereal and marshmallows is about a cup of chopped, salted pretzels. The salt cuts through the sweetness of the white chocolate so perfectly! My friend over at Lina Cakes sometimes uses Biscoff, which is another fantastic idea if you have that flavor profile lying around!
Storage and Serving Suggestions for Easy Avalanche Cookies
So, you made a massive batch of these, right? Good call! Since these are Easy Avalanche Cookies and involve no eggs or dairy that needs refrigeration (besides the initial setting), storage is super straightforward. Keep them in a single layer or separated by parchment paper in an airtight container—I like a nice, sturdy tin for the holidays.
They stay fresh on the counter for a solid week. If you’re prepping for a big event, these easy potluck desserts actually firm up a bit more overnight, which I love. They look gorgeous piled high on a platter or nestled into little candy cups for gifting!
Frequently Asked Questions About Avalanche Cookies
I always get so many questions after people try this recipe because it’s just so easy and surprisingly satisfying! If you’re still wondering about substitutions or how best to handle these, here are some of the top things folks ask about these fantastic Quick Dessert Recipes.
Can I use crunchy peanut butter in avalanche cookies?
That’s a great question about the Peanut Butter No Bake element! You absolutely *can* use crunchy peanut butter, but you need to know what you’re signing up for. Since the recipe relies on the creamy binder to coat everything evenly, crunchy peanut butter will add extra texture, which isn’t necessarily bad! Just be aware that the texture of the overall cookie will be chunkier since you’re adding peanut chunks on top of the cereal chunks. If you want the smoothest, most uniform coating, stick with creamy, but go for crunchy if you love that extra bite!
What is the best way to store these no oven recipes?
Because these are considered no oven recipes and they don’t have a baked structure, keeping them fresh is easy, but they can get a little soft if it’s too humid. The absolute best way to store your finished avalanche cookies is in an airtight container at room temperature. I find they are perfect for about a week this way. You don’t need to refrigerate them unless your kitchen is baking hot, but if you do chill them, just pull them out about 15 minutes before serving so the white chocolate coating softens slightly again.
Can I substitute the white chocolate chips?
White chocolate is sort of the star here—it’s what gives them that classic “snowy” look and unique sweetness. If you *must* substitute, you have a couple of options, but the look and flavor will change. You can use milk chocolate chips (that’s how you get the flavor variation in the swirl idea we discussed!), but be warned: milk chocolate has less fat than white chocolate, so you might need to add an extra tablespoon of peanut butter just to make sure everything still sticks together nicely. Dark chocolate works too, but it makes for a much more intense, less sweet candy cluster.
If you need more inspiration for speedy sweets, check out my guide to fast dessert ideas!
Nutritional Estimate for These White Chocolate Treats
If you tracked down the ingredients for these incredibly easy avalanche cookies for a neighborhood gathering, you might be wondering where they fall nutritionally. Since these are made with white chocolate, peanut butter, and cereal, they definitely fall into the ‘treat’ category, but knowing the numbers can be helpful!
I want to be totally upfront with you: Every single batch of my recipes is tested in my regular home kitchen using standard, store-bought ingredients—I don’t use specialized diet products or precise lab equipment here! So, please treat these numbers as a solid estimate. The exact breakdown will change based on your brand of peanut butter or if you toss in those pretzel variations we talked about.
Here’s the general estimate for one standard cluster, assuming this recipe yields about 24 servings:
- Serving Size: 1 cookie
- Calories: 250
- Sugar: 22g
- Fat: 14g (with 7g saturated fat)
- Carbohydrates: 30g
- Protein: 4g
- Sodium: 150mg
Remember, these are meant to be a delicious indulgence, not an everyday snack! That’s okay; we deserve amazing, easy treats like these magnificent **White Chocolate Treats** sometimes!
Share Your Favorite Homemade Avalanche Cookies
Well, that’s it! You now have the blueprint for the absolute easiest, most satisfying no-bake treat around. I truly hope you love making these avalanche cookies just as much as I do. Sometimes the best recipes are the ones that require minimal effort but deliver maximum happiness, right?
I always get so excited when I hear from readers who’ve tried one of my simple recipes. Whether you made them plain, added those salty pretzels, or tried the chocolate swirl—I want to know how they turned out for you!
Don’t be shy! Please take a moment to leave a rating for the recipe below and drop a quick comment telling me what you thought. Did they become a new family tradition? Were they instantly devoured at your last gathering? And if you snap a picture, tag me on social media—seeing your finished **easy avalanche cookies** always makes my day!
If you have any lingering questions that weren’t covered above, don’t hesitate to send a note through my contact page. Happy tasting, and thanks so much for stopping by my kitchen!
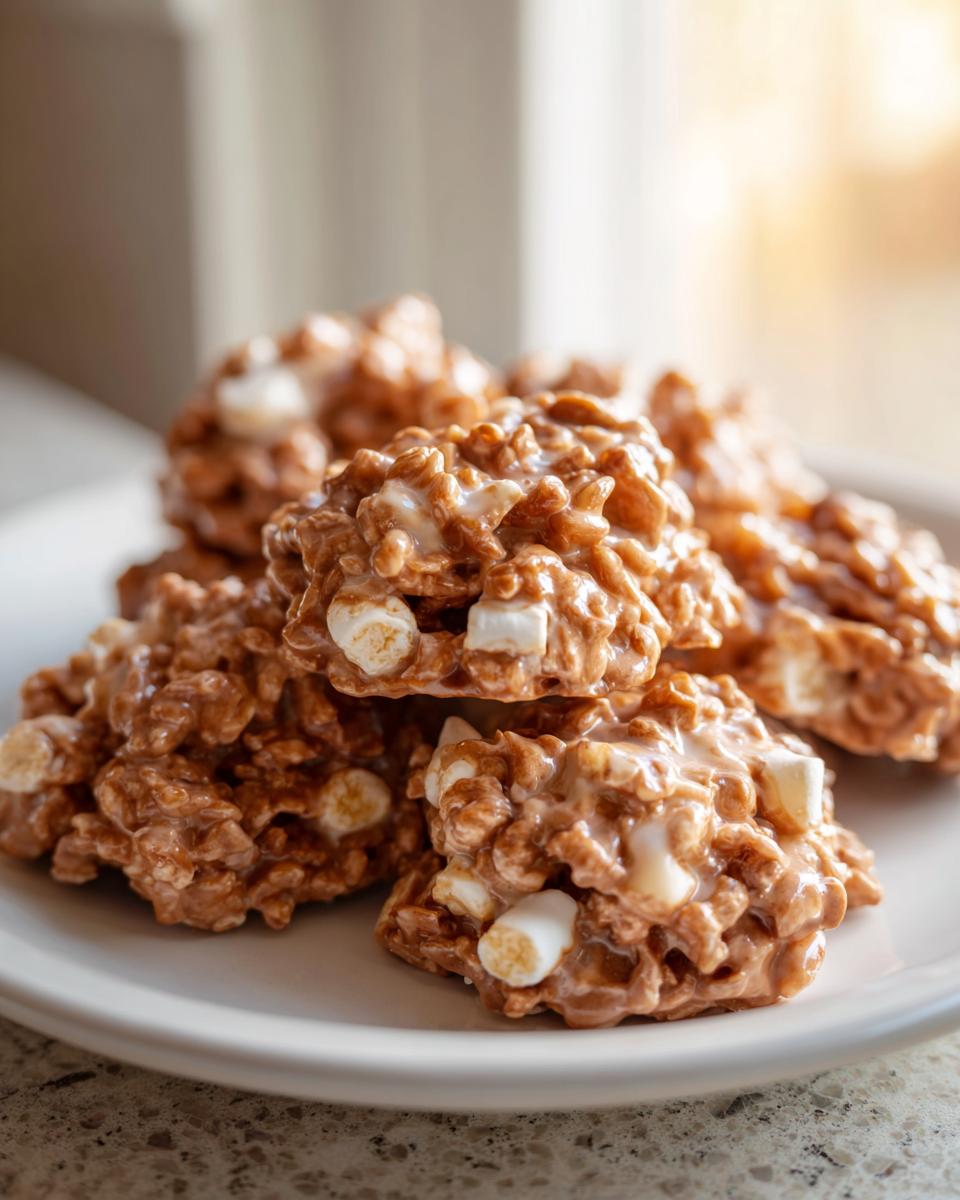
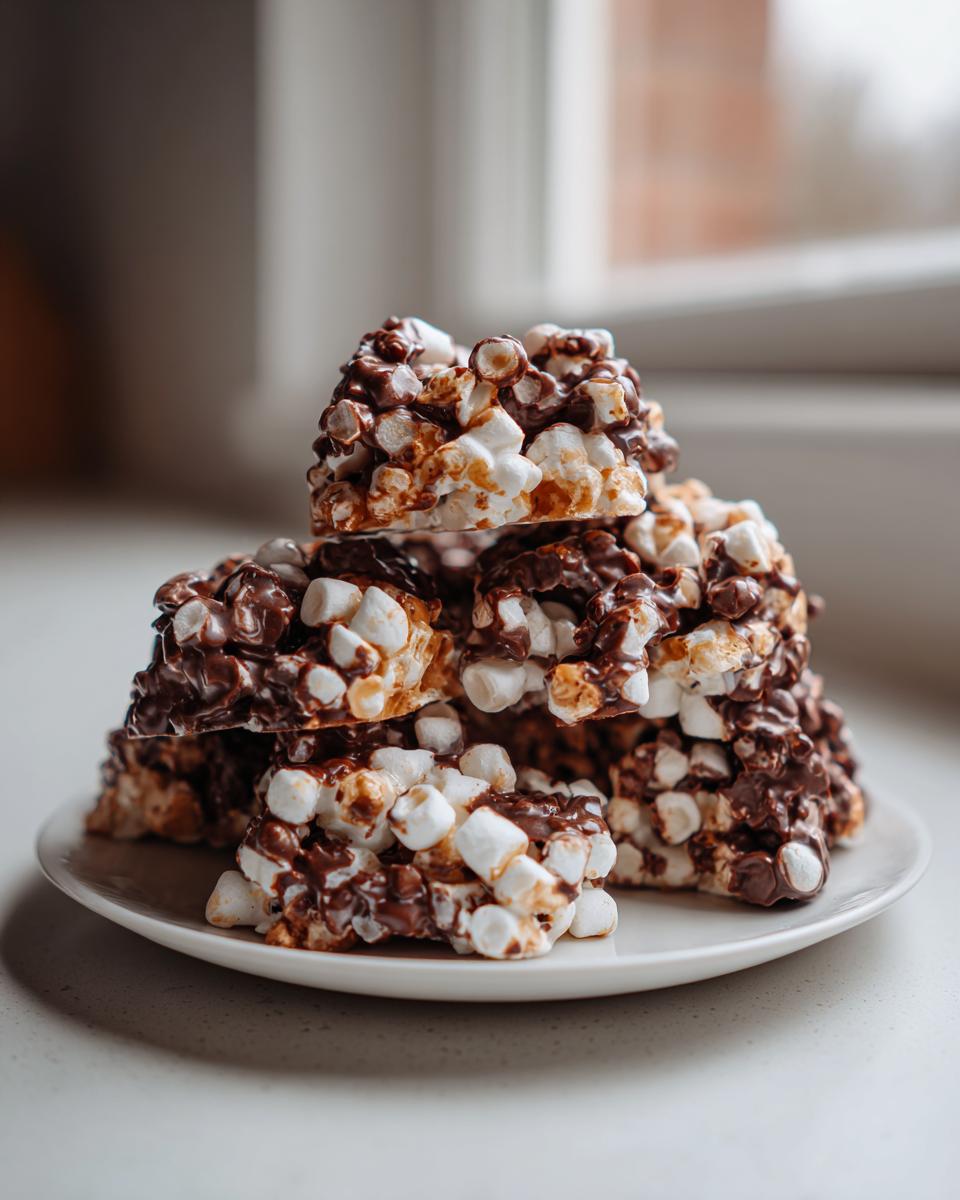
PrintEasy No-Bake Avalanche Cookies

Make these irresistible Avalanche Cookies for a quick, crowd-pleasing no-bake treat. These simple candy clusters come together fast using white chocolate, peanut butter, crispy rice cereal, and marshmallows.
- Prep Time: 15 min
- Cook Time: 0 min
- Total Time: 1 hour 15 min
- Yield: About 24 cookies 1x
- Category: Dessert
- Method: No Bake
- Cuisine: American
- Diet: Vegetarian
Ingredients
- 12 ounces white chocolate chips
- 1 cup creamy peanut butter
- 6 cups crispy rice cereal (Rice Krispies)
- 4 cups mini marshmallows
Instructions
- Line a baking sheet with parchment paper.
- Place the white chocolate chips in a large, microwave-safe bowl. Microwave on 50% power for 30-second intervals, stirring well after each interval, until the chocolate is completely smooth.
- Stir the creamy peanut butter into the melted white chocolate until fully combined.
- Add the crispy rice cereal and mini marshmallows to the chocolate mixture. Fold gently until all the dry ingredients are evenly coated.
- Drop spoonfuls of the mixture onto the prepared baking sheet. You can drop them as clusters or press them lightly into small mounds.
- Allow the cookies to set completely at room temperature for about 1 hour, or place them in the refrigerator for 20 minutes to speed up the process.
- Store these no-bake avalanche cookies in an airtight container.
Notes
- For a richer flavor, substitute half of the white chocolate chips with milk chocolate chips or semi-sweet chocolate chips for a chocolate swirl effect.
- If you want a crunchier texture, add 1 cup of chopped pretzels or nuts along with the cereal.
- If your peanut butter is very stiff, warm it slightly before mixing it with the melted chocolate to ensure a smooth blend.
Nutrition
- Serving Size: 1 cookie
- Calories: 250
- Sugar: 22
- Sodium: 150
- Fat: 14
- Saturated Fat: 7
- Unsaturated Fat: 7
- Trans Fat: 0
- Carbohydrates: 30
- Fiber: 1
- Protein: 4
- Cholesterol: 5