
The holidays are all about gathering, isn’t it? I mean, sure, the gifts are nice, but for me, the best memories are always made right there in the kitchen, usually with a strong drink in hand. If you’ve been looking for the absolute best, most authentic, and surprisingly easy **Coquito** recipe, stop scrolling right now. You’ve found it! Forget any stress you associate with perfecting traditional drinks. This creamy coconut rum cocktail captures the true flavor of the islands and works perfectly whether you’re serving it on Nochebuena or just craving a taste of the tropics during a cold snap. I promise you, making this memorable treat doesn’t have to be complicated.
- Why This Traditional Coquito Recipe Works Every Time
- Classic Coquito Ingredients: What You Need for this Creamy Coconut Rum Cocktail
- How to Make Coquito: Step-by-Step Instructions
- Serving Suggestions for Your Festive Coconut Dessert Drink
- Make Ahead Holiday Drinks: Storing Your Coquito
- Coquito Variations and Flavor Twists
- Frequently Asked Questions About Puerto Rican Holiday Drink
- Estimated Nutritional Data for This Tropical Holiday Cocktail
- Share Your Homemade Coquito Creations
Why This Traditional Coquito Recipe Works Every Time
I know there are thousands of recipes floating around out there—some involve hours of simmering, some require obscure ingredients, and honestly, some just taste… watery. When I developed this recipe, my goal was simple: make something truly authentic that works flawlessly using ingredients you can grab easily. We’re aiming for that rich, velvety texture, the kind that makes people ask, “Wait, is this homemade Puerto Rican eggnog?!” Yes, it is, and it’s so reliable!
This blend of milks and spices creates a flavor profile that just can’t be easily replicated. You don’t need to be a master mixologist to nail this. We test and trust these steps so you can step into your kitchen confidently, knowing the result will be stellar. If you’re looking for a similar foolproof recipe that really delivers on creaminess, you might want to check out my guide on classic creamy homemade eggnog, too!
Simple Ingredients, Extraordinary Coquito
One of my core beliefs here is that you shouldn’t need a treasure map to find what you need for a great meal—or a great holiday drink! That’s why I stuck to the essentials here. You won’t be hunting down specialty coconut water or rare extracts for this version of our **Coquito**.
- You’re grabbing full-fat coconut milk, evaporated milk, and condensed milk right off the regular grocery store shelf.
- The spices are standard cinnamon and nutmeg—nothing complicated, just pure, warming flavor.
- This means when you get the urge to make this festive coconut dessert drink, you can usually whip it up right then and there without a special trip!
The Blender Technique for the Best Coquito
This is where we save time and absolutely nail the texture. Forget shaking cans or whisking endlessly; a good blender is your secret weapon here. It really delivers on that promise of an Easy Coquito Recipe.
We aren’t trying to break down chunks of ice or anything crazy here. We are just emulsifying the fats and liquids perfectly. When you blast those milks and spices together in the blender, you create a beautiful, homogenous mixture that chills down into that signature, thick, smooth texture instantly. See? Simple, quick, and totally effective for a creamy coconut rum cocktail!
Classic Coquito Ingredients: What You Need for this Creamy Coconut Rum Cocktail
When we talk about the best **Coquito**, we are really talking about a symphony of creamy textures working together, held up by the warmth of the spices. That’s why the milks are so critical here. You can’t skimp on any of them if you want that signature, rich texture of a fantastic Creamy Coconut Rum Cocktail. Don’t worry, though, I’ve written down exactly what you need below. This list is straightforward, and it’s the exact combination that makes our batch so undeniably delicious every single time.
- 1 can (13.5 ounces) full-fat coconut milk
- 1 can (15 ounces) evaporated milk
- 1 can (14 ounces) sweetened condensed milk
- 1 can (13.5 ounces) coconut cream
- 1 1/2 cups white rum (we can talk about adjusting this in a minute!)
- 1 teaspoon vanilla extract
- 1 teaspoon ground cinnamon
- 1/4 teaspoon ground nutmeg
- Pinch of salt
See? Nothing intimidating there! Just grab these things, and we’re halfway to having the perfect Puerto Rican Holiday Drink ready to go. If you’re grabbing things for a whole dinner spread, remember that simple, flavorful recipes are the best, like my skillet coconut lime chicken (you can see that recipe here).
Ingredient Notes and Rum Selection for Coquito
Okay, let’s get picky for just a second, because that’s how we ensure perfection! First, when buying your coconut, always go for the full-fat coconut milk and definitely grab the coconut cream—that’s the thick part from the top of the can, and it’s essential for richness. If you try using ‘light’ versions, trust me, your final **Coquito** will just be thin and sad.
Now, the star: the rum! For the traditional flavor profile, stick to a good quality white rum. It provides that necessary alcoholic kick without muddying up the clean coconut and spice flavors. If you want to experiment later—maybe for a batch made next month—you can swap in a nice spiced rum for a warmer, deeper note, but for this classic version, white rum keeps it bright.
Also, don’t skip that tiny pinch of salt. It’s tiny, but it really wakes up the sweetness from the condensed milk, making the whole drink taste more complex and less like a simple sweet mix. It’s one of those little secrets that makes the difference between good and absolutely unforgettable!
How to Make Coquito: Step-by-Step Instructions
Alright, buckle up, because this is the easy part! If you thought making **Coquito** was complicated because it’s so delicious, think again. Since we’re using the blender method, the actual mixing takes less time than it takes to unload the dishwasher. But don’t let the speed fool you—following these exact steps ensures we pull off that perfect, luxurious texture every time we get ready for our **Nochebuena Drinks** celebration.
I think of making this like dumping your favorite ingredients into a musical instrument and letting it play a perfect, creamy note. We need everything in sequence so the machine can do its work efficiently. Seriously, if you’ve ever struggled with lumpiness in homemade drinks, keep watching how we layer these ingredients!
- First things first, you need to gather everything up. If you don’t have all those glorious milks and the rum sitting out, go ahead and grab them. You absolutely need your blender ready for this mission.
- Next, we start pouring! Add the coconut milk, the evaporated milk, the sweet condensed milk, and that thick coconut cream right into the blender jar. Try not to make a huge mess—though I always seem to splash a little bit of something!
- Now for the flavor boosters. Toss in that teaspoon of vanilla extract. Follow that up with the ground cinnamon, the nutmeg, and don’t forget that critical pinch of salt we talked about earlier.
- Time for the good stuff—the rum! We’re starting with 1 1/2 cups of white rum. If you taste test later and realize you like it stronger, that’s when you adjust up. But start here; you can always add more later, but you sure can’t take it out!
- This is the moment of truth! Secure that lid tightly—and I mean *tightly*—because we are going high power. Blend on high speed for about 30 to 60 seconds. We aren’t whipping cream here; we are just making sure everything is completely unified.
- Once blended, take a quick peek and taste it. Does it need a tiny bit more spice? Maybe a splash more rum for kick? Adjust it now while it’s still liquid.
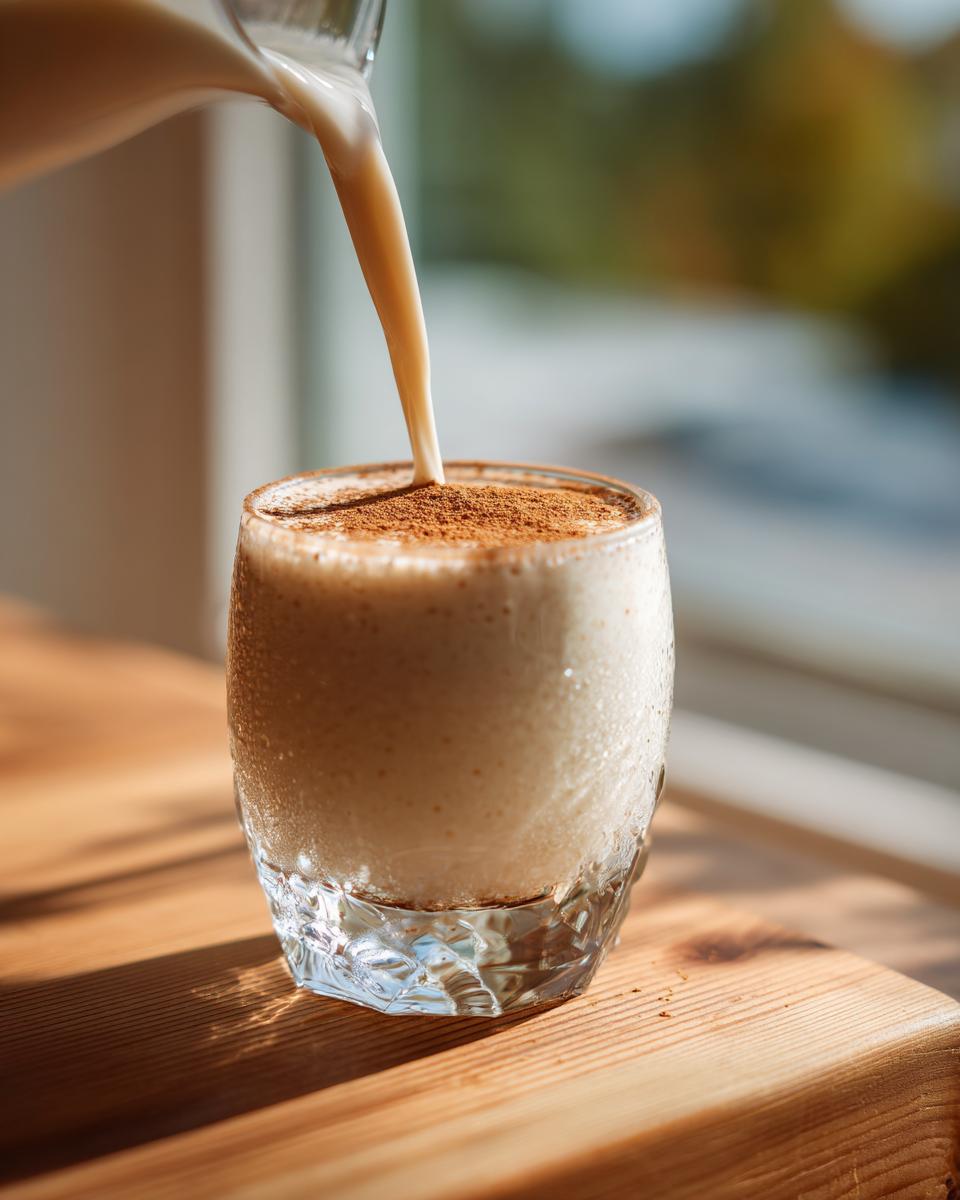
- Pour the whole beautiful batch into your clean glass bottles or maybe a nice big pitcher if you plan on serving it immediately.
- Now for the hard part: waiting! Seal those containers up and put them straight into the refrigerator. You must chill this **Coquito** for at least four hours, but I’m telling you now, chilling it overnight is when the magic truly happens. The flavors need time to cuddle up and get to know each other!
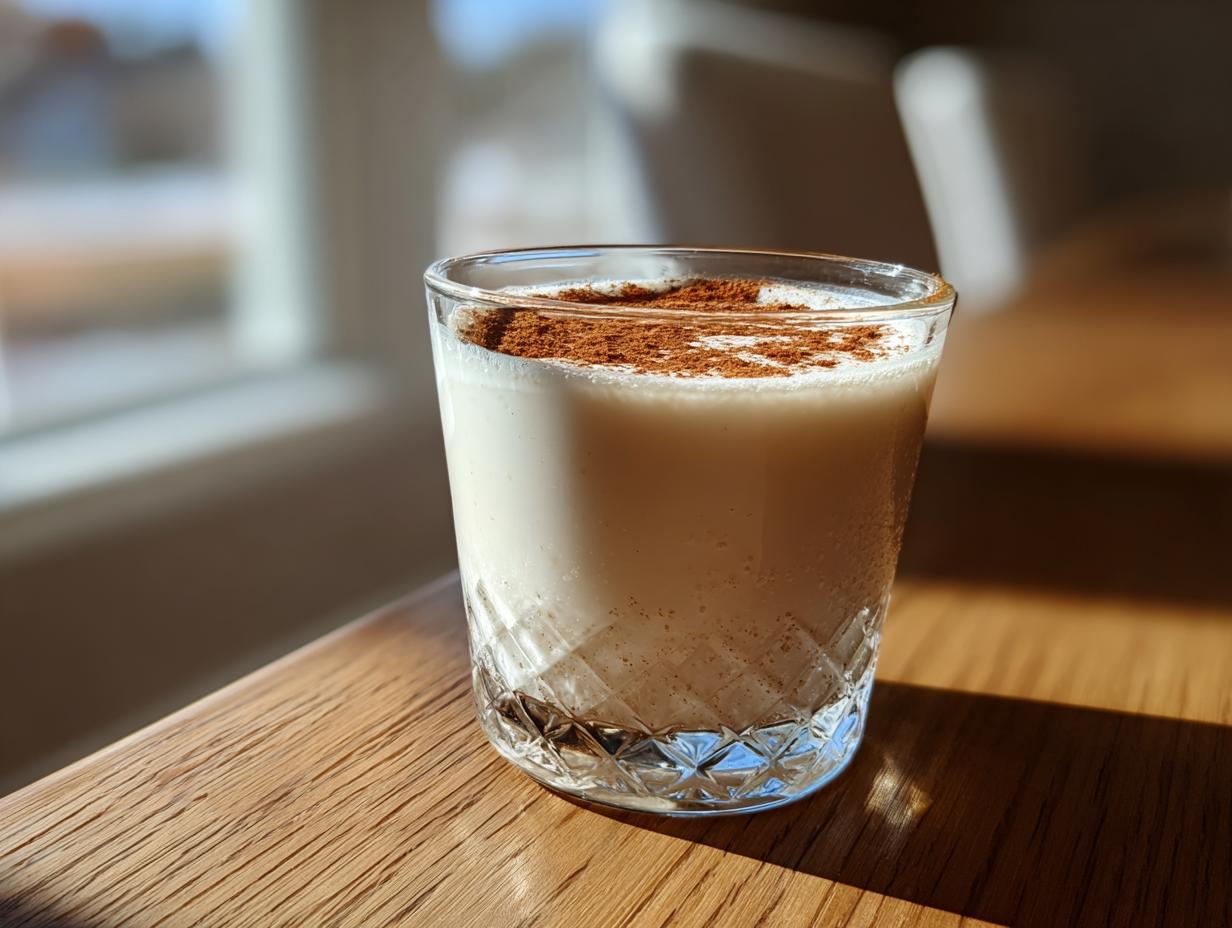
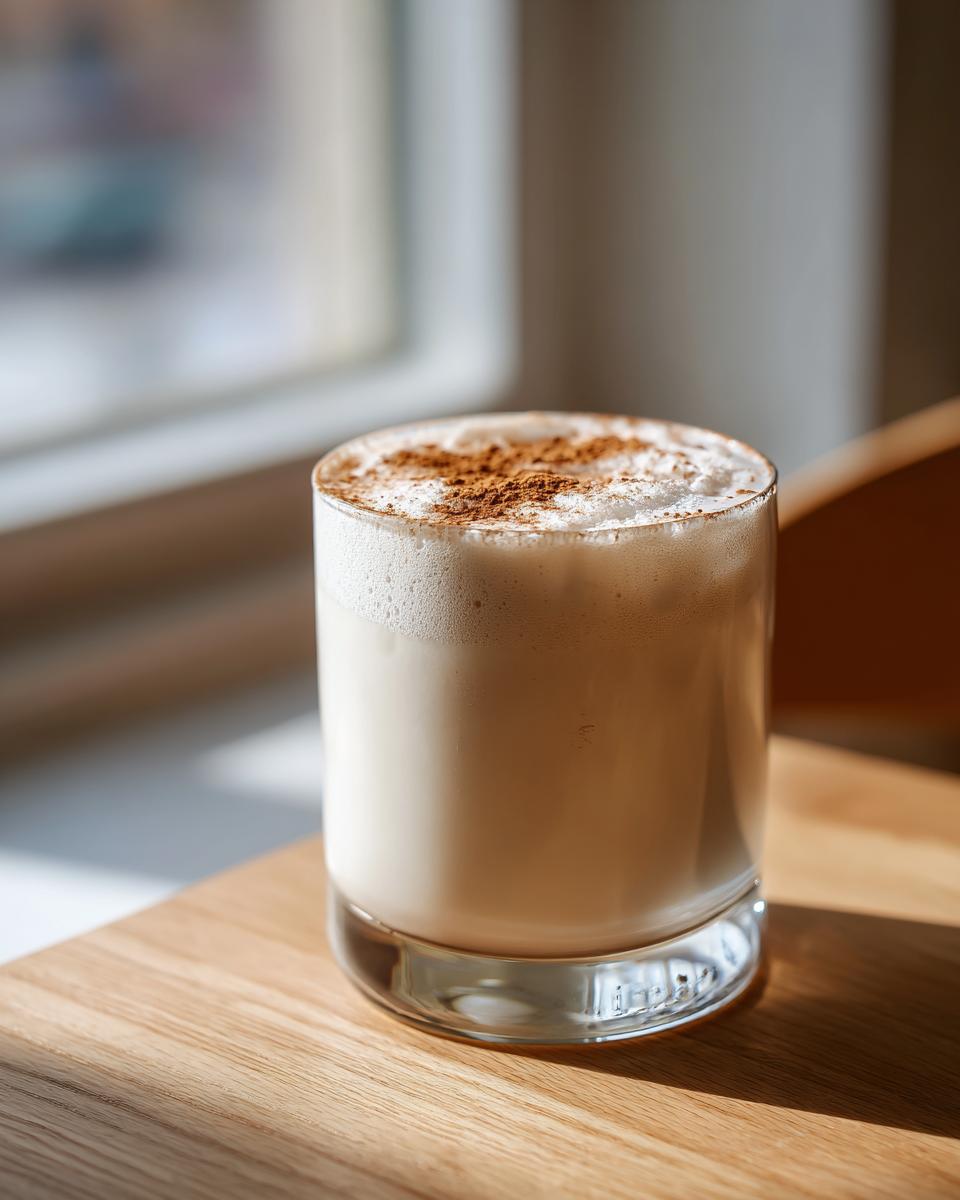
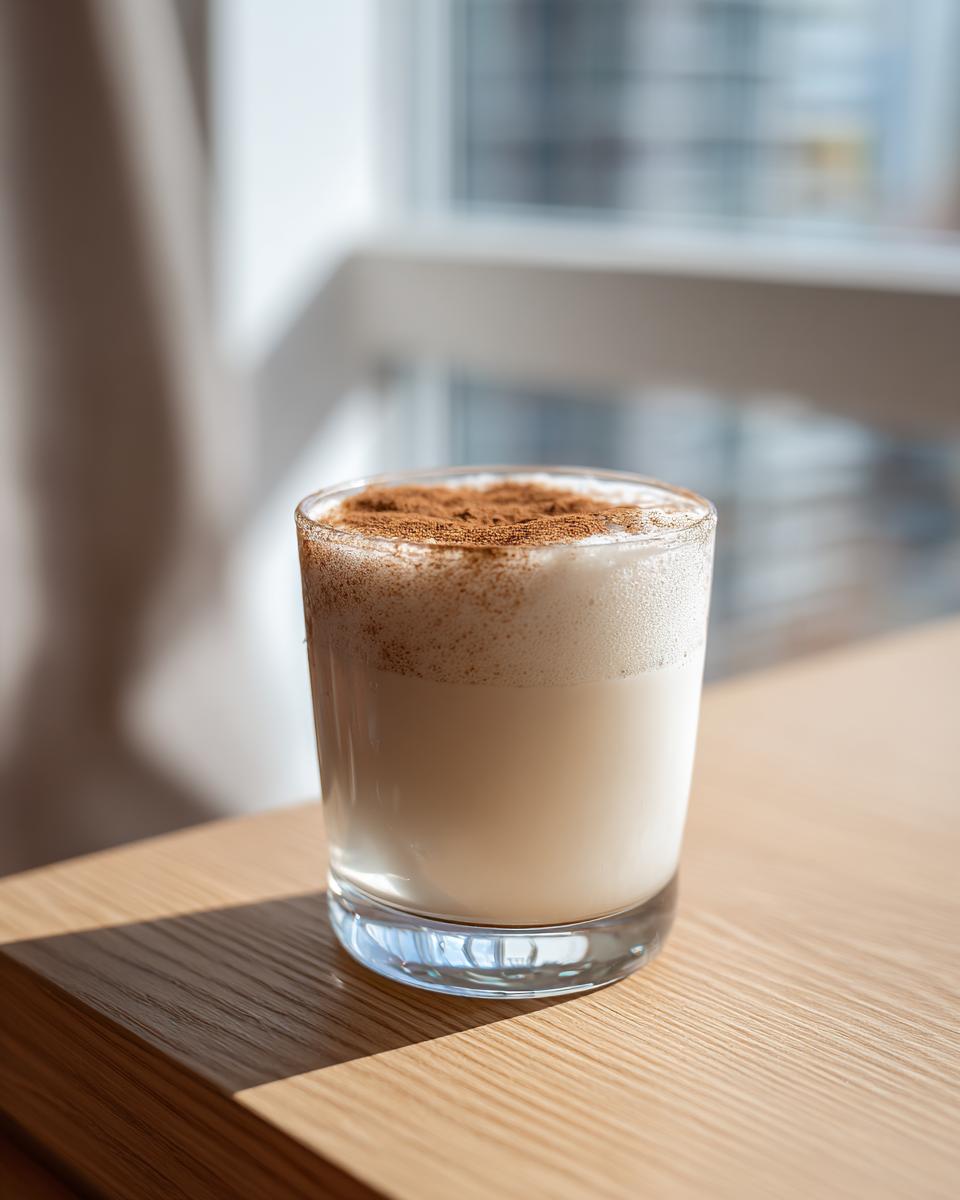
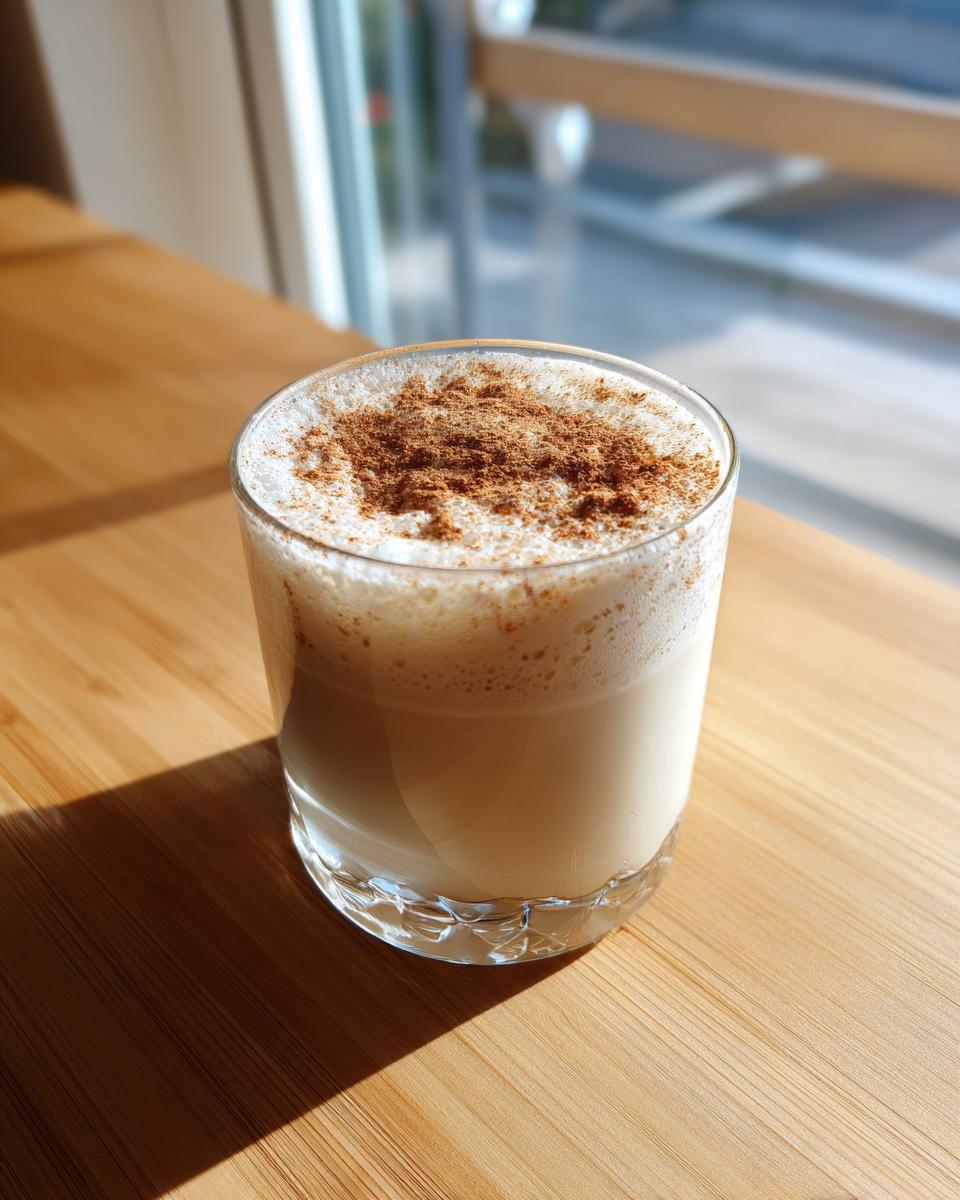
- When you’re ready to serve your perfect, icy cold cocktail, pour it into small glasses and finish it off with a light dusting of ground cinnamon right on top.
If you want to see my technique for combining liquids and powders in dryer baking recipes, check out my tips on not over-mixing when making creamy pasta salads—similar concept!
Blending for Ultimate Smoothness in Your Coquito
Listen, if you have a high-speed blender, use it! It’s going to make your life so much easier getting that ultra-smooth finish you want in a quality **Creamy Coconut Rum Cocktail**. You only need to run the blender for about 30 seconds, max, maybe 60 if your machine isn’t super powerful.
The main thing I watch for is the vortex—that little swirling whirlpool in the middle. When that vortex looks smooth, shiny, and absolutely uniform, you’re done. If you see any separation—like the coconut cream trying to cling to the sides—just pause, scrape down the sides quickly with a spatula, and blend for another 10 seconds. We want zero graininess. This quick blending is the core reason this is such an Easy Coquito Recipe!
The Critical Chilling Time for Coquito Flavor Development
I cannot stress this enough: **Coquito** must be cold. If you try to serve it straight out of the blender, it’ll taste sweet and boozy, but it won’t taste *right*. Think of it like letting a stew simmer; the components need time to marry. This resting period helps the rum mellow just slightly and allows the warm nutmeg and cinnamon to really infuse into the coconut fats.
Aim for overnight chilling if you can swing it. If you start it first thing in the morning for an evening party, that’s usually just enough time. If you absolutely must serve it, four hours in the fridge poured over ice will work in a pinch, but for the *best* flavor, give it that full overnight rest. Trust me, patient chilling is the secret handshake for this Traditional Coquito Recipe.
Serving Suggestions for Your Festive Coconut Dessert Drink
We’ve done the hard work—blended, chilled, and let the flavors harmonize! Now it’s time to serve up this gorgeous **Festive Coconut Dessert Drink**. Remember how I said this is the epitome of Nochebuena Drinks? Well, serving it properly keeps that festive feeling alive from the first pour to the last sip.
The absolute rule for serving **Coquito** is this: It must be ice cold. You want that texture to be thick, almost like a melted scoop of ice cream, but still very pourable. I often store my bottles right in the coldest part of the fridge for at least eight hours before planning to serve.
When pouring into small glasses—we call them shot glasses or small cordial glasses because this tropical holiday cocktail is rich—keep a small jar of ground cinnamon nearby. That sprinkle on top is non-negotiable for me! It’s not just pretty; the aroma of the fresh spice mixing with the cold coconut is the final touch that elevates this from a simple cocktail to a true celebration moment.
If you’re making this for a big party and want to keep it extra cold without diluting the flavor, pour it into a chilled punch bowl and set that bowl inside a larger bowl filled with ice. It looks beautiful on a buffet spread, too!
For those who might want a little something extra alongside their drink, keeping things simple works best. Since this is already a rich, sweet beverage, skip the heavy desserts. Think about pairing it with something light after dinner—maybe some fresh pineapple or something simple from my dessert pages, like a light simple fruit platter or shortbread cookies. It’s the perfect, creamy ending to any holiday feast.
Make Ahead Holiday Drinks: Storing Your Coquito
Listen, holiday season is already hectic enough without worrying about making a cocktail the minute your guests walk in the door! That’s why I absolutely love that this **Coquito** falls squarely into the category of Make Ahead Holiday Drinks. This is huge for anyone trying to juggle cooking, cleaning, and keeping the tree lit! Because this drink is essentially a liqueur, it holds up beautifully in the fridge.
You can—and I often do—whip up a massive batch about a week before you even need it. It keeps perfectly sealed in the refrigerator for up to two weeks, sometimes even pushing three if you’re careful about cross-contamination. That means less stress on Christmas Eve or for your Nochebuena party. When people ask how you managed to have everything done, you can just smile knowing your signature cocktail has been chilling happily for days!
Having this ready means you can focus on the appetizers or making sure the green bean casserole isn’t burning. It truly removes one big item from your holiday to-do list. And honestly? It tastes better after a week of resting anyway, so it’s a win-win situation for planning your next great gathering.
Tips for Gifting Homemade Liqueurs
Since this recipe makes such a large yield (we get about six cups!), I always end up with extra—which is perfect for making lovely, personalized gifts! There is nothing more thoughtful than sharing a bottle of something homemade, especially when it tastes this decadent. If you plan on Gifting Homemade Liqueurs, take a little extra care with the presentation.
First, grab some nice, clean glass bottles. Swing by the craft store and look for bottles with swing-top lids or attractive cork stoppers—they look much more professional than an old jar. Make sure you wash them in hot, soapy water and rinse them really well before you pour anything in!
While the **Coquito** is still thick, pour it in, leaving a little headspace at the top. Then, have fun labeling. I just use simple twine and a nice thick card stock tag. Write down what it is (Creamy Coconut Rum Cocktail!) and, crucially, remind them that it needs to be refrigerated and how long it lasts. A little ribbon tied around the neck of the bottle makes it look like you spent hours on it, even though we know you used that magical blender!
If you’re looking for other ideas for sharing your kitchen creations, you can read some of my thoughts on gifting homemade liqueurs and other treats here.
Coquito Variations and Flavor Twists
Now, while I stand firmly by our classic, creamy, spiced recipe—it’s the blueprint for a reason!—I totally get wanting to switch things up, especially if you’re serving a crowd that likes variety. Think of this base recipe as your sturdy foundation. Once you’ve nailed the original, you can really start playing around with other flavors! This gives you lots of options for those Tropical Holiday Cocktails.
The beauty of this blended recipe is how easily it accepts an extra boost of flavor when you’re blending everything together. You don’t need any extra cooking time, making these twists really fit into that ‘easy’ category we love so much around here.
So, if you’re looking to host a true cocktail spread, here are a few ideas that work wonderfully:
- Pistachio Coquito: This one is gorgeous! Simply add about a cup of shelled, unsalted roasted pistachios right into the blender with the milks. They break down beautifully and give you a stunning pale green color and a rich, nutty flavor. You can find a great take on that pistachio variation online if you want to see the visual, but trust me, it’s easy to incorporate!
- Orange Zest Zing: This is my favorite way to cut through the richness just a little. Add the zest of one large orange right into the blender. Don’t add the white pithy part! Just the bright, colorful zest. It brightens up the whole beverage and makes it taste almost like a dessert on the beach.
- Margarita Fusion Fun: Okay, this is for the bold crowd! If you have friends who love a little tartness with their sweetness, try swapping out about half a cup of the white rum for high-quality tequila and adding the juice of one lime when you blend. It transforms your holiday sipper into something really exciting!
The key for all these is to stick closely to the original milk and rum quantities for thickness, and just add your flavor enhancers during that main blending step. Remember, even when you try a new flavor twist, you can always keep going back to the reliable, pure taste of the traditional recipe when you need it. For more ideas on different drinks you can make, check out my general cocktail and beverage recipes.
If you want to see how another trusted source approaches the classic recipe when you’re ready to compare, take a peek at this guide on authentic Puerto Rican coquito. Happy mixing!
Frequently Asked Questions About Puerto Rican Holiday Drink
I get so many questions whenever I post about **Coquito**, and honestly, that’s great! It means people are excited to bring this incredible Puerto Rican Holiday Drink into their own traditions. I pulled the ones I hear most often to save you some time. Hopefully, this helps you feel totally confident before you even fire up the blender!
Is Coquito basically the same as eggnog?
That’s a common thought since they both show up around the same time of year and are creamy, spiced, and contain alcohol! But they are fundamentally different. Traditional eggnog relies heavily on eggs for its creamy texture, which is why you often have to temper them or worry about spoilage. Our **Coquito** is completely egg-free! The creaminess comes entirely from that magical blend of coconut milk, coconut cream, and the evaporated and condensed milks. It’s a tropical cousin to eggnog, offering that rich, festive flavor without the egg worry.
Can I make this Coquito recipe without rum?
You absolutely can! If you need a strictly non-alcoholic version, or if you’re making a batch just for a party where some guests abstain, you can simply omit the rum entirely. Before you do that, though, make sure you chill it really well! To replace the liquid volume and keep the consistency correct, I usually substitute the rum with an equal amount of cold coconut water or a splash of regular milk. You might also want to add a little extra vanilla or a dash of almond extract to give that non-alcoholic version a little more ‘oomph’ since you’re losing the spirit note. It turns it into a wonderful, dense, festive coconut dessert drink!
How thick should my finished Coquito be?
This is all about personal preference, but generally, perfect **Coquito** has the consistency of a thick melted milkshake or a very creamy heavy cream when it’s cold. It should pour smoothly but not run like water off a table. If yours came out too thin after chilling, don’t panic! You can always save the day. Next time you make a batch, reduce the evaporated milk by about half a cup. For this current batch, you can try blending in another half can of plain coconut cream. Blend it again briefly, and let it chill for another hour to see if that firms it up to your liking!
How long do I need to blend everything together?
As I mentioned in the steps, we are using the blender here specifically to emulsify those liquids, not to whip air into them for volume necessarily. You only need about 30 to 60 seconds on high speed. The goal is total integration where you can’t see any separated layers of milk. If you blend it for too long—say, several minutes—you risk heating the liquid up too much, which can sometimes affect the final texture once it chills. Quick, powerful blending is the key to this fast and Easy Coquito Recipe!
Once you feel confident serving this to your loved ones, don’t forget to check out my simple ideas for party snacks—you need something to nibble on while enjoying this delicious drink! You can find some easy crowd-pleasers here: Simple Appetizers and Snacks.
Estimated Nutritional Data for This Tropical Holiday Cocktail
I always get asked about the nutrition when someone tries this rich batch of **Coquito** for the first time—it’s so creamy, people assume it’s incredibly heavy! Since this is essentially a delightful dessert drink wrapped up in a festive package, I want to be upfront about what goes into that creamy goodness. Remember, this is a very rich treat, meant for celebrating, not for daily consumption!
The data below is based on a standard serving size of 6 ounces of our classic recipe, using the ingredients listed. Because we use so much condensed milk and rum, the numbers reflect that indulgence. But hey, that’s why we only have one glass! If you are looking for lighter fare for your parties, remember we can always explore variations, though this classic version demands that richness.
Please keep in mind that these are just estimates. The exact values can change based on the specific brand of rum you choose or if you decide to use slightly less condensed milk in your batch. We always do the heavy lifting in the kitchen, but we leave the precise nutritional math to the professionals!
- Serving Size: 6 oz
- Calories: 350
- Sugar: 35g
- Sodium: 80mg
- Fat: 15g
- Saturated Fat: 12g
- Unsaturated Fat: 3g
- Trans Fat: 0g
- Carbohydrates: 38g
- Fiber: 1g
- Protein: 5g
- Cholesterol: 35mg
See? It packs a punch, making it perfect for sipping slowly! It’s a true Tropical Holiday Cocktail moment in a glass. When you’re serving something this decadent, remember to balance it with some simpler snacks or appetizers earlier in the evening!
Share Your Homemade Coquito Creations
That’s it! You are officially initiated into the world of making truly spectacular, creamy, unforgettable holiday cocktails. Seeing how this **Coquito** comes together in your own kitchen is my favorite part of sharing these recipes. Food is about connection, and I really, truly want to know how this tastes at your table.
Did you make it just like the recipe, or did you try a little extra dash of nutmeg? Did you bring it to a party, and what was the reaction? Please, drop a comment down below! Five stars, one star, questions, funny stories—I read every single one. Hearing about your success (or even troubleshooting a little hiccup) is what helps me keep making sure Taste This Plate remains your reliable source for food you can trust.
If you took a picture of that beautifully garnished glass or that bottle all ready for gifting, please snap a photo and share it on social media! Tagging me means I get to see your handiwork, and honestly, it makes my day to see my recipes living happily in other people’s homes. It’s all about sharing the love and the deliciousness, right?
If you need to reach me directly with a super specific question, or maybe you’ve got a recipe idea you want to float my way, don’t hesitate to send a note through my contact page. I love hearing from you all! Happy sipping, and thank you again for trusting me with your holiday tradition!
PrintAuthentic Puerto Rican Coquito: Creamy Coconut Rum Cocktail

Make the best Coquito, a traditional Puerto Rican holiday drink often called homemade Puerto Rican eggnog. This easy recipe uses a blender for a rich, creamy coconut rum cocktail perfect for Nochebuena celebrations.
- Prep Time: 10 min
- Cook Time: 0 min
- Total Time: 4 hr 10 min
- Yield: About 6 cups 1x
- Category: Dessert Drink
- Method: Blender
- Cuisine: Puerto Rican
- Diet: Vegetarian
Ingredients
- 1 can (13.5 ounces) full-fat coconut milk
- 1 can (15 ounces) evaporated milk
- 1 can (14 ounces) sweetened condensed milk
- 1 can (13.5 ounces) coconut cream
- 1 1/2 cups white rum (adjust to taste)
- 1 teaspoon vanilla extract
- 1 teaspoon ground cinnamon
- 1/4 teaspoon ground nutmeg
- Pinch of salt
Instructions
- Gather all your ingredients. You will need a blender for this easy Coquito recipe.
- Pour the coconut milk, evaporated milk, sweetened condensed milk, and coconut cream into the blender jar.
- Add the vanilla extract, ground cinnamon, ground nutmeg, and salt to the blender.
- Add the white rum. Start with 1 1/2 cups, but you can add more if you prefer a stronger drink.
- Secure the lid on the blender and blend on high speed for about 30 to 60 seconds until the mixture is completely smooth and creamy.
- Taste the mixture and adjust the rum or spices if needed.
- Pour the Coquito into glass bottles or a large pitcher.
- Seal the containers and refrigerate for at least 4 hours, or preferably overnight. Chilling allows the flavors to fully combine.
- Serve your Coquito cold. Pour into small glasses and garnish with a sprinkle of ground cinnamon or a whole cinnamon stick.
Notes
- This recipe makes a large batch, perfect for holiday parties or gifting homemade liqueurs.
- For a richer flavor, use high-quality white rum. You can also use spiced rum for a different profile.
- If you want a thicker drink, reduce the amount of evaporated milk slightly.
- This drink keeps well in the refrigerator for up to two weeks.
Nutrition
- Serving Size: 6 oz
- Calories: 350
- Sugar: 35
- Sodium: 80
- Fat: 15
- Saturated Fat: 12
- Unsaturated Fat: 3
- Trans Fat: 0
- Carbohydrates: 38
- Fiber: 1
- Protein: 5
- Cholesterol: 35