

Oh, the holidays! Doesn’t the sheer thought of hosting Thanksgiving send a little shiver of stress down your back? For so many of us, the biggest worry is that beautiful centerpiece bird—the entire meal comes down to one giant roasted turkey, and the fear of dry breast meat is real, I get it. I spent years studying classic American roasts, trying to figure out the exact science required to guarantee juicy meat every single time, even with my analytical marketing brain telling me to follow the instructions exactly.
But I found the secret! Our holiday centerpiece doesn’t have to be a guessing game. This Ultra Juicy Herb Butter Roasted Turkey recipe is my signature solution. Forget complicated brines or hours spent basting; this method relies on a simple, deeply flavored herb butter rubbed generously inside and out. It locks in the moisture you need while giving you the most stunning, shatteringly crisp skin you’ve ever pulled out of your oven. Trust me, this is the roast that will make everyone ask for your technique!
- Why This Herb Butter Roasted Turkey Recipe Works (Juicy Turkey Cooking Secrets)
- Gathering Ingredients for Your Holiday Turkey Centerpiece
- Step-by-Step Instructions for a Perfect Roast Turkey Recipe
- Tips for Success with Your Oven Roasted Turkey
- Serving Suggestions for Your Savory Turkey Dinner
- Make-Ahead and Storage for Leftover Turkey
- Frequently Asked Questions About Roasting a Turkey
- Nutritional Estimate for This Herb Butter Turkey
- Share Your Turkey Success
Why This Herb Butter Roasted Turkey Recipe Works (Juicy Turkey Cooking Secrets)
I want you to feel completely confident bringing this bird to your table, which is why I dig into the *why* behind the steps. My goal is to give you a centerpiece that everyone talks about—for all the right reasons! This method is simple, but those few key moments are what separate a merely good bird from a truly unforgettable holiday experience. You’ll be sending people home with leftovers that are just as good as the first slice!
Here’s what makes this recipe a winner:
- It guarantees beautiful, mahogany-colored, crispy skin.
- The herb butter penetrates deep for flavor, not just sitting on top, much like the method described in this lovely maple butter glazed turkey recipe.
- It saves you hours of tedious basting once the main bake starts.
Speaking of making things easier, if you need a fantastic gravy that you can whip up a day or two ahead, check out my recipe for foolproof make-ahead gravy. It’s a lifesaver!
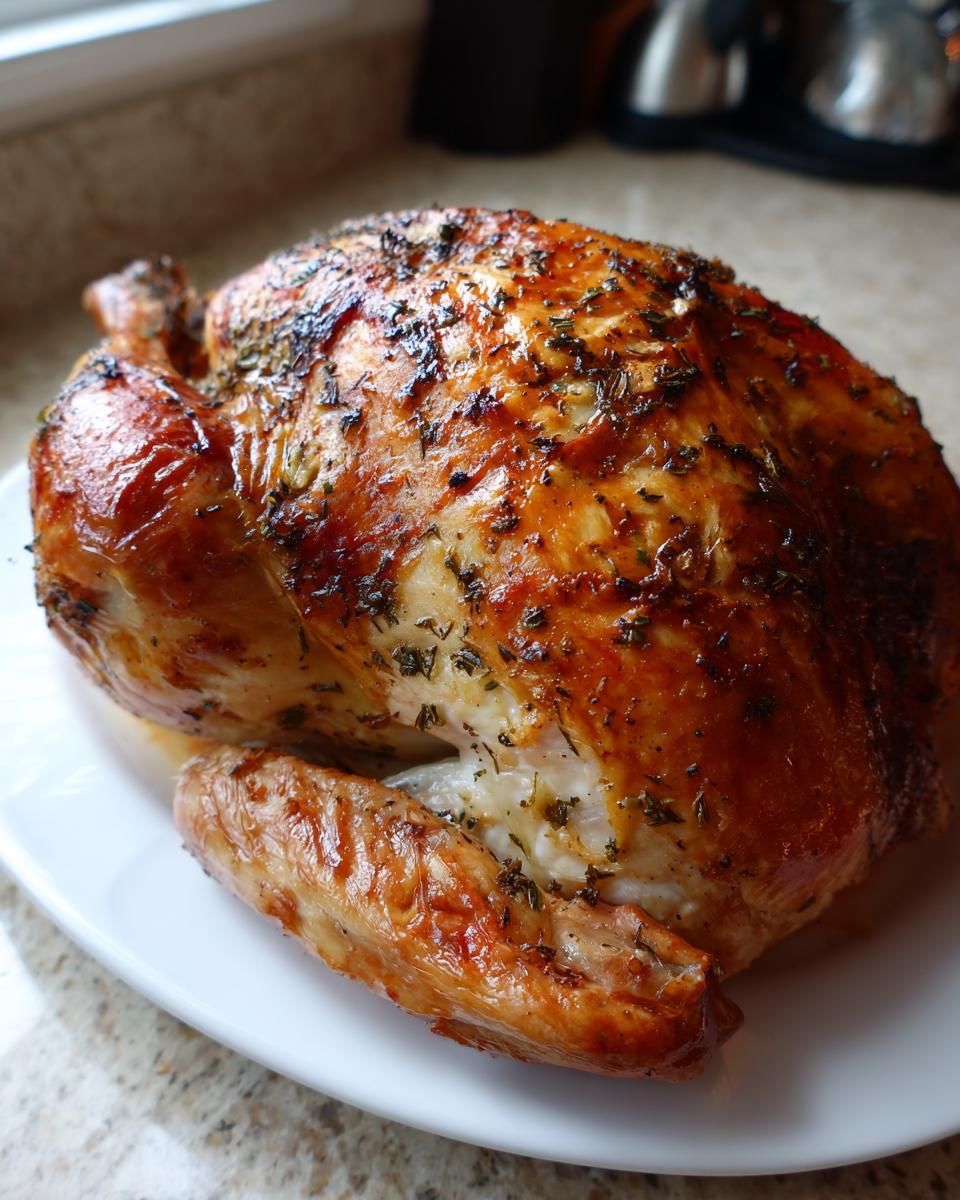
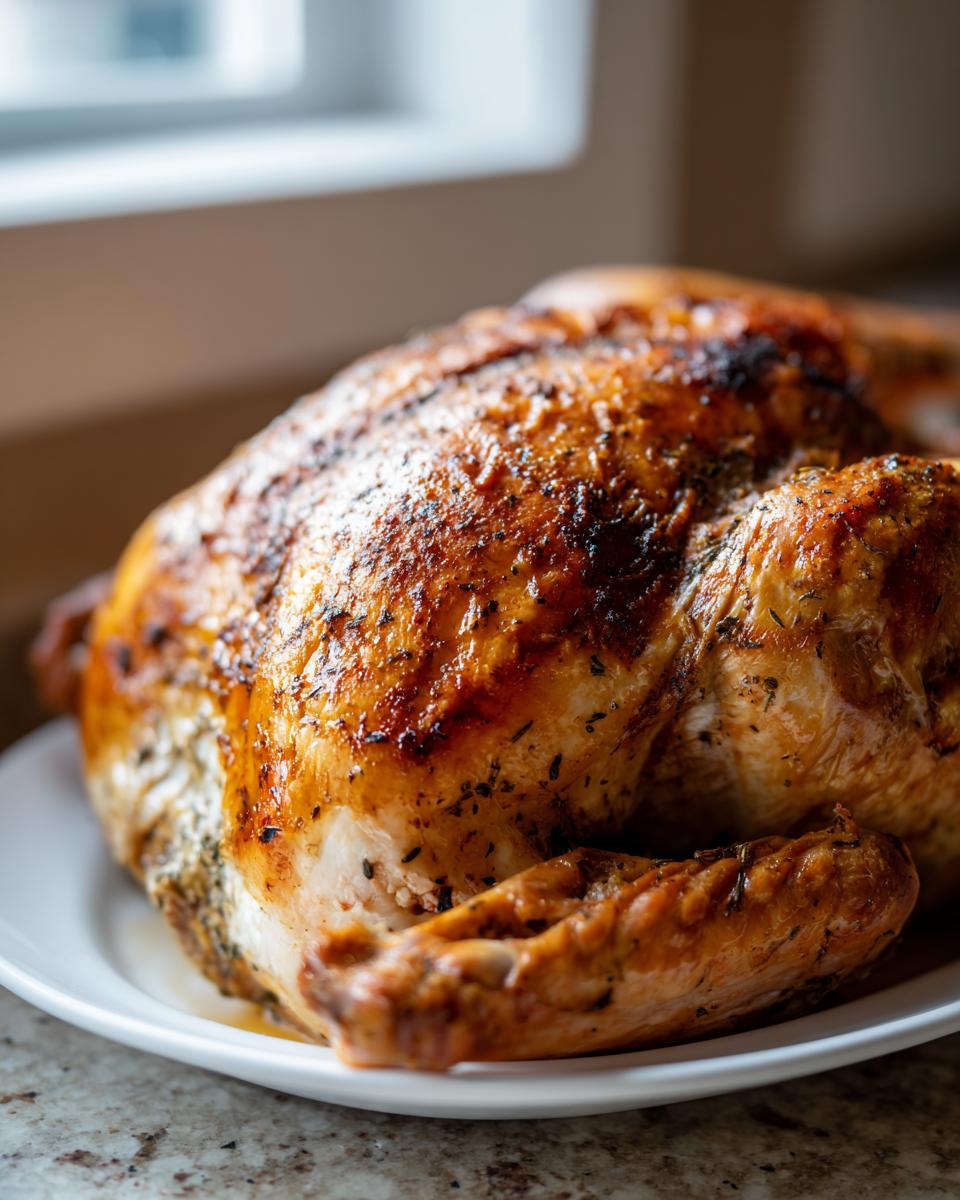
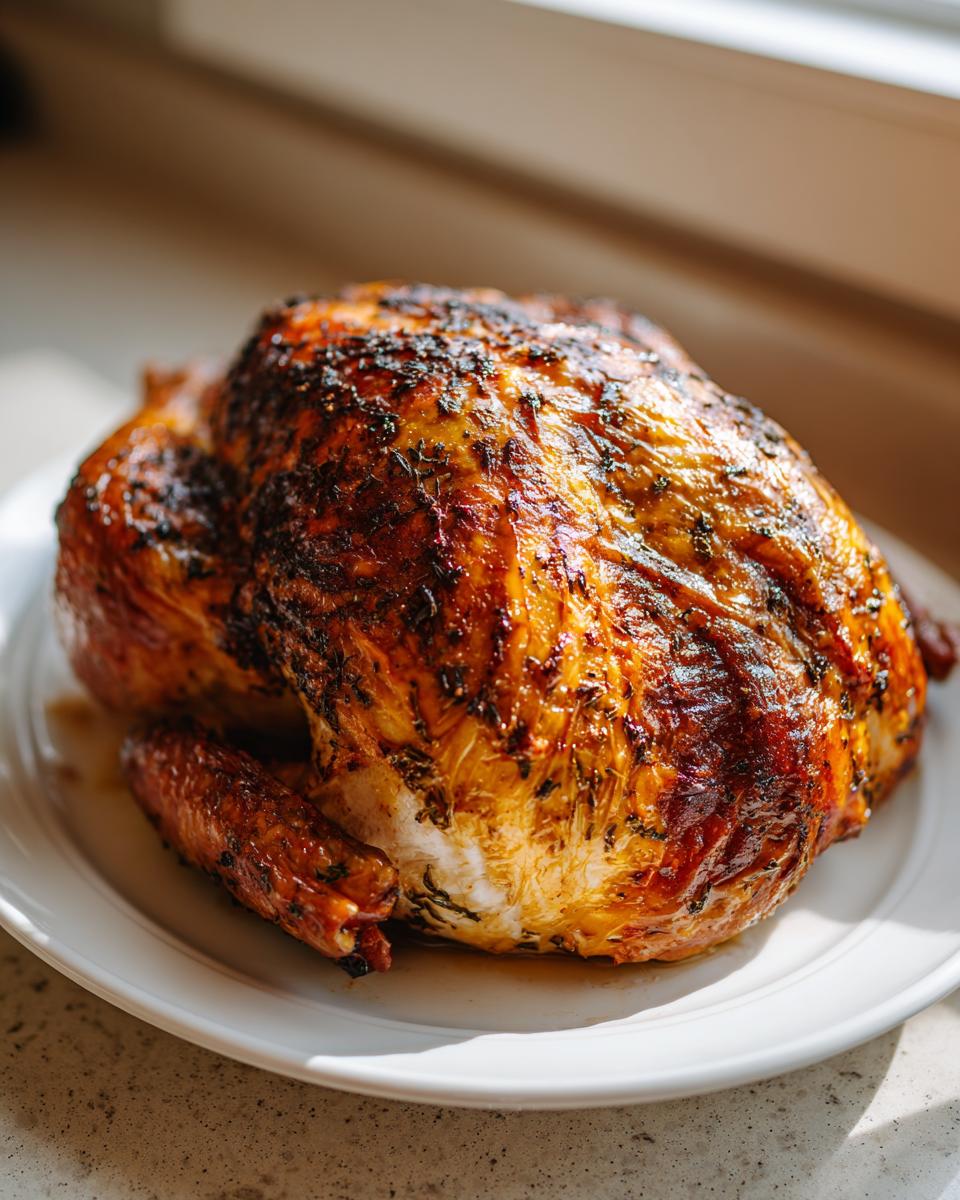
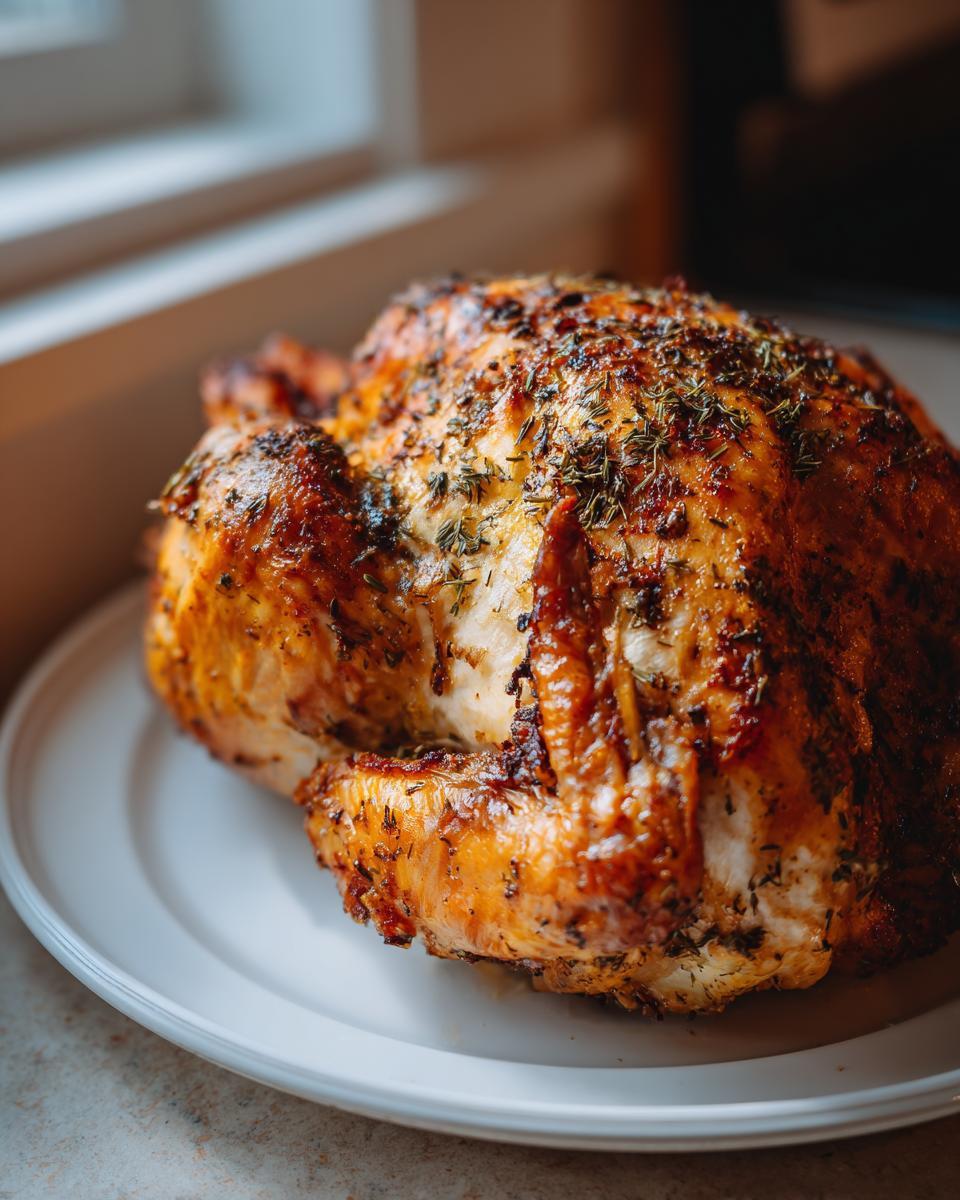
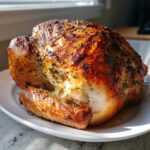
Achieving the Ultimate Crispy Skin Turkey
This is non-negotiable, folks: you must pat that turkey skin bone dry! Use paper towels and keep blotting until the surface feels almost tacky, not wet. Seriously, any moisture left on the skin turns to steam in the oven, and steam equals soggy skin. Then, we hit it with a blast of high heat—425°F for the first 30 minutes! That initial shock of heat starts rendering the fat and setting that gorgeous, crispy exterior right away before we settle down to the slower roasting temperature.
Moist Turkey Techniques: Butter Under the Skin
This is perhaps my most crucial tip for a moist turkey. We aren’t just slathering the outside; we are spooning about half of that glorious herb butter mixture directly onto the breast meat underneath the skin. Think of that fatty butter as a shield! It insulates the delicate white meat, basting it from the inside out. This direct contact ensures incredible flavor penetration and keeps those expensive breast slices tender and juicy even when the thighs are done.
Gathering Ingredients for Your Holiday Turkey Centerpiece
Alright, let’s talk about what you need to pull this off. When you’re hosting a big meal, the last thing you want is to realize halfway through prep that you’re missing something important. I always tell people to lay everything out on the counter first—it saves so much frustration later!
Since we feature accessible ingredients here at Taste This Plate, everything you need for this amazing roast turkey recipe should be easy to find at your regular grocery store. Remember, the quality of your fresh herbs really shines through in the final flavor, so grab the brightest ones you can find.
Here is exactly what you’ll need for one perfect 12- to 14-pound bird:
- One whole turkey, thawed—and listen, 12 to 14 pounds is perfect for hitting that sweet spot on cooking time. If your bird is much larger, you might need to adjust my roasting times, so keep that meat thermometer handy!
- One cup of unsalted butter that you’ve remembered to set out early so it’s nice and soft. We don’t want to tear the skin trying to mash cold butter!
- Fresh herbs are essential: aim for 1/4 cup of fresh rosemary, chopped up fine, and 1/4 cup of fresh thyme leaves.
- Four plump cloves of garlic, minced into a paste.
- Your simple seasonings: 2 tablespoons of kosher salt, 1 tablespoon of black pepper, and 1 tablespoon of paprika for color.
- A bright, fresh lemon and one white or yellow onion, both cut in half or quarters—these go right into the cavity to steam things up gently.
- About 4 cups of chicken or turkey broth to keep the bottom of the pan moist and prevent any burning drippings.
That’s it! See? No complicated grocery lists or specialty items needed. Just good, honest flavor builders waiting to create that stunning holiday turkey centerpiece.
Step-by-Step Instructions for a Perfect Roast Turkey Recipe
Now that we’ve gathered our beautiful ingredients, it’s time to get assembly-line organized! Making a show-stopping, juicy turkey really boils down to sequential steps, and if you follow these precisely, I promise you’ll feel completely in control. Remember, my goal here is never to intimidate you; it’s to empower you to create a magnificent holiday centerpiece that tastes incredible. You’ve got this!
When it comes to timing, you need to keep your eye on the thermometer, not the clock, but these steps will get you right where you need to be for an amazing meal. If you’ve got your bread maker ready to go for some homemade rolls—check out my no-knead bread—get that dough going now, because this turkey process needs your full attention!
Preparing the Herb Butter Turkey Rub
First things first, let’s get that bird ready. Take the turkey out, remove all those giblets and the neck from the cavity—we don’t need those hiding in there for roasting! After that, grab those paper towels and pat the entire outside skin until it’s seriously dry. I can’t stress this enough! Now, in a small bowl, mix up your wonderful herb butter: softened butter, all that chopped rosemary and thyme, the minced garlic, salt, pepper, and paprika. Take your time mixing this until it’s perfectly uniform. Then comes the fun part (and the most important technique for flavor): gently slide your fingers between the breast meat and the skin. Peel it back just enough to create pockets. Take about half of that herb butter mixture and massage it directly onto the meat surface beneath the skin. Use the rest to coat the entire outside of the bird. Don’t forget to tuck those lemon and onion pieces into the cavity for internal aromatics!
Roasting the Turkey: Temperature Control is Key
Time to get this bird into the oven! You want to start hot to blast that skin crisp. Preheat your oven to a roaring 425°F (220°C). Place the turkey on the rack in your roasting pan and pour that nice broth right into the bottom of the pan—this humid environment helps keep things moist down below! Roast it hard at 425°F for just 30 minutes. This sets the skin beautifully. After that initial blast, you must drop the temperature down to 325°F (160°C).
Keep roasting, basting it with those pan juices every 45 minutes or so, until your meat thermometer reads 165°F (74°C) buried deep in the thickest part of the thigh. Don’t be tempted to pull it out early! Once it hits that temperature, pull it out immediately, tent it loosely with foil—don’t seal it tight!—and let it rest for a minimum of 30 minutes. That resting time is what guarantees you a moist turkey; it lets those juices settle back into the meat fibers instead of running all over your cutting board. If you can manage that rest, you’ve won the turkey battle, just like the folks aiming for a perfectly crispy Thanksgiving turkey aim for!
Tips for Success with Your Oven Roasted Turkey
Even with a great recipe, sometimes we need a little bonus reassurance, right? I always keep my ear to the ground for little tricks that make hosting less overwhelming. My grandmother used to swear by prepping things a day ahead, and I’ve totally adopted that mindset. These small moves mean you get to enjoy your guests instead of frantically worrying by the stove!
Here are a couple of things I always do—and I think you should too—to ensure this herb butter turkey is your best one yet:
- Go for the Overnight Dry Brine: This might sound advanced, but it’s so easy! After you’ve rubbed the bird with the initial salt and pepper (before you add the herbs!), stick it uncovered in the fridge overnight. Seriously, just the salt sitting on the skin overnight draws out moisture, then reabsorbs it later, leading to crazy flavor and extra juiciness. It’s one of the best secrets for a juicy turkey I’ve ever learned.
- Watch That Browning: If you notice your beautiful skin is turning dark brown way too fast during that initial high-heat blast, don’t panic! Grab a sheet of aluminum foil—just a regular piece—and loosely tent the breast area. This shields it from direct radiant heat while allowing the rest of the bird to cook through gently.
- Don’t Forget the Gravy Base: Make sure you always have that broth in the bottom of the pan! Those pan drippings are liquid gold, and they are the base for any fantastic gravy you plan to make later, which is much easier than trying to scramble for flavor enhancers when everyone is hungry.
Serving Suggestions for Your Savory Turkey Dinner
A magnificent roast turkey like this deserves a supporting cast that truly shines, right? Hosting shouldn’t mean spending all day chained to the stove when the main event is already demanding your attention! I find that my favorite holiday meals focus on simple sides that can mostly hang out in the oven or on the counter while the bird rests.
You absolutely have to include some creamy starch. My ultimate comfort choice is my creamy scalloped potatoes recipe; they bake up beautifully alongside the turkey during those last couple of hours. And since we are talking about satisfying comfort food, you can never go wrong with a vibrant green vegetable.
For dessert? If you need something that will make everyone swoon but doesn’t require last-minute fuss, you should definitely try my homemade cinnamon buns recipe. They might seem like a breakfast item, but honestly, a warm sticky bun after a heavy savory meal is pure heaven. It’s about balance, folks!
Make-Ahead and Storage for Leftover Turkey
The feast is over, the dishes are (mostly) done, and now you’re looking at that massive carcass. Don’t let that amazing flavor go to waste! Leftover turkey is honestly one of the best parts of the entire holiday, but you have to store it correctly so it tastes just as good the next day. This is where Kate Reilly, the former marketer turned home cook, gets super organized.
My biggest rule here is getting things cooled down quickly. Don’t leave that cooked turkey sitting out for hours waiting for the last guest to leave! Slice up the breast meat right away and store it in airtight containers. It’s good in the fridge for about three to four days. If you know you won’t get to it by then, shred the meat and freeze it flat in heavy-duty freezer bags. It freezes beautifully for up to three months, which means delicious meals even when it’s snowing outside!
So, what do we do with all that leftover goodness? We go beyond just sandwiches! A few days after the big dinner, use that shredded meat to top a salad, or turn it into something cozy. I love making a full-blown, comforting homemade turkey pot pie. That flaky crust with creamy fillings and tender turkey pieces is just unbeatable.
Of course, nothing beats a quick and easy leftover meal, either. You can whip up some simple turkey sliders the next day, or if you’re feeling adventurous, try using the carcass to make a fantastic stock for a rich soup base. Trust me, that leftover bird is your ticket to easy weeknight dinners for the next week!
Frequently Asked Questions About Roasting a Turkey
When I first started tackling a whole turkey, my brain felt like it was overloaded with conflicting advice. You hear so many different ideas about brining versus not brining, or whether the oven temperature should be high or low! It’s totally normal to have questions swirling around. I’ve bundled together the most common things people ask me about to help you feel totally prepared for your big roast turkey day.
How do I calculate the cooking time for my turkey?
This is the big one, right? Time is always the constraint! For a general estimate, I usually count on about 13 to 15 minutes per pound for an unstuffed bird at 325°F. However, this is why thermometers are your best friend! Cooking time is just a guideline. Your bird is done when your thermometer inserted into the thickest part of the thigh (without touching bone) reads 165°F. A 14-pound turkey takes us about 3 to 3.5 hours total, but always trust the temperature over the clock. If you pull it too early, you end up with unsafe meat; if you pull it too late, well, you know how that goes!
Can I stuff the cavity before roasting my turkey?
This is where my analytical side takes over! While many recipes call for stuffing the cavity, I strongly advise against it if you are aiming for that perfectly moist turkey. When you stuff the bird, the stuffing inside takes much longer to reach a safe temperature (165°F) than the breast meat does. By the time the center of the stuffing is safe, the breast meat is usually hopelessly overcooked and dry. My preference is always to roast the turkey unstuffed and cook the dressing or stuffing separately in a casserole dish. That way, you can bake the delicious side dishes without compromising your main event!
What is the absolute best temperature for carving my turkey?
Please, please, please do not carve the turkey straight out of the oven! Seriously, this might be the number one reason people end up with dry meat on their plate. After you’ve pulled the turkey when it hits 165°F, cover it loosely with foil and let it rest for at least 30 minutes—I prefer 40 minutes for a larger bird. During this critical resting time, the muscle fibers relax and the juices that have rushed to the center of the bird redistribute back throughout the meat. If you cut into it before this rest, all that beautiful, flavorful moisture just runs out onto your cutting board. If you’re curious about different techniques people test out, I saw a fun comparison piece over at The Kitchn that you might find interesting!
Do I need to brine the turkey if I’m using this herb butter method?
That’s a great question if you’re nervous about moisture! Our herb butter application is designed to provide exceptional flavor and create a barrier for juiciness, so a traditional wet brine isn’t strictly necessary here. However, if you want to go the extra mile for the absolute juiciest turkey possible, you can absolutely dry brine it overnight. That means using just the salt and pepper from the recipe (skip the herbs and butter for now) rubbed all over the bird, and letting it sit uncovered in the fridge overnight. It seasons deeply and primes the skin for supreme crispiness!
Nutritional Estimate for This Herb Butter Turkey
I know a lot of you are watching what you eat, even during the holidays, and it’s helpful to have a general idea of what’s on the plate when serving up a big roast turkey. Since we are using simple, natural ingredients—lean meat, fresh herbs, and butter for flavor—this recipe leans toward being a fairly straightforward, protein-packed centerpiece. It certainly beats a lot of the heavy casseroles sometimes served alongside!
Based on a 6-ounce serving of the cooked meat from this recipe, here are the estimated values. Remember, these are just starting points! How much butter you scoop on the outside or how much broth you use in your gravy will change these numbers slightly, which is totally normal when cooking for a crowd.
- Serving Size: 6 oz cooked meat
- Calories: 350
- Protein: 45g
- Fat: 18g (with 8g saturated fat)
- Carbohydrates: 1g
- Sugar: 1g
- Sodium: 450mg
- Cholesterol: 150mg
Just a quick note here: These nutritional estimates are calculated based on the ingredients provided and assume standard portion sizes. When you are serving a big holiday meal, please know that exact values can vary based on the specific cuts of meat, how much moisture is lost during cooking, and any additions you sneak in, like that extra drizzle of maple glaze you might be tempted to add!
Share Your Turkey Success
Well, we made it! You have successfully navigated the most intimidating part of the holiday meal, and now you get to bask in the glory of serving a truly magnificent, juicy, and beautifully browned bird. I so hope that as you carved into that roast turkey, you found yourself smiling because you knew exactly how you achieved that crispy skin.
Here at Taste This Plate, building confidence in the kitchen is my whole mission. When you make this Herb Butter Turkey recipe, you aren’t just feeding your people; you are creating a new reliable kitchen memory! I truly want to know how it went for you and your family’s holiday table.
Please, take a moment after you’ve rested and carved the bird to leave a quick rating. Five stars if it lived up to the hype, but I really want to hear about your experience in the comments below. Did you try the overnight dry brine? Did the kids love the smell of rosemary filling the house? Sharing your success helps the next person who is standing there feeling that same bit of holiday panic!
Let’s keep creating wonderful food memories together. Happy eating, everyone!
PrintUltra Juicy Herb Butter Roasted Thanksgiving Turkey
Create a centerpiece turkey that stays moist and flavorful using a simple herb butter rub and proper roasting technique. This recipe focuses on achieving crispy skin and tender meat for your holiday meal.
- Prep Time: 30 min
- Cook Time: 3 hr 30 min
- Total Time: 4 hr 0 min
- Yield: 10 servings 1x
- Category: Holiday Dinner
- Method: Roasting
- Cuisine: American
- Diet: Low Fat
Ingredients
- 1 whole turkey (12–14 lbs), thawed
- 1 cup unsalted butter, softened
- 1/4 cup fresh rosemary, chopped
- 1/4 cup fresh thyme leaves
- 4 cloves garlic, minced
- 2 tablespoons kosher salt
- 1 tablespoon black pepper
- 1 tablespoon paprika
- 1 lemon, halved
- 1 onion, quartered
- 4 cups chicken or turkey broth
Instructions
- Remove the turkey from its packaging. Remove the neck and giblets from the cavity. Pat the entire turkey skin dry with paper towels; this step is key for crispy skin.
- In a small bowl, combine the softened butter, chopped rosemary, thyme, minced garlic, salt, pepper, and paprika to create the herb butter.
- Gently separate the skin from the breast meat using your fingers, being careful not to tear the skin. Rub half of the herb butter mixture directly onto the breast meat under the skin. Rub the remaining herb butter all over the outside of the turkey skin.
- Place the lemon halves and onion quarters inside the turkey cavity. Truss the legs together with kitchen twine.
- Preheat your oven to 425°F (220°C). Place the turkey on a roasting rack set inside a roasting pan. Pour the broth into the bottom of the roasting pan.
- Roast the turkey at 425°F for 30 minutes to start crisping the skin.
- Reduce the oven temperature to 325°F (160°C). Continue roasting until a meat thermometer inserted into the thickest part of the thigh registers 165°F (74°C). For a 14-pound turkey, this usually takes about 3 to 3.5 hours total cooking time. Baste the turkey with pan juices every 45 minutes.
- Once the turkey reaches 165°F, remove it from the oven. Tent it loosely with foil and let it rest for at least 30 minutes before carving. This resting period allows the juices to redistribute, making the meat moist.
Notes
- For an extra juicy turkey, consider dry brining the turkey overnight in the refrigerator after applying the initial salt and pepper.
- If the turkey skin browns too quickly during the initial high-heat roasting, loosely cover the breast area with aluminum foil.
- Use the pan drippings to make a simple gravy to serve alongside your moist turkey.
Nutrition
- Serving Size: 6 oz cooked meat
- Calories: 350
- Sugar: 1
- Sodium: 450
- Fat: 18
- Saturated Fat: 8
- Unsaturated Fat: 10
- Trans Fat: 0
- Carbohydrates: 1
- Fiber: 0
- Protein: 45
- Cholesterol: 150