
You know that feeling, right? You crush your workout, you eat clean all day, and then BAM—you are staring down a massive craving for something rich, creamy, and oh-so-sweet. It feels like the kitchen is sending you a challenge! For years, I thought sticking to fitness goals meant saying goodbye to desserts like cheesecake. But that’s just not how we do things here at Taste This Plate. We believe that making memories—even the small, everyday ones—should involve delicious food without the stress, and that includes guilt-free indulgence.
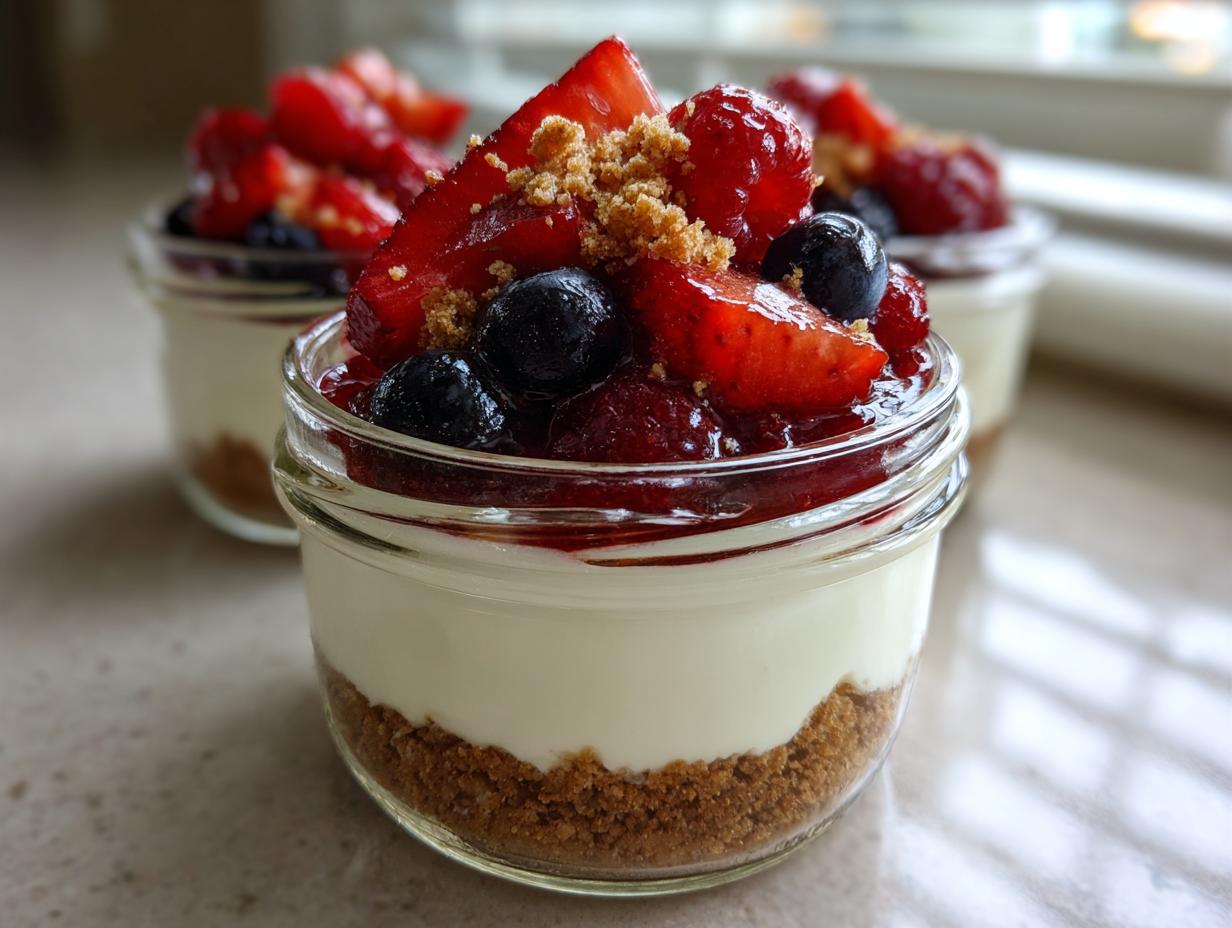
That’s why I’m sharing my ultimate **Protein Cheesecake** hack today: No-Bake Cheesecake Jars. Forget fussy oven temperatures and cracked tops. Preparing this recipe in individual jars makes portion control easy and the cleanup practically nonexistent. It’s simple, speedy, and delivers unbelievable flavor, keeping us right on track with our nutrition without sacrificing that satisfying, creamy experience we all love.
- Why This No-Bake Protein Cheesecake Jars Recipe Works (Simple Ingredients, Extraordinary Meals)
- Gathering Ingredients for Your High Protein Cheesecake
- Step-by-Step Instructions for No Bake Protein Dessert Jars
- Tips for Success with Your Macro Friendly Cheesecake
- Storage and Meal Prep Dessert Protein Options
- Variations: Making Baked Protein Cheesecake or Fluffy Protein Mousse
- Serving Suggestions for Your Guilt Free Cheesecake
- Frequently Asked Questions About Protein Cheesecake
- Share Your Favorite Protein Cheesecake Creations
Why This No-Bake Protein Cheesecake Jars Recipe Works (Simple Ingredients, Extraordinary Meals)
When you’re trying to hit your fitness goals, the absolute last thing you want is a dessert that tastes like sandy chalk or watered-down frosting. That’s the risk with so many **Protein Cheesecake** attempts out there! My mission here is always to deliver extraordinary meals using simple ingredients, just like in my other favorites, like the cottage cheese chicken salad. That’s why I’m sharing my ultimate **Protein Cheesecake** hack today: No-Bake Cheesecake Jars. We skip the oven entirely, which cuts down on a ton of hassle and potential texture mistakes.
- It sets up perfectly in the fridge, giving you that true, velvety mouthfeel.
- It uses whole food bases like cottage cheese for a huge protein punch—we’re looking at 30 grams per jar, which is fantastic!
- It’s portion-controlled right from the start, meaning no accidental overeating later.
It’s a win-win for flavor and macros!
Quick Prep Time for Your Easy Protein Dessert Jars
Listen, I know your time is precious. If a recipe takes longer than an hour, I probably haven’t perfected it yet for our weeknight schedule! This entire mixture comes together in about 15 minutes of active work. Seriously! Throw everything in the blender, pulse until smooth, and you are done with the effort. Pop it in the fridge, and that’s it. It’s the perfect **Simple Protein Sweet Treat** for when you need something fast.
Achieving Creamy Protein Recipe Texture Without Baking
If you’ve ever made a fitness dessert only to find it gritty after it cooled, I hear you! That texture issue is totally solved here. We are leveraging the power duo: non-fat Greek yogurt and low-fat cottage cheese. When these two get properly blended—and I mean *completely* smooth—they mimic the density of cream cheese better than anything else. It creates that rich, dense, yet unbelievably creamy **Protein Cheesecake** filling we all crave.
Gathering Ingredients for Your High Protein Cheesecake
Okay, let’s talk about what goes into these jars because the ingredients are what make this recipe such a game-changer for hitting your protein goals. We are keeping it super simple, focusing on what gives us volume and texture without adding a ton of fat or sugar. You’ll notice we rely heavily on dairy bases here to lock in that creaminess. You need one cup of low-fat cottage cheese, one cup of plain non-fat Greek yogurt, and that crucial half-cup of vanilla whey or casein protein powder. Don’t forget your fourth cup of sweetener, vanilla extract, and the lemon zest if you want that little pop of brightness!
Ingredient Notes and Substitutions for Protein Cheesecake
The protein powder choice is important, trust me on this one. If you want a result that sets up thicker, almost like a firm *fluffy protein mousse*, go for casein powder. Whey works great and gives a wonderful flavor, but it tends to stay naturally a little softer. When we blend the cottage cheese—which is the secret to making this a fantastic **Cottage Cheese Cheesecake**—make sure your sweetener is powdered erythritol or monk fruit blend. Granulated sweeteners just won’t dissolve properly without baking, and we don’t want any crunchiness in our smooth filling!
For the crust, we keep it basic: just a quarter-cup of graham cracker crumbs mixed with just one tablespoon of melted light butter or coconut oil. This mix is what helps hold everything together down at the bottom.
Step-by-Step Instructions for No Bake Protein Dessert Jars
Getting these **Protein Cheesecake** jars ready is honestly faster than deciding what to watch on TV later. We’re using the provided instructions, but I’ll overlay my own home-cook tips for success, especially around getting that perfectly smooth texture. Remember, the biggest pitfall in any fitness dessert made with dairy is grittiness, and we are fighting that with aggressive blending!
First, ensure you have four small jars or four ramekins lined up. We’re moving fast here. Once the filling is ready, it needs to set, so make sure you’re ready to transfer them to the fridge right after layering.
Preparing the Crust Layer for Your Protein Cheesecake Jars
We don’t need to bake anything, thank goodness! Grab a small bowl and mix your graham cracker crumbs—or low-carb ones if you prefer—with that tablespoon of melted light butter or coconut oil. You want the crumbs evenly moistened, not swimming in fat. Just enough liquid to make them stick together when you squeeze a bit. Divide this mixture evenly among the bottom of your four jars. Use the back of a small spoon or your fingers to press it down firmly to create a nice, even base layer for your dessert.
Blending the Creamy Protein Cheesecake Filling
This is where the magic happens. Everything soft—cottage cheese, Greek yogurt, protein powder, sweetener, vanilla, and zest if you’re using it—goes straight into your food processor, or a high-powered blender if that’s what you have. Do not rush this part! You need to blend it until it’s absolutely, totally, 100% smooth. Stop the machine frequently—maybe every 30 seconds—and use a spatula to scrape down the sides. I mean it, scrape ALL the sides. If you leave lumps of cottage cheese, you’ll have a gritty **Protein Cheesecake**, and nobody wants that! Once it looks like velvet, spoon that mixture right over your crusts. Then, those jars go into the fridge for at least three hours to firm up. Seriously, don’t skip that chilling time!
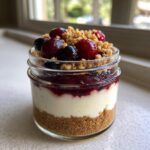
After chilling, top them with fresh berries. If you need more easy ideas like this, I posted some great crockpot chicken and rice recipes you might enjoy too. And for more inspiration on simple, delicious treats, check out this two-ingredient cheesecake idea!
Tips for Success with Your Macro Friendly Cheesecake
Even though this is a no-bake recipe, getting that perfect, satisfying mouthfeel in your **Macro Friendly Cheesecake** still takes a little finesse. We want indulgence without the guilt, and that means paying attention to the little things that prevent dryness or that unwelcome grainy texture.
One of my biggest non-negotiables for maximum creaminess is the blending step. If you run your food processor for a full minute and you *still* see tiny white flecks floating around, stop, scrape the sides, and keep going! Protein powder loves to hide in the corners, and those little dry pockets are what ruin an otherwise perfect **Low Calorie Cheesecake**. I’m telling you, aim for something that looks exactly like thick pudding before you layer it.

When it comes to achieving that classic cheesecake flavor, don’t skip the optional lemon zest. It’s such a small measurement, but that tiny bit of acid wakes up all the sweetness from the vanilla protein powder and balances the dairy tang. It makes the whole thing taste richer than it actually is—a great trick for any **Simple Protein Sweet Treat**!
If you’re prepping these for the week, make sure the lids aren’t sealed too tightly immediately after you blend them. Let them sit on the counter for about 15 minutes before you cover them and chill. This lets any residual air escape easily. For more recipe development insights, I always love reading up on how others tackle baked versions; check out this incredible baked protein cheesecake recipe for comparison!
Also, if you are looking for another unbelievably fluffy treat that really focuses on technique, you must try out my gooey cinnamon rolls recipe. Sometimes science just needs a little time to fully integrate everything perfectly, whether you’re baking or just blending!
Storage and Meal Prep Dessert Protein Options
This is one of my favorite parts about making things in jars—they solve the weeknight scramble! Since these are no-bake, they hold up beautifully, which makes them the perfect **Meal Prep Dessert Protein** staple. You can get so much done ahead of time, which just means more relaxing time later, right?
I’ve tested how long this **Protein Cheesecake** filling lasts—and frankly, the texture stays amazing. You can safely store these covered tightly in the refrigerator for up to four full days. That gives you a guaranteed great dessert waiting for you after work on Monday, Tuesday, Wednesday, and Thursday! They never seem to last that long in my house, especially once the kids discover them, but the recipe notes confirm that dairy-based, high-sugar mixtures like this keep well for about four days.
If you’re prepping meals often, you know how much time it saves to have healthy snacks or desserts ready to grab. These are fantastic for that. For more easy ways to prep your meals ahead of time, you might want to check out my guide to easy meal prep egg bites; they work on the exact same principle of making a whole week’s worth of food in one easy session!
If you are looking at other people who have mastered the jar concept, Carla has a great method for no-bake jars that you might find interesting for future flavor variations. You can read more about her version here. No matter how you customize them, having those ready-to-go servings stocked up is the definition of being an intuitive, organized cook!
Variations: Making Baked Protein Cheesecake or Fluffy Protein Mousse
I love that this base recipe is so versatile. While I absolutely push the no-bake jars because they are effortless, sometimes you just want that classic baked dessert experience, right? Adaptability is everything in a home kitchen!
If you’re dreaming of a rich, decadent **Baked Protein Cheesecake**, you can definitely use this blend as your starting point. You would need to add a little more binder; usually, one extra egg yolk helps give it structure when heating. You’d mix that in gently along with the lemon zest. Pour the mixture into a springform pan lined with parchment—don’t forget to use that cake goop!—and bake it low and slow until it just sets in the center. For a great guide on the techniques needed to prevent cracks in baked fitness desserts, take a look at this detailed ultimate healthy baked recipe. It really makes a difference!
On the flip side, if you want something lighter and airier for a quick fix—maybe a **Fluffy Protein Mousse** on a warm evening—you can thin this jar filling out significantly. The key here is adding a bit of extra liquid, like a tablespoon or two MORE of unsweetened almond milk or even a splash of water, and using casein protein if you haven’t already purchased it. Blend a little longer until it feels lighter and looser. Don’t chill it as long either; just 30 minutes in the fridge will help it firm up just enough to scoop, turning it into a dreamy, airy cloud.
Serving Suggestions for Your Guilt Free Cheesecake
The best part about making a great base recipe like this **Guilt Free Cheesecake** is deciding how to dress it up! Since the filling is already so rich and creamy from the Greek yogurt and cottage cheese blend, you really don’t need much else to make it feel like a restaurant-worthy dessert. Minimalism can be unbelievably satisfying, especially when you’re focused on macros.
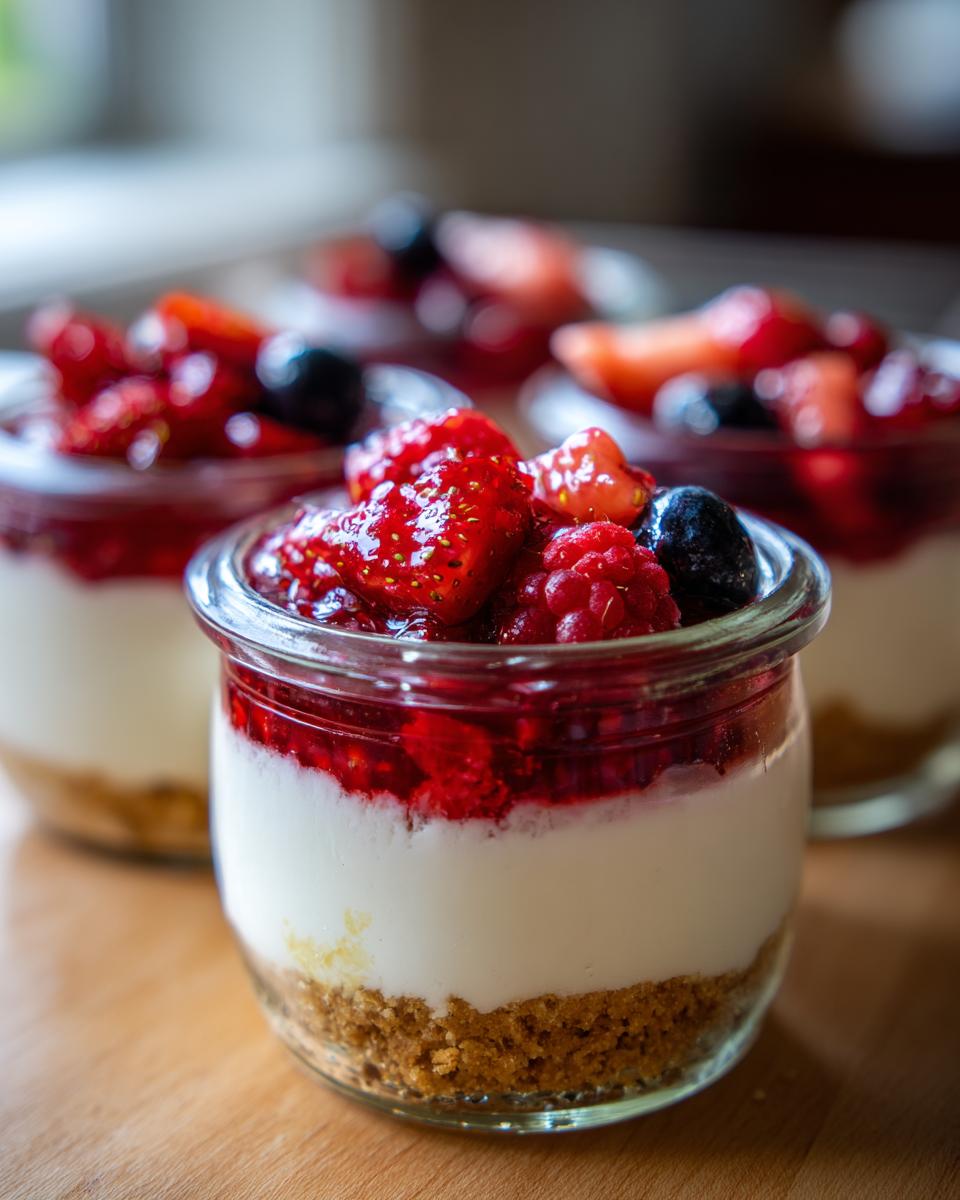
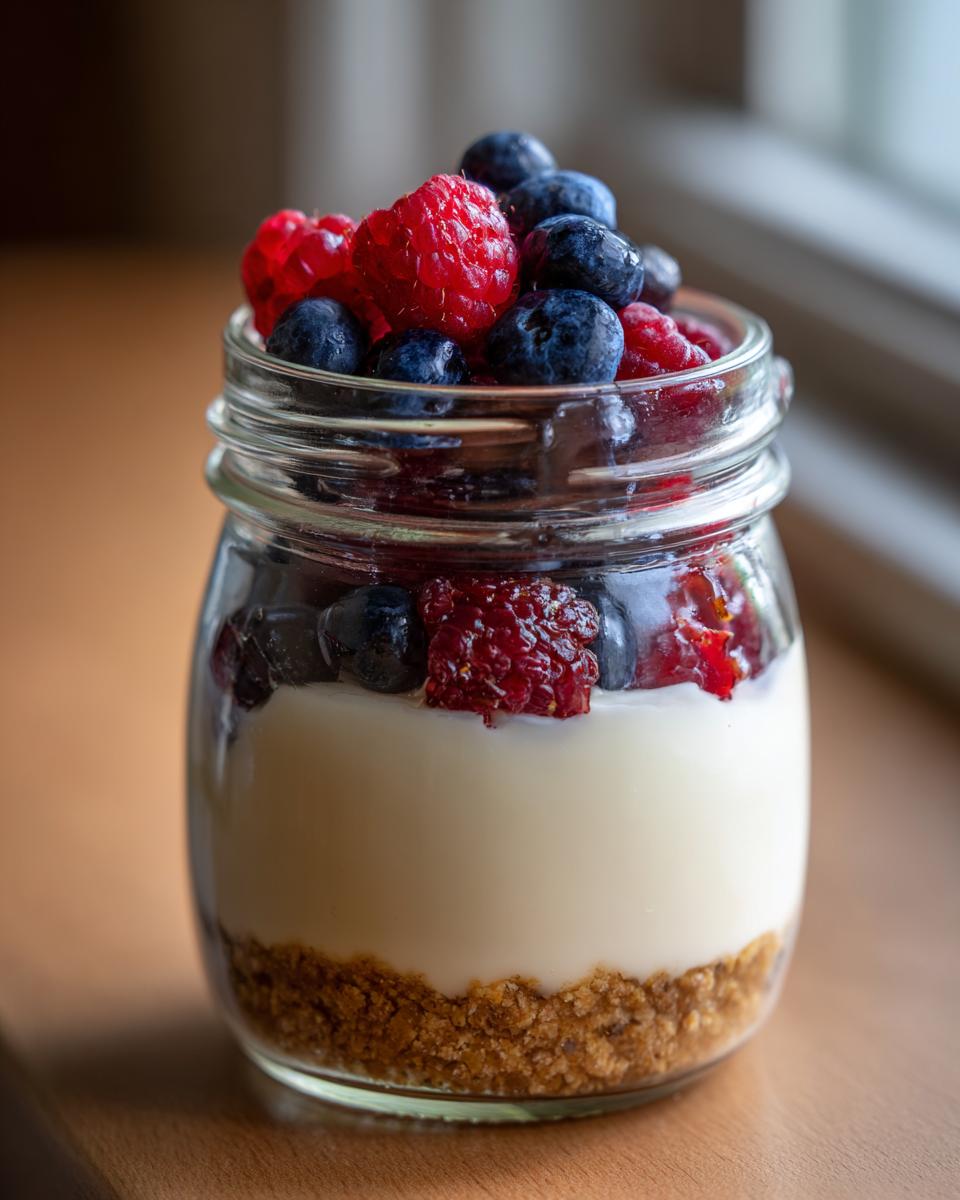
My first go-to suggestion, and the one I use most often for my family, is fresh seasonal berries. Strawberries, raspberries, or even a sprinkle of blueberries piled high on top adds beautiful color, a nice fresh tang, and a little needed fiber. They contrast perfectly with the sweet, smooth filling.
If you’re craving something that tastes more decadent, try adding a drizzle of high-quality sugar-free syrup. You can find great caramel or chocolate versions now that really boost that **Low Sugar Cheesecake Alternative** flavor profile while keeping the calories down. If you want a richer drizzle, I have a simple method for homemade chocolate sauce that you can check out here: chocolate sauce for ice cream. You only need a teaspoon or two over the top because the filling is already so satisfying!
Finally, for a little bit of crunch that mimics the traditional crust, try grinding up a few chopped nuts like pistachios or almonds over the top just before serving them cold from the fridge. It’s all about texture, and these simple additions make your **Easy Protein Dessert Jars** feel like a true indulgence every single time.
Frequently Asked Questions About Protein Cheesecake
I always get asked questions after I share this recipe because people are worried it won’t taste as good as the real, full-fat versions. Don’t worry! We’ve designed these jars to work perfectly with macro-friendly ingredients. Here are some of the things I hear most often when people try to adapt this **Protein Cheesecake** for their own needs.
Can I make this Protein Cheesecake without cottage cheese?
That’s a great question, and it really gets to the heart of what makes these jars work! The cottage cheese is key because it helps break down into that super-creamy base when blended, providing structure without adding fat like actual cream cheese would. If you absolutely cannot use cottage cheese, you *can* skip it, but you’ll need to use extra thick Greek yogurt—maybe two full cups total—and you might need slightly less protein powder to compensate for the increased liquid volume. Just know that the texture will lean a bit more toward a light **Greek Yogurt Dessert** mousse than a dense cheesecake, but it will still be delicious!
How much protein is in one serving of this Low Calorie Cheesecake?
This is probably my favorite stat about this recipe! When you divide this mixture into the four intended servings, each jar packs a whopping 30 grams of protein. That’s right, thirty! It’s a full meal’s worth of protein in a tiny, delicious package. This is why I call it a true **Low Calorie Cheesecake** alternative—it satisfies that sweet craving while actively supporting your fitness goals, unlike desserts that just push you over your macros.
If you want more insight into how to use Greek yogurt in savory dishes, I have a fantastic chicken salad recipe that uses it to replace mayo. It’s astonishing how versatile Greek yogurt is!
Share Your Favorite Protein Cheesecake Creations
Well, we did it! We made rich, creamy, macro-friendly **Protein Cheesecake** without turning on the oven. I truly hope these little jars make dessert time the easiest, most satisfying part of your week. Now that you have the blueprint, I’d absolutely love to hear what you did with it!
This kitchen community is all about sharing what works, so please, please leave a comment below. Did you try swapping the vanilla protein for chocolate? Maybe you skipped the graham crackers entirely? I’m always looking for new ways to tweak these kinds of recipes, and hearing about your successful ingredient swaps is truly the best part for me. Remember that little contact page I put together? If you have a picture of your gorgeous jars—maybe topped with sliced almonds or smothered in sugar-free peanut butter—send it my way! You can reach us easily through our contact form. I’d love to see how you brought this **Creamy Protein Recipe** to life.
Thank you again for stopping by my table. Knowing that you’re out there making delicious, healthy food without stress is exactly why Kate started this whole thing. Happy cooking, and I’ll see you in the next recipe!
PrintCreamy No-Bake High Protein Cheesecake Jars
Make satisfying, macro friendly dessert jars that taste like real cheesecake. This easy, no-bake recipe uses Greek yogurt and cottage cheese for a high protein count, perfect for meal prep or a guilt-free sweet treat.
- Prep Time: 15 min
- Cook Time: 0 min
- Total Time: 3 hr 15 min
- Yield: 4 servings 1x
- Category: Dessert
- Method: No-Bake
- Cuisine: American
- Diet: Low Fat
Ingredients
- 1 cup low-fat cottage cheese
- 1 cup plain non-fat Greek yogurt
- 1/2 cup vanilla whey or casein protein powder
- 1/4 cup powdered erythritol or preferred sweetener
- 1 teaspoon vanilla extract
- 1/4 teaspoon lemon zest (optional, for brightness)
- 1/4 cup graham cracker crumbs (or low-carb alternative)
- 1 tablespoon melted light butter or coconut oil
- Fresh berries, for topping
Instructions
- Prepare the crust layer: In a small bowl, mix the graham cracker crumbs with the melted light butter or coconut oil until the crumbs are evenly moistened.
- Divide the crust mixture evenly among four small jars or ramekins. Press the mixture down gently to form the base layer.
- Prepare the cheesecake filling: Place the cottage cheese, Greek yogurt, protein powder, sweetener, vanilla extract, and lemon zest (if using) into a food processor or high-powered blender.
- Blend the mixture until it is completely smooth and creamy. Stop and scrape down the sides as needed. You want no lumps remaining.
- Taste the mixture and add more sweetener if you prefer it sweeter.
- Spoon or pipe the cheesecake filling over the crust layer in each jar, dividing it equally. Smooth the tops.
- Cover the jars and place them in the refrigerator to chill and set for at least 3 hours, or until firm.
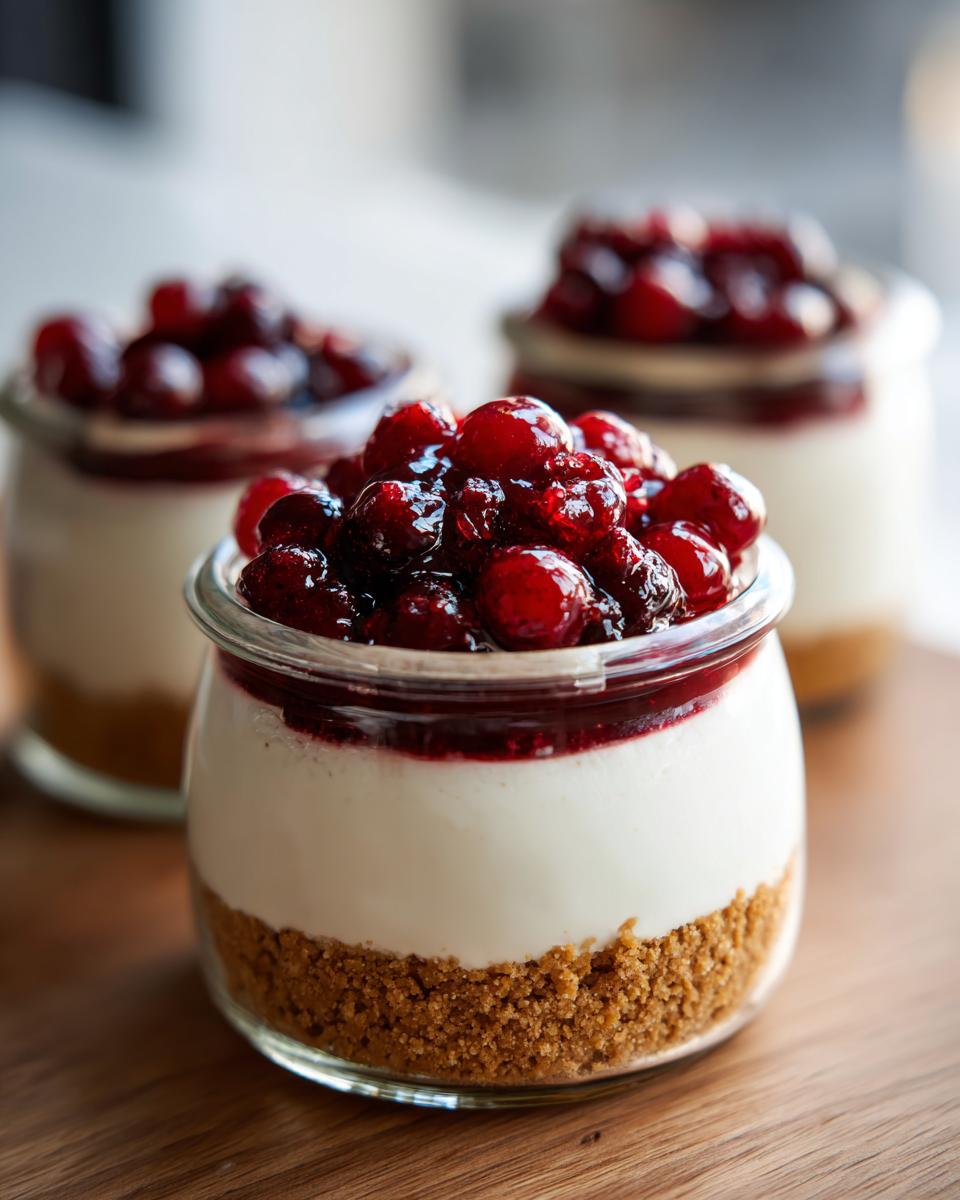
- Before serving, top each jar with fresh berries or a sugar-free jam.
Notes
- For a thicker, more mousse-like texture, use casein protein powder, as it absorbs more liquid.
- If you do not have a food processor, use an immersion blender and ensure your cottage cheese is very smooth before blending.
- This recipe is excellent for meal prep; it keeps well in the refrigerator for up to 4 days.
- To make this a ‘Low Sugar Cheesecake Alternative,’ use a sugar-free sweetener and sugar-free graham crackers for the crust.
Nutrition
- Serving Size: 1 jar
- Calories: 240
- Sugar: 6
- Sodium: 280
- Fat: 5
- Saturated Fat: 2
- Unsaturated Fat: 3
- Trans Fat: 0
- Carbohydrates: 18
- Fiber: 1
- Protein: 30
- Cholesterol: 15