
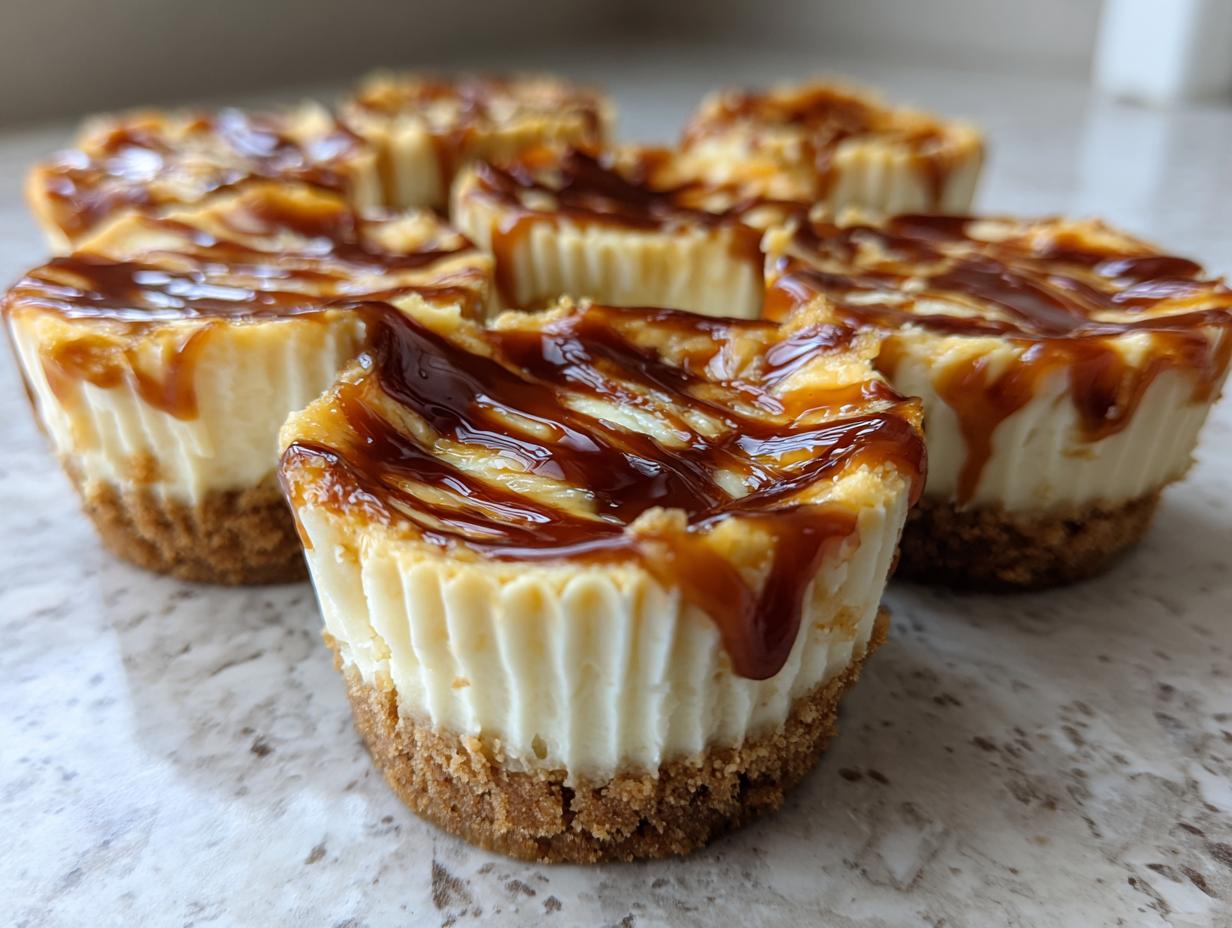
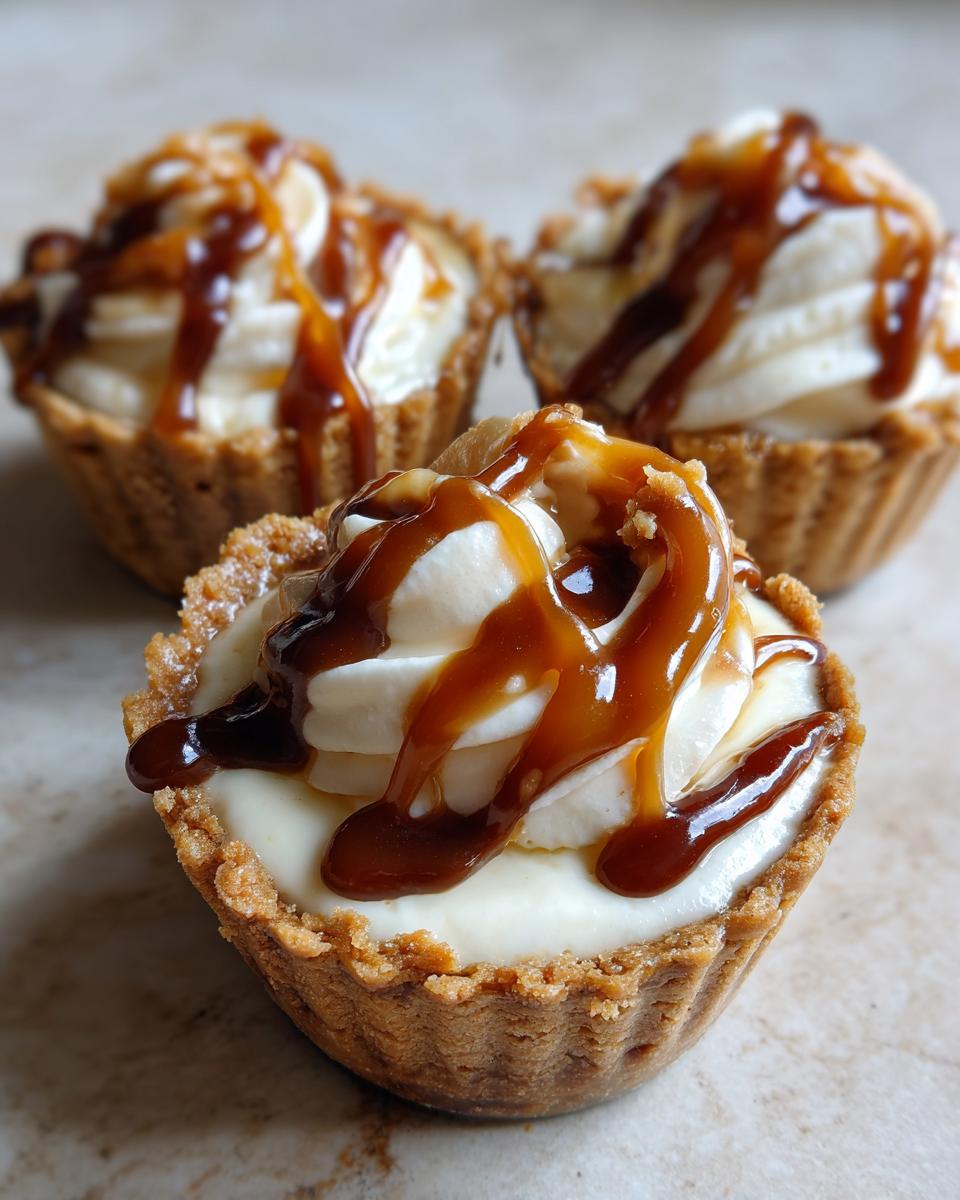
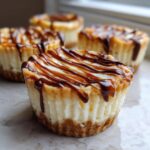
I don’t know about you, but sometimes I just need a dessert that looks like I spent all day fussing over it, but honestly, only took maybe twenty minutes of active work. When those cravings hit—and trust me, they hit hard when that spiced cookie butter flavor calls—I turn straight to these incredible, individual **cookie butter cheesecake cups**.
This recipe is pure magic because it’s completely no-bake. Seriously, toss the oven mitts aside! This is exactly the kind of simple, trustworthy home cooking Kate Reilly is always talking about here at Taste This Plate. We want delicious, memorable things on the table without the stress, and these creamy little delights check every single box. They are so easy to pull together, chill up nicely, and feel instantly celebratory. You’ll have the richest, dreamiest dessert ready to go without even turning on a burner!
If you love rich, creamy texture paired with that irresistible spiced crunch, you absolutely need to try making a batch of these easy no-bake Biscoff treats. They are everything good about cheesecake, made simple!
- Why You Will Love These Easy No-Bake Cookie Butter Cheesecake Cups
- Gathering Ingredients for Your Cookie Butter Cheesecake Cups
- Step-by-Step Instructions for No Bake Cookie Butter Cheesecake Cups
- Tips for Perfect Cookie Butter Cheesecake Cups Every Time
- Ingredient Notes and Simple Substitutions
- Serving Suggestions for Your Party Dessert Cups
- Storage and Reheating for Cookie Butter Cheesecake Cups
- Frequently Asked Questions About No Bake Cheesecake Cups
- Sharing Your Creamy Cookie Butter Treat
Why You Will Love These Easy No-Bake Cookie Butter Cheesecake Cups
Whenever I show up at a potluck with these cups, they disappear first. And honestly, I don’t blame people! They look fancy—nestled in their little paper liners like tiny jewels—but the reality is, they rock because they require almost zero effort. That’s the magic of simple desserts, right? You get maximum payoff for minimum fuss.
Here’s why these **cookie butter cheesecake cups** are about to become your new go-to when you need something delicious, fast:
- They are gloriously **no-bake**. We are keeping the kitchen cool and the process sweet!
- They set up fast enough that you can bake them (or rather, chill them!) the same day you decide you need a treat.
- You get that perfect, satisfying crunch from the crust balancing the super creamy cheesecake dessert filling inside.
Quick Assembly for Busy Schedules
This is the major selling point for me! When I’m running out the door to an event or just need a sweet moment at the end of a long week, I reach for this recipe. We aren’t waiting around for anything to bake or cool down from the oven; the most time-consuming part is just making sure the cream cheese is softened enough. Seriously, this is one of my favorite no oven cheesecake fixes.
Perfect Individual Cheesecake Portions
I love making a whole cake, I really do, but sometimes you just don’t want to cut it, deal with messy slices, or worry about leftovers going stale. These **Individual Cheesecake Portions** solve that problem completely! They are perfectly portioned—elegant, easy to serve, and no extra plates or forks required if you’re doing a casual gathering. Everyone just grabs their own little cup of heaven.
Gathering Ingredients for Your Cookie Butter Cheesecake Cups
If you know me, you know my philosophy is to keep the pantry stocked with simple ingredients that pull double duty. That’s the great thing about these cookie butter cheesecake cups; you probably have half of this list sitting around right now! We are focusing on accessible items—no need for specialty store runs, I promise. The result? An absolutely extraordinary, rich dessert.
The key here, and this goes for any creamy cheesecake dessert you make, is temperature. Your cream cheese needs to be fully softened—not melted, just soft enough that it won’t fight you when the mixer starts up. Also, make sure you scoop out the cookie butter for the filling *and* set aside a little extra for that beautiful finishing drizzle!
You can see the full breakdown below, but if you want an extra punch, swap out the graham crackers in the crust for crushed Biscoff cookies. Trust me on this one; that level of flavor is worth it. For more simple baking inspiration, check out my recipe for easy pecan pie bark.
Crust Components
- 1 1/2 cups graham cracker crumbs (or Biscoff cookie crumbs for extra flavor!)
- 1/4 cup granulated sugar
- 6 tablespoons unsalted butter, melted
Creamy Filling for Cookie Butter Cheesecake Cups
- 16 ounces cream cheese, softened to room temperature—this is non-negotiable for a smooth result!
- 1 cup powdered sugar
- 1 teaspoon vanilla extract
- 1/2 cup heavy whipping cream
- 1/2 cup cookie butter (like Biscoff or Speculoos spread)
Topping and Flavor Boosters
- Extra cookie butter, warmed slightly for drizzling
Step-by-Step Instructions for No Bake Cookie Butter Cheesecake Cups
Alright, this is where we turn simple ingredients into those gorgeous, layered **cookie butter cheesecake cups** everyone craves! Because this is a no-bake recipe, structure is everything. We need that crust to be rock-solid before we add the creamy filling, or things get messy fast. Remember, we aren’t using an oven here, so we rely on the chill factor to set everything perfectly. I’ve included a link to my favorite no-bake tiramisu cheesecake for more chilling inspiration!
Take your time, especially when mixing the filling. If you overwork the batter once the whipped cream is in, you’ll deflate all that lovely air we just incorporated. We want airy, light texture, not dense goo!
Preparing the Crunchy Cookie Crust Base
- First things first, let’s tackle the base. In a standard bowl—no need for fancy equipment here—toss together your cracker (or Biscoff!) crumbs and that 1/4 cup of sugar.
- Pour in the melted butter and mix it up until everything looks evenly damp. It should feel like wet sand ready to be molded.
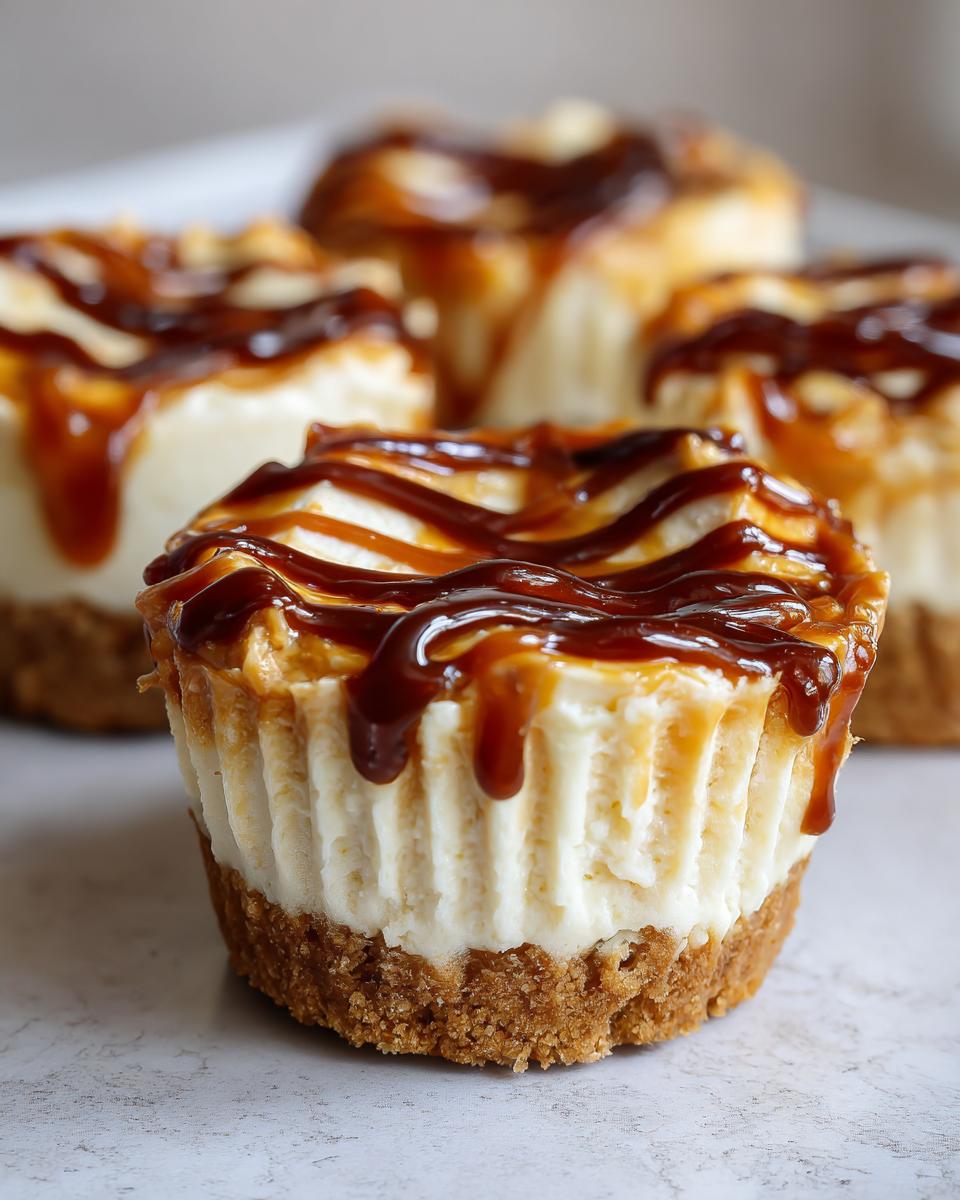
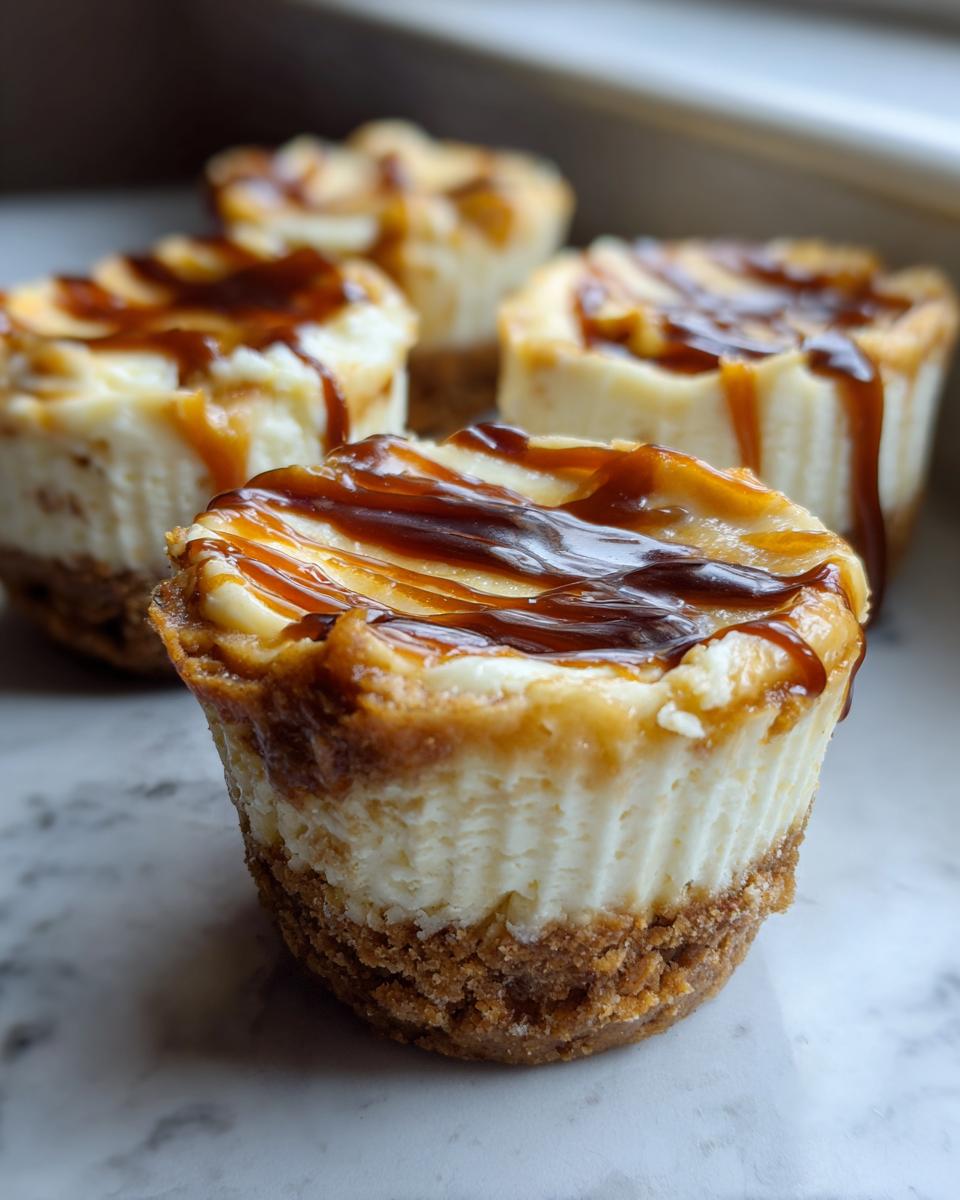
- Now, line your 12 muffin cups with paper liners. This makes serving these **mini cheesecake cups** so much cleaner later on! Divide that crumb mixture evenly among the liners.
- This next step is crucial for structure: firmly press the crumbs down into the bottom of each cup. Use the bottom of a clean shot glass or the back of a spoon. They need to be packed tight! Pop the whole tray into the freezer while you whip up the filling. A quick 10 minutes in the freezer firms them right up.
Creating the Creamy Cookie Butter Cheesecake Filling
- Time for the star of the show—the cream cheese! Make sure it’s softened, then beat it in a large bowl with your electric mixer until it’s fluffy and completely smooth. We are hunting for zero lumps here.
- Add your powdered sugar and vanilla extract, beating just until that gets incorporated nicely. Scrape down the sides of the bowl as you go.
- Here’s where we keep things light: In a separate, clean bowl, whip your heavy whipping cream until soft to medium peaks form. Don’t go all the way to stiff peaks—we want a gentle texture.
- Now, gently fold that whipped cream into your cream cheese mixture. This is where you create the air pockets! Use a spatula and cut down the middle, scooping up and over. Stop folding the second it looks combined. Overmixing deflates the cream, which means a sad, heavy cheesecake.
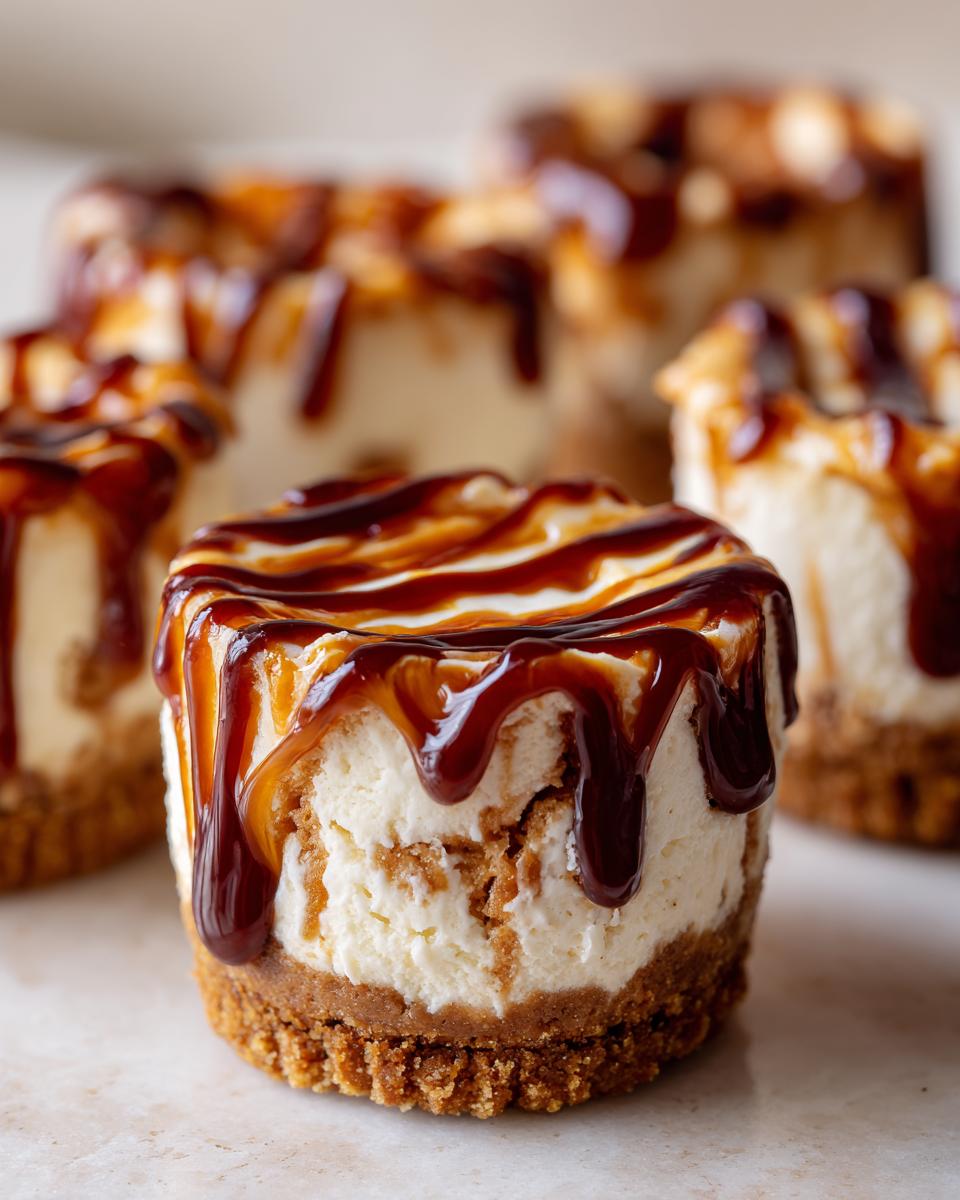
- Finally, take your 1/2 cup of cookie butter and quickly fold it in. My personal tip here to get that pretty marbling effect—the one you see in all the best photos—is to stop folding when you still see pale swirls of the cream cheese peeking through. Don’t blend it completely smooth! Check out this amazing look on other irresistible dessert recipes for inspiration.
Assembling and Chilling the Cookie Butter Cheesecake Cups
- Take your chilled crusts out of the freezer. Spoon or pipe that dreamy filling right over the top of your crusts, dividing it evenly into the 12 cups.
- Return the tray of filled **Mini Cheesecake Cups** to the refrigerator. They need a good, long chill to set up—I insist on at least 4 hours. If you can leave them overnight, even better! If they aren’t firm, they won’t hold their lovely shape when you try to peel off the liner later.
- Once they are perfectly firm, it’s drizzle time! Warm up that extra spoonful of cookie butter for about 15 seconds in the microwave until it flows easily off a spoon. Drizzle generously over the top of each perfect little treat.
Tips for Perfect Cookie Butter Cheesecake Cups Every Time
Even though this is a straightforward, no-bake recipe, a couple of little tricks can elevate these **cookie butter cheesecake cups** from great to absolutely show-stopping. I learned early on that preparation makes all the difference, especially when dealing with ingredients like cream cheese that can be stubborn!
We’re aiming for that super smooth, rich texture that makes this an unforgettable favorite. If you want to see how to make sure your crust stays crisp and your filling is flawless, check out my guide on making a creamy cheesecake that never cracks—the principles are the same, even without the oven!
Achieving the Best Creamy Cheesecake Dessert Texture
The single fastest way to ruin a batch of **creamy cheesecake dessert** is using cream cheese that’s too cold. It just won’t blend smooth, and you end up with those distracting little lumps, even with a powerful mixer. Before you start, make absolutely sure your 16 ounces of cream cheese has been sitting out for at least an hour. It should yield slightly when you poke it gently.
And remember what I mentioned back in the instructions about the whipped cream? Don’t get greedy when you fold everything together! Once you see those beautiful streaks of cookie butter mingling with the white filling, stop mixing immediately. Overdoing it blends the colors out and knocks the air right out of the filling we worked so hard to whip in.
Mastering the Cookie Butter Drizzle
That final drizzle of melted cookie butter is what really makes these desserts pop, but if the butter is too thick, it just sits in a sad dollop on top. If it’s too thin, it soaks right into the cheesecake layer.
The secret is a quick hit in the microwave. Take the amount you need for drizzling—maybe a couple of tablespoons—and microwave it for just 10 to 15 seconds on medium power. You want it runny enough to coat the back of a spoon easily and flow off when you tilt it. That slight warmth contrast against the cold cheesecake is amazing, and it solidifies just enough as it hits the filling to look perfectly professional!
Ingredient Notes and Simple Substitutions
The beauty of these **cookie butter cheesecake cups** is that they are surprisingly flexible, even though they are so decadent! I always aim to use ingredients you can grab easily at your regular grocery store, but sometimes substitutions just make sense, or maybe you’re out of one thing!
Let’s talk about the crust first. While many recipes call for basic graham crackers—and those work perfectly fine, creating a classic sweet-salty base—I really, really encourage you to try crushed Biscoff cookies if you can find them. It instantly amps up that spiced flavor right from the bottom layer. It doubles down on the theme, and frankly, it’s worth the minor extra effort to crush them up.
When you’re purchasing your cookie butter spread, just make sure you grab one of the recognizable brands, like Lotus Biscoff or Speculoos. The consistency is usually just right for mixing into the batter and then melting down for that gorgeous finishing drizzle later. If your cookie butter seems super oily or separates right out of the jar, you might want to stir it really well before you measure it out. We want creamy, not greasy, for these individual dessert portions!
Serving Suggestions for Your Party Dessert Cups
These **party dessert cups** look so fantastic all by themselves, but if you’re serving them at a big gathering, sometimes a little extra flair helps them shine even more! Since the flavor profile is so rich and spiced, we want to keep the accompaniments light and simple so they don’t compete with that amazing cookie butter flavor.
For a beautiful aesthetic, serve these chilled cups on a tiered platter. If you want to add a textural element, sprinkle a few finely chopped toasted pecans right on top of the drizzle—that little bit of crunch works wonders! If you’re looking for something savory to balance the sweetness on your dessert table, you absolutely must try my recipe for the easy Neiman Marcus dip. It’s my favorite potluck staple!
Storage and Reheating for Cookie Butter Cheesecake Cups
Since these **cookie butter cheesecake cups** are a no-bake dessert, storage is super straightforward, which is another reason they are fantastic for making ahead! The main goal when storing them is keeping that cream cheese filling perfectly chilled and firm.
You should absolutely plan to make these ahead of time. They taste even better the next day once everything has had time to really meld and set up properly. I usually aim to prepare them the day before a party. The general rule I stick to is that these **simple cheesecake bites** will keep beautifully in the refrigerator for up to 4 days. Make sure they are in an airtight container, though! You don’t want them absorbing any weird fridge smells.
Now, can you freeze them? Yes, you certainly can, but you have to be careful with the texture. Freezing can sometimes make the cream cheese filling a little grainy when it thaws completely, especially if you don’t thaw it slowly. If you do decide to freeze these **individual cheesecake portions**, make sure they are completely solid first. Place them in a freezer-safe container, perhaps with a layer of plastic wrap between tiers so they don’t stick. You’ll want to transfer them to the refrigerator and let them thaw overnight before you plan to serve them warm or drizzled. Don’t even think about trying to reheat these; they are meant to be served cold and creamy!
Frequently Asked Questions About No Bake Cheesecake Cups
I know that even the simplest recipe can bring up a few random questions, especially when you’re swapping out ingredients or trying to fit a dessert into a busy schedule! I’ve gathered some of the things I get asked most often about these fantastic **No Oven Cheesecake** cups so you can feel totally confident heading into the mixing bowl. We don’t want any guesswork when making a great Quick Cheesecake Recipe.
These are the best kinds of treats because they are foolproof when you know the right little secrets. If I haven’t covered what you need to know, please feel free to drop a question below—I love hearing how you customized your own batch of this creamy dessert! If you are looking for more simple, make-ahead fun, you must check out my guide on easy no-bake Oreo balls.
Can I use a different cookie for the crust in these cookie butter cheesecake cups?
Oh, absolutely! While I strongly recommend using crushed Biscoff cookies if you want that intense cookie butter flavor base for your **cookie butter cheesecake cups**, you definitely have options if you’re running low. Classic graham crackers are always a reliable choice; they give you that standard sweet and slightly salty foundation that works with everything.
If you’re out of graham crackers, vanilla wafers are another fantastic option. They crush up beautifully and give a lighter, sweeter base than the graham crackers do. Just remember, whatever cookie you pick, you need that melted butter to bind it together tightly. We need a solid foundation to support that creamy filling! For more party-ready ideas, see this great recipe over at Pastry With Me.
How far in advance can I make these individual dessert portions?
This is one of the best features of needing **Individual Cheesecake Portions** like this—they are built to be made ahead! They actually taste better after a full night in the fridge because the crust slightly softens and the cookie butter flavor really deepens into the filling.
You can safely keep these refrigerated, covered tightly, for up to four days. Honestly, if they last that long, you’re being much more disciplined than my family is! Just make sure you wait until just before serving to add that final warm drizzle of cookie butter, as cold cheesecake tends to firm up the drizzle too quickly if it sits too long in the fridge after topping.
Sharing Your Creamy Cookie Butter Treat
Now that you have a tray full of these gorgeous, unbelievably rich **cookie butter cheesecake cups**, I’d absolutely love to hear how they turned out for you! Honestly, seeing your successes is the best part of cooking for me. It proves that anyone, even if you only have 20 minutes of active time, can create something truly memorable for their family or friends.
Did you stick to the graham cracker crust, or did you go all-in with crushed Biscoff cookies like I suggested? Let me know what you thought of that super creamy texture! Please feel free to drop a comment right down below and tell me if you added any twist of your own.
If you made a batch and snapped a photo, tag us on social media! And if you’re looking for quick ways to connect about sharing recipes or if you have any burning questions about substitutions, you can always reach out via the contact page. Happy creating, and I hope these little **cookie butter dessert ideas** bring a little extra joy to your day!
PrintEasy No-Bake Cookie Butter Cheesecake Cups
Create individual, creamy cheesecake cups featuring a crunchy cookie crust and rich cookie butter flavor. This no-bake recipe is simple to assemble and perfect for parties or quick desserts.
- Prep Time: 20 min
- Cook Time: 0 min
- Total Time: 4 hr 20 min
- Yield: 12 servings 1x
- Category: Dessert
- Method: No-Bake
- Cuisine: American
- Diet: Vegetarian
Ingredients
- 1 1/2 cups graham cracker crumbs (or Biscoff cookie crumbs)
- 1/4 cup granulated sugar
- 6 tablespoons unsalted butter, melted
- 16 ounces cream cheese, softened
- 1 cup powdered sugar
- 1 teaspoon vanilla extract
- 1/2 cup heavy whipping cream
- 1/2 cup cookie butter (Biscoff/Speculoos spread), plus extra for drizzling
Instructions
- Prepare the crust: In a medium bowl, combine the graham cracker crumbs, 1/4 cup granulated sugar, and melted butter. Mix until the crumbs are evenly moistened.
- Divide the crust mixture evenly among 12 standard muffin cups lined with paper liners. Press the mixture firmly into the bottom of each liner to form the crust. Place the cups in the freezer while you prepare the filling.
- Make the cheesecake filling: In a large bowl, beat the softened cream cheese with an electric mixer until smooth. Add the powdered sugar and vanilla extract, beating until fully combined and creamy.
- In a separate bowl, whip the heavy whipping cream until medium peaks form. Gently fold the whipped cream into the cream cheese mixture until just combined.
- Gently fold in the 1/2 cup of cookie butter until streaks remain; do not overmix to maintain some marbling.
- Spoon or pipe the cheesecake filling evenly over the chilled crusts in the muffin cups.
- Chill the cheesecake cups in the refrigerator for at least 4 hours, or until firm.
- Before serving, warm a small amount of extra cookie butter slightly (about 15 seconds in the microwave) so it is easily drizzled. Drizzle the melted cookie butter over the top of each cheesecake cup.
- Remove the paper liners before serving these simple cheesecake bites.
Notes
- For a stronger cookie butter flavor, use crushed Biscoff cookies instead of graham crackers for the crust.
- If you do not have paper liners, you can use silicone muffin molds or small clear plastic dessert cups.
- These individual dessert portions keep well in the refrigerator for up to 4 days.
Nutrition
- Serving Size: 1 cup
- Calories: 350
- Sugar: 28g
- Sodium: 210mg
- Fat: 22g
- Saturated Fat: 13g
- Unsaturated Fat: 9g
- Trans Fat: 0.5g
- Carbohydrates: 34g
- Fiber: 1g
- Protein: 4g
- Cholesterol: 65mg