
Sometimes, you just crave that perfect marriage of two amazing desserts, right? That’s exactly what happened when I decided to tackle the tiramisu cheesecake. I wanted the light, fluffy magic of Italy’s favorite coffee dessert combined with the satisfying, silky density of a classic, no-fuss cheesecake. And here’s the best part: we’re skipping the oven entirely! This No Bake Tiramisu Cheesecake is my go-to when I need something that looks incredibly elegant for a dinner party but needs to come together without any oven stress. Trust me, creating a showstopper dessert that tastes this rich and luxurious has never been easier. You can find more amazing desserts we love right over at our dessert collection!
- Why This No Bake Tiramisu Cheesecake is Your New Favorite Dessert
- Gathering Ingredients for Your Tiramisu Cheesecake
- Assembling Your No Bake Tiramisu Cheesecake
- Tips for the Best Tiramisu Cheesecake Results
- Making Variations of the Tiramisu Cheesecake
- Serving Suggestions for Your Elegant Dinner Party Dessert
- Storage and Make Ahead Cheesecake Instructions
- Frequently Asked Questions About Tiramisu Cheesecake
- Nutritional Snapshot of This Mascarpone Coffee Dessert
Why This No Bake Tiramisu Cheesecake is Your New Favorite Dessert
I bake so you don’t have to stress! This tiramisu cheesecake is special because it delivers serious wow-factor without any anxiety. You don’t even have to think about a water bath—it sets up beautifully just chilling in the fridge. It’s the perfect make-ahead option for busy weekends.
- It’s completely no-bake, saving you oven space for other things.
- The mascarpone and espresso layers give it that sophisticated Italian flair.
- It’s sturdy enough to look incredible when you slice it—definitely an elegant dinner party dessert.
Simple Ingredients for a Decadent Tiramisu Cheesecake
Our philosophy here is simple ingredients, extraordinary meals, and this dessert totally proves that point! You don’t need tricky imported goods to pull this off. This tiramisu cheesecake recipe relies on things you probably already have, like cream cheese and a good pound of coffee. We use accessible chocolate wafers for the base, which makes prep lightning fast. It’s honestly the easiest way to make something look like it took days!
Gathering Ingredients for Your Tiramisu Cheesecake
Okay, now that you know how easy this is, let’s talk about what you need to grab from the store. We want every layer of this Italian Inspired Cheesecake to sing, so precision matters here, although don’t stress about specialty items! I’ve broken down the shopping list by what part of the assembly it belongs to, so you can shop efficiently. If you’re looking for other Italian treats, you might check out our recipes for Italian Ricotta Cookies while you’re here!
For the Crust, you’ll need one and a half cups of chocolate wafer crumbs—Oreo crumbs work sensationally if you want a darker, richer base—and six tablespoons of unsalted butter, melted down. Don’t forget a quarter cup of granulated sugar and one teaspoon of instant espresso powder to give that foundation a little coffee kick.
Next up is the Coffee Soak, which is crucial for that authentic tiramisu flavor. You need one cup of strong brewed coffee that’s been cooled completely. I also call for a half cup of Kahlua or coffee liqueur, but honestly, if you aren’t feeling the booze, double up on your strong cold coffee; it adds depth either way.
The Filling is where the magic happens, and we rely on two stars here: sixteen ounces of full-fat cream cheese, softened so it blends beautifully, and eight ounces of mascarpone cheese, also softened. You’ll also whisk in one cup of powdered sugar, one teaspoon of vanilla extract, a quarter cup of heavy cream, and another quarter cup of Kahlua or strong brewed coffee—that’s the liquid element for the filling!
Ingredient Notes and Substitutions for Your Creamy Espresso Dessert
Let’s talk swaps, because sometimes we don’t have exactly what the recipe calls for, right? If you can’t find chocolate wafers, good old graham crackers mixed with an extra teaspoon of cocoa powder will stand in for the crust. Now, for the mascarpone—please try to find it! It’s what makes this a true tiramisu cheesecake. If you absolutely cannot locate it, you can usually substitute it with an equal amount of heavy cream whipped to stiff peaks and then folded into the cream cheese, but the texture won’t be quite as authentic.
For the coffee, it has to be *strong*. Think French press or espresso if you can manage it. The flavor needs to cut through all that dairy goodness! And whether you use liquor in the soak or filling is totally up to you, but I find the Kahlua just gives this Mascarpone Coffee Dessert that extra layer of complexity that makes people ask for the recipe.
Assembling Your No Bake Tiramisu Cheesecake
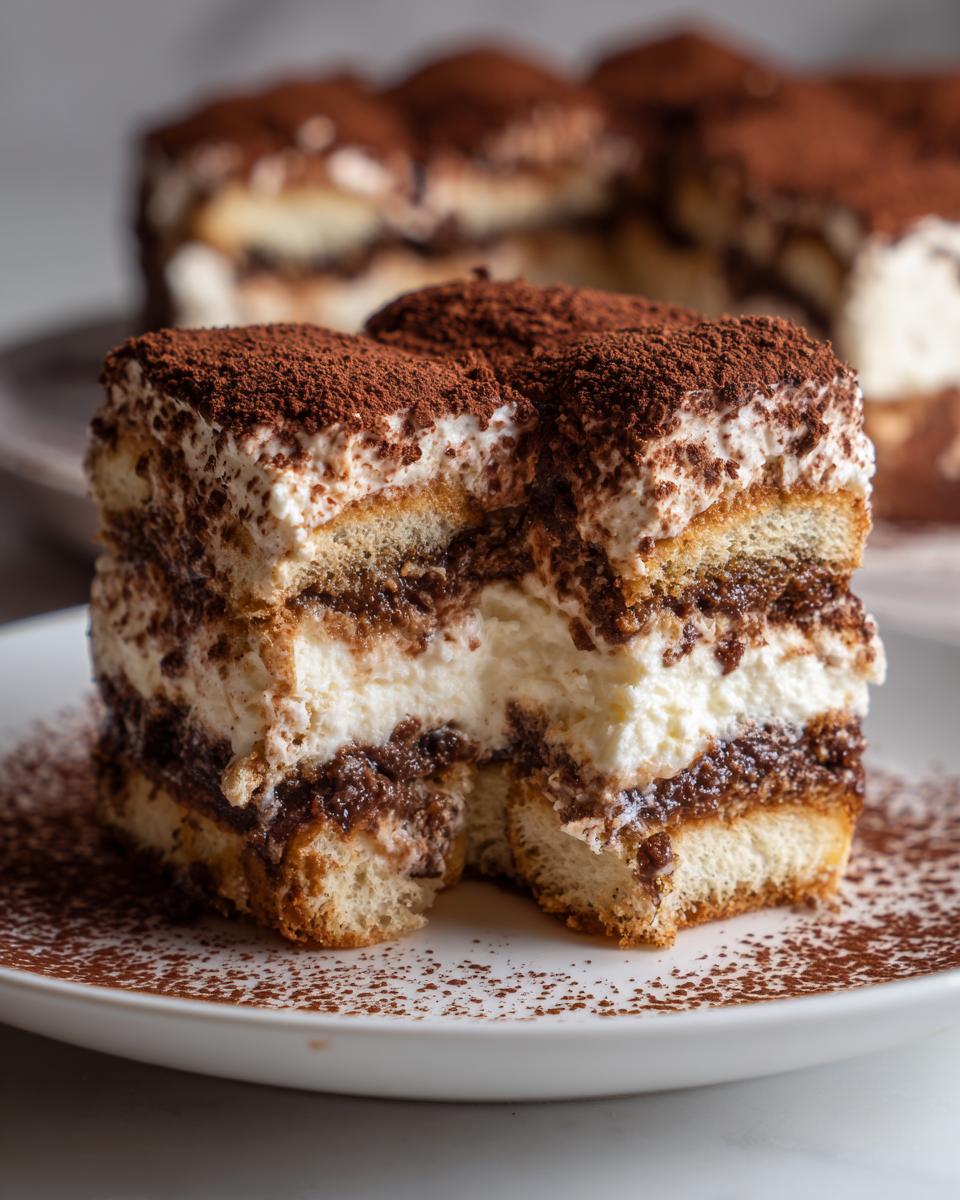
Okay, time to put this gorgeous tiramisu cheesecake together! First things first, pull that chilled crust out—it should be firm and ready for action. Now, for the coffee soak; I like to use a shallow dish here, which makes dipping easier. Remember this part is fast! You want to dip each ladyfinger quickly into your cooled coffee and Kahlua mix, just a one-second dunk on each side. Don’t let them sit in there, or they’ll turn to mush before they even hit the base. Layer those dipped beauties right over your crust. Then, gently spread half of your creamy filling evenly over that coffee-drenched layer. We want distinct flavor zones, not a sloppy mess!
Once that first layer of filling is set, you repeat the process: dip the rest of your ladyfingers and place them neatly on top. Then, spread that final, luscious portion of filling right over the top. Make sure it’s beautiful and smooth because that’s the surface that will show off when we dust it later. Smooth it with your favorite spatula and cover the whole pan tightly with plastic wrap. You can find instructions for making homemade non-stick pan release, which is super helpful for cheesecakes, over here at our pizza sauce post!
Achieving the Silky Smooth Cheesecake Filling
This is where we guarantee that wonderful ‘Silky Smooth Cheesecake’ texture. You absolutely must beat your softened cream cheese and mascarpone together until they are perfectly smooth before anything else goes in. If you add sugar to lumpy cheese, you’ll never get it smooth later! Once it’s cloud-like, then add the powdered sugar and vanilla. The trick for ultimate lightness is whipping your heavy cream separately until soft peaks form. Then, gently fold that whipped cream into the cheese base. Folding, not mixing, keeps all those lovely air pockets trapped inside. That’s the secret to a light, cloud-like filling that sings!
Setting and Chilling Your Layered Tiramisu Cake
Once you have finished spreading that final layer of filling, we need patience. This is the hardest part about any no-bake dessert, I know! Cover your masterpiece tightly and send it straight into the fridge. It needs a minimum of six hours to set up properly so it holds its shape when you slice it, but I truly mean it when I say overnight is best. When you let this Layered Tiramisu Cake chill overnight, it gives the coffee time to soak really beautifully into the cream cheese filling layers, deepening that rich, Italian flavor profile immensely.
Tips for the Best Tiramisu Cheesecake Results
Listen, even though this is a no-bake recipe, a few little tricks can take your tiramisu cheesecake from good to absolutely show-stopping. First, if you want that coffee flavor to really punch through the creamy layers, try dissolving one teaspoon of instant espresso powder right into the quarter cup of heavy cream before you whip it. Trust me, that technique makes a huge difference in flavor depth!
Also, this is absolutely the queen of make-ahead desserts, so plan accordingly. While you can get it set in six hours, the flavors really just deepen when you let it chill overnight. The longer it sits, the more the slight bitterness of the coffee balances that rich mascarpone and sugar. If you’re looking for a deep dive into other classic cheesecake styles, I walk through the density secrets of a great New York cheesecake over here at this recipe post!
Making Variations of the Tiramisu Cheesecake
You know I love sticking to a classic, but one of the things I enjoy most about baking is seeing how a great recipe like this tiramisu cheesecake can morph into different shapes! If you’re someone who just needs that warm, comforting bite, you can definitely switch gears and try a Baked Tiramisu Cheesecake. For that version, you mix up a similar filling, but you layer it all without the middle ladyfinger layer and bake it gently at 325°F until set. It gives you a slightly firmer, richer texture which some people just adore.
Also, if you hate dealing with a springform pan, no worries! You can easily press that chocolate crust mixture into an 8×8 pan and layer the filling right on top to create these incredible Oreo Crust Cheesecake bars. They slice up beautifully for potlucks! And if Kahlua isn’t your favorite, try swapping it out for some good quality brandy or even a splash of dark rum in the coffee soak. It’s all about making this decadent dessert your own. For more deeply satisfying, single-serving desserts, you might enjoy my recipe for Simple Southern Chocolate Chess Pie!
Serving Suggestions for Your Elegant Dinner Party Dessert
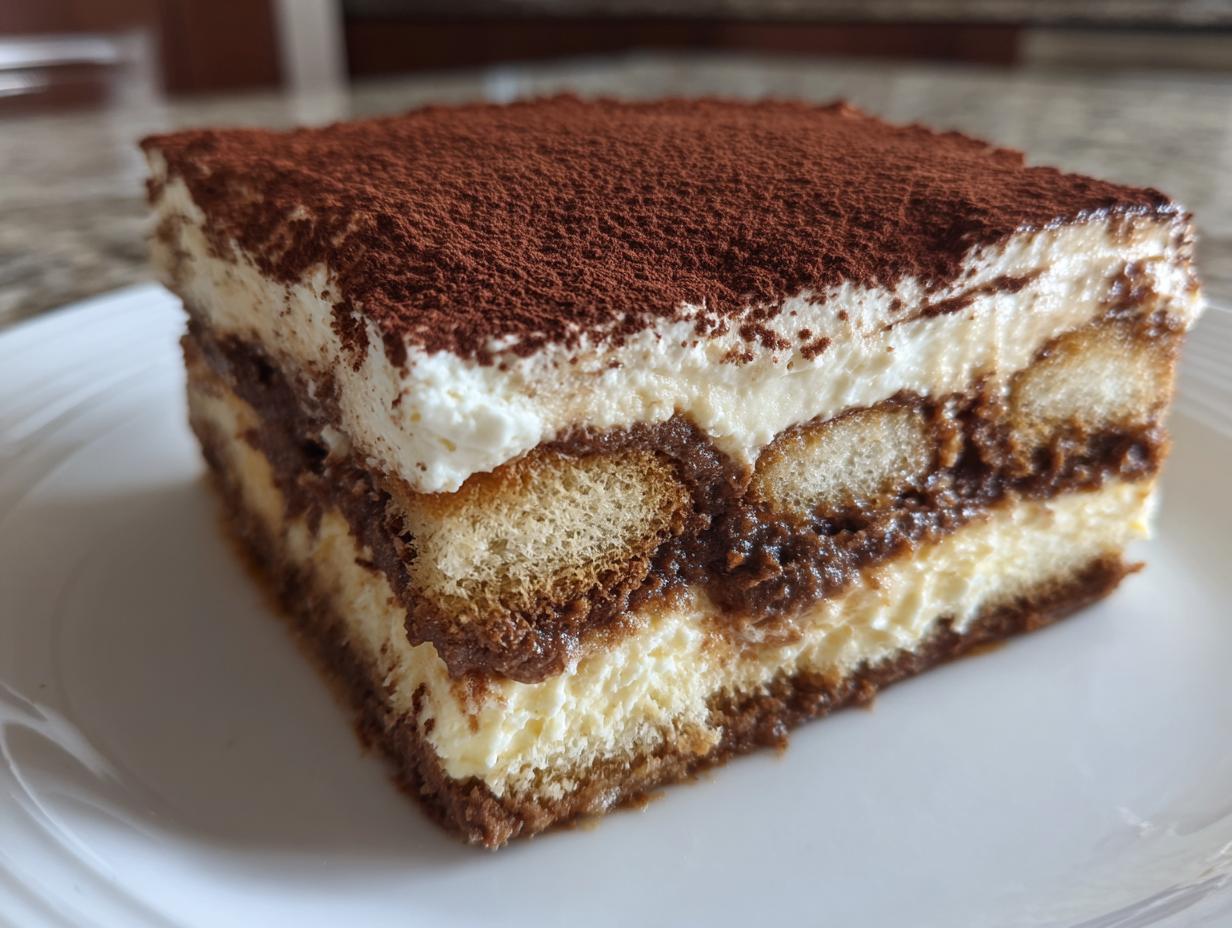
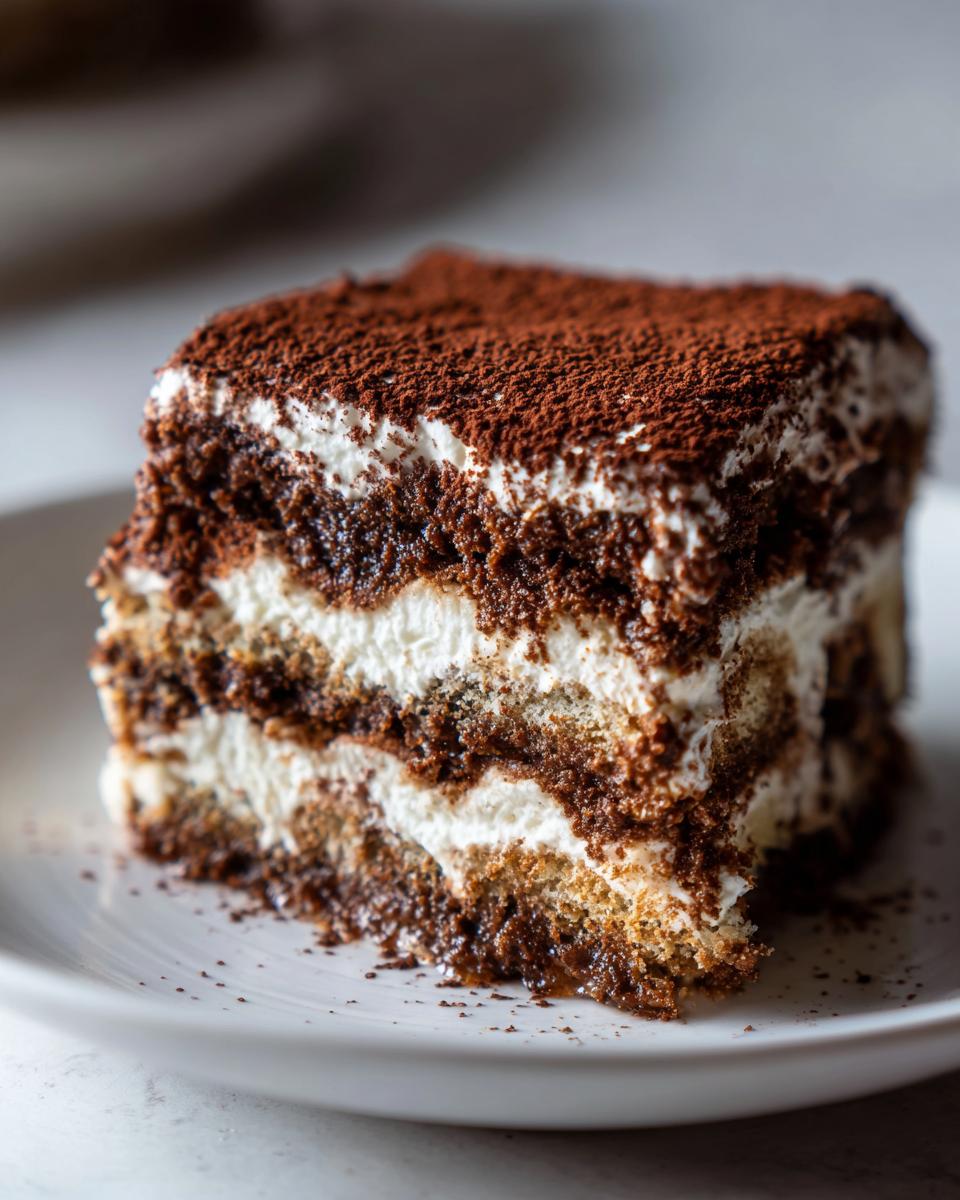
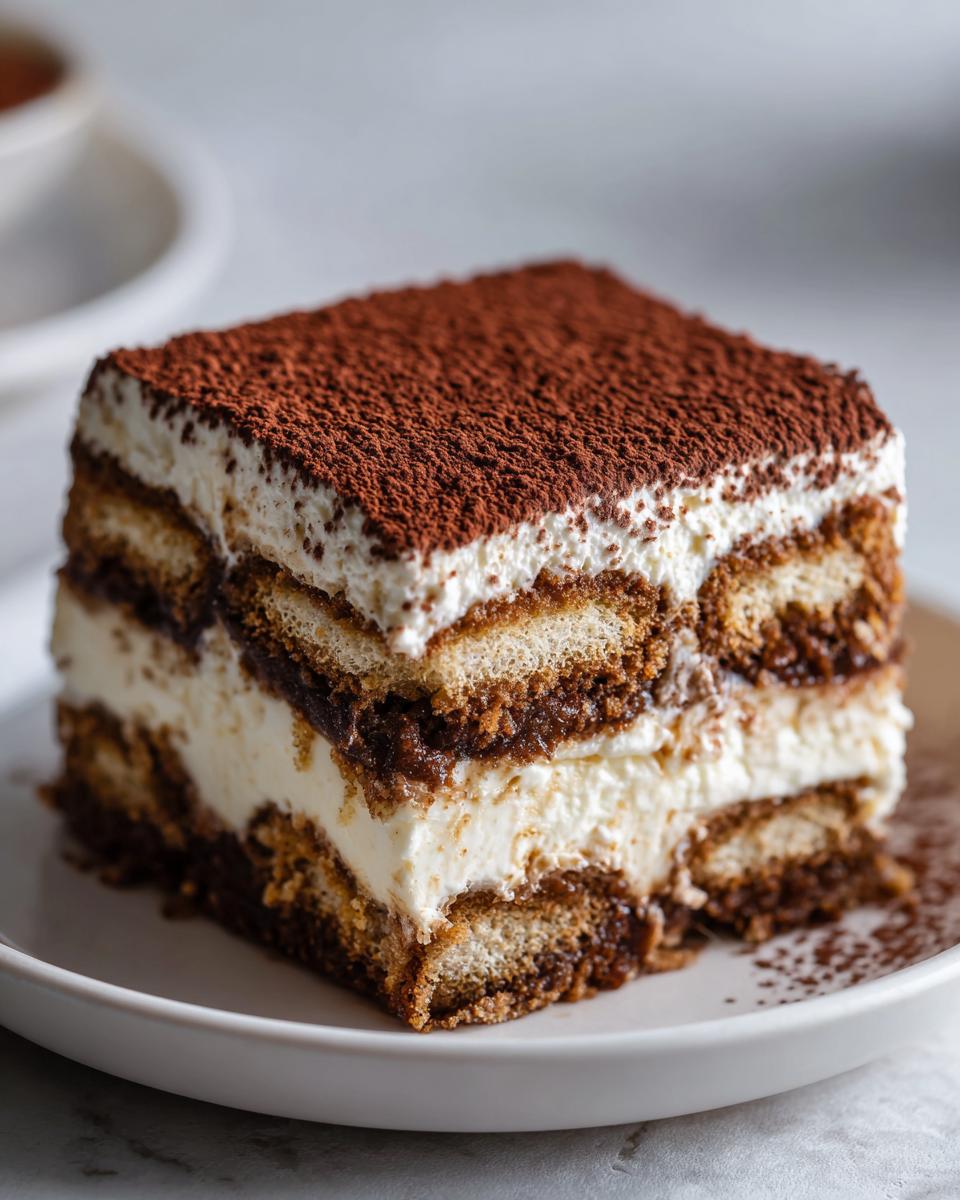
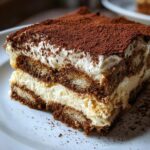
Presentation is everything when you’ve made something as luxurious as this Decadent Cheesecake Dessert! Since this is a no-bake version, the top needs that perfect snowy finish. Right before you slice it, use a fine-mesh sieve to dust the entire surface generously with good quality unsweetened cocoa powder. That stark dark brown against the creamy white underneath just screams elegance.
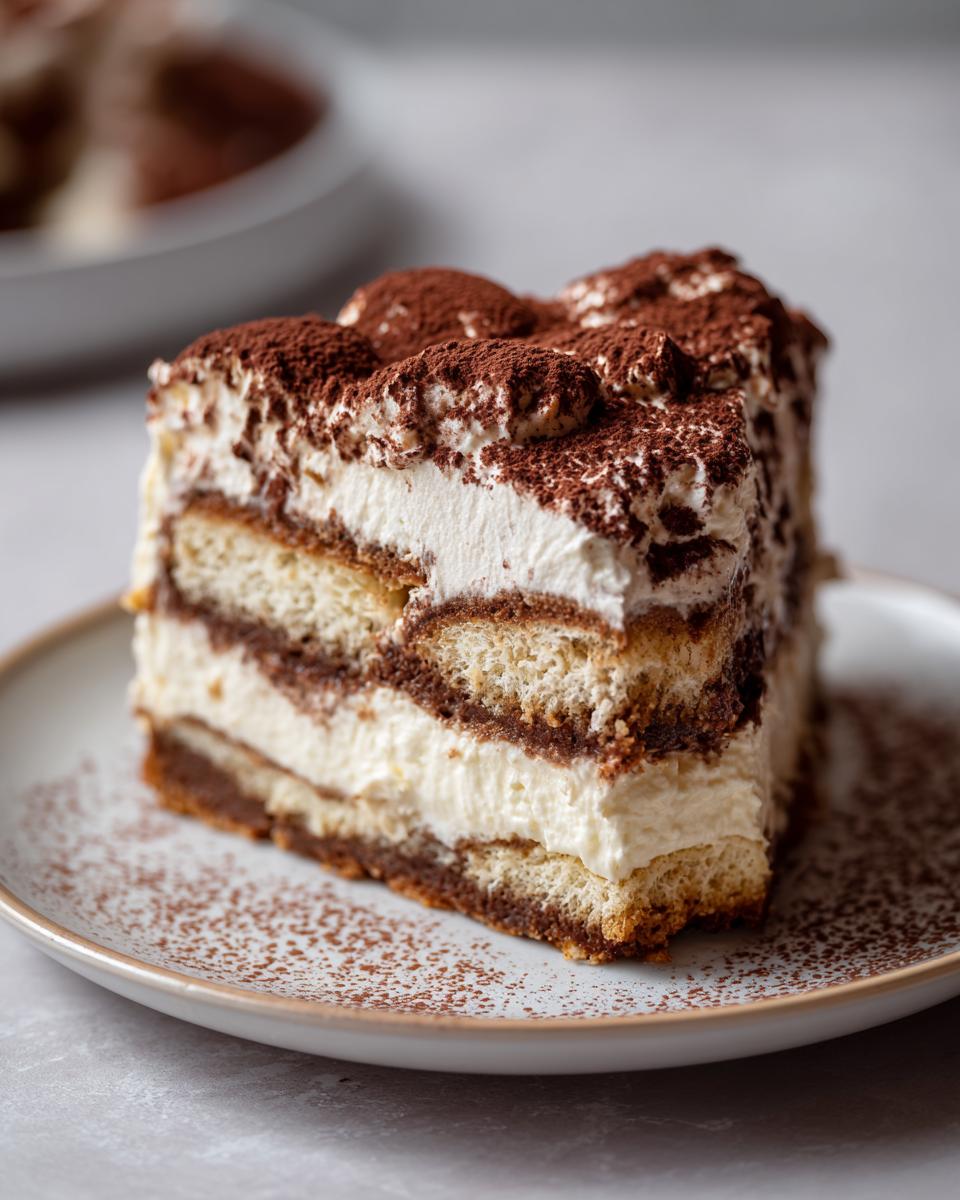
For a little extra flair, I sometimes use a vegetable peeler to shave some dark chocolate right over the cocoa dusting—it adds texture! When it comes to pairings, you can’t beat a strong, freshly brewed espresso to cut through the richness. Or, if you’re serving this after a big meal, a small glass of Vin Santo or a deep, fruity red wine works beautifully. Need something chocolate-forward alongside it? You should try my Easy Chocolate Fondue for a fun dipping station!
Storage and Make Ahead Cheesecake Instructions
One of the absolute best things about this amazing tiramisu cheesecake is how perfect it is for planning ahead! This truly is a champion make ahead cheesecake. You need to cover the whole springform pan tightly with plastic wrap once it’s fully set, and it can chill happily in the refrigerator for up to three days. It actually tastes better the next day, as the coffee flavors really settle in.
When serving time rolls around, pull it straight from the fridge. This dessert shines when served nice and cold—don’t let it sit out too long! If you want to see what another great baker did with their version, check out the steps over at Made By Sweeney. I promise, this one is worth the wait!
Frequently Asked Questions About Tiramisu Cheesecake
Can I use different cookies for the crust instead of chocolate wafers?
Oh, absolutely! While chocolate wafers give you that perfect dark, slightly bitter base that echoes the cocoa topping on the tiramisu cheesecake, you always have options. Graham crackers are a classic stand-in, but if you use them, I highly recommend mixing in an extra teaspoon of cocoa powder and maybe a tiny pinch of instant espresso powder to the crumbs. That helps bridge the flavor gap and keeps it feeling like a genuine coffee and cocoa dessert!
Just how strong does the coffee need to be for the soak?
This is important—the coffee brine has to be strong enough to hold its own next to all that creamy cheese filling. You want something close to espresso strength, maybe a very strong French press or double-strength coffee made in a regular drip machine. If it’s weak, the ladyfingers will just taste watery, and you won’t get that quintessential bitterness that balances the sweetness in this amazing Mascarpone Coffee Dessert. Don’t dilute those bold flavors!
Can I freeze this Tiramisu Cheesecake?
Yes, you can actually freeze this, which confirms its status as a fantastic make-ahead dessert! Once it’s completely set, wrap the entire cheesecake—still in the springform pan, or transferred to an airtight container—very securely in plastic wrap, and then foil. It freezes beautifully for up to a month. The best part is you thaw it in the fridge overnight, and it comes out tasting just as good! It definitely holds up better than a traditional baked cheesecake when frozen.
What sets this Tiramisu Cheesecake apart from regular Tiramisu?
The difference is structural, darling! Classic Tiramisu is a softer, layered dessert that uses whipped egg yolks, cream, and often simple savoiardi biscuits layered with the mascarpone mixture. Our Layered Tiramisu Cake adds that sturdy, tangy backbone from the cream cheese, creating a sliceable, dense format that doesn’t slump. It captures the flavor profile but ditches the delicate construction of the Italian original.
Nutritional Snapshot of This Mascarpone Coffee Dessert
Now, I always tell folks that we bake with love, not calorie counters, around here! But because I know some of you are curious, I pulled the estimated nutritional breakdown for a single slice of this glorious Mascarpone Coffee Dessert. Remember, since we’re dealing with whole cheeses, butter, and rich liqueur, this is definitely a decadent treat meant for celebration. These numbers are just estimates, of course, and they will shift slightly depending on which brand of cream cheese you decide to use!
- Serving Size: 1 slice
- Calories: 450
- Sugar: 35g
- Sodium: 250mg
- Fat: 30g
- Saturated Fat: 18g
- Unsaturated Fat: 12g
- Trans Fat: 0g
- Carbohydrates: 40g
- Fiber: 1g
- Protein: 7g
- Cholesterol: 95mg
If you want to see how other creamy, comfort-food recipes stack up, check out the details on my velvety Homemade Creamy Celery Soup. Enjoy this amazing Tiramisu Cheesecake, and don’t worry too much about tracking things when the dessert is this good!
PrintNo Bake Tiramisu Cheesecake: Simple Recipe for an Elegant Dessert
Create a decadent Tiramisu Cheesecake that combines creamy mascarpone filling with espresso-soaked ladyfingers. This no-bake recipe is easy to prepare ahead and perfect for impressing guests at any special occasion.
- Prep Time: 35 min
- Cook Time: 0 min
- Total Time: 6 hours 35 min
- Yield: 10 servings 1x
- Category: Dessert
- Method: No Bake
- Cuisine: Italian Inspired
- Diet: Vegetarian
Ingredients
- 1 1/2 cups chocolate wafer crumbs or Oreo crumbs
- 6 tablespoons unsalted butter, melted
- 1/4 cup granulated sugar (for crust)
- 1 teaspoon instant espresso powder (for crust)
- 16 ounces cream cheese, softened
- 8 ounces mascarpone cheese, softened
- 1 cup powdered sugar
- 1 teaspoon vanilla extract
- 1/4 cup heavy cream
- 1/4 cup Kahlua or strong brewed coffee
- 1 package (7 ounces) ladyfingers
- 1 cup strong brewed coffee, cooled
- 1/2 cup Kahlua or coffee liqueur (optional, for soaking)
- Unsweetened cocoa powder, for dusting
Instructions
- Prepare the crust: Mix the chocolate wafer crumbs, melted butter, 1/4 cup granulated sugar, and 1 teaspoon instant espresso powder in a bowl until combined. Press the mixture firmly into the bottom of a 9-inch springform pan. Chill the crust for at least 15 minutes while you prepare the filling.
- Prepare the coffee soak: In a shallow dish, combine the 1 cup cooled strong coffee with the 1/2 cup Kahlua or coffee liqueur, if using.
- Assemble the ladyfinger layer: Quickly dip each ladyfinger into the coffee mixture, turning once. Do not over-soak, or they will become mushy. Arrange the dipped ladyfingers in a single layer over the chilled crust. Set aside.
- Make the cheesecake filling: In a large bowl, beat the softened cream cheese and mascarpone cheese with an electric mixer until smooth. Add the powdered sugar and vanilla extract, mixing until just combined.
- In a separate small bowl, whip the heavy cream until soft peaks form. Gently fold the whipped cream into the cream cheese mixture.
- Pour half of the cheesecake filling evenly over the layer of coffee-soaked ladyfingers.
- Dip the remaining ladyfingers and arrange them in a second layer over the first layer of filling.
- Spread the remaining half of the cheesecake filling over the second layer of ladyfingers, smoothing the top with an offset spatula.
- Cover the pan tightly with plastic wrap. Chill the Tiramisu Cheesecake in the refrigerator for a minimum of 6 hours, or preferably overnight, to allow it to set completely.
- Before serving, carefully remove the springform ring. Dust the top generously with unsweetened cocoa powder using a fine-mesh sieve. Slice and serve this elegant dinner party dessert.
Notes
- For a richer coffee flavor in the filling, dissolve 1 teaspoon of instant espresso powder into the 1/4 cup of heavy cream before whipping it.
- If you prefer a baked version, omit the ladyfinger layer in the middle and bake the entire cheesecake at 325°F for 50-60 minutes, then cool and top with mascarpone cream instead of the no-bake filling.
- This make ahead cheesecake tastes best when chilled for at least 12 hours, allowing the coffee flavor to fully permeate the layers.
Nutrition
- Serving Size: 1 slice
- Calories: 450
- Sugar: 35g
- Sodium: 250mg
- Fat: 30g
- Saturated Fat: 18g
- Unsaturated Fat: 12g
- Trans Fat: 0g
- Carbohydrates: 40g
- Fiber: 1g
- Protein: 7g
- Cholesterol: 95mg